

So one of the products I was sent to play with from Kingston Crafts for my DT work was an adhesive mega kit and it was released by hobbymaker tv on 5th January so can now share what I did with it.
Well it certainly was full of really useful items – double sided tape of different widths, red tape of different widths, glue dots of different sizes and lots of different colour adhesive foam dots. As I say really useful – but then I had to think of a way of showing off what having this range of adhesive could help create. So as it’s an odd thing to show off I thought I would blog all three things I made in one post …
Well one of the first thoughts I came up with was to use it as a way of adding gilding flakes to a project – so that became my first project.

I decided to decorate a little decorative wooden heart I had in the stash (it is the same as one I covered in glitter glue for another project I shared a few months ago) so I chose the widest of the red tapes and totally covered the surface of the heart.
I then removed the cover sheet off the tape to expose the sticky and rubbed the gilding flakes all over the top. I just love how this looks – and it makes me wonder why I haven’t done this in ages!
Then it was time to decorate the heart – in reality I could have done both sides with the flakes and left it like that as it looks so pretty – but decided to create a little more interest to the front.
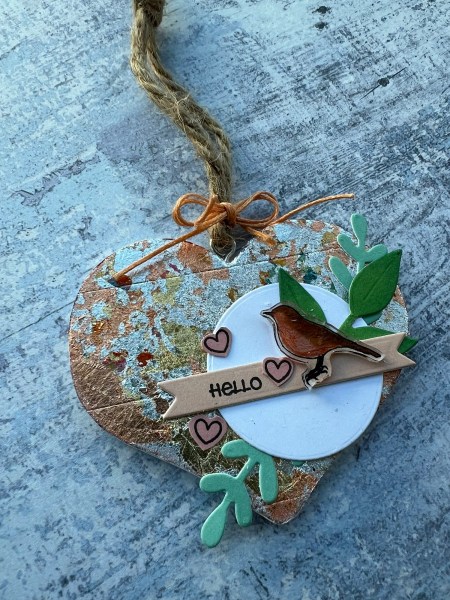
I added the die cut elements all cut from the scraps of either everyday cardstock or spring slimline papers that were on my desk. I then added the stamped sentiment and stamped some tiny hearts and cut them out to scatter a few onto the cluster. I then added a shiny plastic bird I had chosen from the Spring shrink plastic set.
All of these I added with the double sided tapes which stick really well – even on the gilded background.
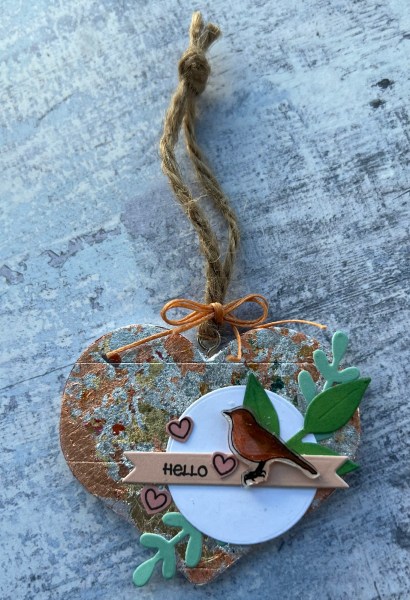
Finished off with some string and waxed thread to create a hanger to the decoration.
So I think that made good use of the adhesives and created a really cute little decorative piece that could either be added to the front of a card or a gift.
Next up is a shaker card – after all adhesive foam is perfect for giving the dimension needed for a shaker element – especially as each sheet comes with the long strips around the edge as well as all those individual squares.
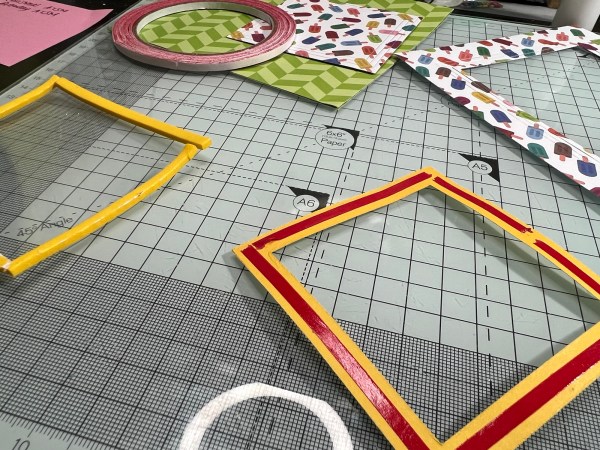
Well I actually use the red tape too on this to make sure the acetate was stuck well to the card frame and then the foam strips for the edge of the acetate to raise it from the back.
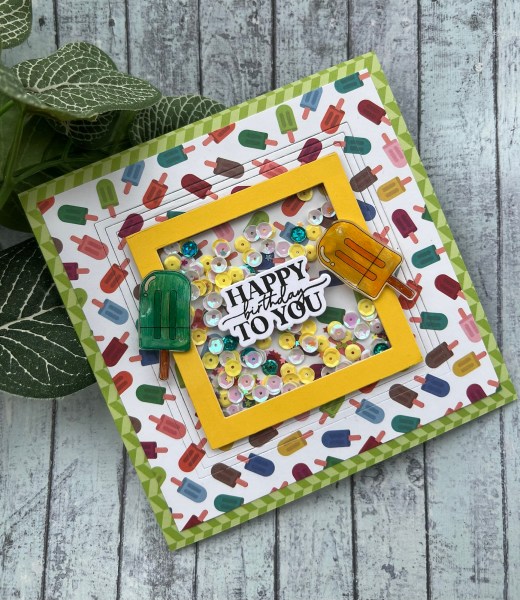
I added a lot of sequins and shiny bits in my shaker and themed it to the Summer Collection papers and shrink plastic pieces for those cute ice lolly’s.
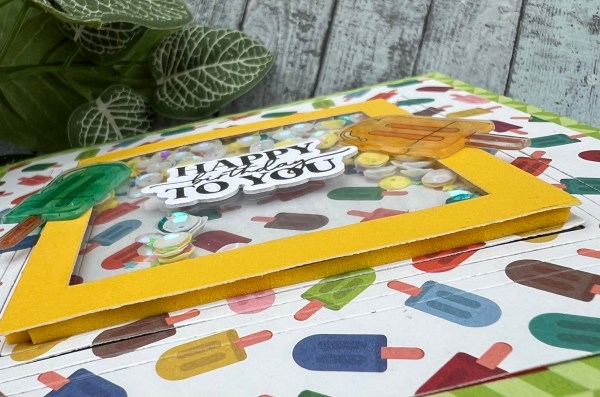
You can see when I tilt the card that the coloured foam works so well at making the card look finished too!
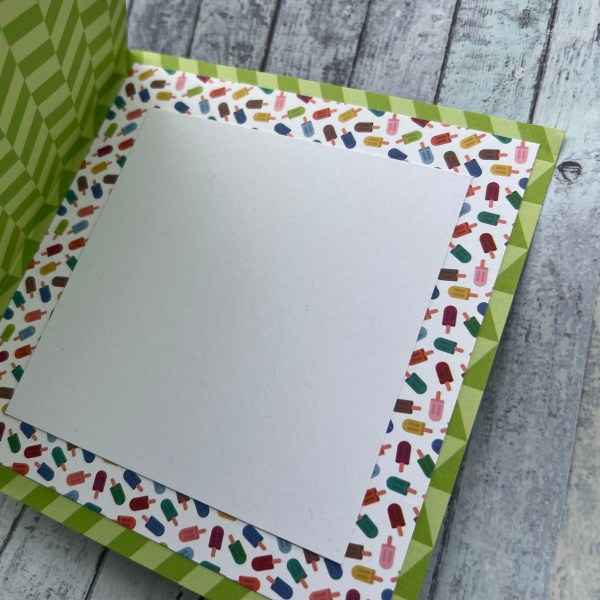
I did use the normal double sided adhesive on this too just to stick all the layers into place both inside the card and out!
Aren’t shaker cards just so cute?
Glue dots are also in the kit but I didn’t end up using them on these projects specifically – but I thought I would mention when I do normally – and that’s for adding a bow to a project – a glue dot is always my go to for the best adhesive to use – it doesn’t bleed through like wet glue and the easiest way to do it is to add the bow to the dot on the roll and then peel up and stick to the project!
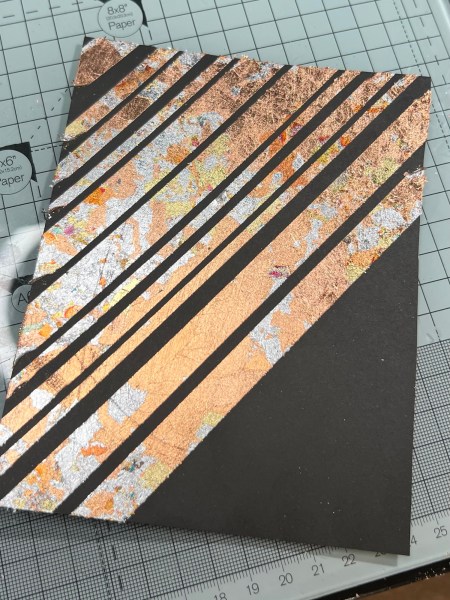
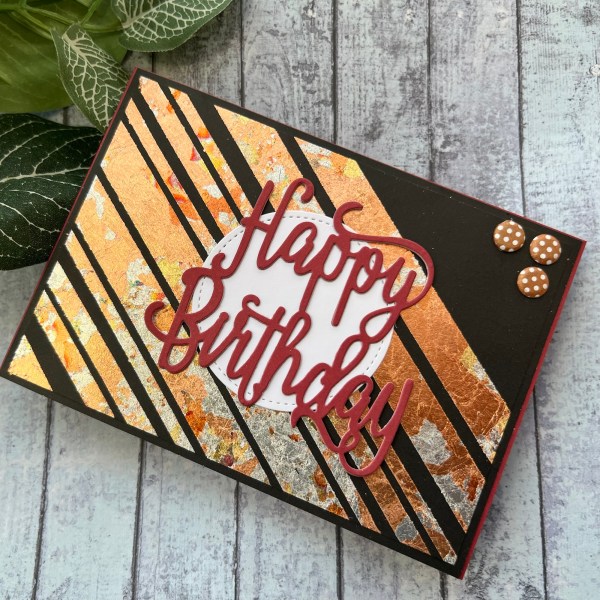
So finally I have my double sided adhesive project – well I use it all the time but I guess the thing that is great is that it comes in all the widths of tape – so I decided to try and show that off… so went back to the gilding flakes again …
I took a panel of the black everyday cardstock and used the different size of tape to create some diagonal stripes across the panel. I tried to keep them straight but not worried about spacing them evenly.

I actually think if you had different colours of foiling or gilding flakes separate this would be good to add different coloured stripes – I don’t though mine are a mix of flakes of different colours. So I peeled back the tape covering and rubbed the flakes over the tape …
Just fabulous! I trimmed the panel down to be just smaller than a card front and then added a frame of black.

I decided to keep the topper simple after all the focus should be on all that shine from the gilding!
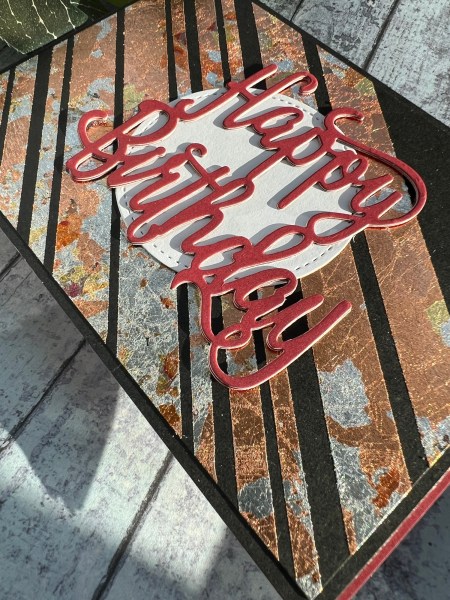
So a die cut sentiment onto a white die cut circle and then some card Candi to finish that corner off!
So a fun blog post with three projects all featuring the mega adhesive kit – but obviously nearly all my projects feature the kit – just usually the adhesive is more hidden! 🤣
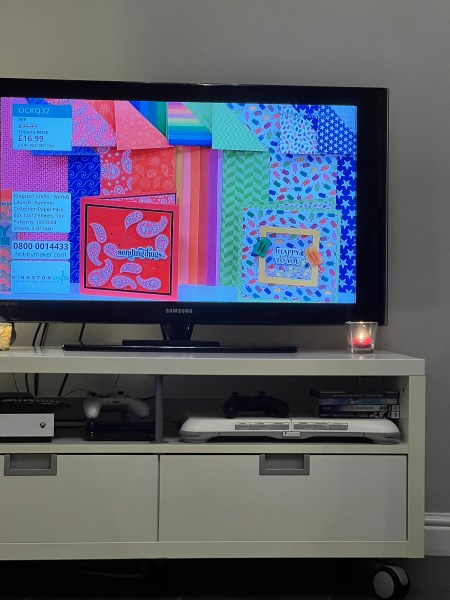
I did spot my shaker card on tv too back on 5th January … so officially this is another ‘as seen on tv’ posts! 🥰
Happy crafting!
Catherine

Brilliant tip with the tape & gilding flakes – will have to put this to use!
Thanks x