It was good to get some of this very old paper used and especially the fabric ❤️ paper as I’ve had it for so long! I still love it but I do think this year I will finally have finished the pack! 🤞
I layered up the paper with Cherry Cobbler card stock and then made up the bow with the same cardstock.
I inked up the bow pieces where I thought the shadow would fall and then when it was all adhered I added wink of Stella to the parts of the bow that would be considered the top of the ribbon to make them shimmery!
I created a tag from the vellum and other patterned paper, inking the top layer to help it stand out. Then added the Lawn Fawn merry die cut to finish off.
Inside the card, another layer of patterned paper, some white and a strip of the fabric paper.
Then a tag from cherry cobbler and the patterned paper and another merry die cut!
Love this! The card is definitely saying Christmas present to me and one that has been beautifully wrapped at that! Especially with the special bow!
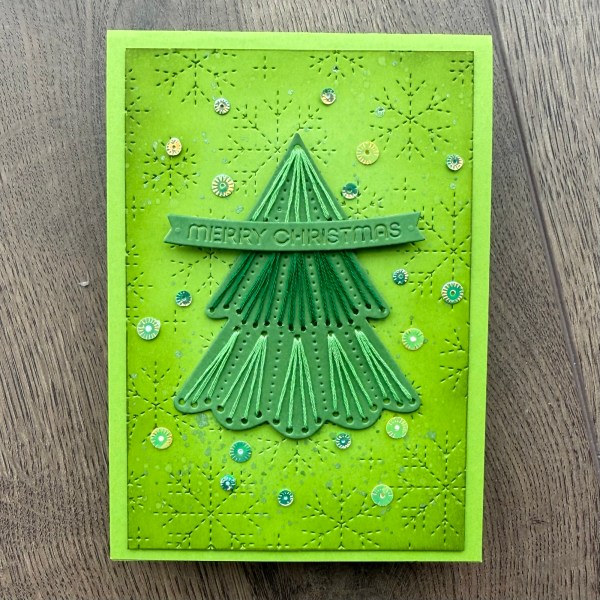
I chose to go with the tree element of today’s prompt and then topped it with sewing!
And created this super sparkly green card!
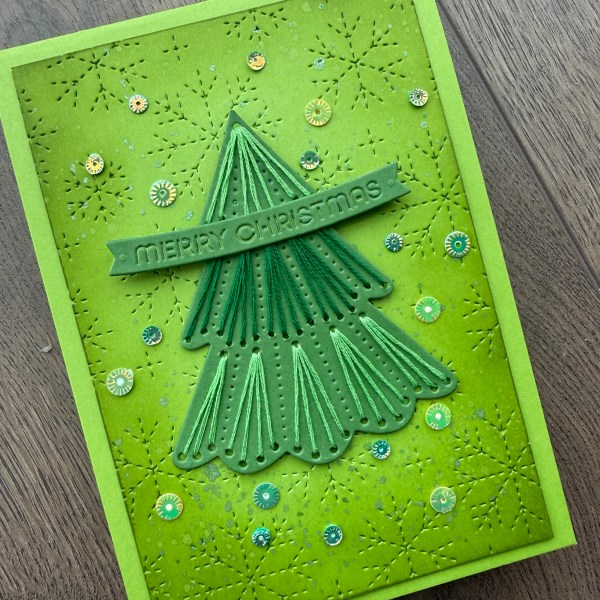
Loved digging the sewing die cut tree out again and playing with the colours of the threads.
Then made the background with the gorgeous pierced snowflake background with the added sparkle coming from many many sequins!
I went with two different colours for the thread for the sewing and then added sentiment over the top with foam adhesive to pop it up over the top of the die cut tree.
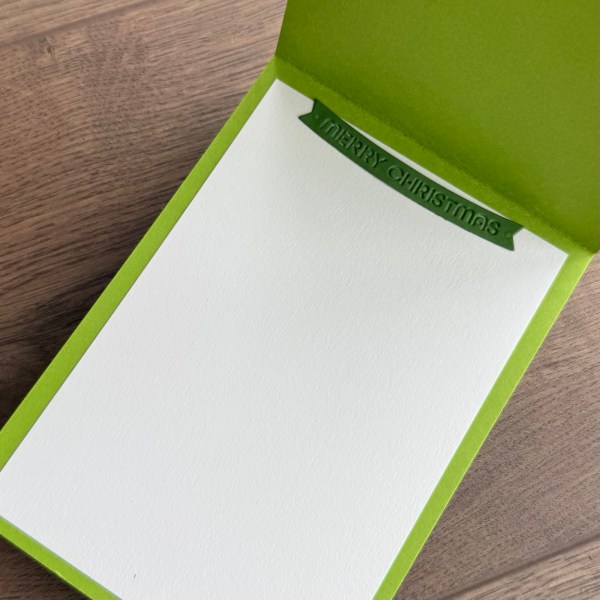
Inside the card I added the white panel and then another die cut sentiment!
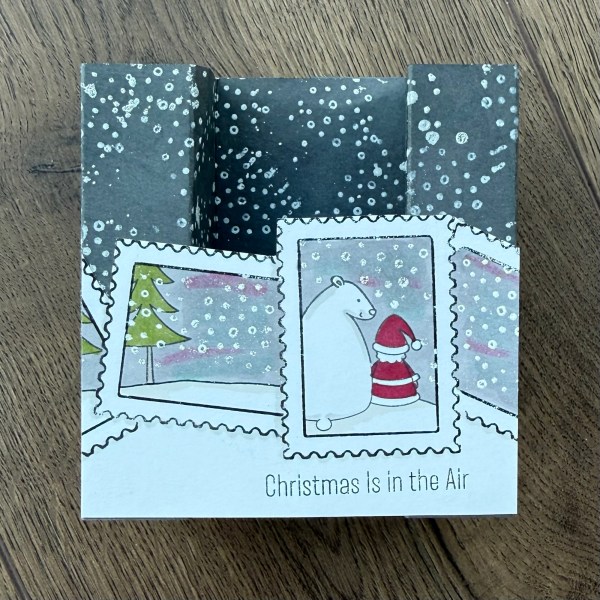
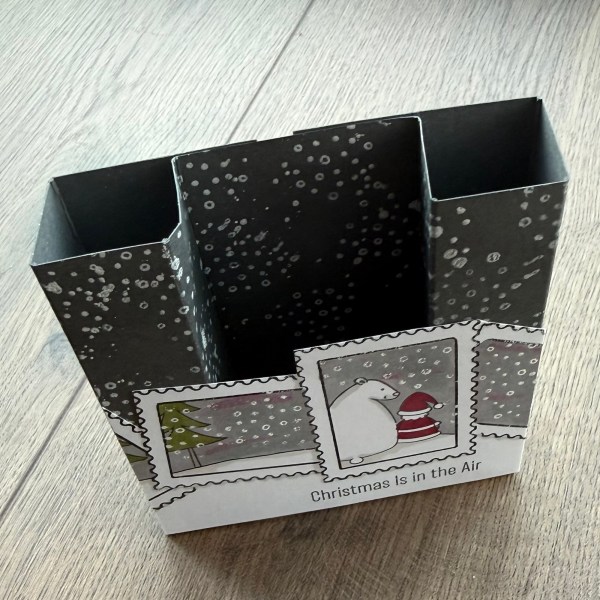
I had chosen the MFT stamps with the cute little polar bear and Santa for this card as they conjured up the magic for me but didn’t really know what to make for the card when I sat down to create this … and gosh it took some work!
I am delighted though with what I eventually made!
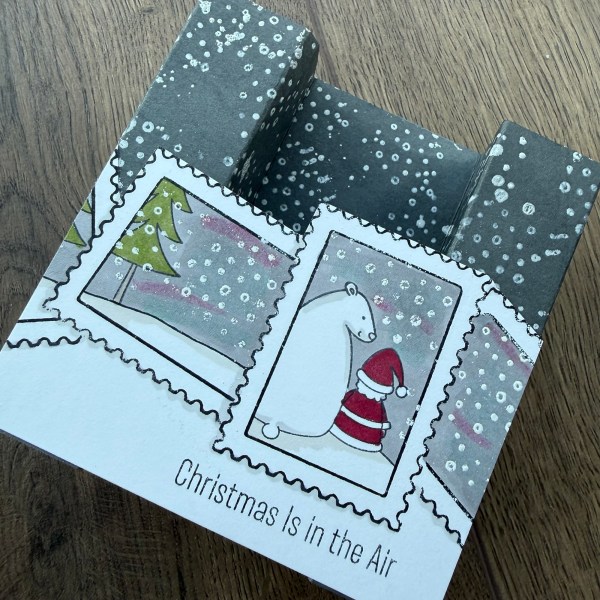
I decided to use the ‘stamp’ stamp from Carabelle and then created a scene in the stamps!
I coloured with alcohol markers and then the embossed snow on top.
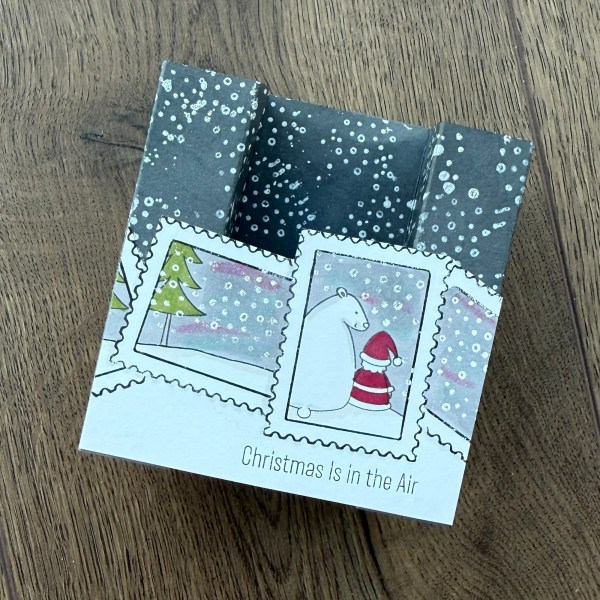
Next I created the fun fold! Yes without being forced into it I went with a fun fold as I fancied the idea of the stamps going across on a bridge between two towers!
After working out how to make the towers I then added snow to the background and darkened it a little too with black soot ink.
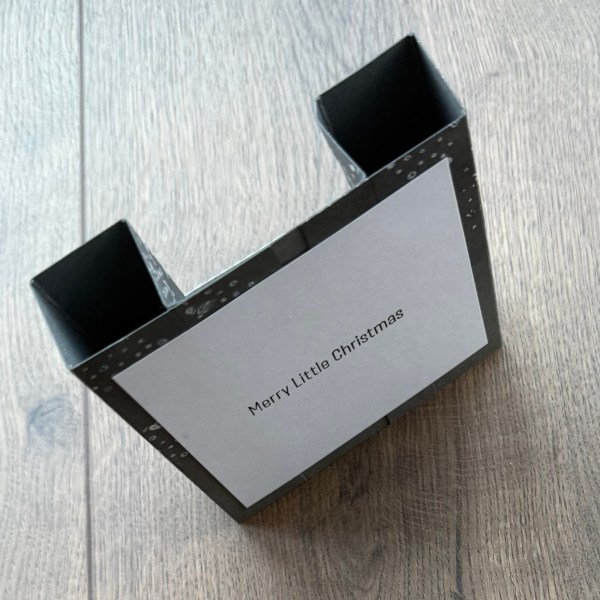
Then I trimmed down the front panel with a fussy cut top and cut off the sides which reduced the width of the panel to 4” to match the pop up card frame.
I added the panel to the back of the card which both strengthened it and added somewhere to write a message.
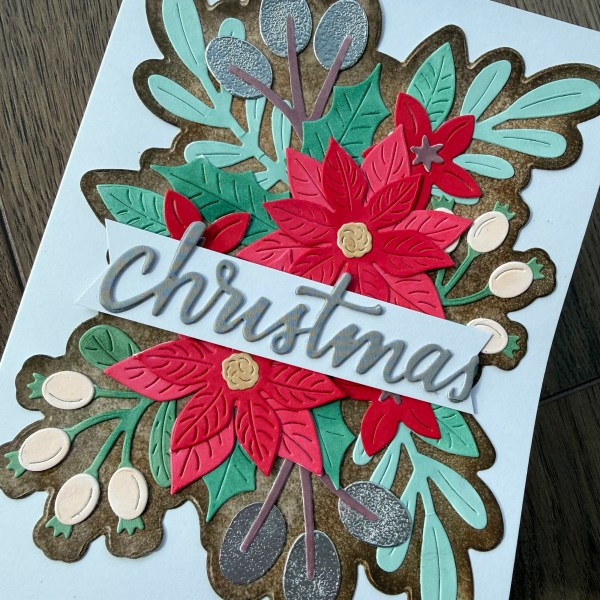
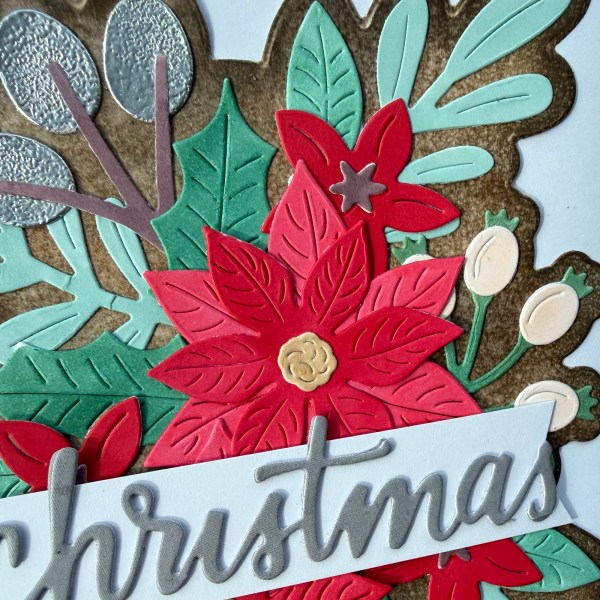
When the theme is poinsettia based you can probably guess my favourite bit of stash I am going to gravitate to … yes the Alex Syberia dies I am obsessed with … and so here they are! Although this Christmas in July I am going to try and only use them this once! I promise I will put them away after this use or otherwise there is a danger they will come out at least once a week!
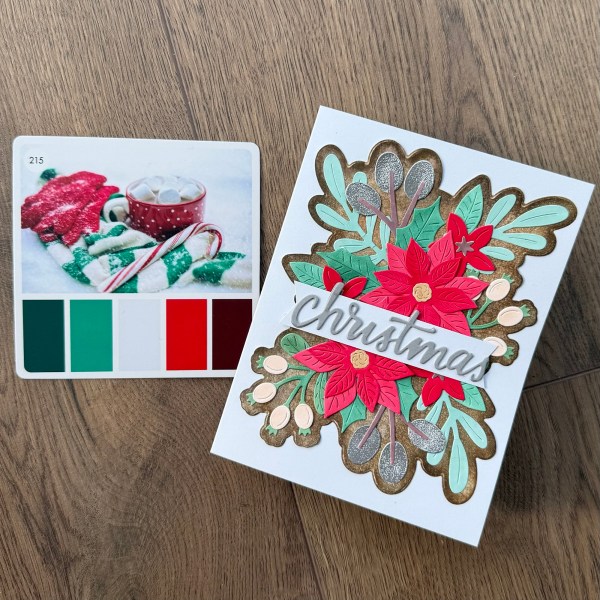
I decided to also turn today video into one where I get the colour cube to dictate the colour scheme … so I used the random generator to choose from the Christmas themed section in cube one and it chose 215.
I cut everything for the card from white cardstock and then used alcohol markers to colour all the elements.
I stepped up the large berries by silver embossing them (I love the bobbly texture I got as they look almost fluffy!) but left the rest of the elements just coloured with the alcohol markers.
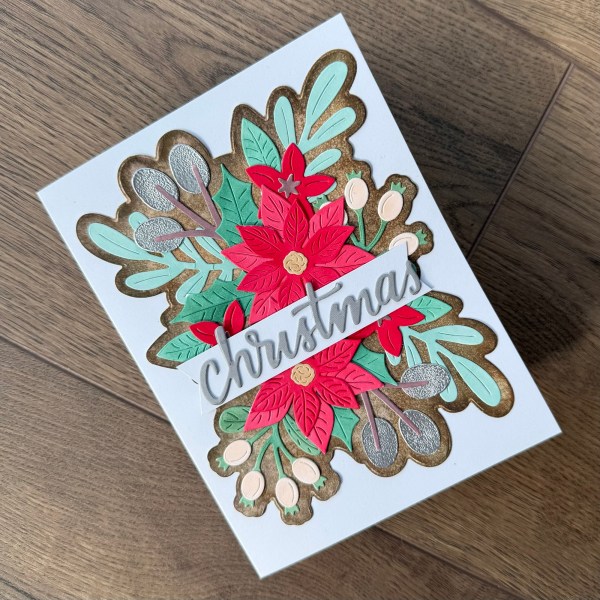
Then the background panel I die cut it from white but turned it brown by using a mix of the vintage photo ink and the Early espresso ink. It’s quite a rustic finish for the background die but I think it works.
I adhered everything pretty much as the die set inspiration suggests and then chose to stick this flat onto the card base which I cut down from a 6×6 square to be slightly larger than the die cut panel.
Next I cut a banner and added the sentiment on top. The sentiment was already die cut and ready to go so it was an easy option as this is quite an involved make when you do everything for the panel. Worth it though!
As for the colour scheme I must admit I would have liked a different colour than the brown but I think it still works! So thanks again colour cubes for pushing me to do something a bit different.
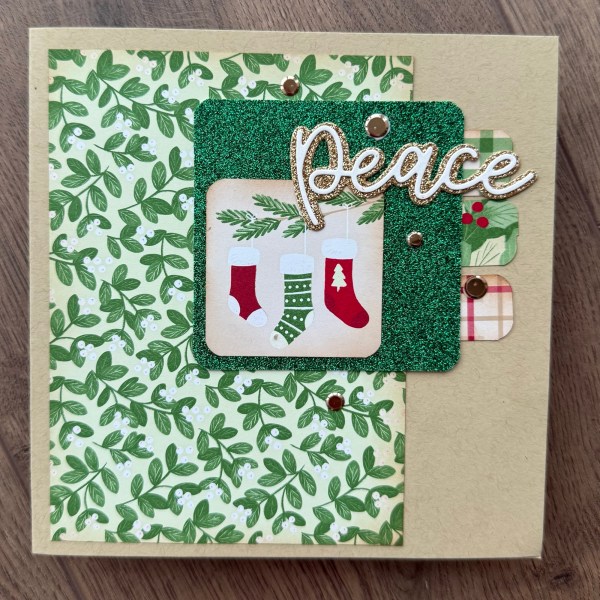
… and I kept it really simple using the Christmas Tags and More speciality DSP kit. Just so easy to use this kit and I kept fairly faithfully to the sketch!
I made a square 6×6 card base from the crumb cake cardstock. Next a panel of the patterned paper. I made three strips from the patterned paper scraps. Then cut a square from the tag elements.
I used a corner rounder on the end of the strips and the topper square and inked the edge of all pieces to frame them a little.
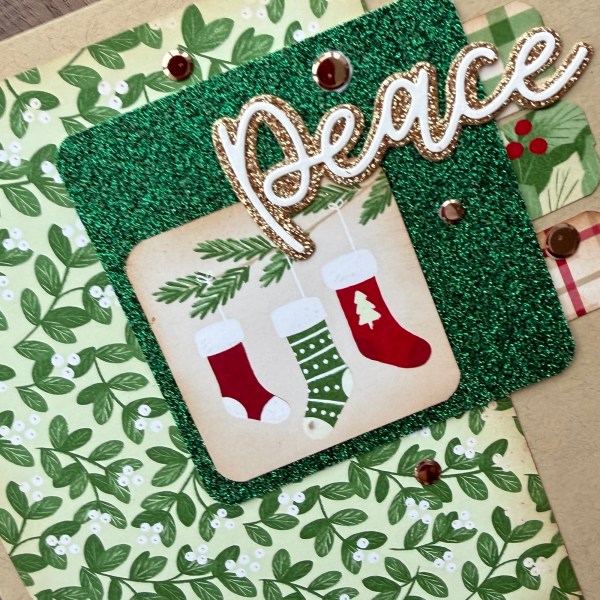
I added the glitter cardstock square, with rounded corners, as the base for the focal point and then added the sentiment onto the top.
Then added some of the rose gold little sequin elements to embellish.
Inside the card I added one more strip with rounded corners and then a die cut stocking on the white panel.
A quick card compared to some of the others but easy is sometimes exactly what we need! And the sketch is a good one for interpreting with different papers or elements I think! Will have to use this one again!
Do let me know if it inspires you to make cards using it!
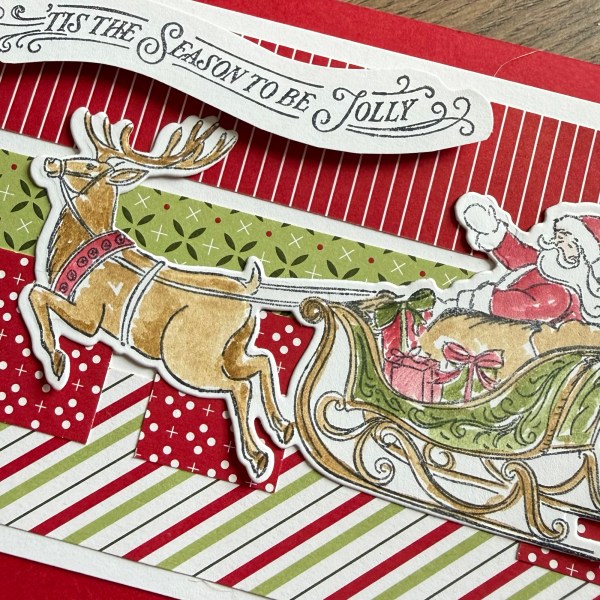
I used the same image, same colouring technique, and same 1” strips of paper but chose to arrange them slightly differently and changed the orientation of the card. I also added different sentiments – but the principles of bulk making mean that you can quickly get cards made by using similar supplies and working in stages.
So I stamped the main image twice. Obviously if you want you could stamp your focal point many many times – the important part is to do this as a stage and get all that done in one go before moving to the next stage.
Stage two for me was colouring. Normally when I am bulk making my advice is to do all the colouring of that colour and then all the colouring of the next colour – but I didn’t do that for these – maybe it was because I was painting rather than using pens or maybe because I didn’t turn the paper to paint the second image. But as it didn’t take long to do the loose painting in this case I don’t think it would have really saved time.
Then I die cut the focal image out. So this is stage three. Whether it be die cutting or fussy cutting – do all your cutting as a stage. It becomes routine and less thought required – although for these cards it was only twice so super quick!
Next I sorted out the card bases and the background panels for each card and made life easy by keeping them the same – knowing card sizes and layering panel sizes helps a lot. For a UK size C6 card I usually fold the cardstock in half and then cut at 10.5cm to create two top fold portrait card blanks. Then I cut a panel for the background of the card at 13.9cmx 9.5cm. This gives it a lovely frame.
With that sorted I decided to create 1” strips of the patterned paper and then when I trimmed them from 6” long to about 13cm I kept those little rectangles for layering too!
Again all this cutting is a stage and if you do it for all the cards you need it for it’s so much easier than retaining measurements whilst you layer up and make your cards.
Once you have everything cut its assembly time and this is where you can choose to go matching or to differ the designs – and of course I chose to differ the designs – I am not a fan of making the same card multiple times. Instead I like to use the supplies and change it up.
For these cards I changed the orientation and the positioning of the small rectangles and on one I went wonky with the background strips not straight!
I also chose to add different sentiments and unusually didn’t grab ready made ones but instead stamped and die cut from this stamp set – so this took me away from my usual bulk making tips and would have advised to do that at the beginning when the stamping stage was happening – but hey that’s the way it goes sometimes!
A lovely set of cards and happy with my bulk making tips!
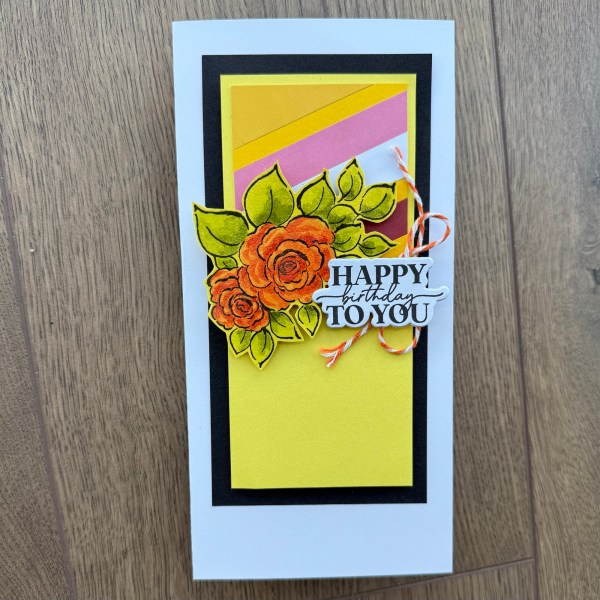
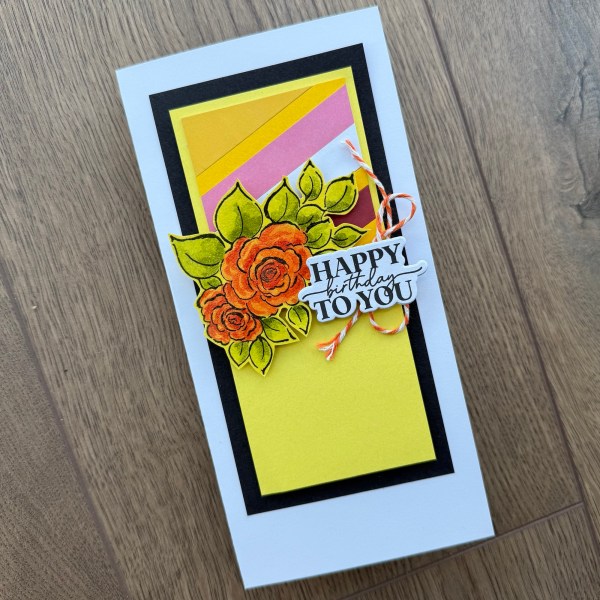
I decided to make use of the scrap strips again and make a bright and cheery floral card for my design team contribution for this fortnights challenge at Addicted to stamps and more .
I made this fab slim card using the panel and mounted that onto yellow and then black cardstock.
I wrapped the panel with the bakers twine in orange.
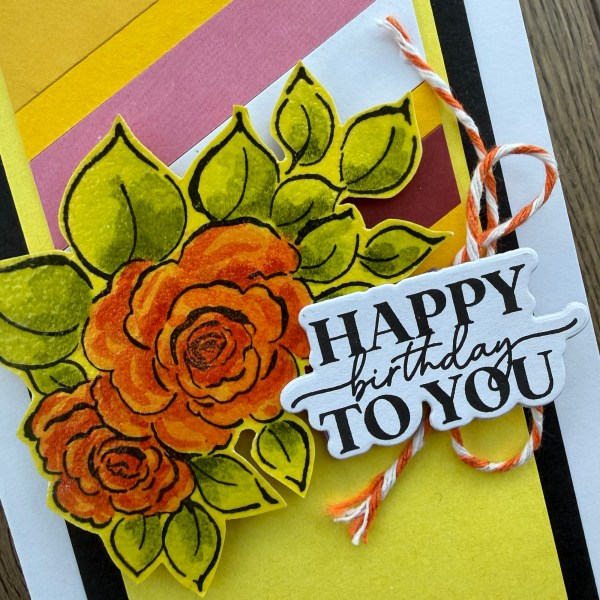
Then I took the charming day floral stamp image and added it to yellow cardstock. I then coloured it with ink and water.
I fussy cut the cluster out and then added it with foam adhesive for some dimension and then added the sentiment over the twine bow.
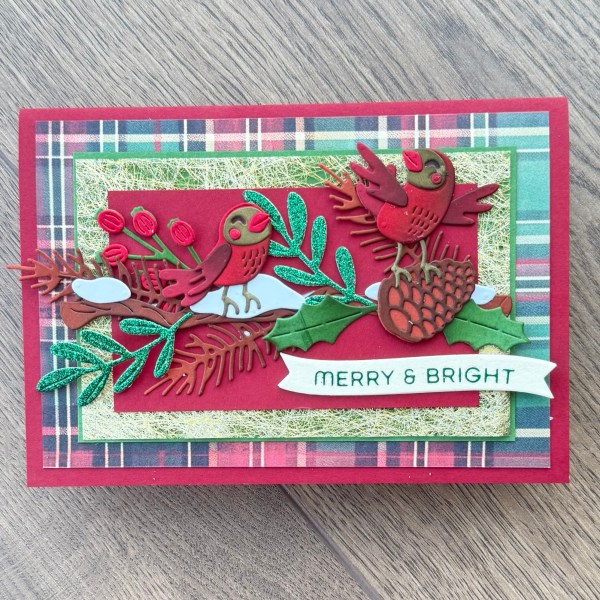
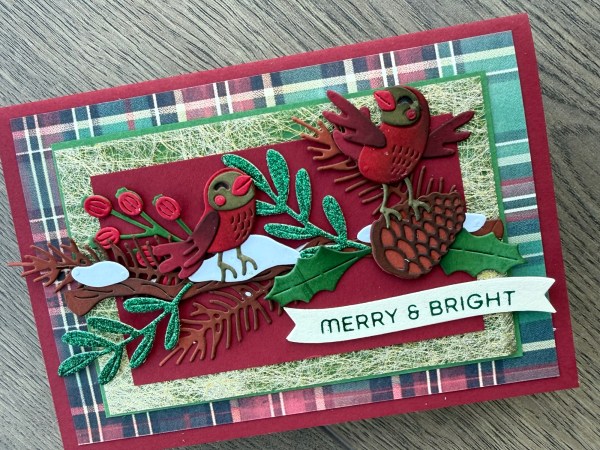
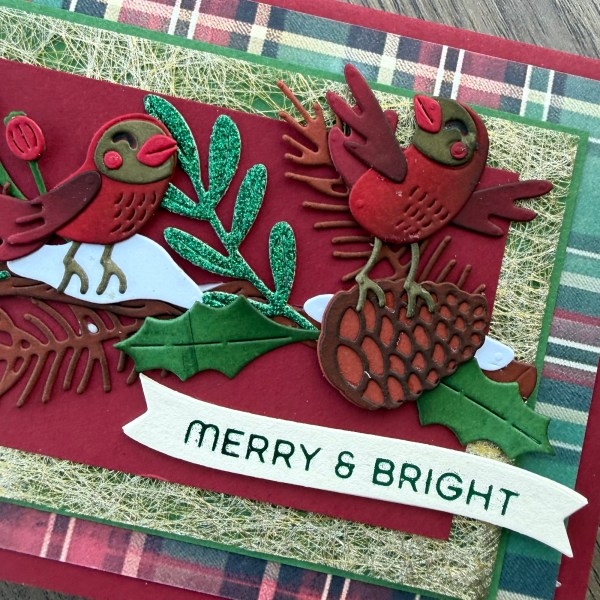
Traditional colours are of course simple to create Christmas cards with so I went with the tartan paper from Indigo Blu and then die cut elements from the Snowcapped Holidays for this one.
The rich green and red work so well for the die cut elements and then the pop of the angel hair gold paper makes it extra special.
I also added in those two glitter cardstock leaves for another touch of fun!
I really like my branch of joy with the two birds.
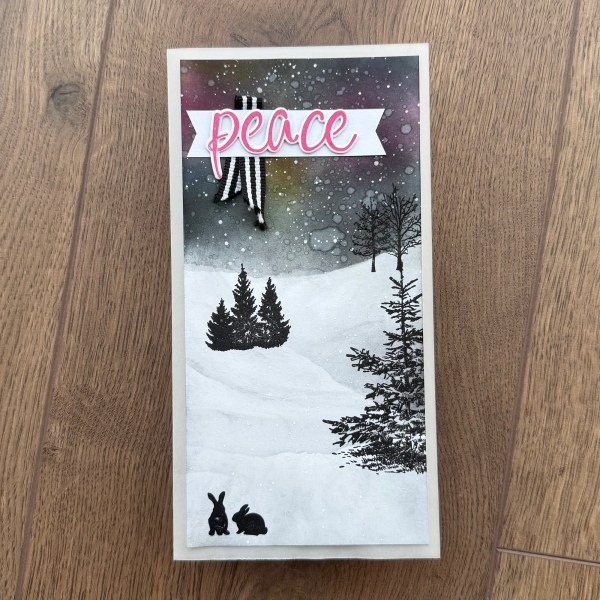
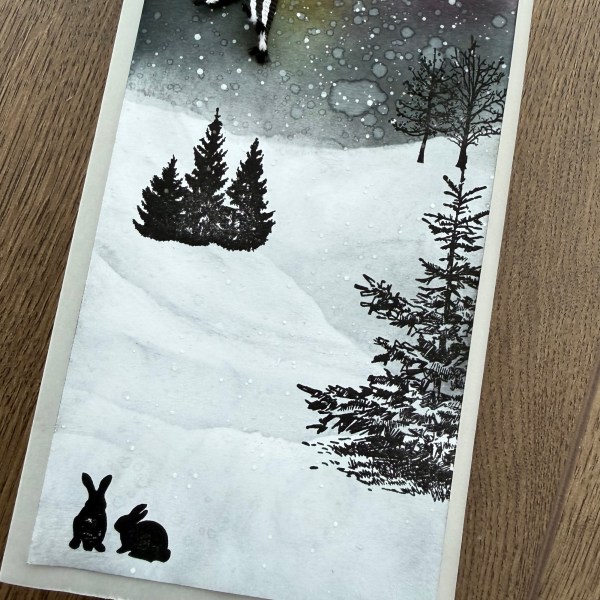
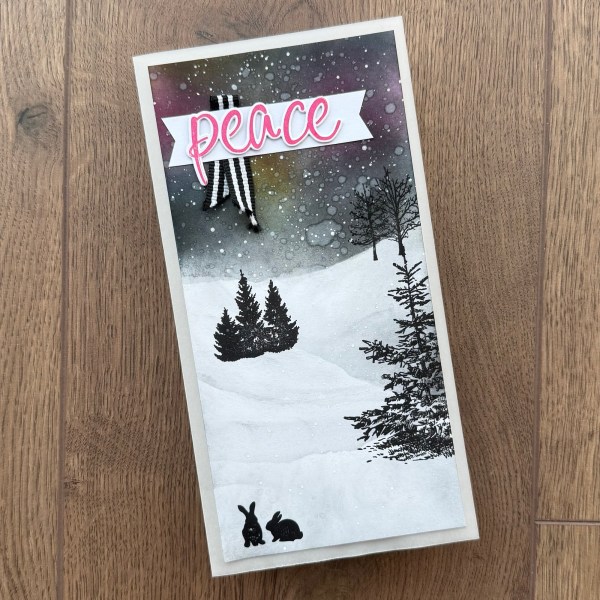
For Silent Night for day 6 of Christmas in July I decided on creating a peaceful nights scene and so went with the trusty northern lights inspired sky with snow drifts for the scene.
I of course added lots of splatter – both water drips and gesso splatter!
I then used the Indigo Blu stamps to create the scene – any silhouette stamp would work well with this kind of scene.
I added a scrap of ribbon, a banner and a die cut stamped sentiment for the finishing touch.
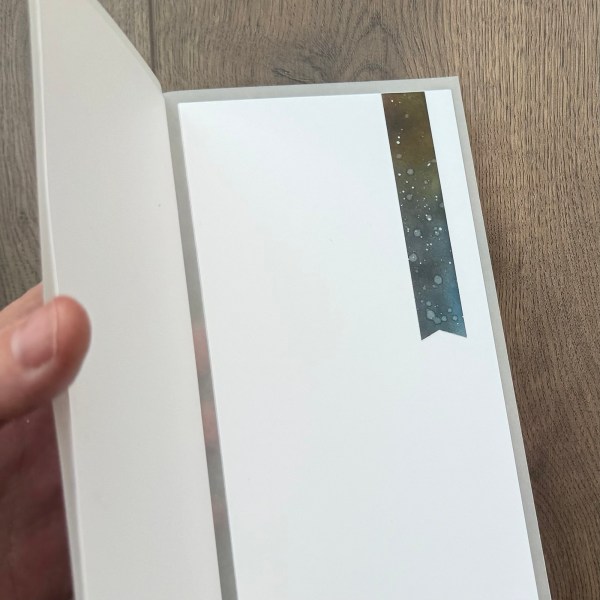
Then I created the card base from vellum and added white panels all the same size as the front to go on the inside to strengthen the card and to ensure adhesive was covered up!
Inside the offcut from the front became the element to draw the outside in.
Love this different card with using the vellum as the base – and such a beautiful way to create a scene!
And considering I made this card in the middle of a heatwave I think I did a good job of making a frosty scene!
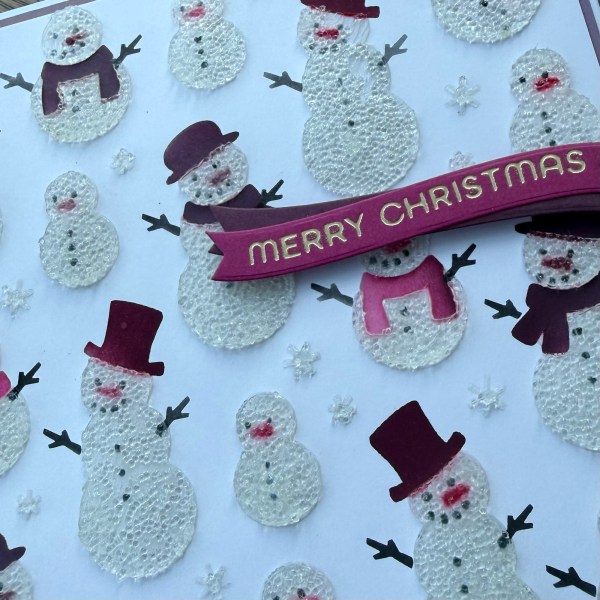
Filming this during a heatwave was a funny turn of events! I imagine frosty would be a big old puddle if he was really in my craft room when I made this last week!
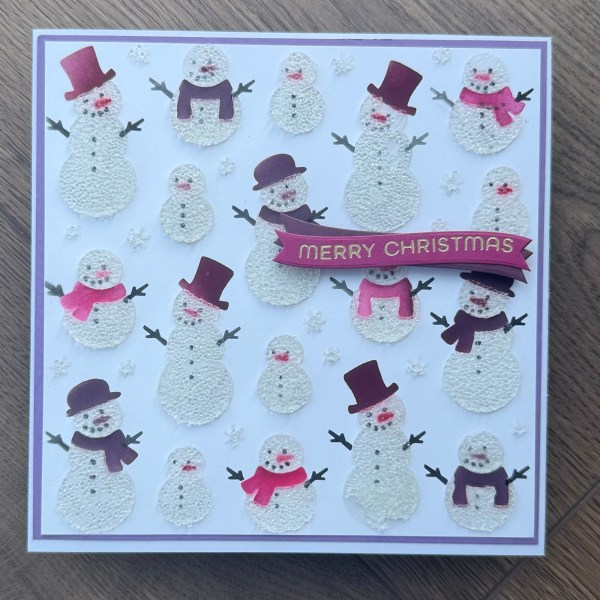
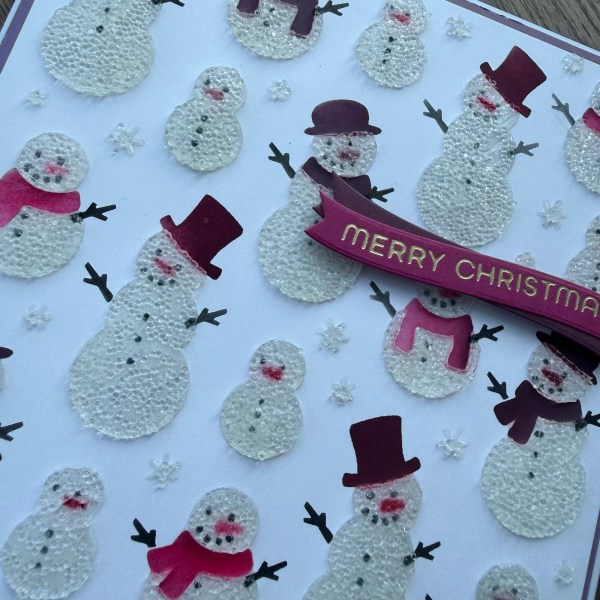
Anyways … the card actually was made over two days as I decided to add a layer of the texture glass bead gel paste – which of course needs time to dry – so after the layer of inking and the layer of paste I set it aside and came back to it the next day!
The panel itself is a layering stencil set I used last year and struggled with … and someone suggested using a paste so I gave it a try!
I love it! The snowmen look so frosty and fun with all of the texture and the gorgeous little hats and scarves.
Because it turned out so well I decided to keep the finish of the card simple – just a sentiment raised up and a panel of the purple to frame it.