

I will be sharing on some of my city break Everyday Stories posts Flip Its in their normal use – to add to memory keeping projects to add in the extra photos – but I did make something very different with the flip its too – a shaker card!

It was so easy to make a flatter shaker card than using adhesive foam and yet I may have gone a little overboard with the sequins to make it extra special!
All I did was die cut the aperture in the front of the card blank and a coordinating one for the inside of the card – not necessary if you done mind seeing the adhesive element or the pattern on the card blank isn’t directional (mine had upside down rainbows and looked weird so I did add the cloud inserts!).
Then I filled the flip I with the sequins and used the adhesive to stick it in place over the aperture on the inside.
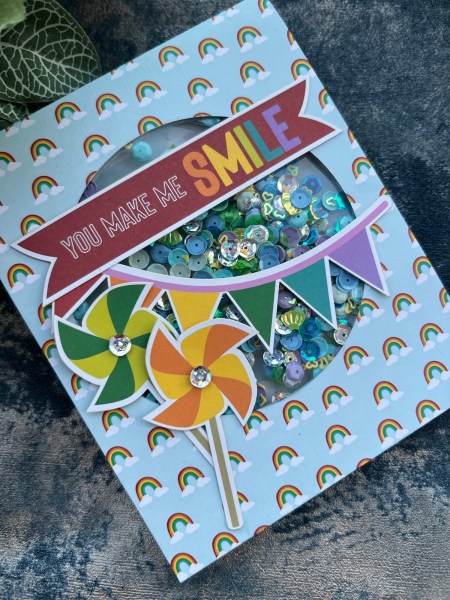
I then used red line tape to glue the pocket shut – I think red line tape is probably your best bet for this as it’s so secure.
Next I added the insert to cover the inside mechanism – and then it is done – just needed the decoration on the front.

For this one I did use the Kingston Crafts rainbow kit for both the cardstock making the card and the embellishments I added – like the sentiment and the paper windmills and the bunting across the aperture.

I added two further sequins to the outside to tie in with the shaker sequins.
Super cute! And a fun and easy way to use any extra flip its you have – or to make less chunky than the norm shaker cards.
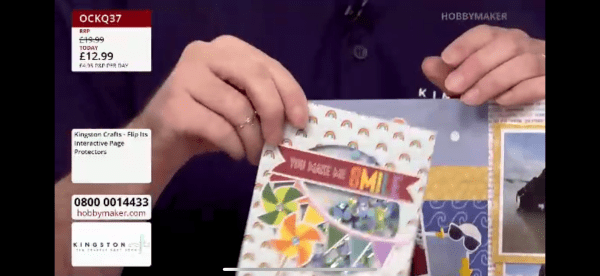
And this is one of those projects I can say ‘as seen on tv’ because yes Martin showed it on the show last Friday – and he also demoed a different way of creating a shaker card which I can’t wait to try!
Happy crafting!
Catherine
