4 artistic thank you’s

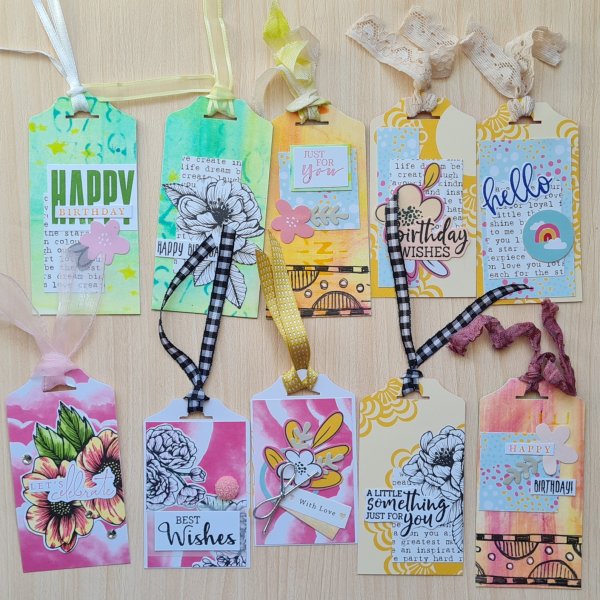
A few weeks ago I cut up papers and did stamping with the intention of making a sheetload of cards challenge but then never really finished it (plus messed up the cutting for the template!) So I shared the four I did at the time and put things aside for another day’s play.

Well I decided to grab the pouch that had all the bits and pieces in it and have a go at making some more and managed four more.

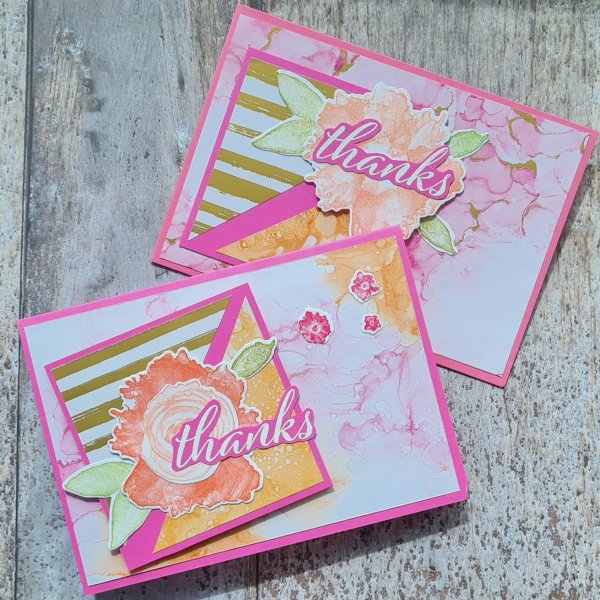
Two are pink and two are peach … but all make cute thank you cards!

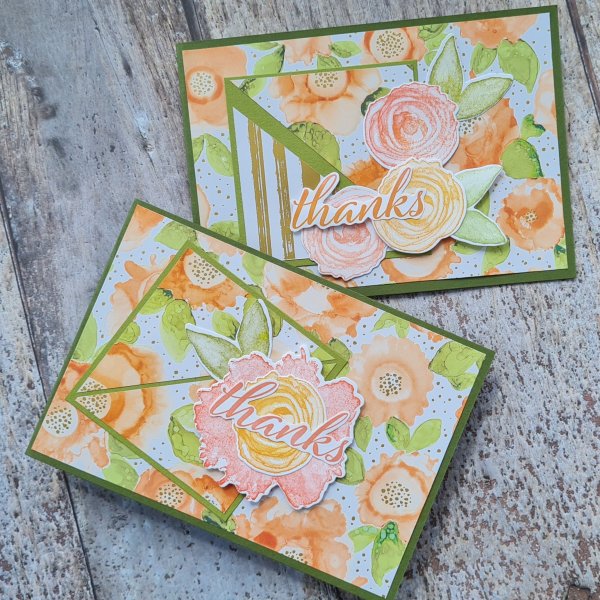
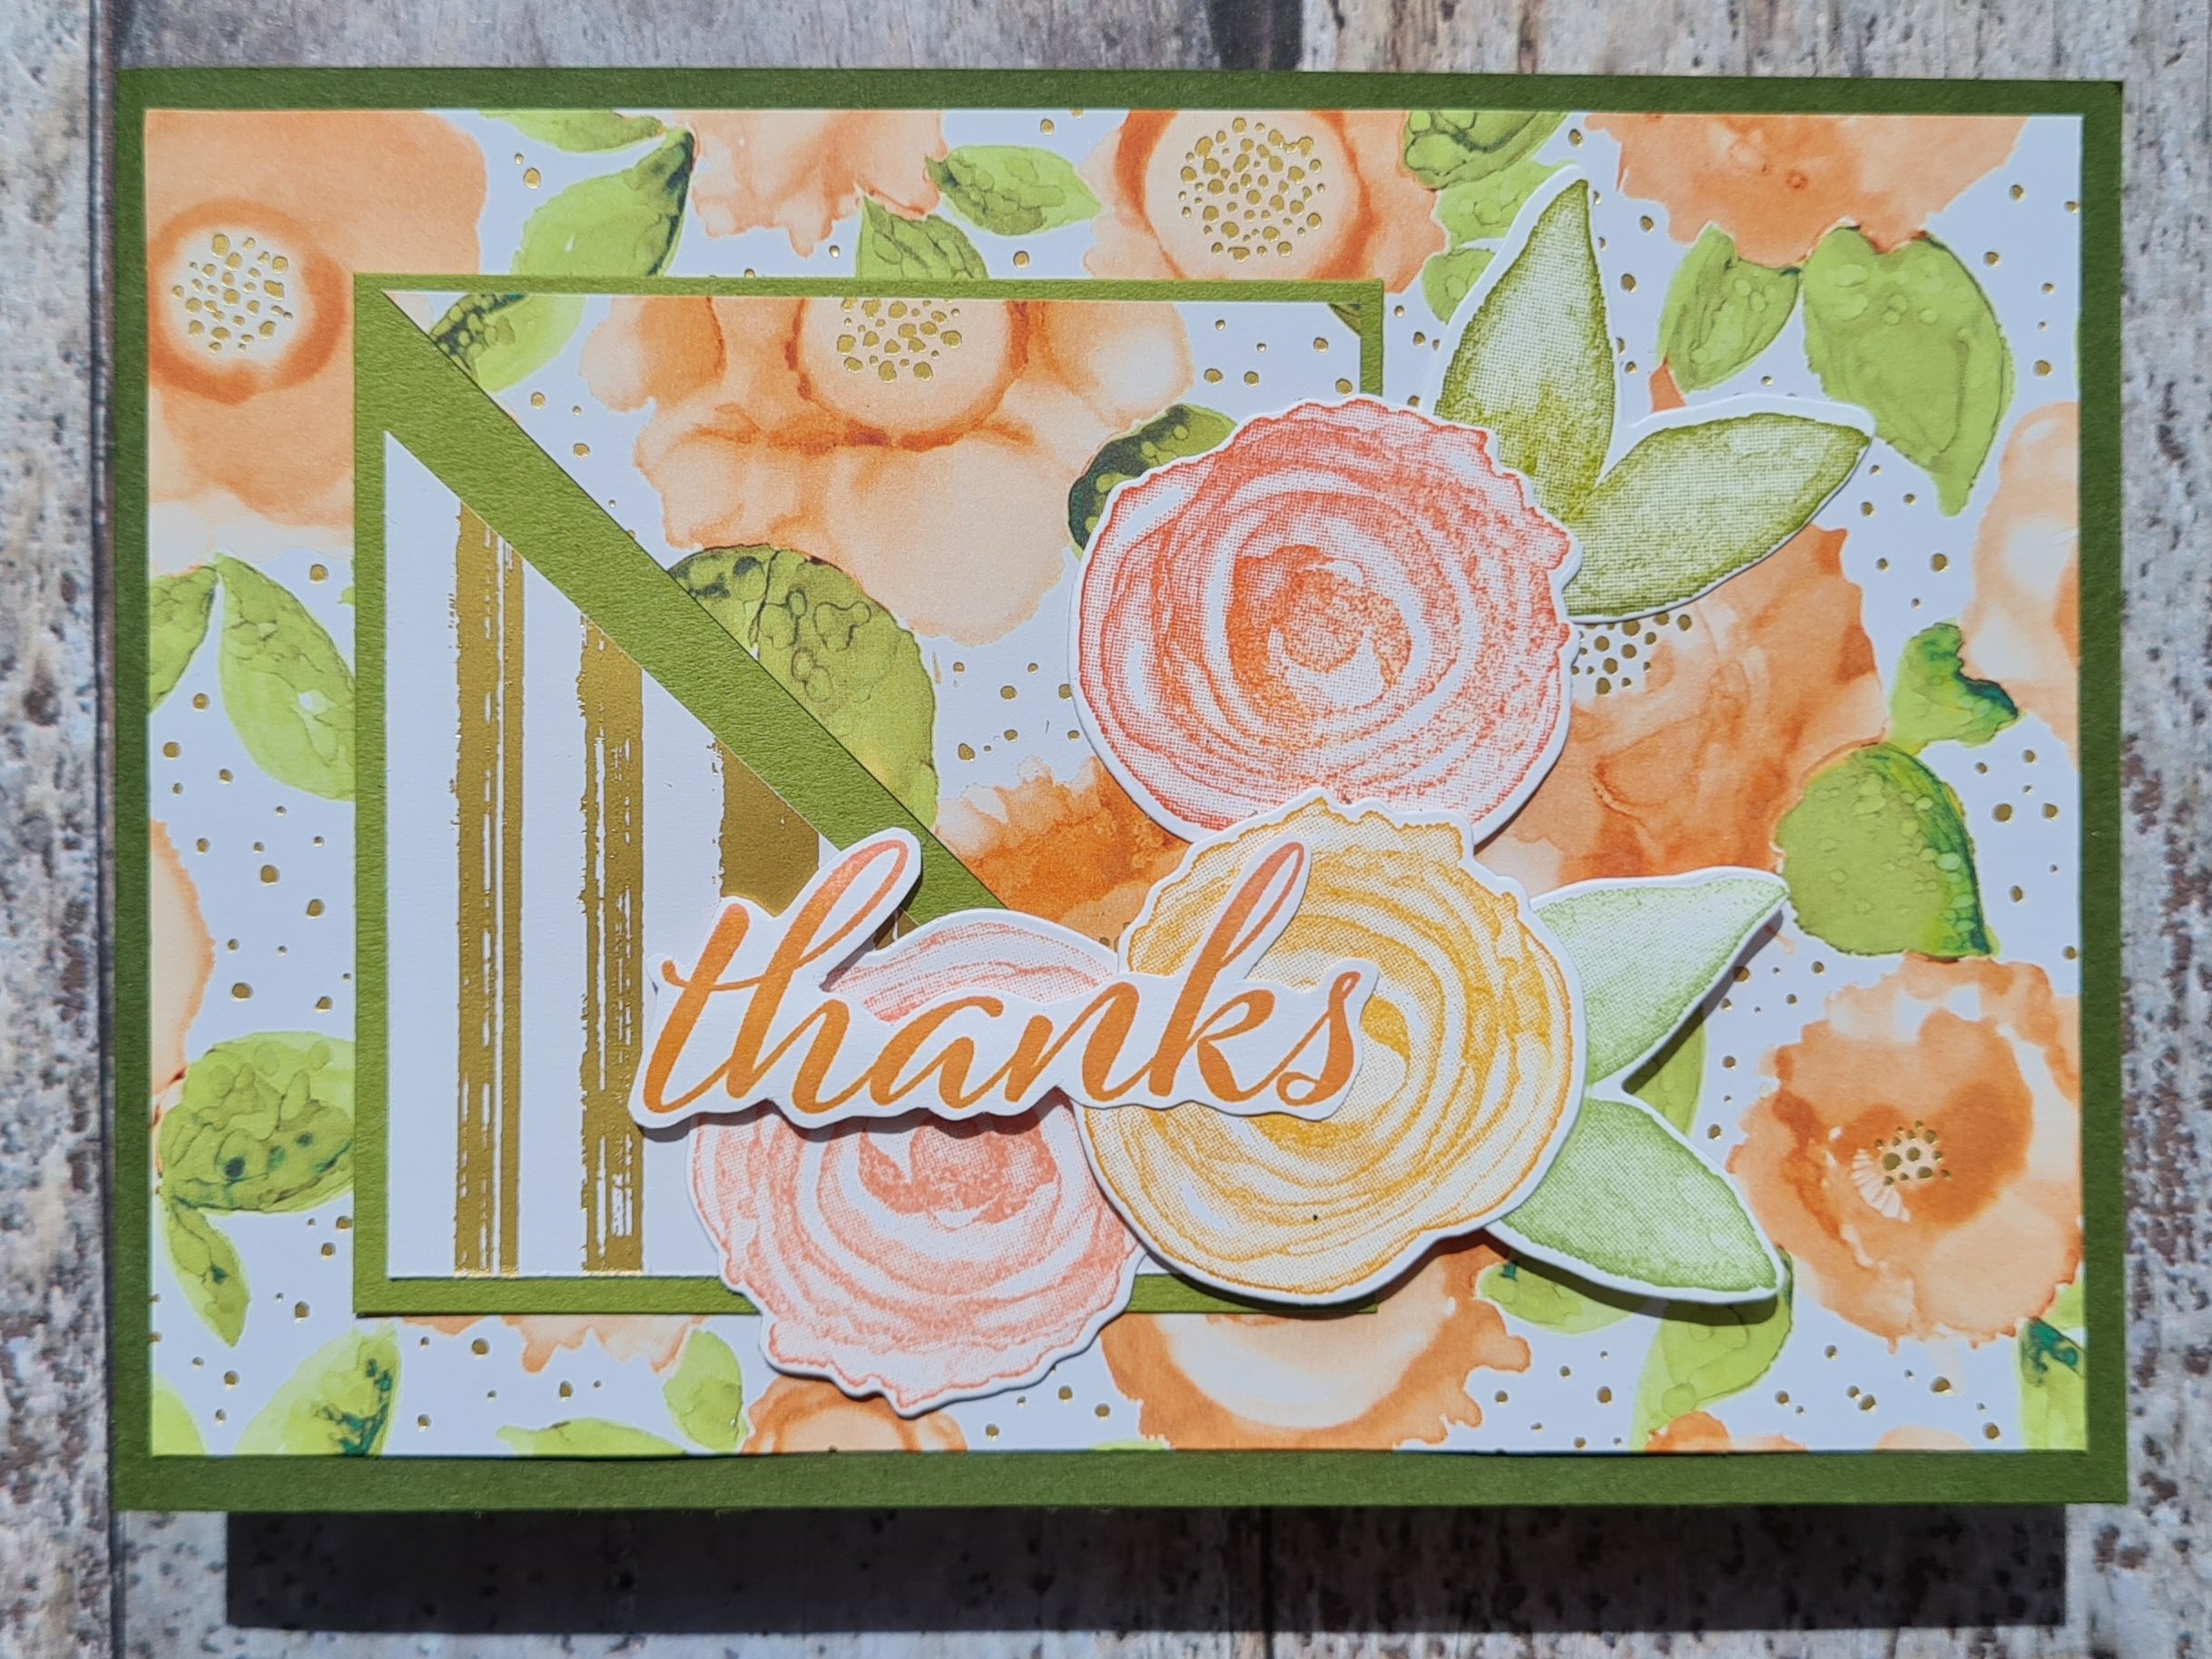
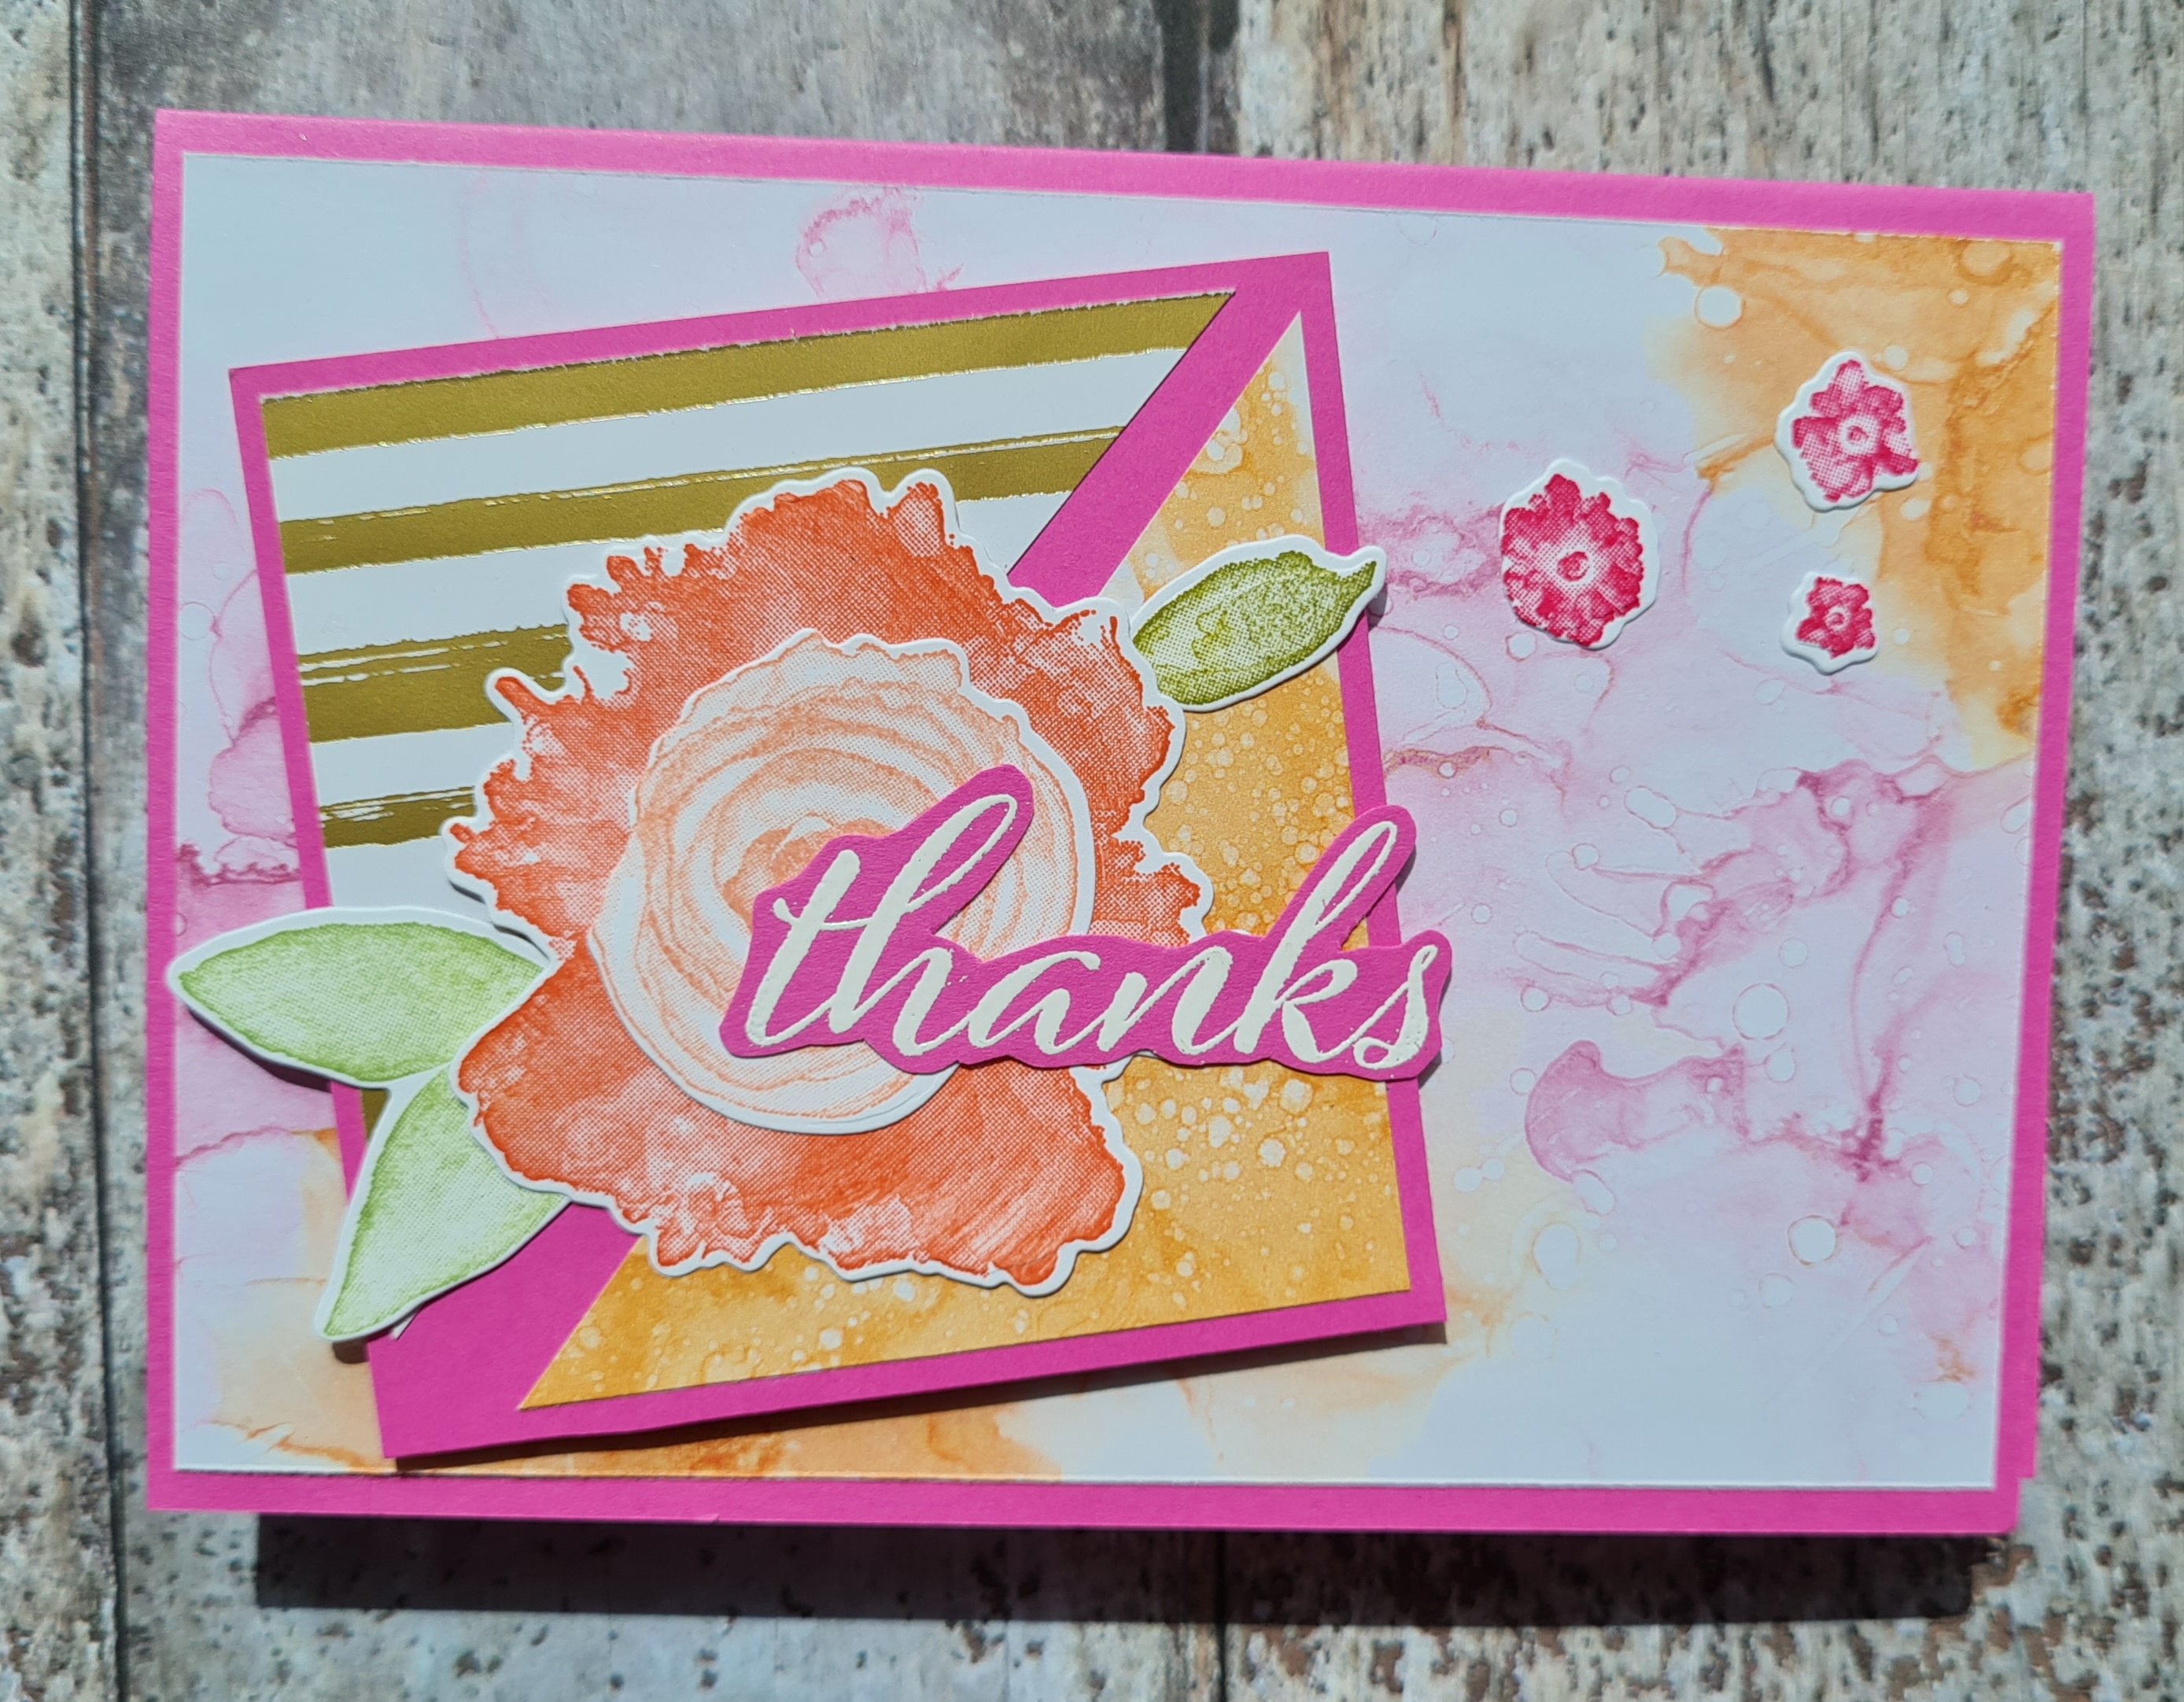
These pale Papaya ones I used the flower images I had stamped and die cut. As I don’t have Pale Papaya ink I used a mix of retired colours (Crisp Canteloupe and More Mustard) and some Calypso Coral as these all worked with the Pale Papaya.

I mounted both of these onto the Mossy Meadow card blanks I had made. This gave a nice frame to the cards.

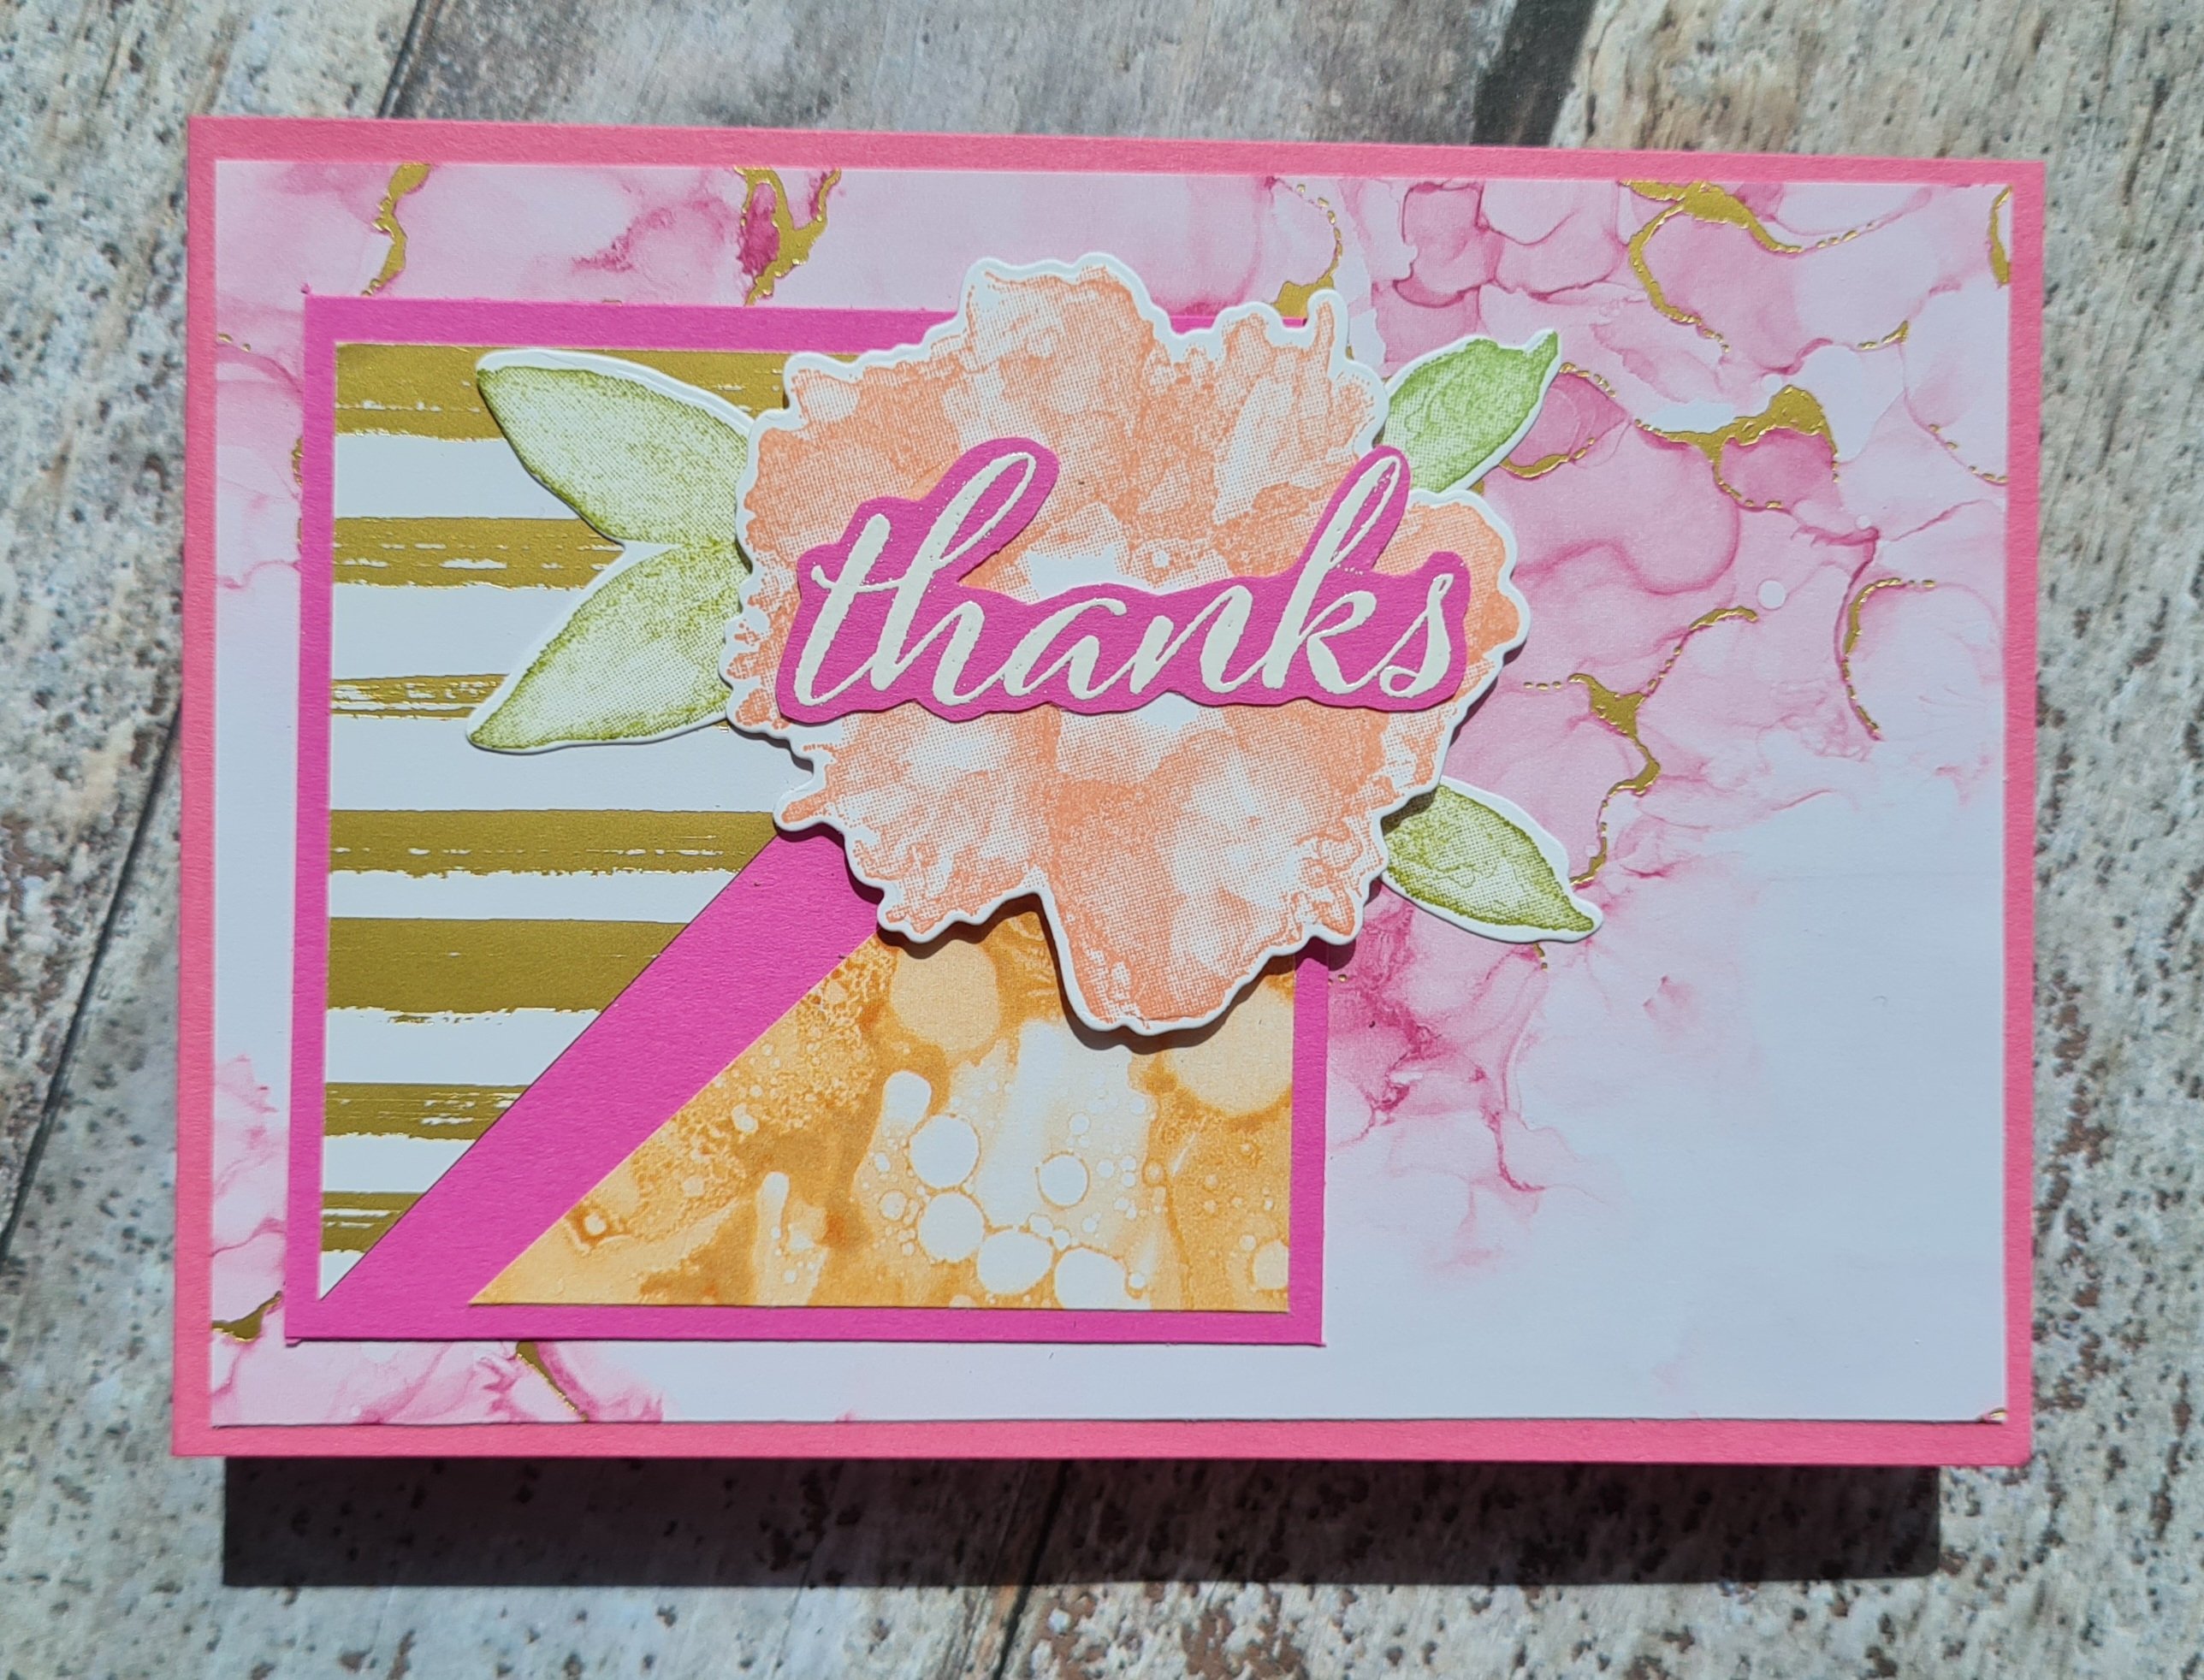
The pink ones I actually have a mix of pinks going on as I ran out of the Polished Pink cardstock so had to use a random other bright pink from the stash.

As these also had the pop of Pale Papaya in the patterned paper I used the same peachy themed colours for stamping the flowers … and one of them also got a few of the smaller flowers stamped in Melon Mambo.

Love how summery and bright these cards are… perfect for saying a cheery thank you!

I love too the gold foiling in the papers … really makes them special.

Happy crafting!

Catherine

More Dylusion Snow Crystals

I’m still working my way through using those Dylusion backgrounds I made years go at a class with Dyan Reaveley… only a few left after todays project I am sharing with you.

I am basically doing a similar design to the cards I shared last week (or thereabouts) where I embossed the Snow Crystal background stamp but this time I changed the powder I used to a white glitter one. I rarely use this powder as glitter isn’t usually my thing, but I thought this stamp was the perfect one for a glittery finish!

I decided to go for square 5×5 cards so cut the Dylusions panels down to 9.5cm square (I had originally thought to do 13.9cmx9.5cm panels for an A6 card but changed my mind… hence the cm sizing!)

Two of the cards I mounted onto the black panels, and two I decided to emboss the card blank front using a snowflake embossing folder.

For both cards I used sentiments from the Christmas to Remember stamp set … I love how varied these sentiments are.

Once again I chose to add the iridescent snowflake embellishments to finish off.

Love these and glad I decided to make more using those backgrounds for my own stash as the others went to the swap recipient.

Happy crafting!

Catherine

Dylusion funky flower card

I am still working my way through things on the desk and trying to clear the decks a bit. I find whilst products are on my desk, or half used supplies, I can’t seem to settle on new stuff until I’ve used it up. I constantly want to grab for the same stuff.

In this case it is these Dylusions backgrounds. I’ve had them for years bit now seems to be the time to put them to use or get rid… and that is just not an option!

So I grabbed a couple of them that were more decorated than most with added doodles and some black edges. I added more black with a bit of black stamping (Gummiapan alphabet text stamp) and also grabbed a smaller piece of one and did the same on that).

I added black around the orange piece and then some white dots to make it coordinate.

I mounted the smaller panel onto the top of the other and then looked around for more supplies to finish this off.

I settled for some flowers stamped and fussy cut (again these were already stamped on the desk from some other Christmas themed projects) and then punched a jar from black scrap cardstock to turn it into a feature.

I decided Cinnamon Cider was the perfect card base colour so used a half sheet of that to make the card blank. It wasn’t a full sheet so I felt fine in then also stamping onto the bit left over to create the sentiment which I then fussy cut out and added to the card with a bit of foam in the middle so it had dimension.

Quite a funky and mixed media style card. Love it!

Happy crafting!

Catherine

Trellis stencil fun

Had a play with a little trellis stencil this weekend and made this cute card with Cottage Rose stamps.

I started with the stencil and put some versamark through it and then added Baked Texture embossing powder and heated it up. This left a lovely verdigris type colour and texture.

I then stamped the image in Soft Suede and then used some watercolour pencils to colour it in. When I had finished colouring I then die cut it.

I decided to add some inking to both the stencilled panel and the sentiment panel but decided the card needed more so grabbed some Crumb Cake and embossed it with the Old paper folder. Again I added ink.

I added the stencilled panel with foam underneath and then added some twine and some pearl gems to finish off.

Happy crafting!

Catherine

More technique Christmas cards for swapping

Yesterday I shared cards made for a swap … well I made 8 in total but these ones I kept to a more traditional look.

I decided to use patterned paper, to add some ink blending and splatters and then stamping and fussy cutting to create the focal images.

I’ve been using the Christmas Season set a lot for foliage recently so decided to change it up for these and used the foliage from the retired Peace and Joy which has been a favourite set for quite a while but mainly for the words. So decided to give the other stamps a little more attention!

I stamped each leaf 4 times and chose a different ink for each leaf type (the Holly stamp is a pair of leaves so I ended up with 8 in total!).

I blended ink on the white panels in a slightly different way for each and then splattered with a darker ink. Then I made my little clusters of leaves.

I decided to raise each topper panel up on foam and then add strips of paper underneath the sentiment (from the In the Pines) set. I then added pearls to the images along with a little more stamping using the accent type stamp from the Peace and Joy set.

The patterned paper is from the stash and I love how these coordinating packs work well together. I then chose to use Cherry Cobbler as the base for the card blank.

I also added some twine to these two to add a different texture.

Hopefully the recipient in the swap likes the two different styles I chose to make up the 8 cards.

Happy crafting!

Catherine

Funky Christmas cards

I’ve joined in with a swap to make Christmas cards using 2 techniques on the cards and here are what I made…

Now the backgrounds themselves are those Dylusions backgrounds I made years ago with Dyan Reaveley using Sprays and paints and stencils … so I guess technique number one is using stencils!

Then I heat embossed the amazing Snow Crystal background stamp in silver on to each of them. This is a stunning image nd embosses beautifully.

I then embossed the sentiment onto black four times and cut it out using the Christmas Greetings dies. On two I just kept it simple, but on the other two I added a little bit of the gingham ribbon to step them up a little.

On all of them I added the little iridescent snowflake embellishments to add some more sparkle.

I added them onto black card bases and inside I added a white panel onto which I stamped Merry Christmas in black to keep it simple.

Super happy with how these came out. Love the shine of that snowflake against the super bright and fun backgrounds.

Entering these into the Christmas in July Challenge at Dream Valley Challenges

Happy crafting!

Catherine

UK stampers forum tag swap

Was beginning to wonder if I would get round to making a tag or not for this months UK stampers forum tag swap … but then inspiration struck whilst playing with this months Creative Stamping magazine which I treated myself to this past weekend.

I stamped the floral image which was the reason I bought the magazine in the first place and decided to colour them in using soft yellows and greens and then fussy cut the image.

The magazine came with a stencil and so decided to ink through the stencil with versamark and then I was going to get a pearl embossing powder but spotted the Seth Apter Baked Texture rust powder and grabbed that instead … and wo was I happy with the result. I forgot how cool these powders were to play with.

I then grabbed some of the die cuts I spent an hour cutting from scraps the other day and layered those under the floral image.

I decided to grab the baked texture embossing powder and a scrap to make a little strip … but this time multiple layers of versamark and the powder to get the different effect and this went across the tag and under the sentiment.

Finished off with ribbon, twine and some pearls.

Love how easily this came together once the stencilling was done … it was like all the pieces were there and waiting! Nice to get a new stamp set to play with too … been a while since I bought a magazine and must admit I have a real thing about floral images at the moment.

Entering this into the Summer Flowers challenge at Sir Stampalot

Happy crafting!

Catherine

Scraps to tags … Christmas

Yesterday I shared with you the 10 tags I made for the challenge of use scraps to make tags … well as the challenge is to make 20 tags I chose to also make 10 Christmas themed ones.

This time I started with scrap cardstock as the base and then grabbed the Christmas box and used papers I had already cut into and the images I had already either die cut or stamped and coloured on other projects and never got around to using.

I did have to stamp a few extra sentiments and the two stars for the Tidings and Trimmings set were new inags, but otherwise all of this was using bits leftover from other projects or things sitting on my desk

Hopefully the swap recipient likes what I made, I’m looking forward to seeing what I get in return.

Happy crafting!

Catherine

Scraps to tags – Birthday

I’ve joined in with a swap over at Twinchies, Inchies and More over on Facebook and the challenge is to use scraps to make 20 tags… so today’s blog is the 10 I made which are birthday themed… well not exactly all birthday, but non-Christmas ones! Tomorrow will be the turn of the Christmas ones!

So this is my scraps type piles and folders … so I popped them all onto the desk and started creating … using the fabulous Scalloped Tag punch to create 2″ wide bases into tags.

Apart from the sentiments and the ribbons (although some of these were also scraps) the ingredients for these tags were all on the desk or in the scraps folders … and the sentiments were also stamped on scraps!

I am amazed I could make so many lovely tags just from bits and pieces.

I used some of the Dylusions backgrounds I refound a while ago and have been slowly using up for the bases for some tags, I also used Memories and More cards for a few too, along with cutting them up as embellishments.

I also used flower images from the scraps of the True Love dsp that I keep in a pouch for when I want a simple floral element or off the edge flowers… some of these I coloured in, and others I just left black and white.

Love how colourful and bright these tags are.

Join me tomorrow to see the Christmas themed ones.

Happy crafting!

Catherine

Desk clearing distraction

Is it just me? Whenever I set myself a task of clearing the desk and the piles of “stuff” that have accumulated I end up finding a “treasure” and making something! And the tidying up concept disappears! 😆

So this card is one of those creations!

I found another gelliprint ATCs that I had started and not finished and decided it worked perfectly with those Memories and More cards that I have been whittling my way through!

A scrap of the Pretty Peacock cardstock, a die cut and Forever gold laser cut and a few Artistically Inked flowers to embellish… with a cute little sentiment … and jobs a good’un … on the cardmaking front that is… the desk tidying… not so much!

Happy crafting!

Catherine