I am an on-the-side and increasingly up front papercrafter who loves nothing more than getting inky and creating pretty things with paper and stamps!
I am also a wife to lovely hubby and mummy to a wonderful 14yr old princess.
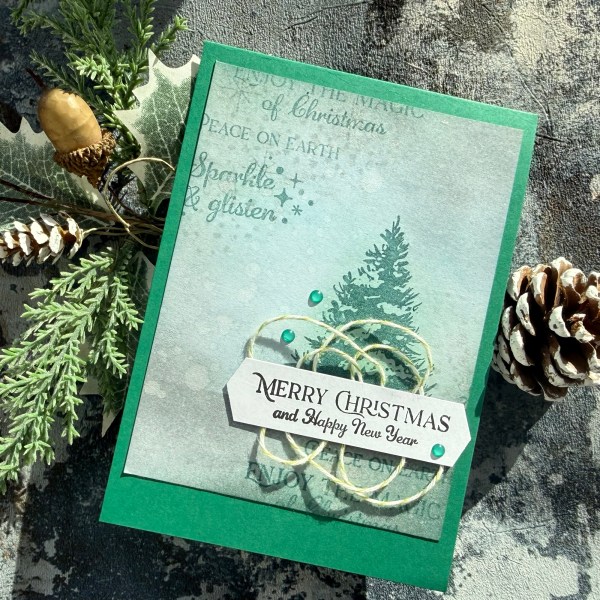
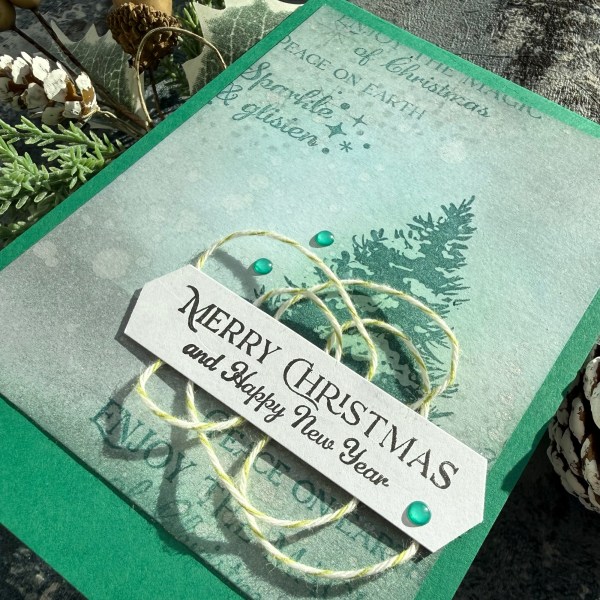
The theme for today is Magic of Midnight and I knew I wanted to capture the magic of Santa flying through the midnight sky.
I used stamps from Creative stamping magazine to stamp the city scene and the Santa and reindeer flying and then went to town with inks and splatter to create the night sky.
I love the iridescent splatter I added as well as the white paint splatter.
The sentiment is a Tim Holtz sticker and then I added the gems to finish off.
Love the simplicity of getting such an atmospheric sky with distress inks – just so easy but effective!
I recorded the process of making this card so check this out on my YouTube channel.
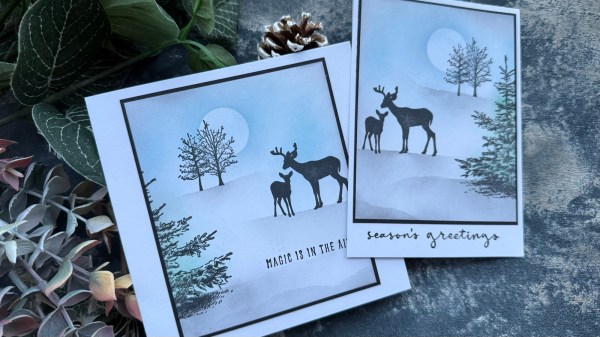
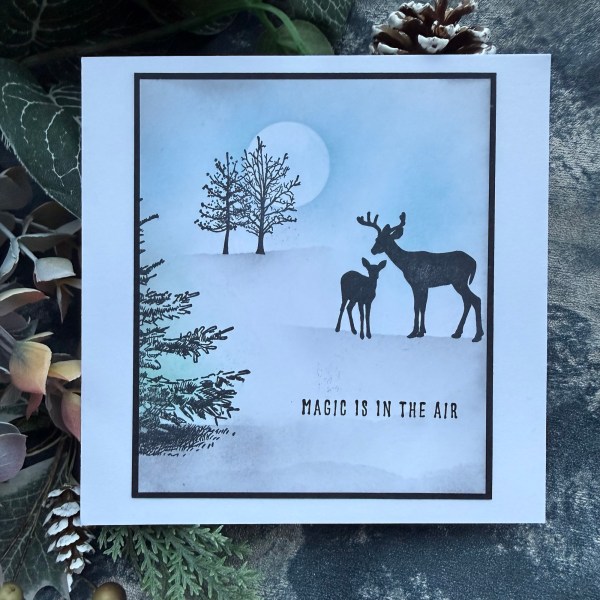
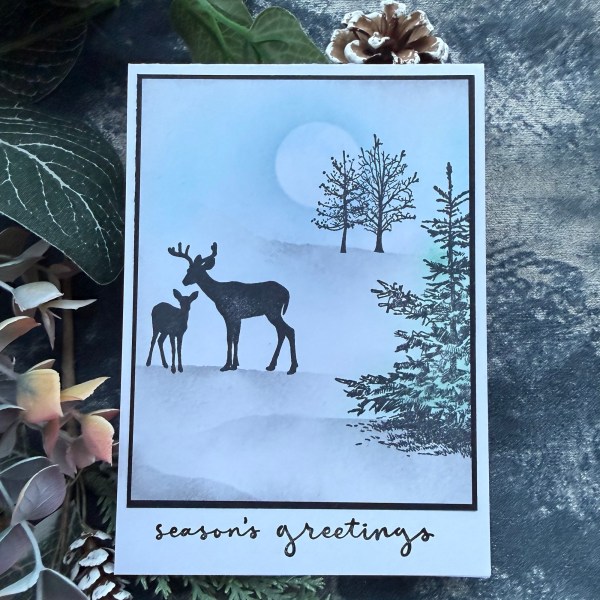
Today’s challenge from Martin was Reindeer Games… which I sort of departed from because I didn’t actually include a reindeer – just normal deer – but I am sure Martin will accept this!
I wanted to use the Indigo Blu stamps I bought a while ago and hadn’t got around to using till now – so created a lovely wintry scene with the deer and trees and some simple inking.
If you watch the video of this you will see this was created as one panel and then cut to make two cards – very simple and I think elegant!
I kept the cards very flat and simple – a real departure from my usual style!
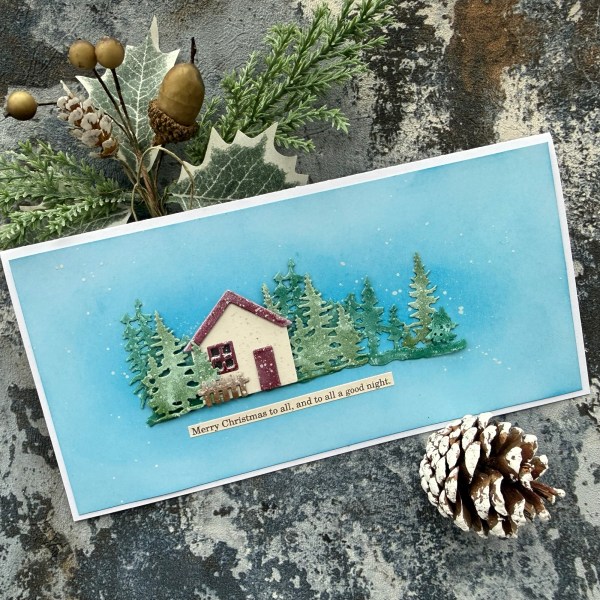
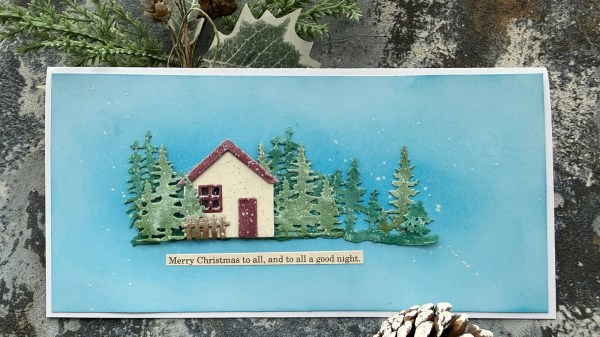
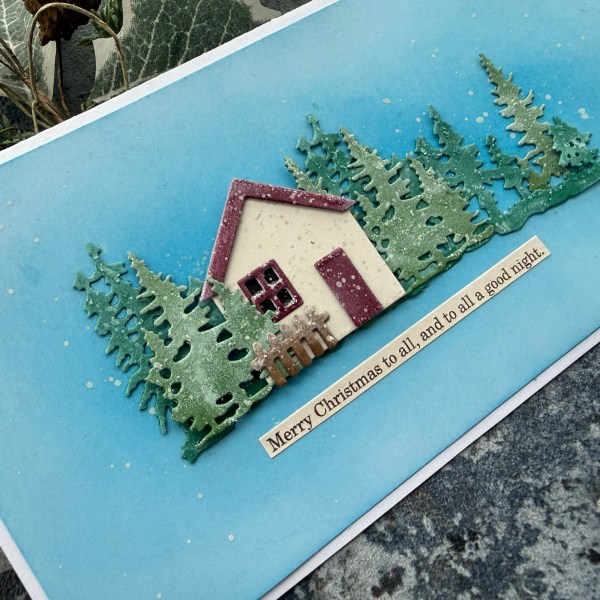
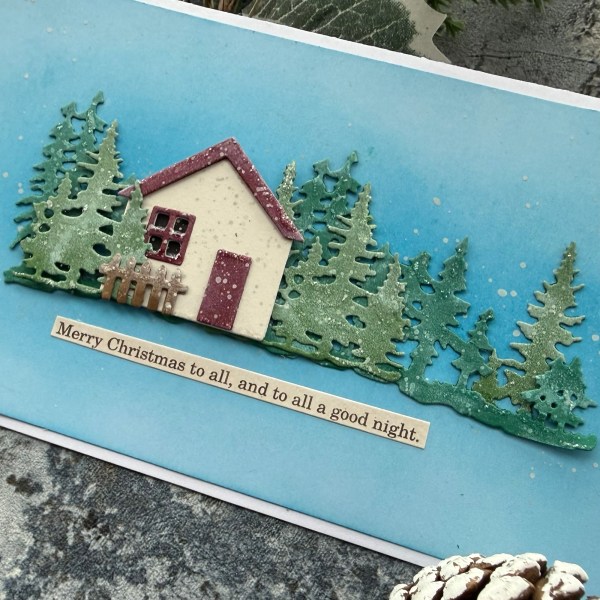
Today’s theme Martin gave us was frosted windowpanes and all I could think of was those die cut windows I used up for a Make It Masculine set of cards a few months ago! Doh! But after a hunt through the die sets I found the cute house with the little window and thought I could make it work.
And then I made a card I was really really pleased with!
I just adore the scene I made from the house die and the tree dies and love how I added the snow using both white craft ink and glitter glue.
In fact I loved it so much I had to immediately go and show it off to both the hubby and the princess – this rarely happens – but this time I wanted to share immediately!
If you want to see me put this together please head over to my YouTube video. Warning – I might gush quite a bit about how much I love this card! 😂
I can see me recreating this at some point and to be honest once the die cutting has been done it didn’t take too long to put together. Also love the fact I made this from scraps … certainly good to get some used up as in the last few weeks my pouch of scraps has got quite full! So may need to do a few more scraps based cards soon!
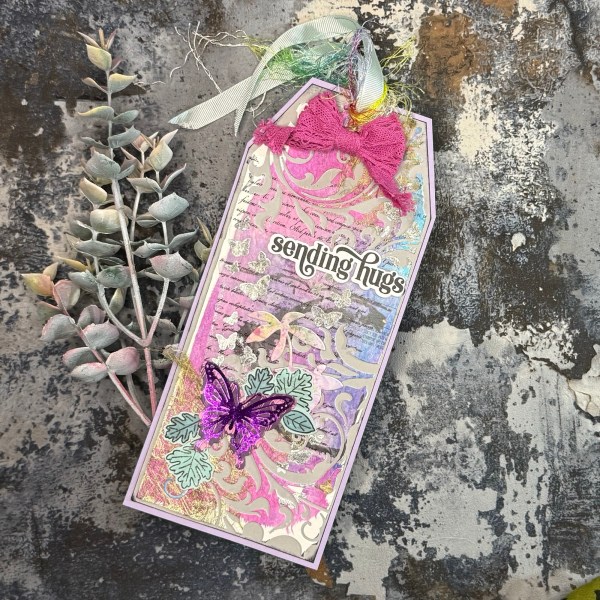
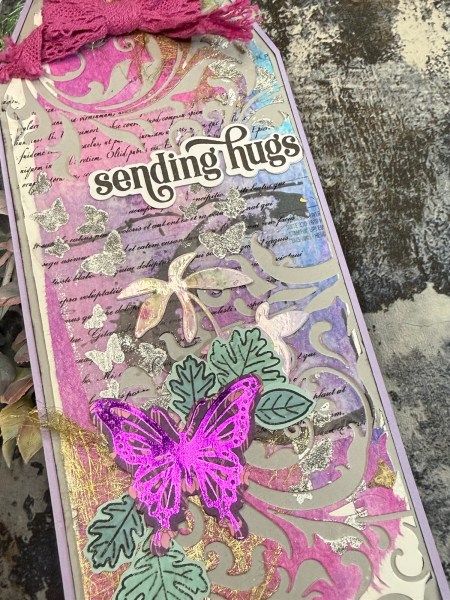
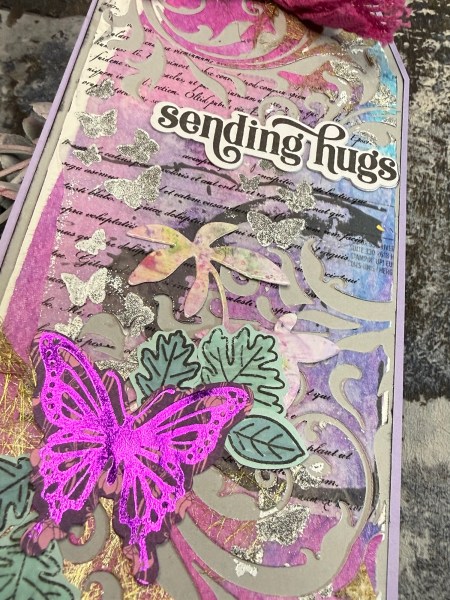
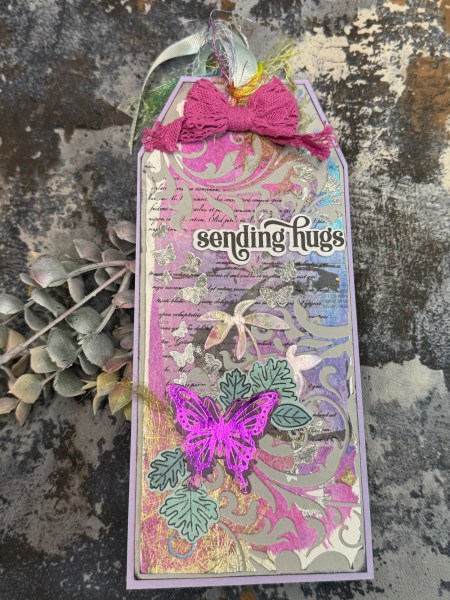
Grabbed some time on Sunday to make a tag for this months swap over at UK stampers forum.
I started with some scrap cardstock and covered most of it with some dyed tissue paper and then some bits of angel hair. I then grabbed a printed tissue scrap and added that too.
This created an interesting background but I wanted to also add some texture so used the Tim Holtz dies that cut out from the panel at both the top and the bottom. This gave me some interesting pattern and I then glued this panel down onto a grey card and cut it to be slightly larger than the original tag.
I edged it with black archival and then grabbed the cute little butterfly stamps and stamped that a few times in black and used white embossing powder – as it heated some of the black came through to create a fun mottled effect.
I added the die cut leaf and the die cut and foiled butterfly that were on the desk and then stamped and coloured and fussy cut the green leaves to give the butterfly a grounding.
I then added the stamped and die cut sentiment to finish off.
I then mounted the panel onto the lilac tag again cut a little larger than the grey later. I punched the hole and then threaded through some fun ribbon and thread trims including a beaded one. I also added the trim bow which I think balanced it nicely.
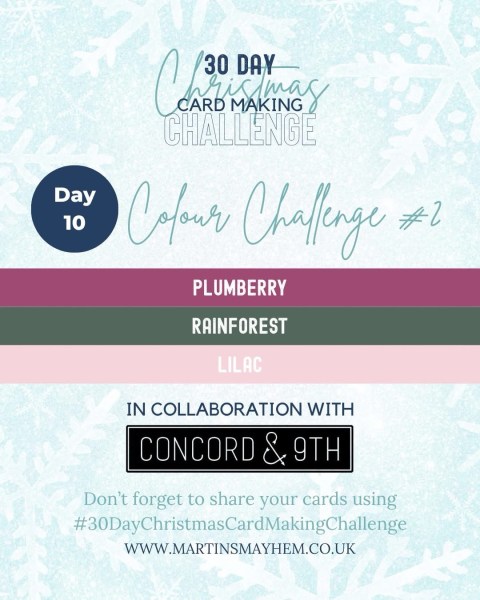
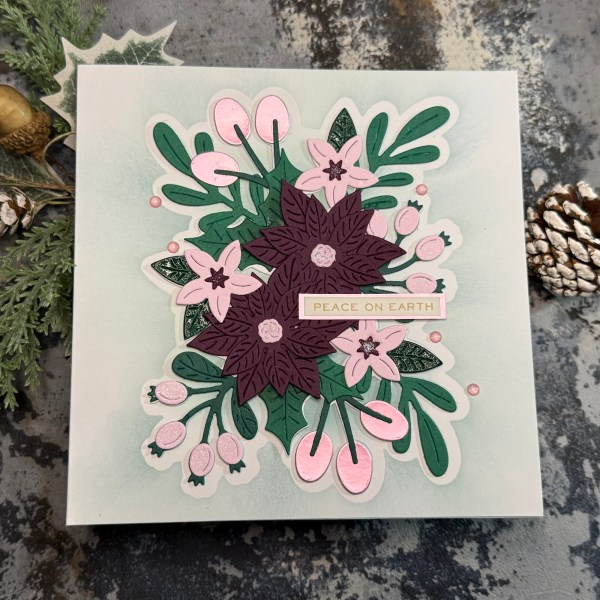
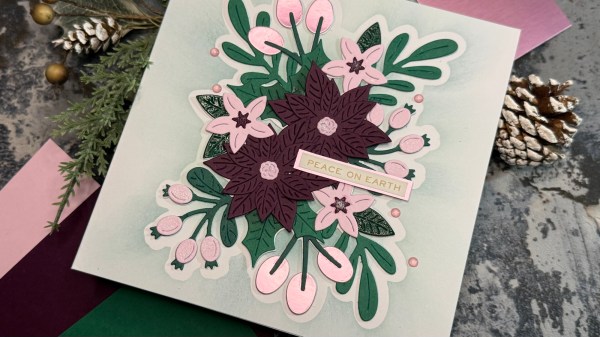
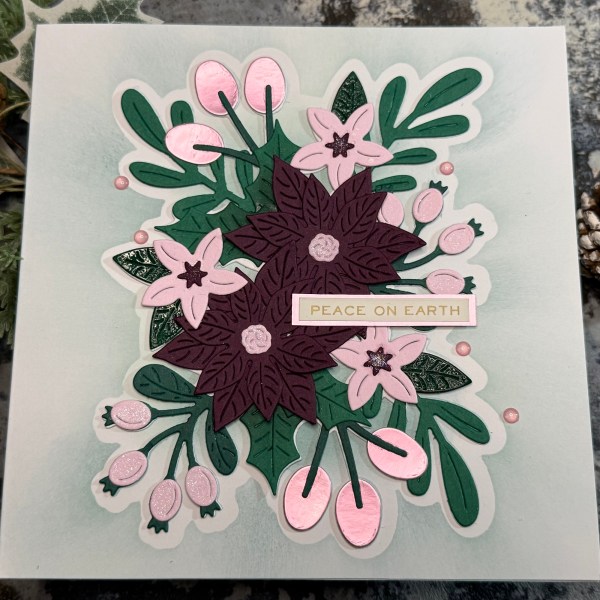
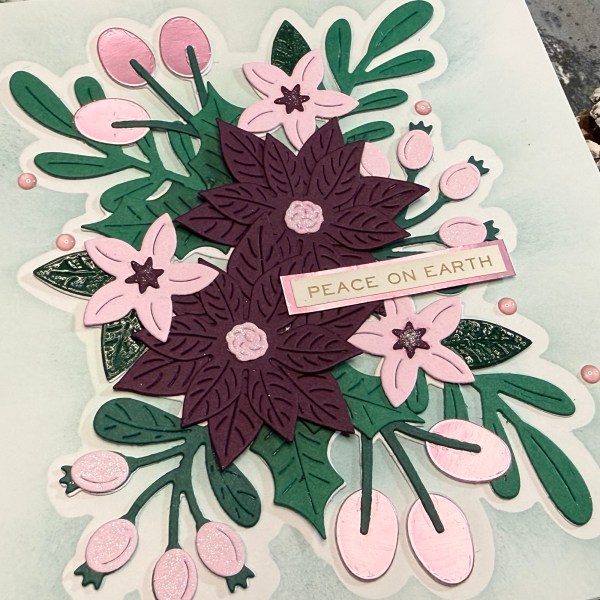
Today’s challenge is a colour challenge. Martin used Concord & 9th colours – plumberry, rainforest & lilac.
And for my interpretation … Blackberry Bliss, Shaded Spruce and Bubble Bath (I think I called it ballet slipper on the video by mistake) were the cardstocks I chose to use along with a pop of satin foiled cardstock and used a few tricks to vary up the greens!
As for the card – well the Alex Syberia dies came out to play and I put this together based on the layout that the larger die suggests.
I even used the die cut frame for the inking to give the base of the card a light inking of the Rainforest ink.
It did take a while to put the card together as it was the first time of assembling this – and although straightforward I kept having to stop and start to make sure I had enough elements.
I added some difference to the greenery by either adding some promarkers to darken them, some inking and in the case of the smaller leaves I added clear embossing!
I added some shimmer to the centres of the flowers and also to the rosehip type berries.
Then the sentiment is a Tim Holtz sticker mounted onto the lilac satin foiled cardstock.
I just love these dies so much! So much fun to work with and although I don’t think I got this perfectly aligned I did quite a good job and so consider it easy once all the die cutting is done!
If you want to watch the process video please check out my YouTube.
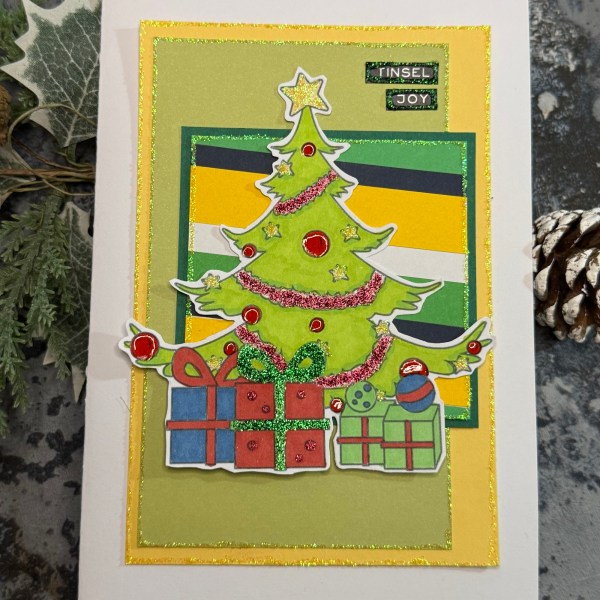
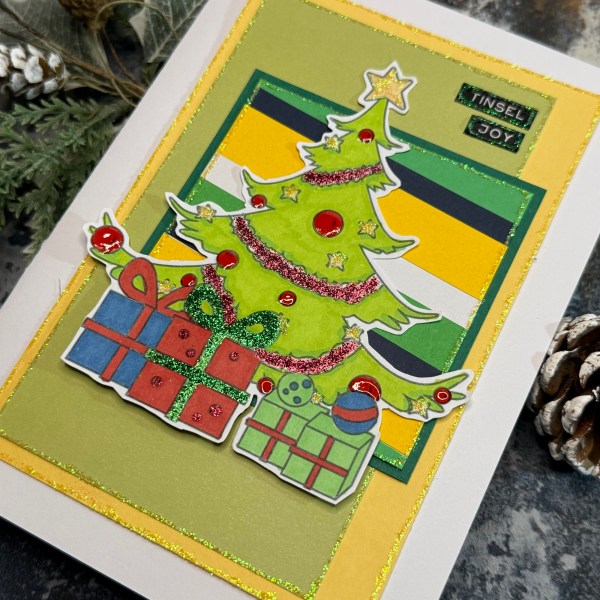
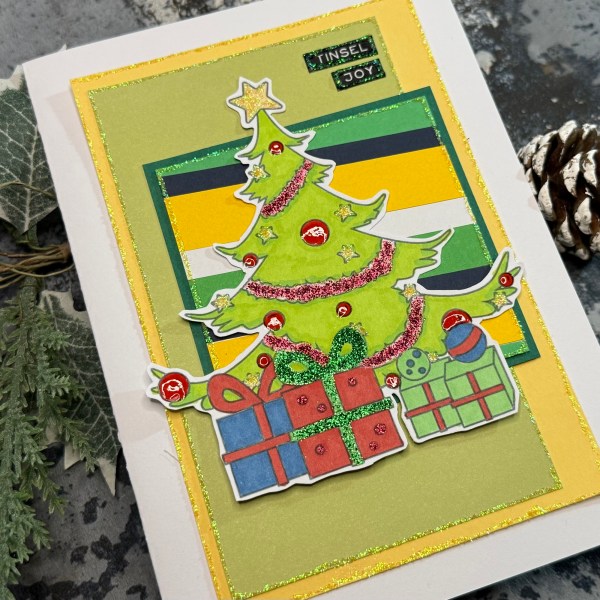
I decided for today’s theme to go with lots of glitter glue – because I usually get into trouble when using glitter glue – but I managed to only make one tiny blip and could clear that up easily!
I ended up with a super bright and sparkly card in a very different colour scheme for me than my usual Christmas cards – so good to play with a different scheme!
I chose the digital stamp image from LeeAnn’s world 101 which was already in my folder of images and coloured in with the alcohol markers and then plenty of glitter glue for adding accents.
I loved putting this together. Definitely different from other recent makes!
A fun card! If you want to see me put it together please check out my YouTube.
Another Scrappin Saturday project that is a design team project for Kingston Crafts – this time using the pastel cardstock.
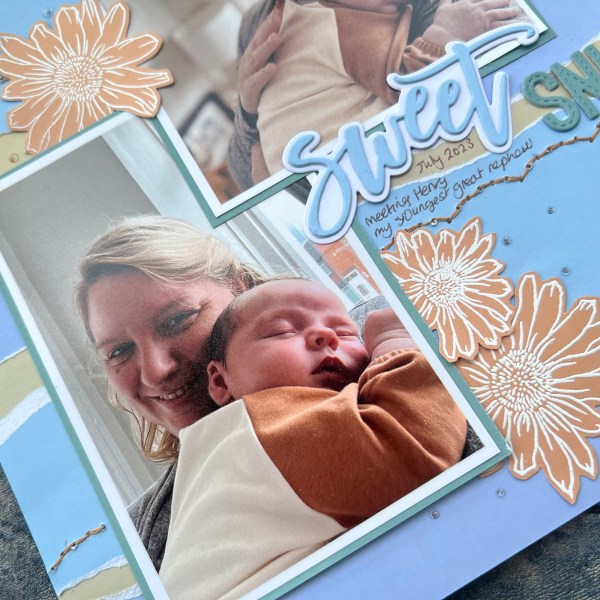
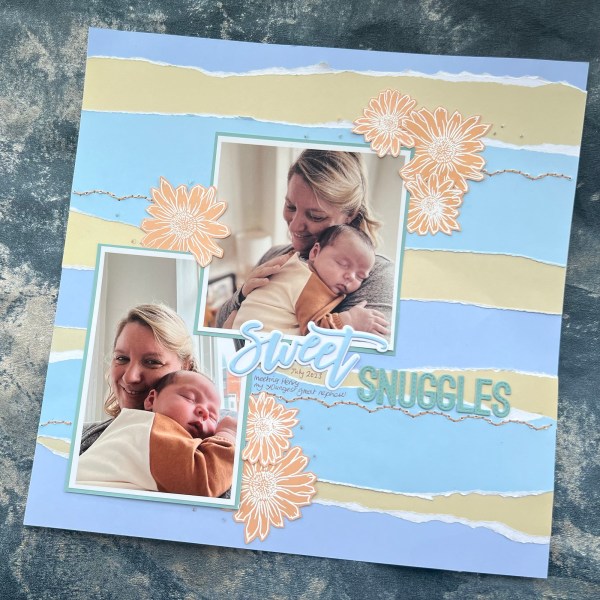
I decided to scrap these pictures from 2023 of my snuggles with my youngest great nephew Henry using a few different colours of the cardstock.
You probably know by now I love the white core of this cardstock and how fun it is when ripping it – so that became a major part of my design and created the waves of colour down the page.
I chose the soft blues and lilacs with the sand for the the background and peachy tones for the embossed flowers to work with the picture.
The cardstock die cuts brilliantly which was perfect for the title on the page.
I also added some sewing in which again the cardstock coped with really well!
I finished off with some dots of glitter glue which just added that little bit of sparkle to the page.
Overall I adore this cardstock and that’s a really good thing as the pack is huge so I’ve got loads left still to play with!
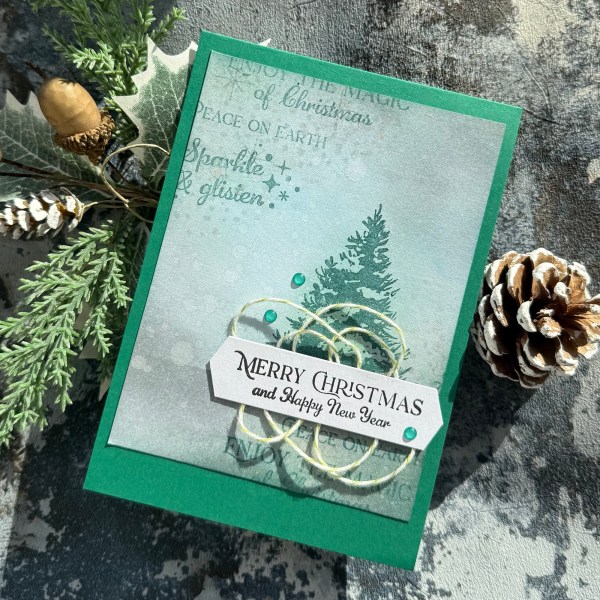
So today we have another sketch Martin has provided for his #30daychristmascardchallenge
Well I went a little rogue and went for a flat card rather than layers and used stamping to create the shape of the sketch – but I think it is still fairly visible!
Ok maybe not totally visible but I promise it was originally my plan to follow the sketch but got carried away with inking! You can watch my process video over on YouTube.
I used the stamps from Creative Stamping magazine sets for both the tree and the words.
I then created a banner label for the sentiment and sandwiched some bakers twine for some softer texture,
I know I am posting lots of Christmas cards for the 30 day challenge so didn’t need a separate Festive Friday post but I had made this so posting it anyway!
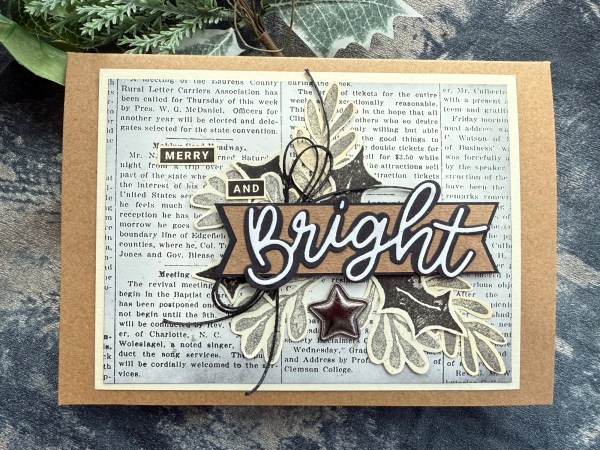
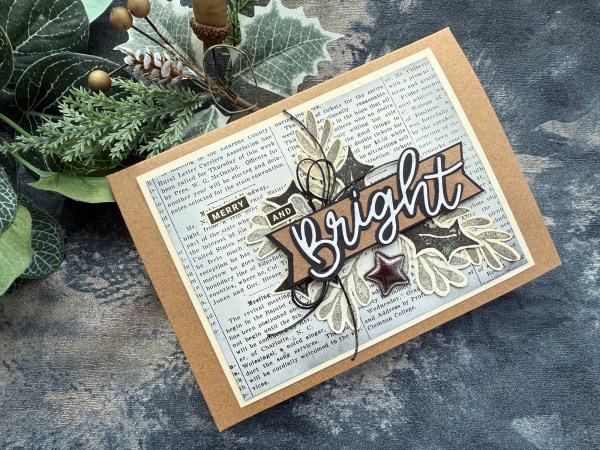
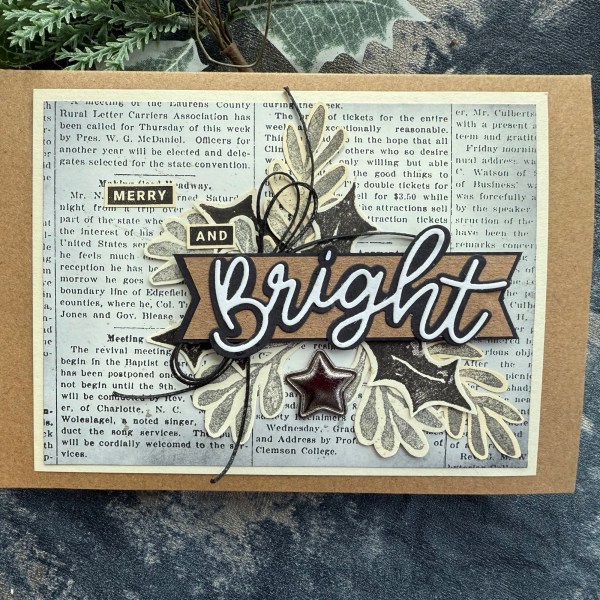
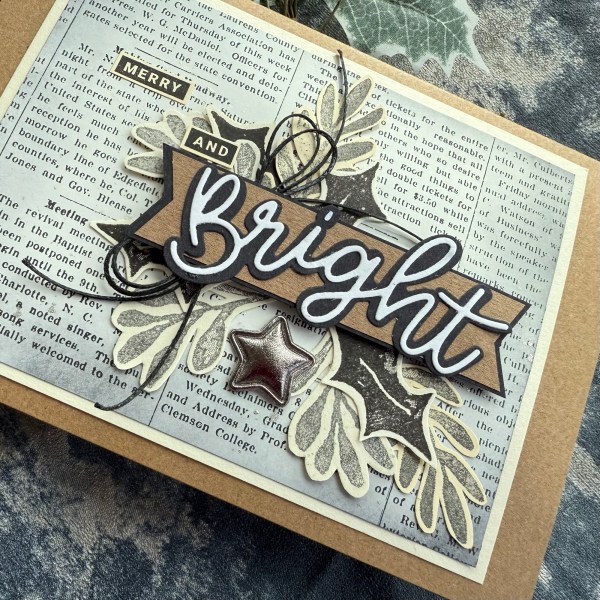
Today’s Festive Friday was a case of spotting a piece of text print paper and deciding I wanted to use it but wasn’t sure what for – so went for a black, cream and kraft Christmas card.
I inked the paper which is old SU dsp where the base is cream not white, and added black soot to it.
Then I chose scraps of cream and stamped the foliage images in both Black Soot and the Versafine to get a variation in the greys/blacks.
I then added splatter to the panel using the shimmer ink in champagne which provides just a bit of shimmery fun!
I did a double layer banner with Kraft and black and then did a die cut sentiment – admittedly this is white as the top layer but I think it works!
I then added some black waxed thread as a bow and added this under the banner which I raised on foam adhesive to give dimension.
I next stamped and cut the other two parts to the sentiment and added those.
I mounted the panel onto some cream and then onto the Kraft card base, adding a panel inside to make it easy to write the message.
Then I spotted the charcoal shiny puffy star in a Hey Little Magpie embellishment kit and decided it was the perfect little extra to finish off! Cute!
So quite a different design with all the blacks and then the cream – but I like it a lot!