I am an on-the-side and increasingly up front papercrafter who loves nothing more than getting inky and creating pretty things with paper and stamps!
I am also a wife to lovely hubby and mummy to a wonderful 14yr old princess.
Had lots of fun playing with the Summer Fun kit from Kingston Crafts for this gatefold card.
I chose the red gingham paper as the base – I say paper but it really is heavy enough to make a card base and stands up nicely. Then I chose the yellow to add the pops of solid colour – but die cutting and just a solid panel on the inside.
Then I chose the die cutting circle ephemera that I thought worked well together for a summer picnic type of vibe!
I thought this made a really fun card.
I finished off the front with the gems to just add in the different texture.
Loved how this came together so easily – and such a cheerful card!
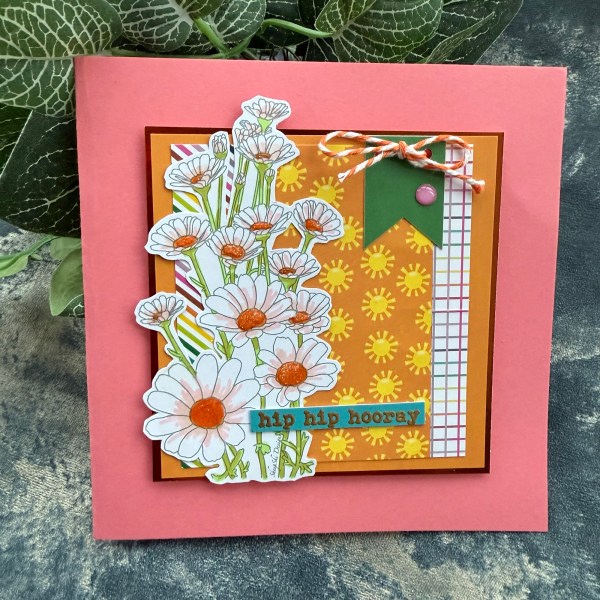
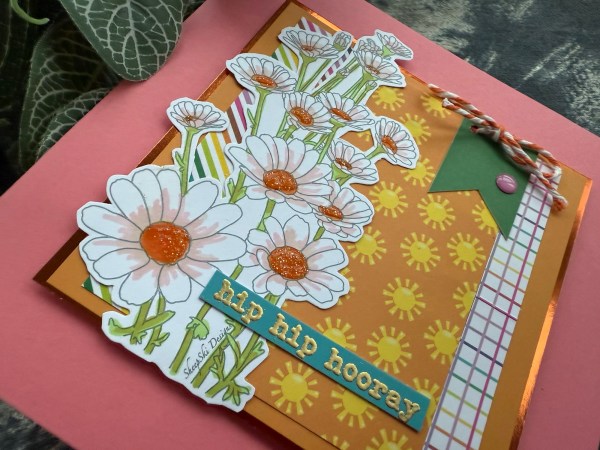
Today’s card I made a little while ago for my cousins daughters birthday but thought it was cute and perfect for a design team project for Addicted to Stamps & More too!
I had the digital stamp printed off ready to colour on the desk and decided it would work beautifully with some of the cheerful papers in the Kingston Crafts rainbow kit that was also out waiting to be tidied up!
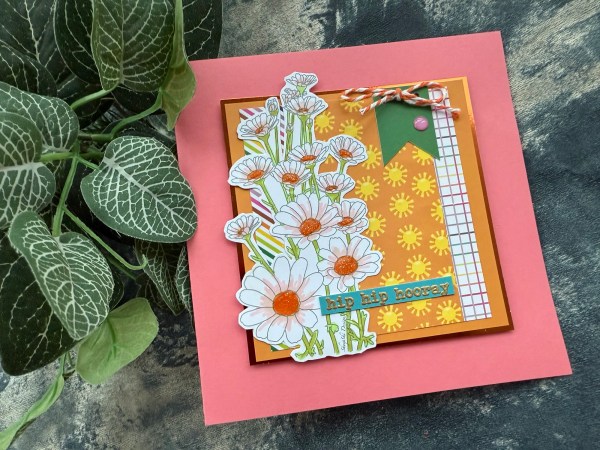
I created the label for the background with three paper bits and then a solid orange. I added that to an orange rainbow foiled cardstock piece too which adds the shine!
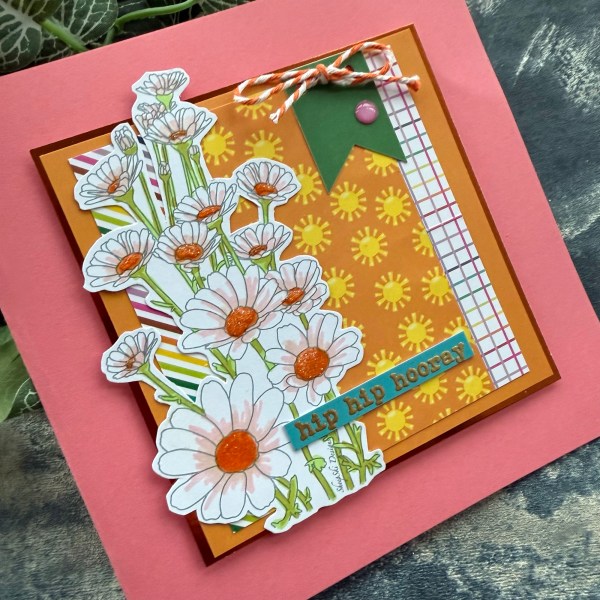
I coloured the flower panel and then fussy cut it out. I stuck this to the left hand side and then found one of the banner elements in the die cut pack.
I glued this in place and then used my crocodile to punch the holes to thread the twine through.
I also added one of the gems from the stash.
I embossed in gold the sentiment Hip Hip Horray and then cut that out.
I raised the whole panel up on foam before making my card blank from some pink cardstock from my stash. The foam added the dimension and meant that the twine didn’t poke up awkwardly as the foam wasn’t under that part.
Inside the card I just added a white panel to write on it.
Love this fun and pretty card – and hope Eleanor liked it too!
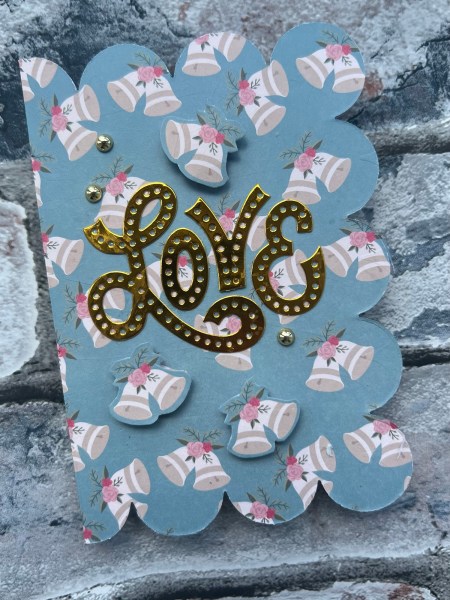
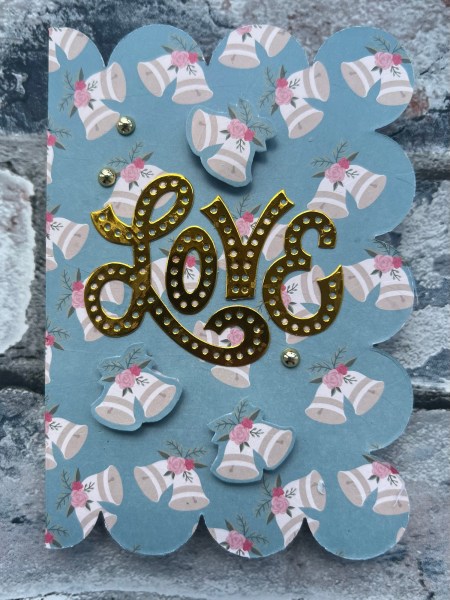
Today’s design team project I am sharing is using those amazing card bases from Kingston Crafts – and this time I went full on die cutting for my card!
I chose the wedding bells pattern card and die cut the card into a shaped card using a spellbinders die.
This gave the card a special feel as it is a lovely unusual shape.
I then kept it really simple with die cutting the gold foiled cardstock that is in the rainbow foiled cardstock kit for the letters and glueing them in place directly on the front.
I had also made another shaped card from the same card base but smaller for another purpose so had some leftover which meant I could fussy cut three bells out and raise them up.
I also added the gems to the front as a little extra embellishment – such a simple card but it looks special with the unusual shape.
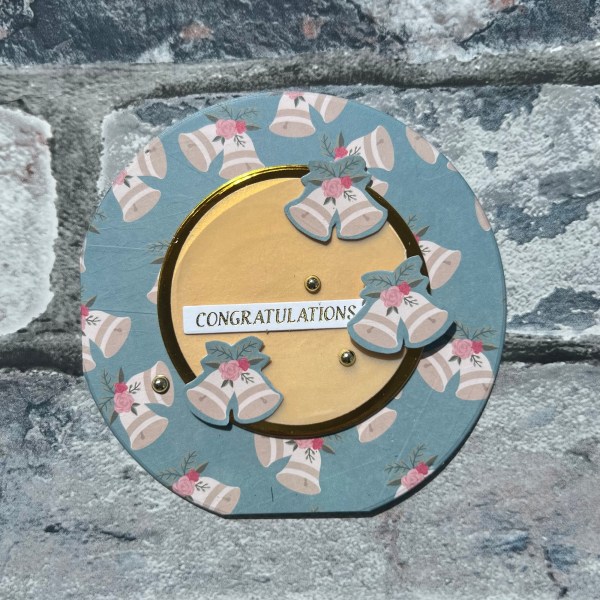
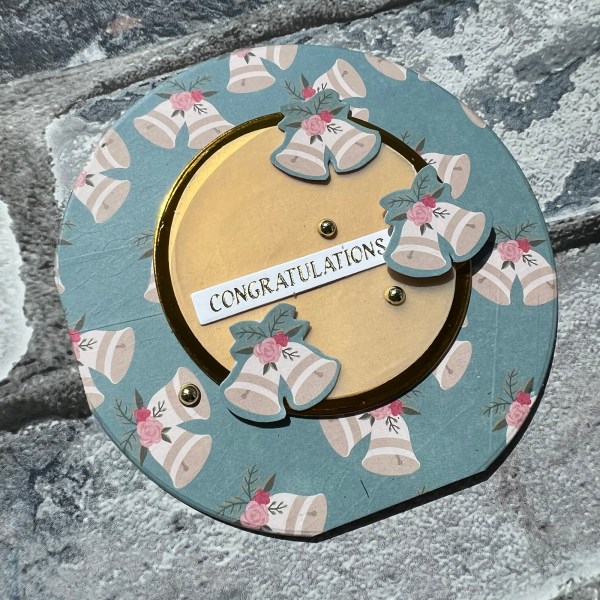
The other card I made – not a design team sample was this one – so thought I would share this at the same time.
This time I used a large circle to die cutting the card base into a circle card.
I then die cutting vellum and the gold to create the central topper and fussy cut some more bells to add to the front from the leftovers.
This time I used a foiled sentiment as it is a much smaller card.
Again I added the gems to finish off.
So both cute shaped cards – I think a lovely way to mix it up and use the card blanks a little differently!
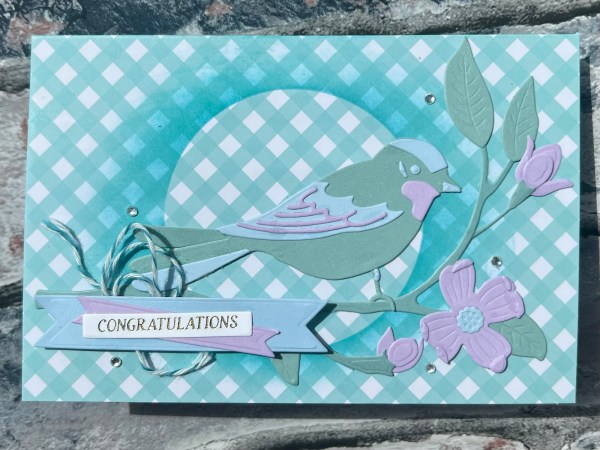
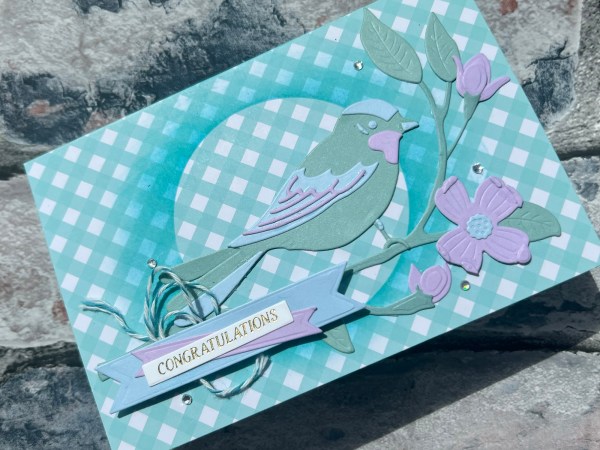
Back with another design team sample using the card bases from Kingston Crafts – this time I decided to have a little play with inking one of the bases – and it worked well!
I chose a circle mask and then inked using my distress inks and a brush around the edge to give a halo type effect. So even though the card blanks already have pattern to them you can change it up a little using the inks.
For this card I then went to town die cutting the pastel cardstock also from Kingston Crafts – they work well with the card bases.
I chose a new to me die I’ve had for ages but not got around to using until I made this card of the bird and the branches. It’s from XCut and not that easy to work out exactly which pieces to die cut to assemble when it comes to the tiny elements but think I did ok!
Obviously I chose colours I thought went with the card base not necessarily realistic! But isn’t it a pretty bird and branch die.
I then die cut some banners and used a foiled sentiment for the cluster to the left hand side of the card. I tucked some twine underneath the cluster to add texture and then some gems to finish off!
A fun card mixing the two products together for the sample.
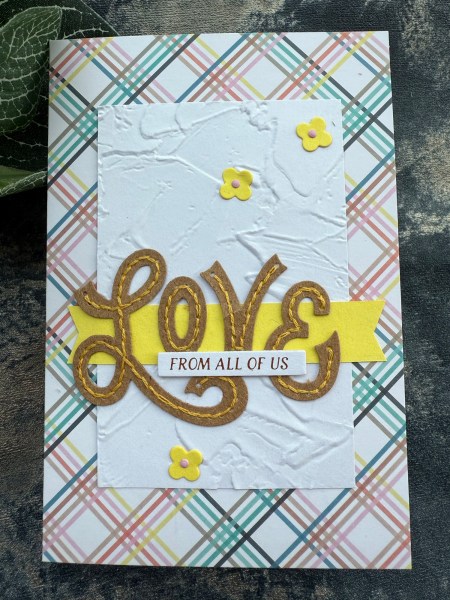
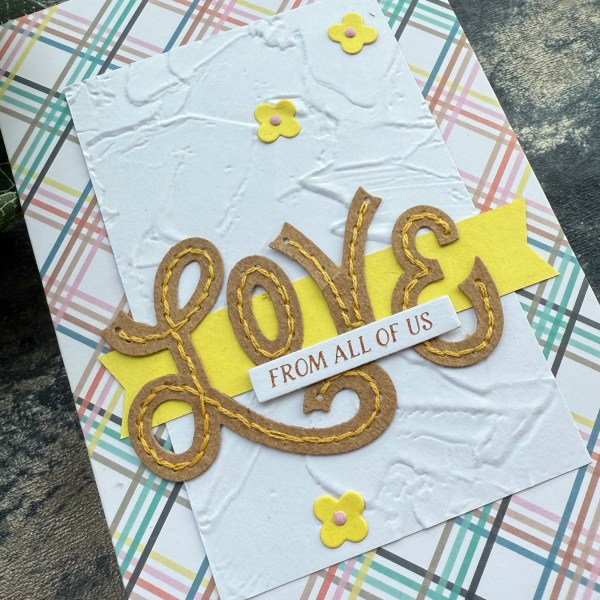
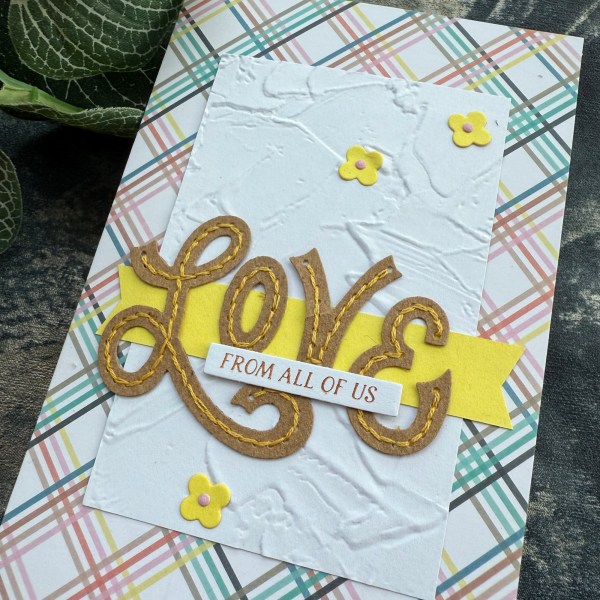
I was tidying up my box of dies and realised I had these already stitched letter dies for the word love and I wanted to get them used!
And so I grabbed a Kingston Crafts card blank and then some coordinating yellow cardstock to make up the rest of the card.
I punched the strip of yellow to make a banner and the allowed me to ground the die cut letters. I wanted a panel of white underneath to help it pop more against the pretty background. So I grabbed some white scrap and ran it through a texture 3d embossing folder.
I stuck all this straight into the card blank and then added the foiled sentiment and then die cut the little flowers from the scrap yellow and some scrap pink – aren’t they just the cutest?
Such a simple card – obviously the effort went into the sewing element but I did that a while ago so today it was a simple one to put together!
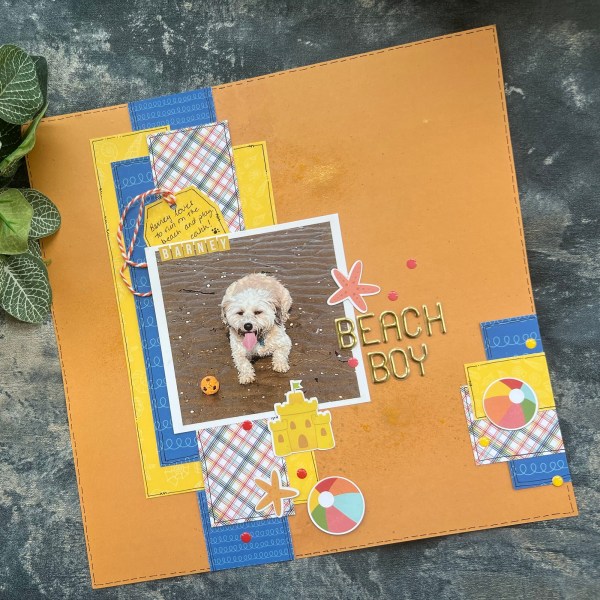
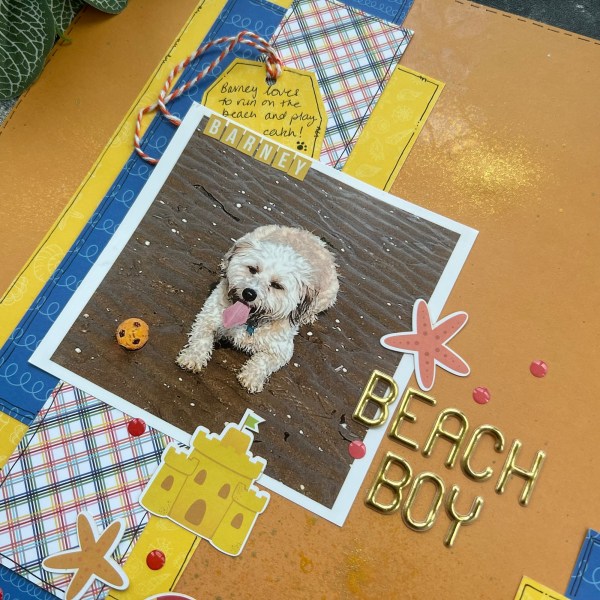
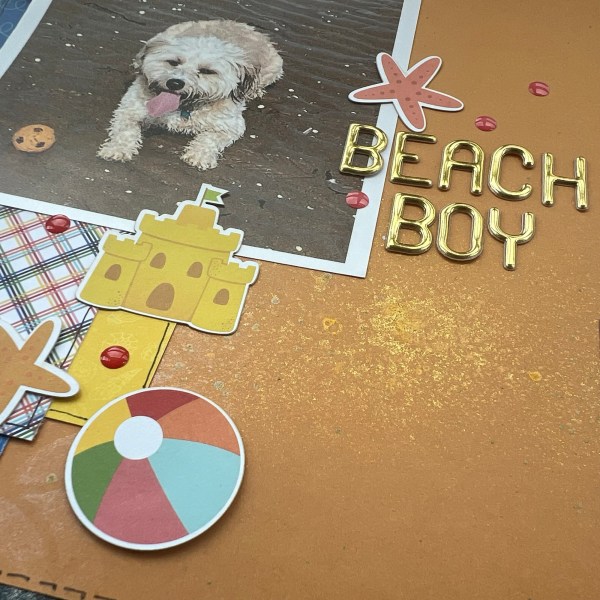
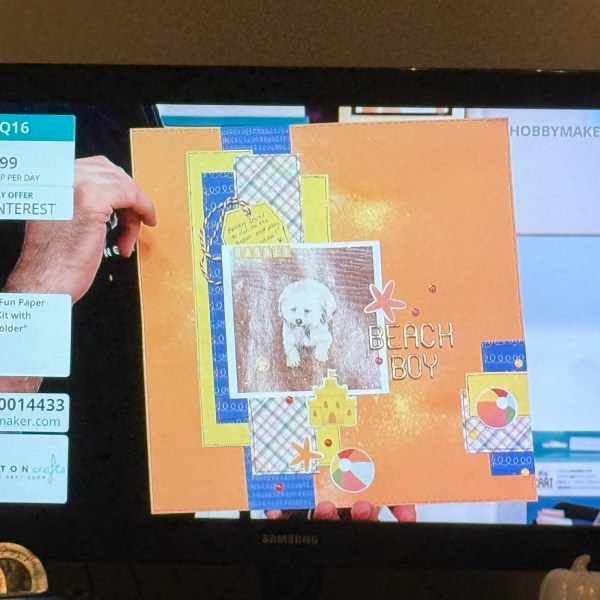
Today I am off to a crop so sure I will have a few pages to share by the end of the day but for today’s Scrappin Saturday post it is one of my design team projects for Kingston Crafts – this time using the Summer Fun kit to make another page of the lovely Barney who is one of my friends dogs and famous from appearing on tv on the hobbymaker show!
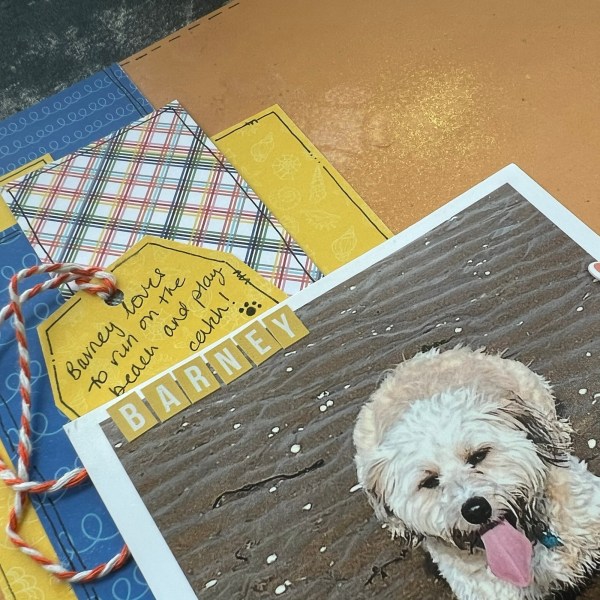
I started with the pic of him on the beach with his little ball and the page inspiration came from that – a solid orange base the yellow shell design paper and the blue squiggle wave paper. I also added in the plaid type design for some contrast.
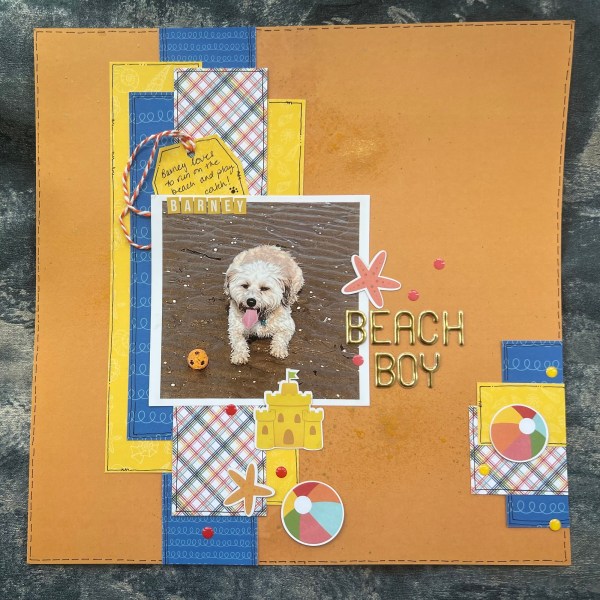
I decided on some strips for the layout and just cut a few of different widths and added them to make a cluster of strips.
Then the same from the offcuts on the right hand side.
I decided that the base needed some shine and added the Kingston Rainbow Spritz in the magnolia and daffodil onto the background. I tried to sponge a bit of the shimmer spritz through a stencil too to add a bit of pattern but most of that is covered by the strips of paper!
I added the embellishments from the die cut pack – I thought the sandcastle, beachballs and starfish were fun additions to the page. I also added a little tag to journal on and added the twine from the kit which I always think helps add texture and contrast.
I also added some of the larger enamel dots as embellishments. I used some stickers from my stash for the title and adding Barney’s name on the photo.
I then decided that a bit of doodling would help finish the page off and tie in the black of the journalling. I chose to go round all the papers and the outside of the page with my black pen to doodle the lines.
It’s quite a subtle thing but I think it helps to personalize the page – especially with such a linear page with the strips.
Loved making this scrapbook page – and think the kit lends itself to so many fun themes as I’m pretty sure this pic wasn’t actually taken in the summer but it worked because he was at the Beach!
Back to the Kendras card challenge number 20 and this time sketches 4 – 6.
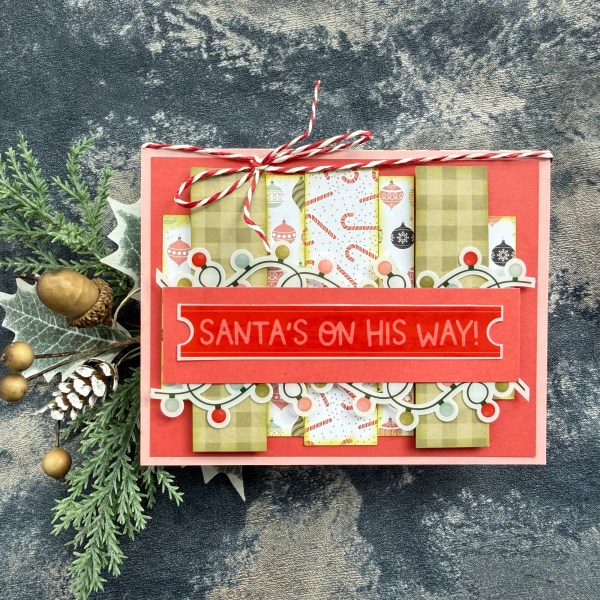
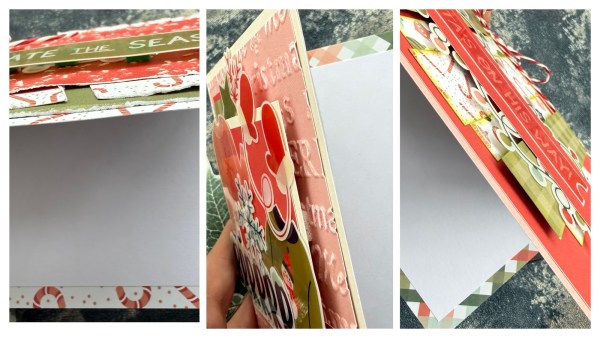
Using the papers from the Kingston Crafts Christmas pad along with acetate pieces I made these three cards.
This one I inked the edges of the papers using the Peeled Paint oxide and then added the gorgeous string lights and then the sentiment using the acetate pieces.
I used foam adhesive to add dimension and then a paper twine for the added texture and embellishment of the bow!
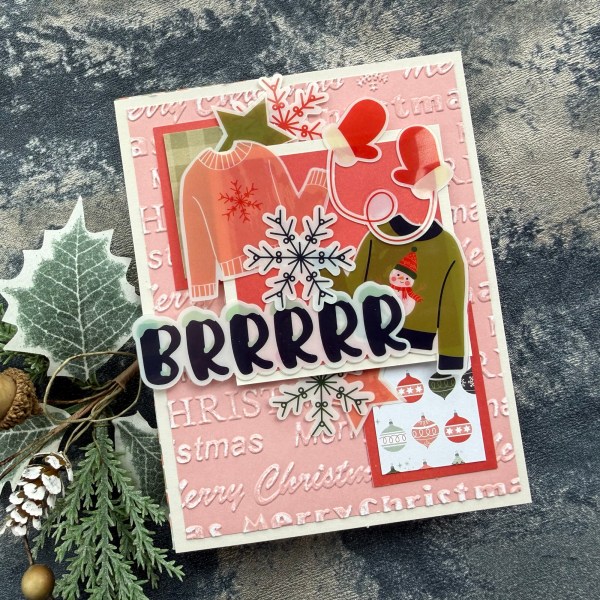
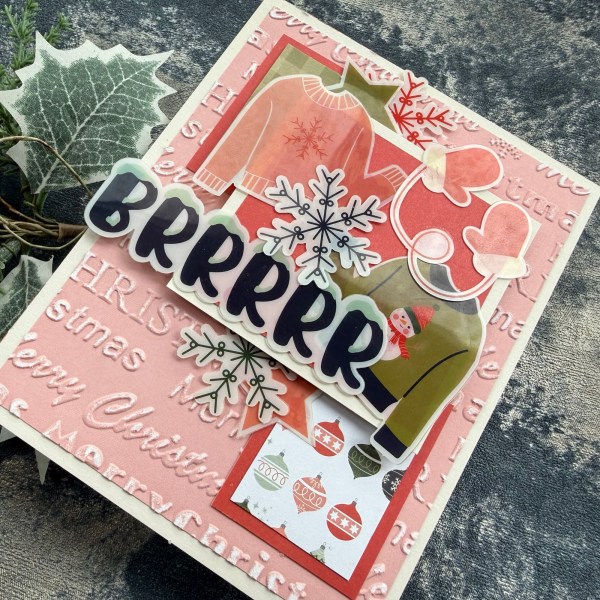
This one had more ‘white’ space with the pink panel so I embossed it with an old embossing folder and sanded it back to expose the core – this added a lovely texture to the card – very different from all the shiny acetate pieces.
I did go a bit OTT with the pieces on this but I think it turned out very cute!
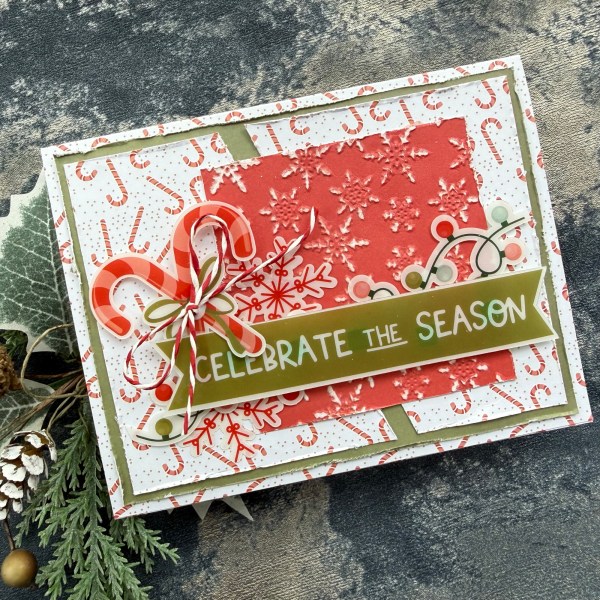
On this one I again embossed a panel and sanded it back – just love doing this with the Kingston Crafts white core papers.
Then added dimension with the sentiment and the larger candy canes.
I also decided to distress the edges of all the panels to give it a nice texture and missed the bottom panel off to show the card blank which has the same patterned paper as the majority of the front of this card.
As I used the patterned paper to make these three card bases I added a white panel to each but with a border to show off the pattern.
I think these photos also show off the dimension I got on all three cards – definitely showing off those papers and the acetate pieces.
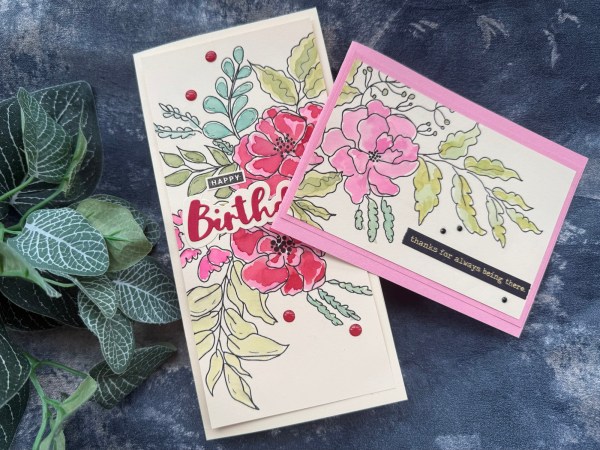
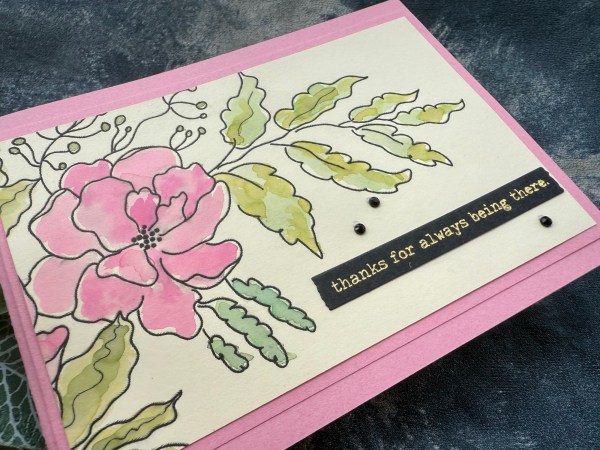
I was sorting through some of the digital stamp images I have printed off and found this Alex Siberia designs one that I mistakenly printed off far too large and decided to just play with it and then see what happens! And what happened was I made two cards from the printed image.
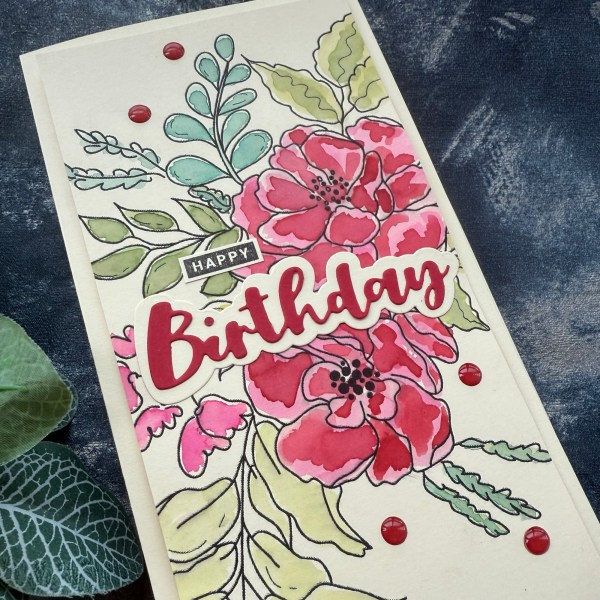
The image was printed on cream cardstock and almost filled a piece of A4. I decided to paint it with my inks and just have fun colouring in!
At first all the flowers were all painted the pink colour but I did end up adding red to the long card when I chose the sentiment.
Once I coloured in the whole image and it had dried I decided to make a DL card where the image covers most of the panel.
I trimmed the panel to a size that is slightly smaller than my standard DL sized card which I then made from the same cream coloured cardstock.
I did add two scraps of cardstock behind the panel to add a little dimension – it just helps separate the panel and the background a little.
I then chose the die cut sentiment which was in the pouch but the best colour was the red one so I then added the red ink to the flowers and again left it to dry before carrying on with the card.
I actually love the mix of the pink and the red on the petals – would never have thought to do it if I hadn’t chosen the die cut sentiment – funny how these creative choices just evolve!
I added the little stamped sentiment and then the gems and decided with that large image it was done!
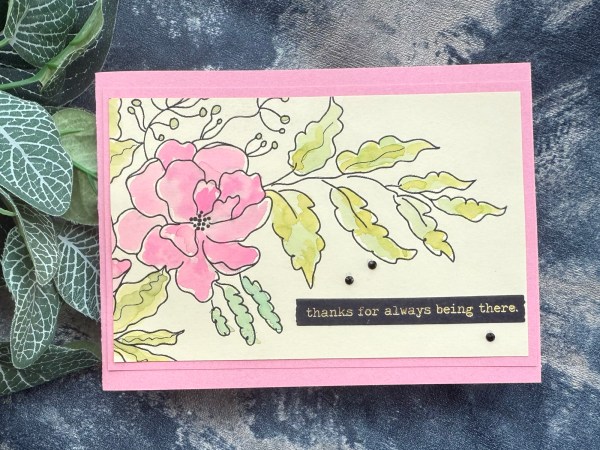
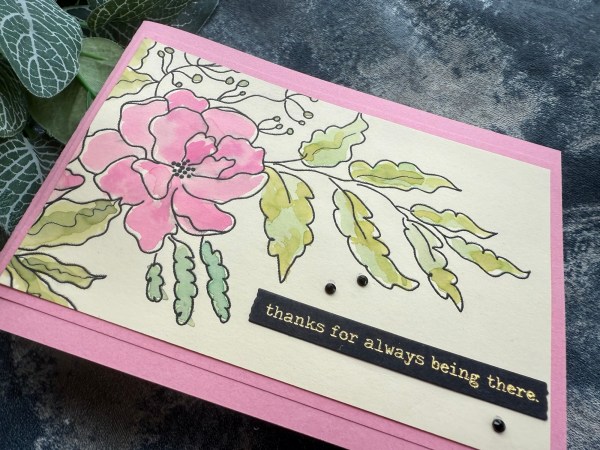
Next I turned to the part of the image leftover.
I kept this one pink and mounted on pink and then onto a pink card base.
Again I kept it simple and this one didn’t add dimension at all. I added the foiled sentiment and then the gems and decided again that the large beautiful imagery did the job perfectly!
A good use of a printing mistake and also it’s reminded me how much I loved this image so may well have to print some more so I can always have fun colouring these lovely florals!
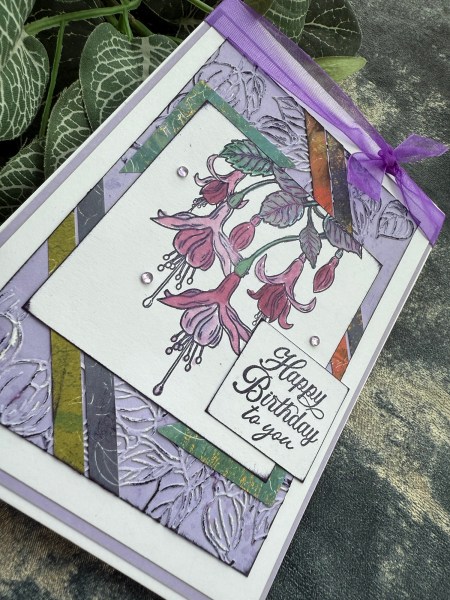
Another two cards made in my series of using up a magazine kit and I do like the final results but it was one of those sessions where it didn’t quite go to plan!
Two totally different designs and colour schemes – let’s start with the lilac one!
I added embossing and inking on this one – also the large fuschia image as the focal point which I’ve not used often in this series of using up the magazine kit.
Added the gems and the ribbon for the top of the card.
Trimming it down to fit the standard A6 UK card size also worked quite well.
Next up the peach themed card.
I added the papers the wrong way round so the sketch isn’t quite right but it’s close enough!
I added stencilling to the background panel and then trimmed off the final layer again to fit the UK sized card blank.
Added the lovely little crochet flower and leaf from the Hey Little Magpie embellishment kit ‘overflow’ box! Really cute and the colour works well.