I am an on-the-side and increasingly up front papercrafter who loves nothing more than getting inky and creating pretty things with paper and stamps!
I am also a wife to lovely hubby and mummy to a wonderful 14yr old princess.
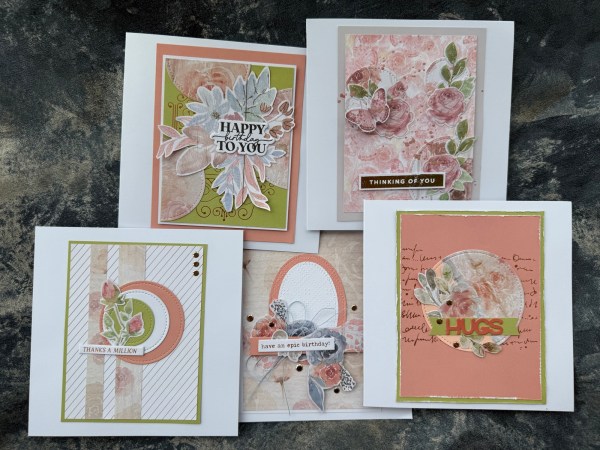
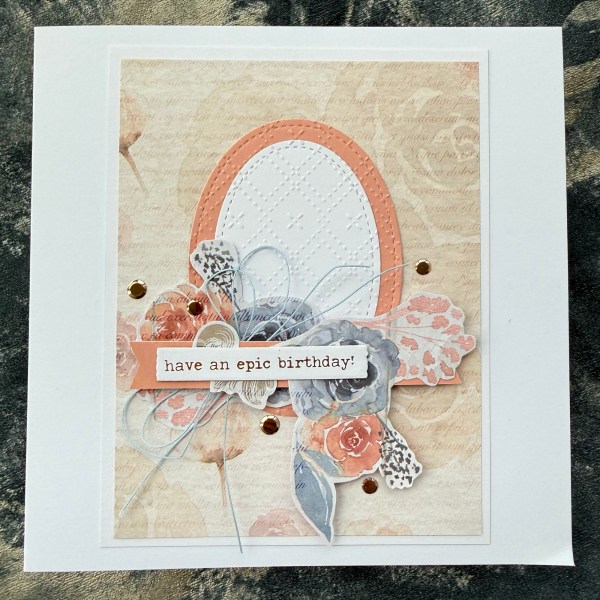
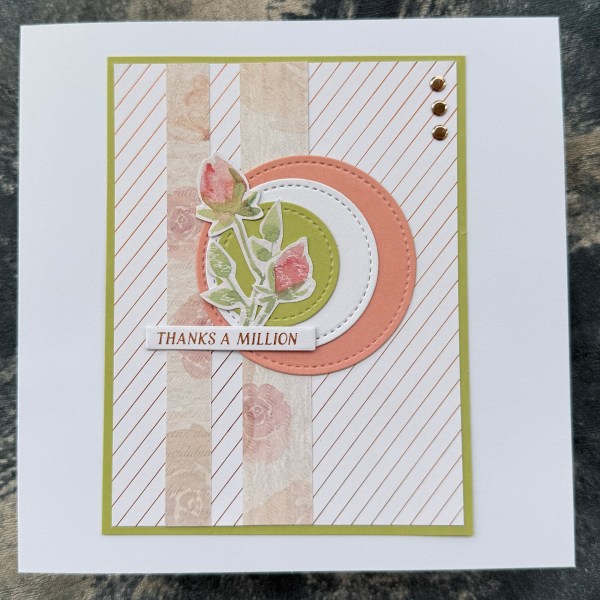
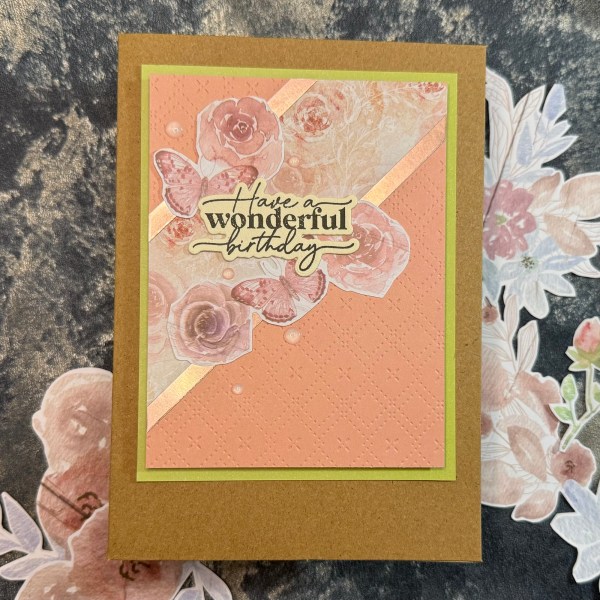
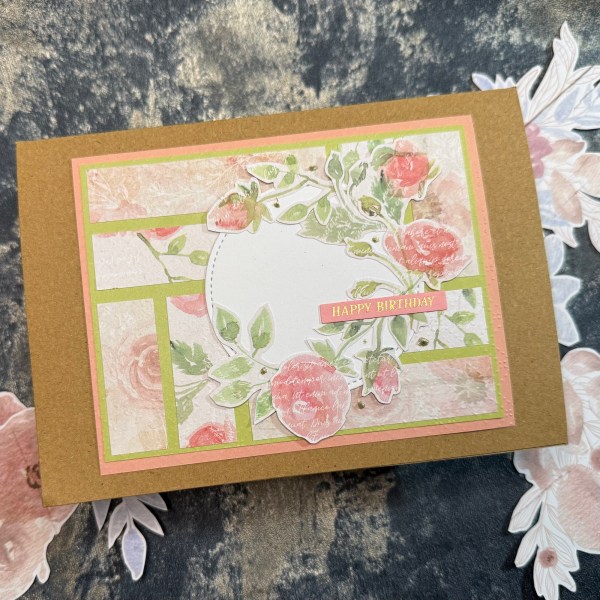
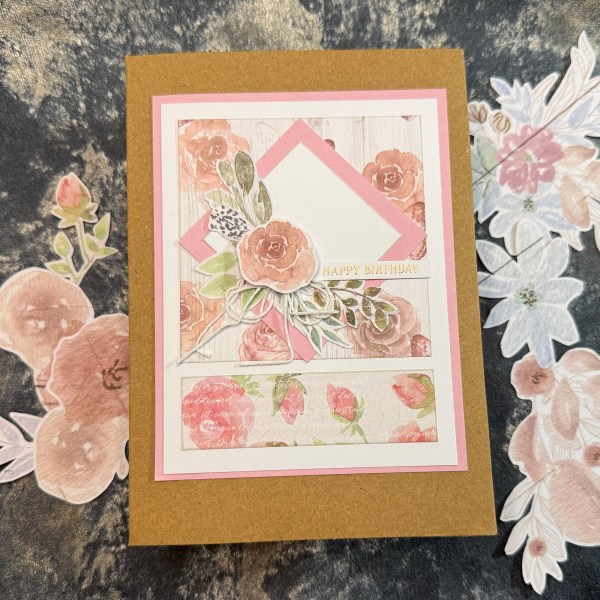
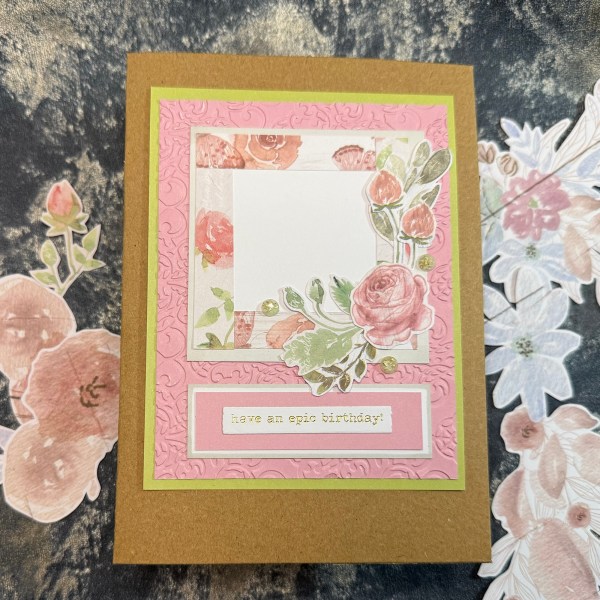
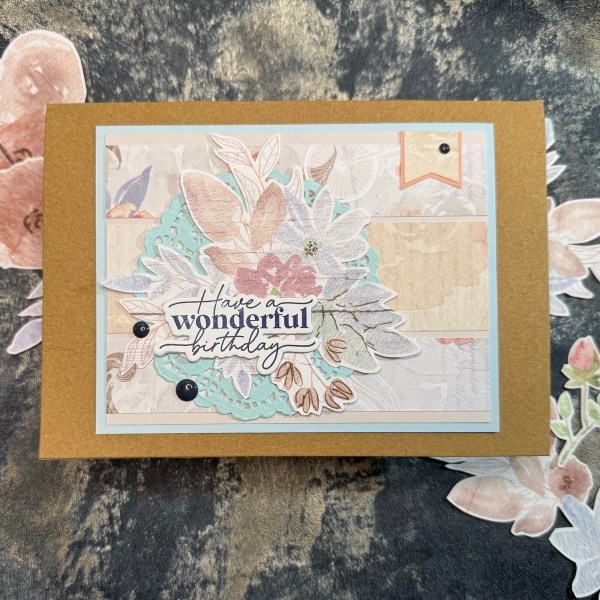
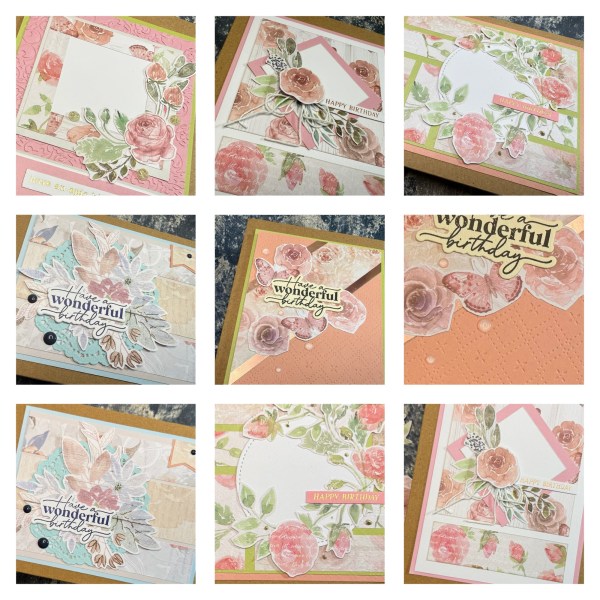
Back with the second session of the cards I am making using the Crafters Companion paper and the Kendras card challenge #kcc21 templates.
I videoed the process again and these five all had die cut elements and some also some foiling. I selected the card sketches that had the circle or the oval die cuts and did all that first and then had the idea to do some foiling so did that all in one go too!
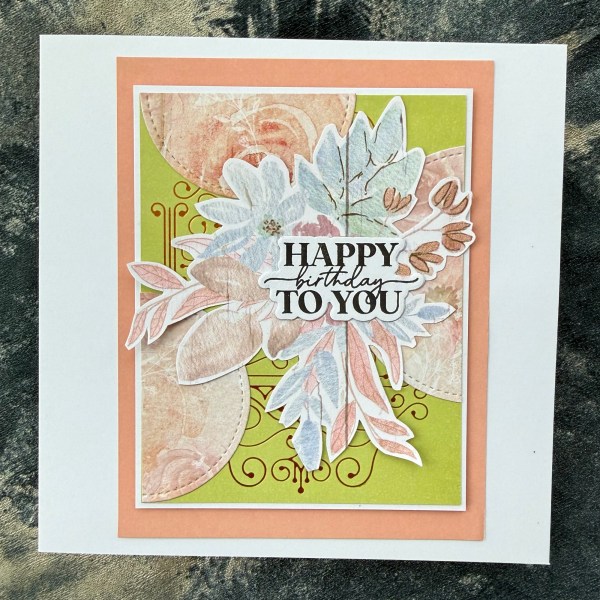
Card 1
Card 2
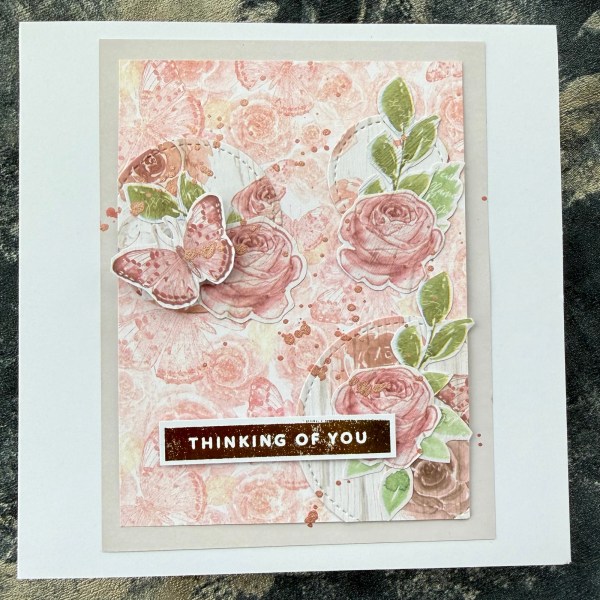
Card 6
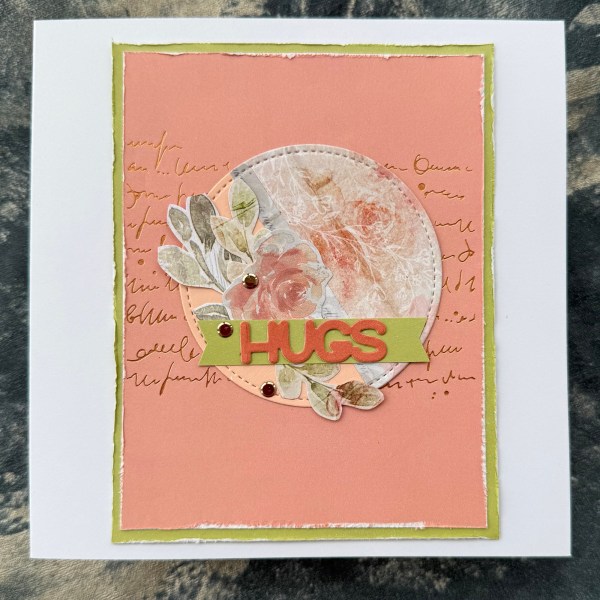
Card 14
Card 15
I mounted the card fronts onto 6×6 card blanks – so these become pretty special cards.
I still need to finish the other five in this series but it will be soon – so please keep an eye out!
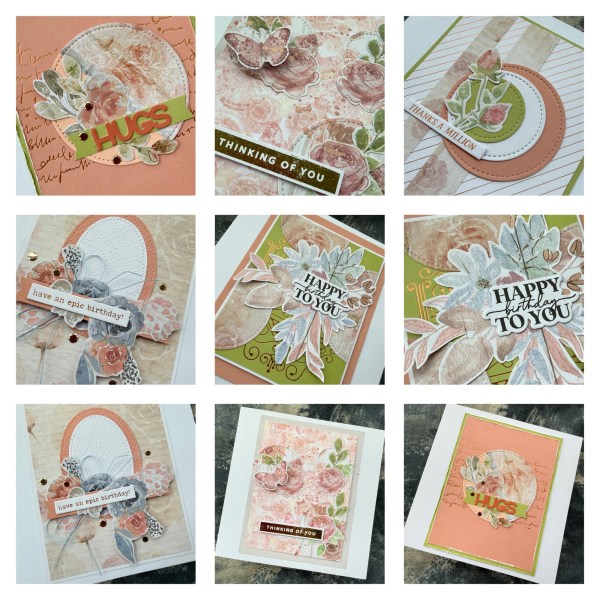
It’s the first of the month which means patterned paper time and this time using Kendras Card Challenge 21!
I made the first five cards for this first video – which also include the cutting and organising for all 15 cards.
I’m using a Crafters Companion paper I was gifted by a friend quite a few years ago and the great thing is that a few of the papers have some cut apart elements to I could use them to create focal points or embellishments on the cards.
I chose which cards to make at random …
Card 3
Card 4
Card 9
Card 10
Card 13
I picked a few different sentiments from my stash of ready made ones – but all birthday ones as those are the ones I need the most in my stash!
I chose to use a few different bits and bobs of stash … gems, doilies… to add bits of texture and finishing touches.
I also used embossing on three of the cards using embossing folders.
A lovely set of cards – more details will be on the instagram!
I’ve already filmed the making of the next five cards in the set – so watch out for those coming soon!
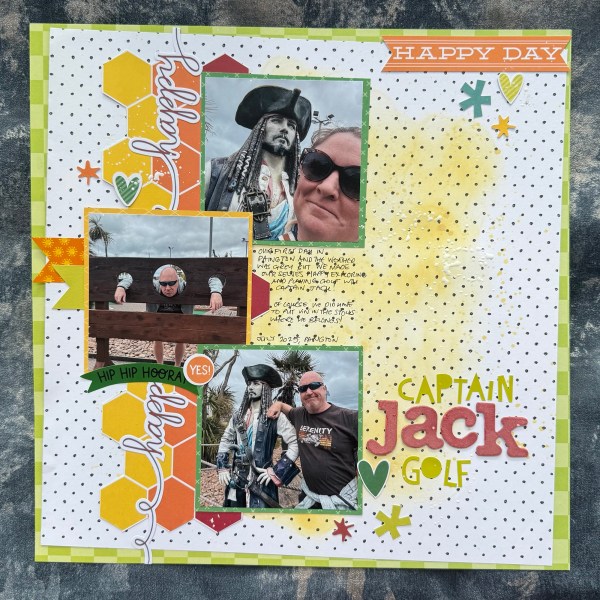
Today I’m sharing both here and on my YouTube the scrapbook page I made last Saturday!
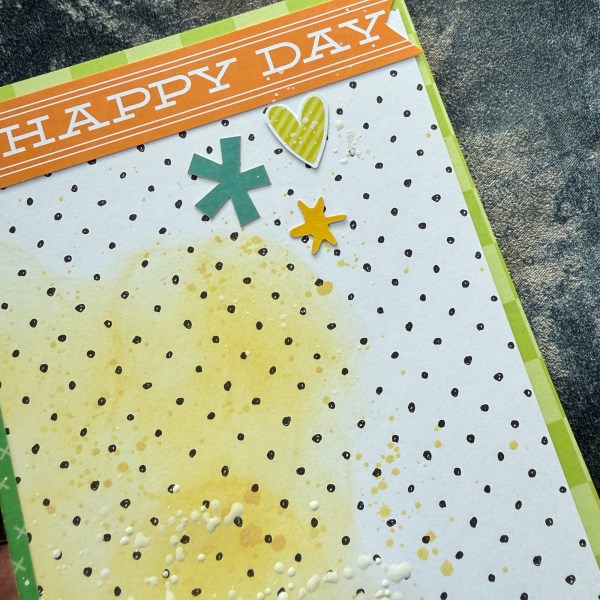
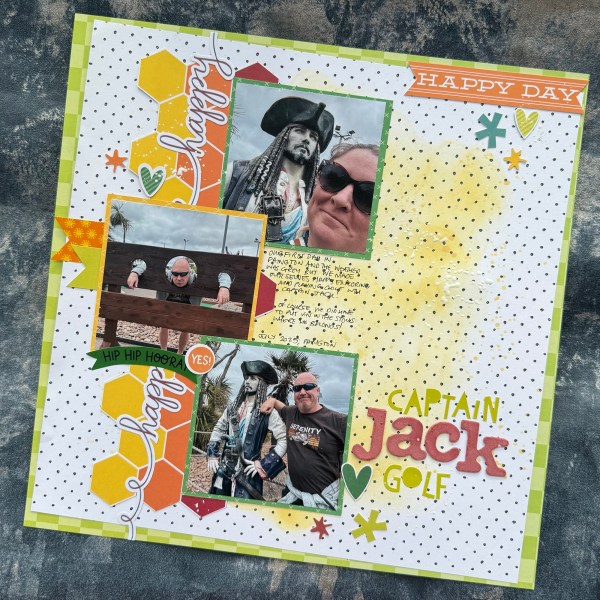
This bright and cheerful page was a scraplift from Amy Kattenbelt…
This was a page she made for the Scrapbook Challenges UK for week one of our winter challenge and in week 3 we got extra points if we did a scraplift of one of the three choices we were given!
I used papers from my #100patternedpaper pile and most of the colourful ones were Kingston Crafts ones so I also pulled in KC embellishments from the Rainbow paper kit.
I added ink and splatters and references to happy and the colour yellow to also meet the challenge – plus you got points if you did two or more photos! 💛
Great to scrap these pirate golf photos from our holidays in Devon – great to turn the grey sky photos into a sunny page too!
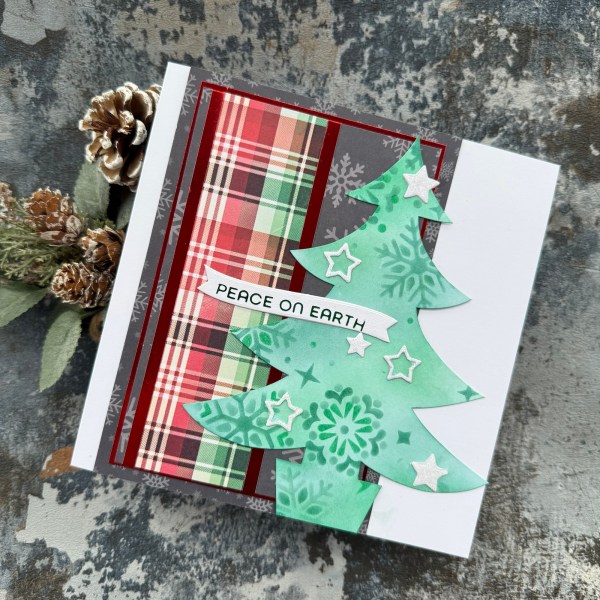
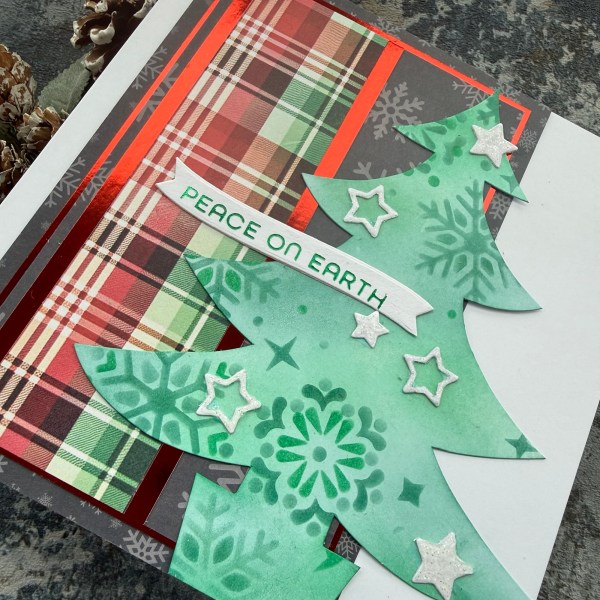
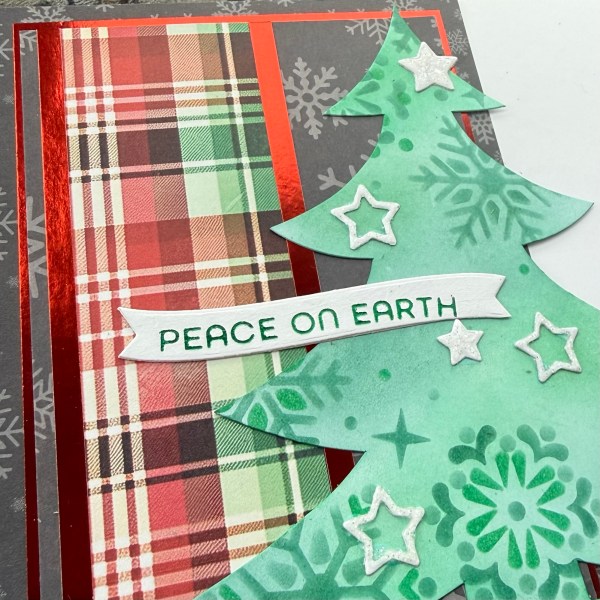
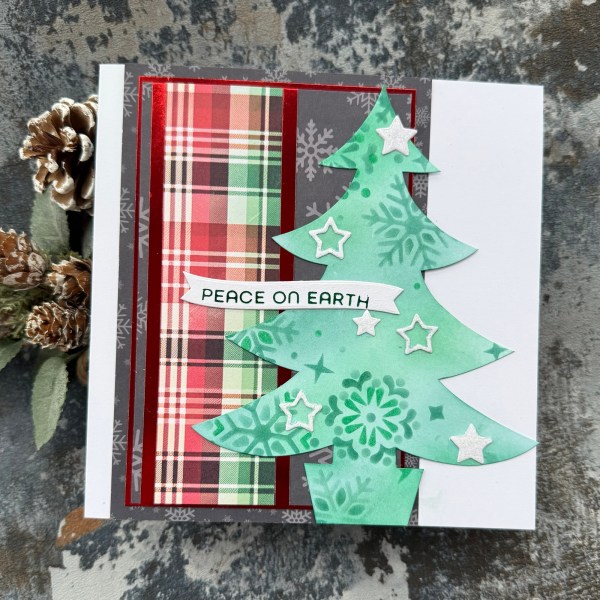
Took some scraps and made a fun card for today’s #festivefriday
I had leftover panel of the Indigo Blu tartan and some of that Kingston Crafts snowflake paper and so made a few panels to layer up along with some foiled cardstock for some bling and different texture.
Then I chose one of the die cut trees I was gifted many years ago but still have some left to use.
I decided to ink it up with the Pine Needles and Lucky Clover inks and then overlay with a layered stencil and use the same inks to add that pattern.
The little stars are die cuts so added some of those and then added glitter glue to them to give them sparkle and texture.
I then added a die cut foiled sentiment – it’s not perfectly straight so on this photo it looks weird but overall it’s not that bad! 🤣
Oh actually it looks really wonky now I look at it so will now have to fix that my making another one but straight and adding it on top – but that’s a job for another day!
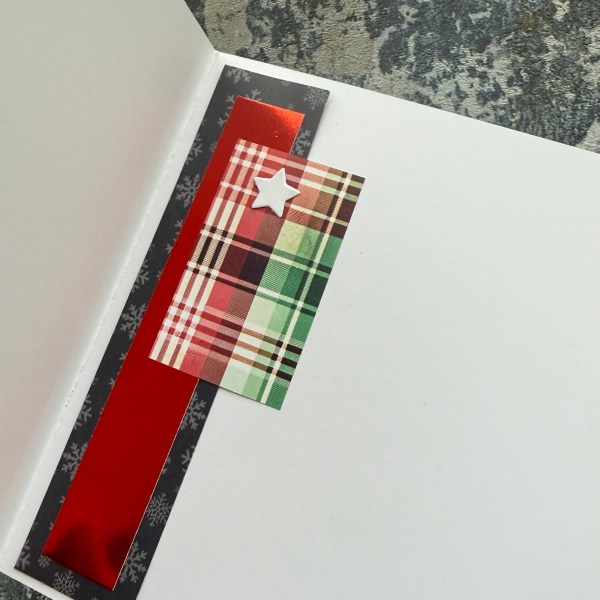
Inside the card I added remaining scrap pieces of the paper and a strip of the foiled cardstock and one of the die cut stars!
Still on a bit of a mission to remember to decorate the inside as well as the outside of the cards! Scraps of paper leftover really make that easy!
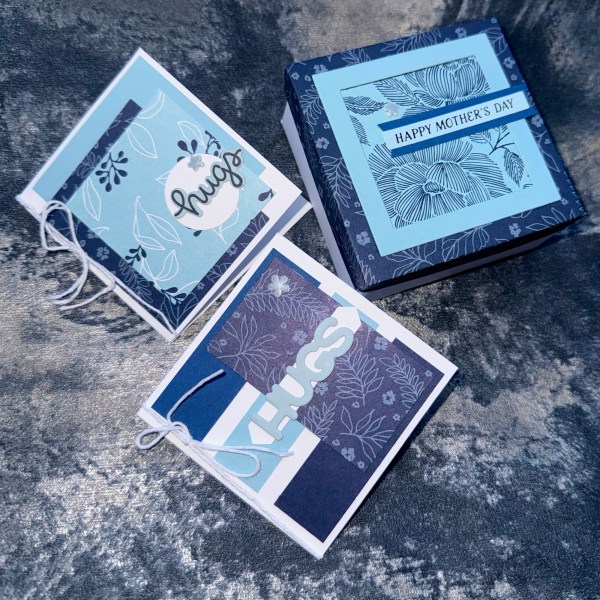
So the lovely Tricia created a little class which I joined on Sunday – I still have to finish the inside of the box project off – but as I’ve been AWOL the majority of the week I thought I would just pop on and share the quick pic of what we made!
Two little 3×3 notecards and then a box with a pull out concertina memory keeping element.
I need to find pics to add to this so I can give to my Mum for Mother’s Day – but seriously how cute?
I just changed up the sentiments but otherwise kept the projects as they were designed by Tricia.
Sorry the posts have been a bit lapse – had a big piece of work on and had to have the crafting take a back seat – hoping that tonight I might get a bit of craft time and normal service will resume in the coming week!
Today I am sharing the four layouts I did last weekend at the Warrington crop. I had such a fabulous day and had a really good laugh whilst also being pretty productive! There were a few of us who were involved in the Scrapbook Challenges UK group so there was a fair amount of competition going on and great deal of banter! All four of mine were included in the challenge for the week as either 4 or 3 pointers – I couldn’t work out a way to get balloons in the pages! 🤣
Page one was a page kit I tweaked. Sarah designed this one and I loved working with it but felt it was too vertical with the photo so had to turn the layout and then mixed it up a little more.
Really happy with how this turned out.
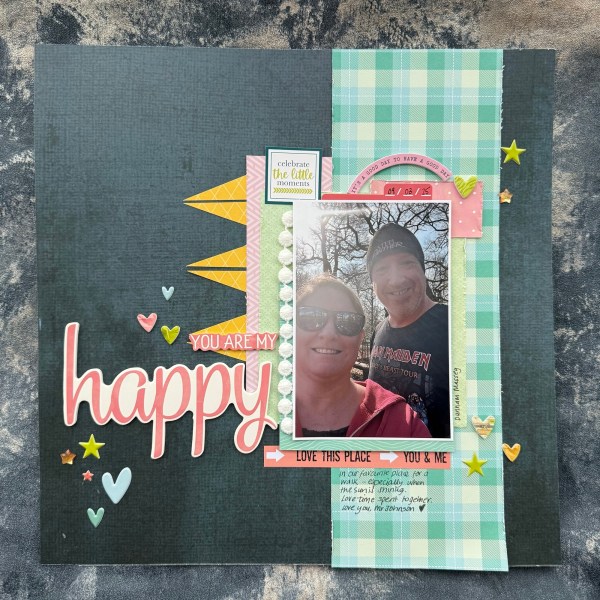
Next I used the leftovers of the papers from the page kit and added in some other bits leftover from #100patternedpaper challenge pile which I had taken along with… this made this page of me and the hubby.
Really liked how the dark background helped to make the colors pop and the pinks picked up on the colours in the photo.
It was fund to also hunt through my limited supplies from being at a crop to make this work – I think the star gems I added must be around 15 years old – definitely good to get something old used!
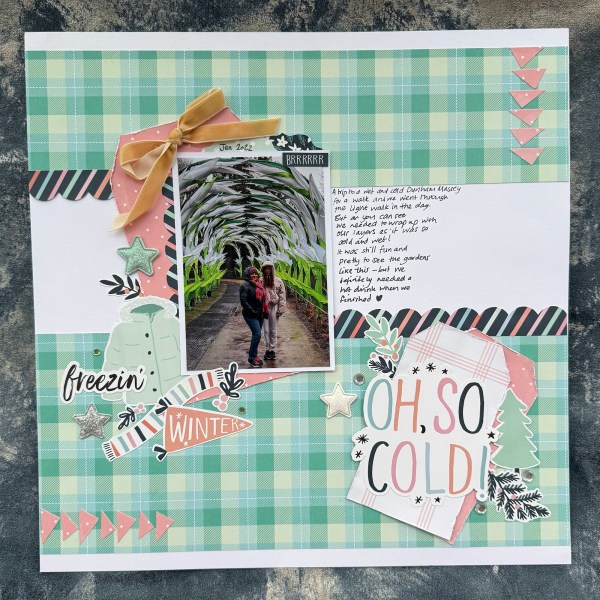
Next I will share the page I actually made last because I made use of a lot of the stickers left from the page kit – plus a few bits of the paper – but teamed them with very different papers from my #100patternedpaper pile.
Those stickers were perfect for making the subject of the photo and story work and I loved working the torn red circles for pulling out the pattern on M’s hat – plus the check in the background just helps ground it all I think!
A fun page that came together quickly – although I will admit I left the journalling to the day after as I was super tired at this point in the day! Who knew crafting could be so exhausting! 🤣
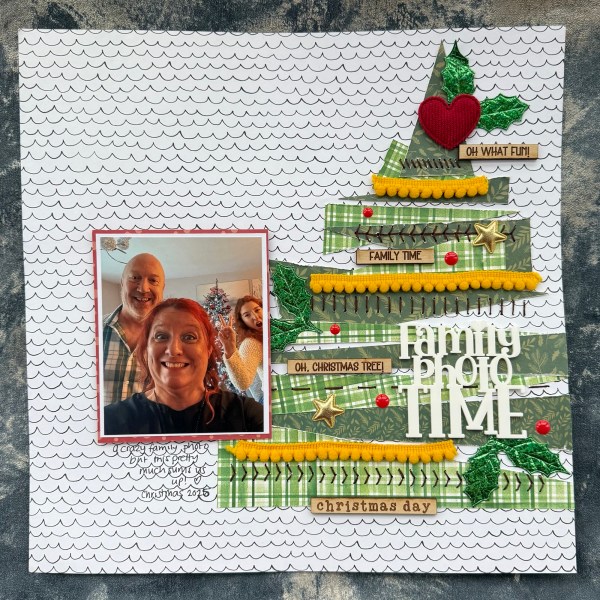
To be honest I was probably exhausted by this final page I am sharing where I decided to add lots of sewing!
I was inspired by having seen a lot of pictures of other peoples makes where they used strips to make a Christmas tree in the background – and so that is what I did. I did make it a little different by having each strip be a triangle (the challenge for week 2 included using triangles on a page).
I then used a new stitching ruler that Sarah has designed for Hey Little Magpie that I bought at the crop to pierce the different designs across the tree and then sat and sewed them all with the brown thread.
This was time consuming and headache inducing (the pattern on the other side of this paper did not make it easy to see the holes!) but I think well worth the effort!
I loved adding the Pom Pom ribbon on this and all the embellishments from the embellishment kit (and a couple of new purchases from the HLM shop like the title!).
So those are my four pages. I’ll share more details on instagram but here is a quick collage!
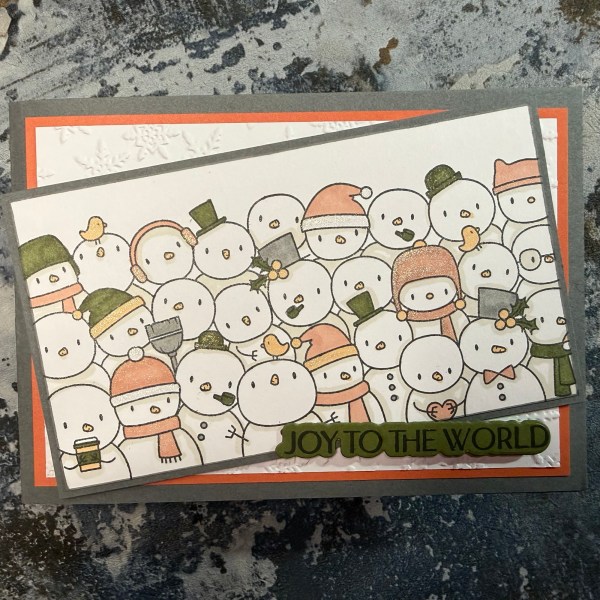
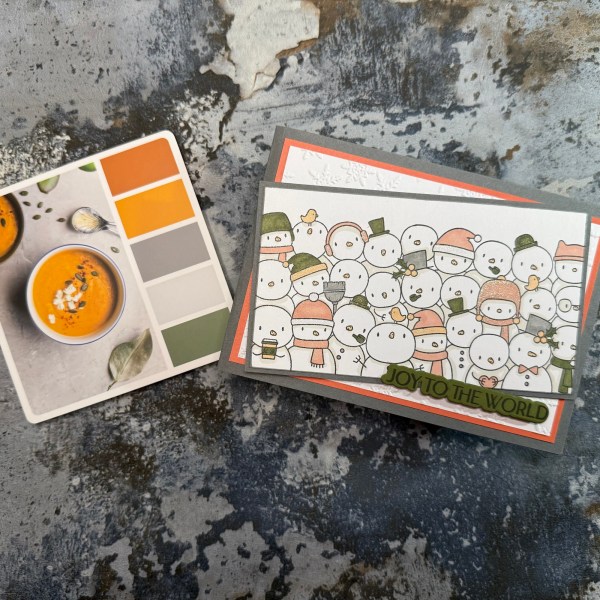
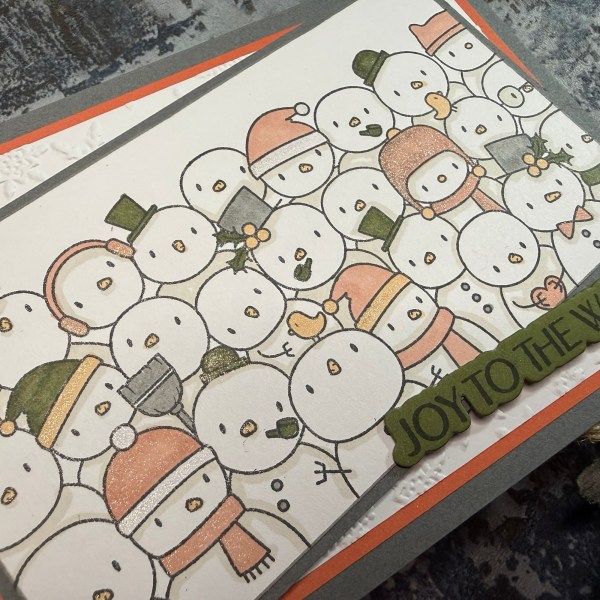
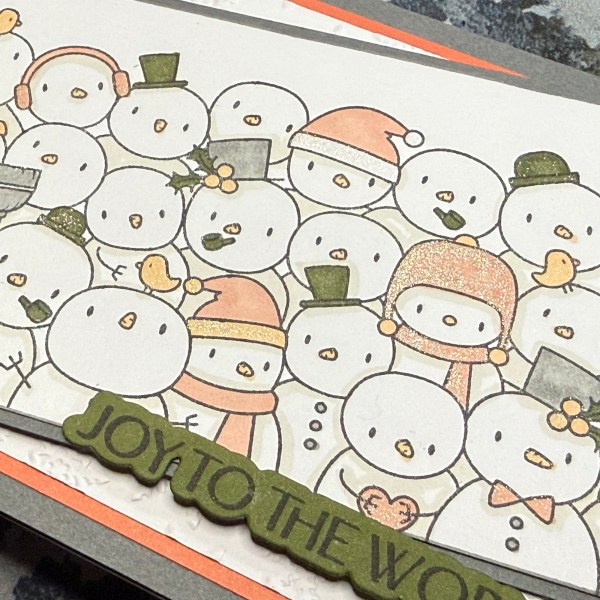
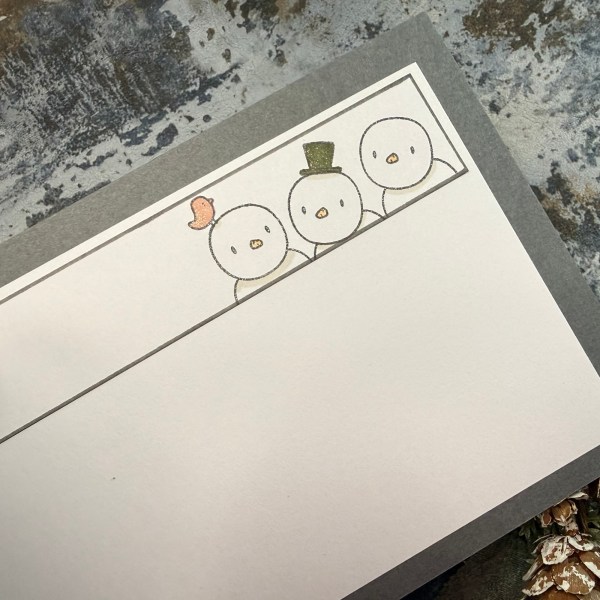
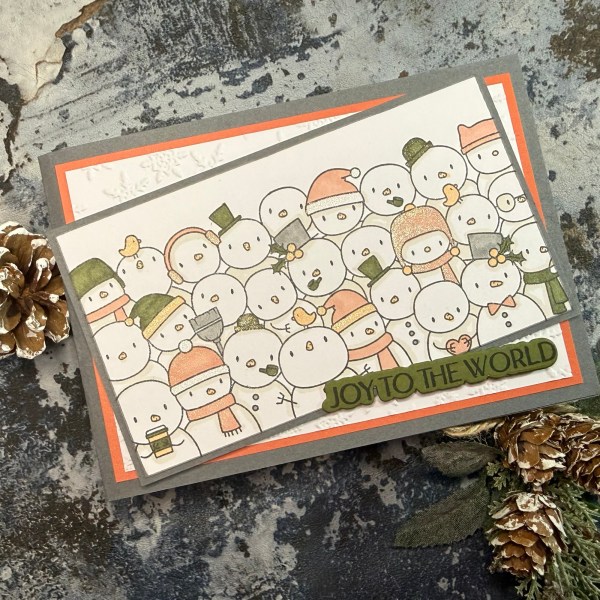
I’m combining this weeks Festive Friday with my prompt response for the Christmas in July group too – as I must admit I kind of forgot about it and then Karen has been posting all those fabulous snowmen cards in the group so I got crafting!
Our theme for January was do you wanna build a snowman and this is the card I made featuring many many snowpeople!
Now it is quite an unusual colour scheme for a Christmas card but I love it!
I chose the colours based on the ColourCube card I selected from the Winter selection.
I must admit I might have been tempted to say this is more autumn than winter vibes but I think it still works! Admittedly my colour choices might have been more pinky than orangey but still not bad!
What really amused me was that I was visiting my friend Deb’s blog last night and she had used a random number generator and it gave her the same card I had chosen! Can’t believe in the same week we’ve used the same card as inspiration by accident!
I used my alcohol markers to add the colour and then base of the grey and the coral pink colour to keep it going!
Added the Mossy meadow sentiment, because I wanted to bring in a bit more of the dark green.
I then went to town with the wink of Stella for shimmer! 💖
Inside the card I added a strip with a few more snowpeople and edged it with the pen to give it some framing – otherwise kept it simple!
So it turned out I did wanna build multiple snowmen … but as someone who hates being cold and physical work I only like building them like this inside my warm craft room! 🤣
So there we go – four Festive Fridays done – including this one which is also my Christmas in July January project.
I did record the process of this card too if you want to check out my YouTube video
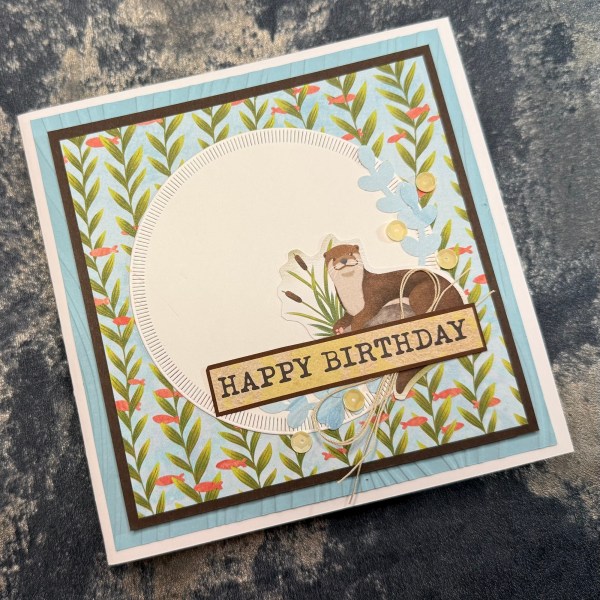
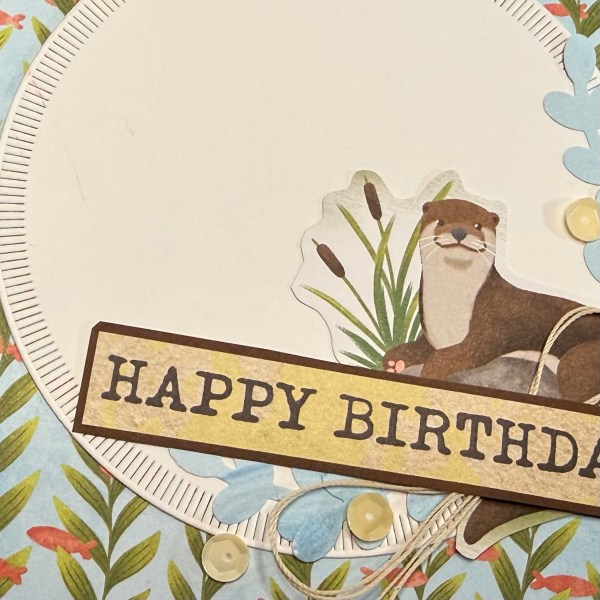
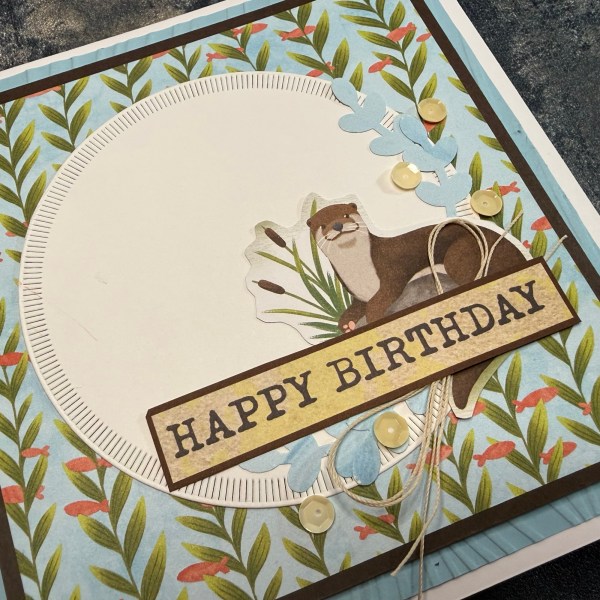
So this cute otter card was a card kit that was gifted to me by the fabulous Tricia.
I needed a quick project to do when I only had 30 mins till an episode of the Traitors last Friday night and so grabbed this that has been sitting (along with some more of the cute otter papers she also gifted) in my to do pile for quite some time and made up the card.
Of course you know me I did change it up a tiny amount! Firstly I used the reverse of the paper for the main square and also trimmed down that square a bit more so I could see more of the embossed panel of blue. I sort of wish I had trimmed it down a bit more but hindsight is of course a wonderful thing!
I changed the sentiment and grabbed this one from an Indigo Blu old magazine paper as I thought the colours worked with the papers and the otter image.
I also grabbed the thread from my stash to add a bow and love how this adds some softer texture – oh and also the cream sequins.
I raised the patterned paper panel up on foam adhesive to give dimension.
Inside the card I just added the off cuts of the paper and brown cardstock to the bottom as a fun staggered strip.
A lovely project to put together – now having thoughts as to what to do with the other otter papers too as they are so cute!
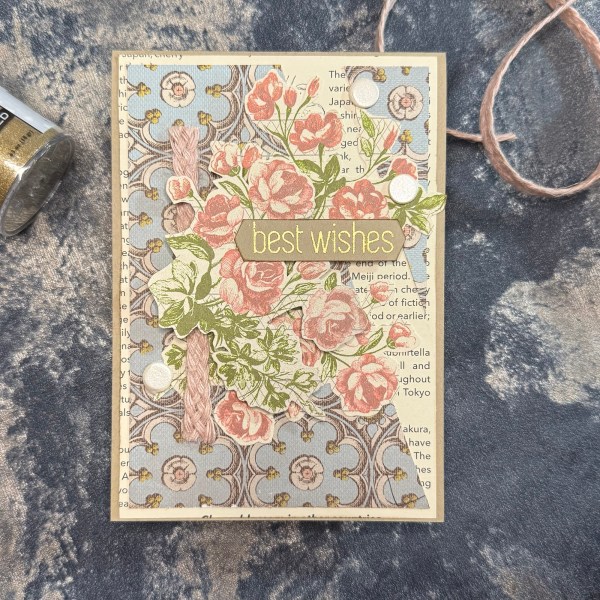
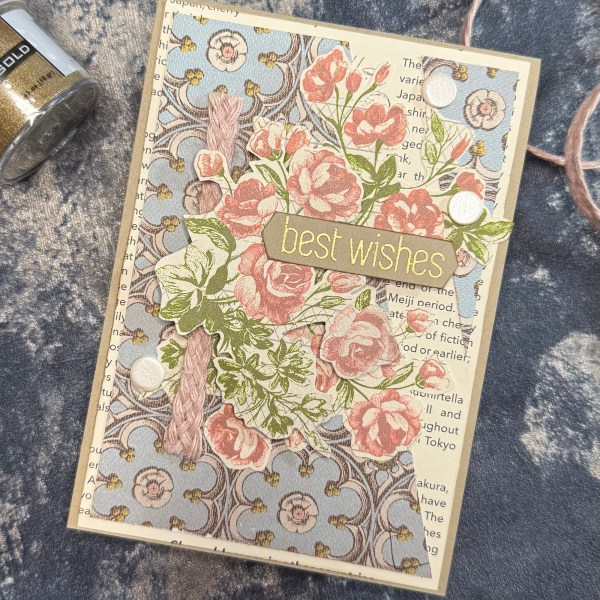
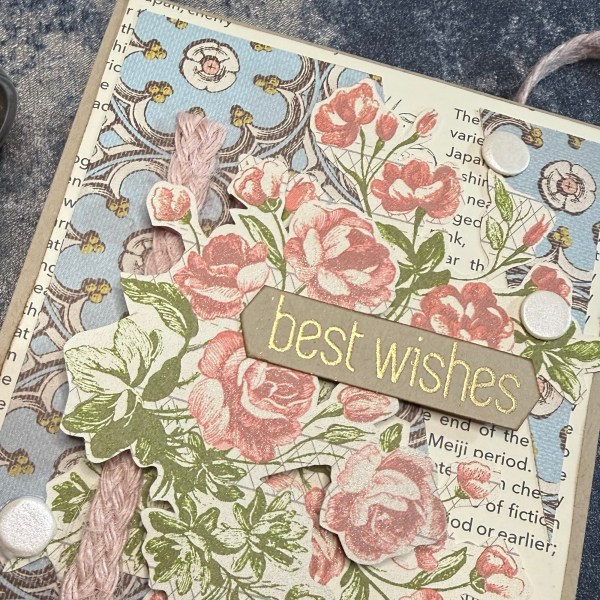
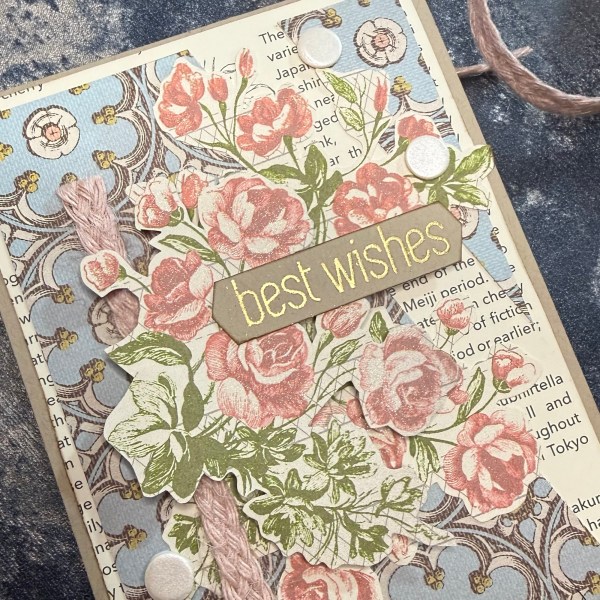
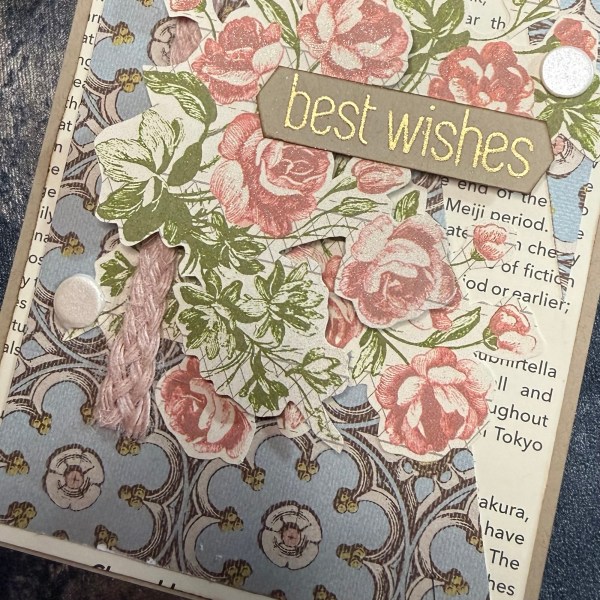
Hello! For today’s design team card for ATSM our theme is any occasion so I decided to just use up papers that were on a pile on my desk leftover from a scrapbooking project and see where it took me!
And it took me to this vintage shabby chic look of a card! And I love it!!
Papers came from old SU packs and then those flowers I fussy cut and have had in a pouch for years – I used them for a patterned paper challenge around 2 years ago! Seriously why do I hold onto these things? Oh because then the perfect project like this comes along!
I layered the smaller cluster of flowers over the larger one with foam adhesive to give it some dimension. I love how the angle I had cut the paper on gave a fun peep through effect for the background too.
Before I adhered it though I realised that the new braided twine I bought from SU would work well and so adhered a strip of that down – this really adds a lovely texture.
I then chose this lovely elegant font sentiment and gold embossed it onto the crumb cake. I then used the punch to finish the edge into the pennant type finish.
I raised one end on the foam to be the same height as the flower bit.
I am currently obsessed with wink of Stella and so went over all the flowers with that to give them shimmer. I then chose some cream card Candi to embellish.
I edged the panel with some brown ink (I did the same to the sentiment) and then adhered to the crumb cake card base.
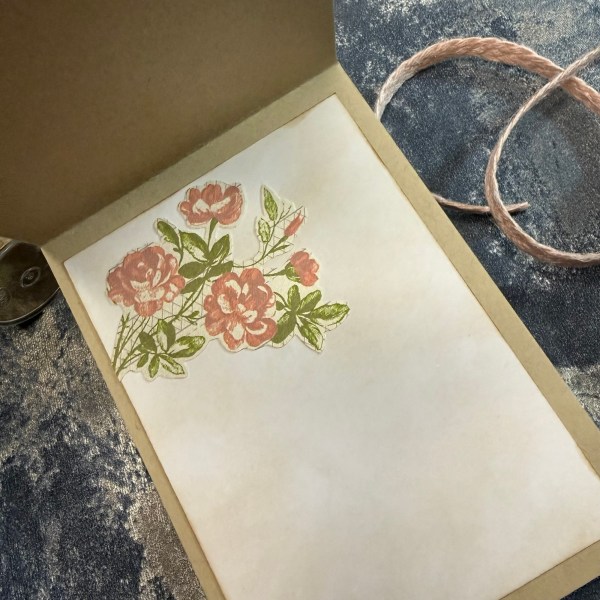
Inside the card I added a panel which I had edged and then lightly inked. I then added the other floral element that had been in the pouch with the others.
So much fun to just grab supplies and see what comes from it – this really was a mix of such old supplies and then the addition of the newest with that twine – but it just worked perfectly!
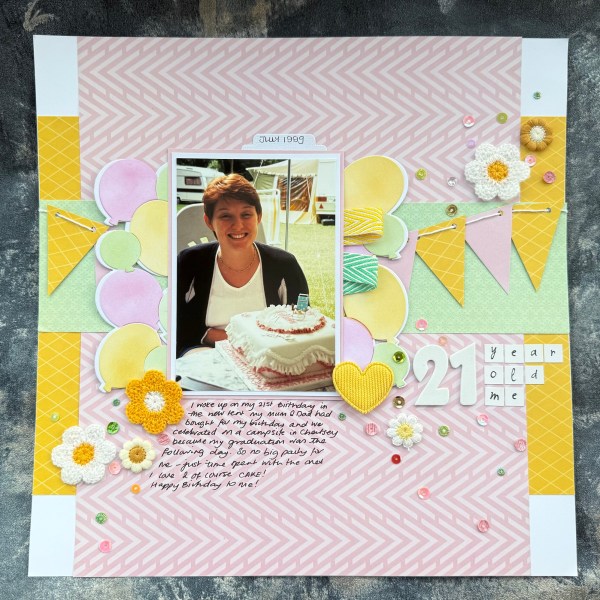
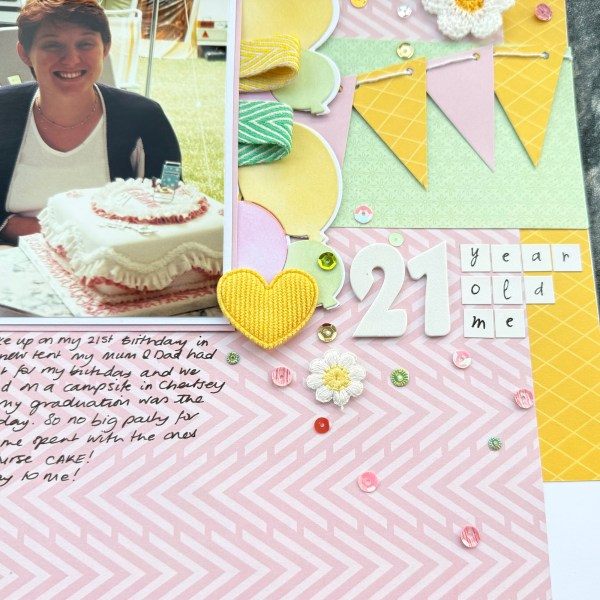
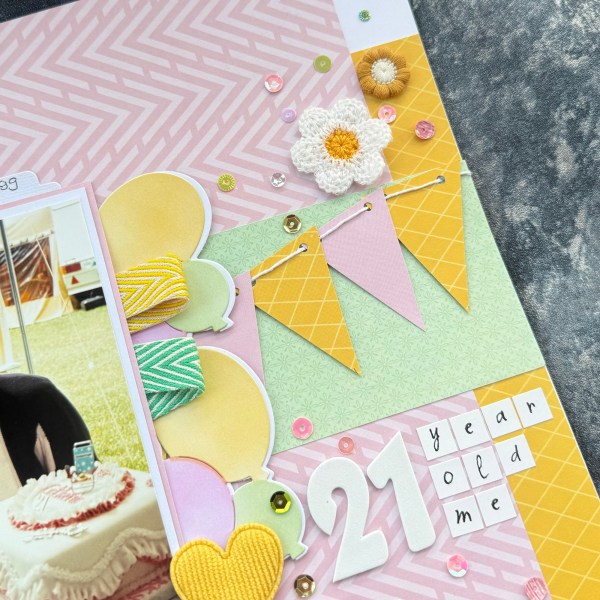
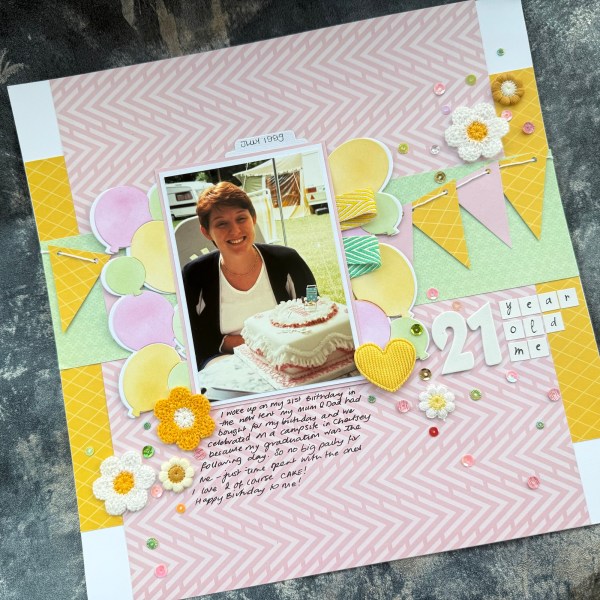
Another page made to meet the challenge over at Scrapbook Challenges UK winter team challenge week 2. This page added 5pts to our team score as it included all the elements needed.
Three or more word title, sequins, ribbon, balloons, triangles
I used papers leftover from the Wicked page I shared last week along with a softer green panel leftover from a different page. Again these are all pulled from my 100 patterned papers pile!
The photo I scrapped (if it’s not obvious from the title) is of me on my 21st birthday – which was only a few years ago! 🤣
So the triangle bunting and the balloons work well with that theme – and of course all the sparkly sequins! As I hadn’t put the die and stencil set away it was a perfect thing to pick up and play with for the layout – I just snipped the panel into two to have it on either side of the photo!
It was really good to scrap such an old photo and remember the day and some of the oddities of my 21st which was on a campsite in Chertsey.
It was also nice to use pretty colours and pull in some gorgeous flower embellishments from the Hey Little Magpie embellishment kit!
A fun page! This challenge has absolutely given me a drive to scrap and will have many more pages to share with you over the coming months!