I am an on-the-side and increasingly up front papercrafter who loves nothing more than getting inky and creating pretty things with paper and stamps!
I am also a wife to lovely hubby and mummy to a wonderful 14yr old princess.
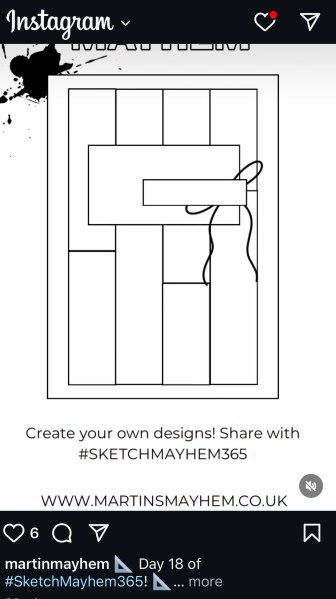
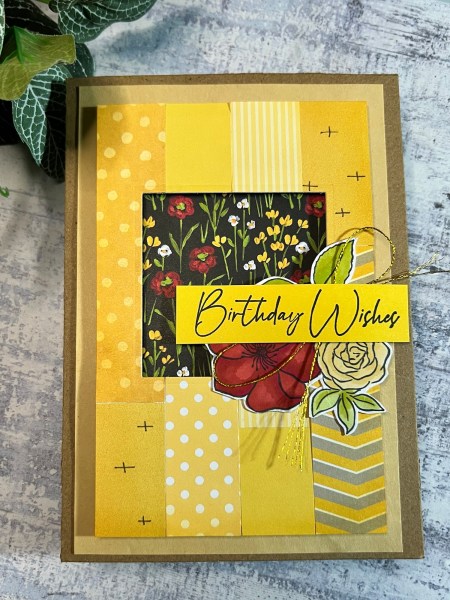
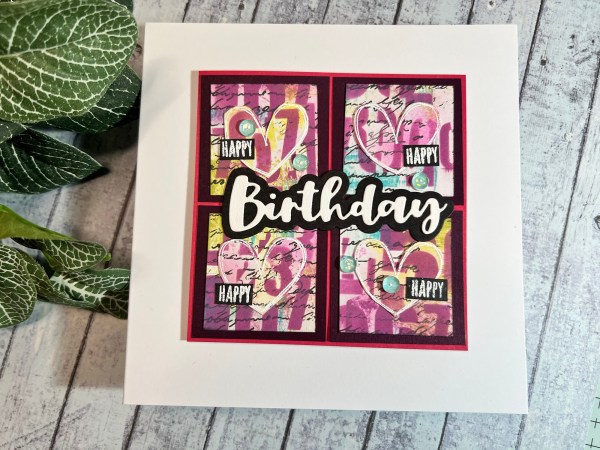
I thought I would join in with Martin’s sketch challenge ( #sketchmayhem365 ) again – this time day 18. I also filmed the process so please check out my YouTube channel.
I went with some scraps of the yellow papers from the stash …
… and then die cut the square panel out. I then raised the front up on foam adhesive over the background with the floral paper behind. This added some dimension.
I stamped the floral element which is a magazine stamp and coloured in with my promarkers.
I added foam under the flowers that hung over the square but then just glued the rest so it laid flat but didn’t dip.
I added the sentiment and the bow like the sketch and then added the full panel to the kraft card blank.
I then added the square I die cut out and a second floral element on the inside with the white panel for writing on.
Love how this came together and how I used the sketch to inspire me.
Decided to mix things up a little for this weeks Festive Friday with some gift tags rather than a Christmas card project as I got very low in my stash by Christmas last year!
I made a whole stash of tags using a few strips of dark green cardstock and some patterned papers and cut apart elements from a magazine kit I bought last year.
These were such fun to make!
I cut the cardstock into the two inch strips and then punched the top with the scalloped tag punch. Then I added the bits of patterned paper. And then the cut apart elements.
I then stamped some sentiments and added those.
I then used a pen to add some hand drawn elements. This gives some fun edging and framing to the panels and sentiments.
I then grabbed the Kingston Crafts glitter glue and added either dots to the edges or to add sparkle to the images. This adds some fun to each of them!
I haven’t added ribbons at this point – I usually only add those to the tags as I gift wrap presents to that I can combine a bow or streamers with the tag so for now these sit in a box I keep with the cards ready to pull out in December when we get round to gift wrapping!
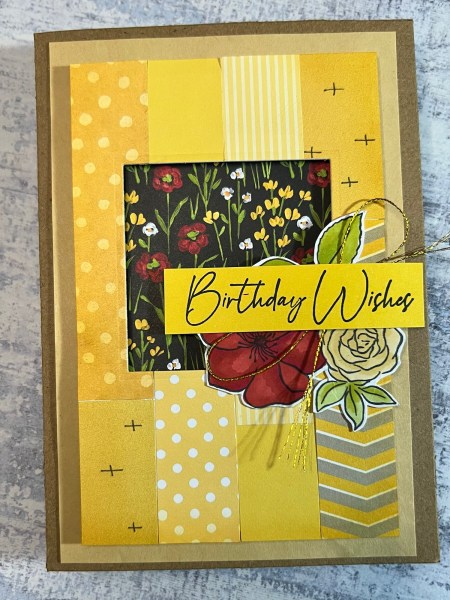
I did join in with this 1 sketch : 3 ways challenge a few times last year but haven’t had the chance to join in for a while. The challenge is to take the sketch and make it your own but Helen, Jackie and Sarah give you three interpretations as inspiration. Then we all share our versions on the Facebook group.
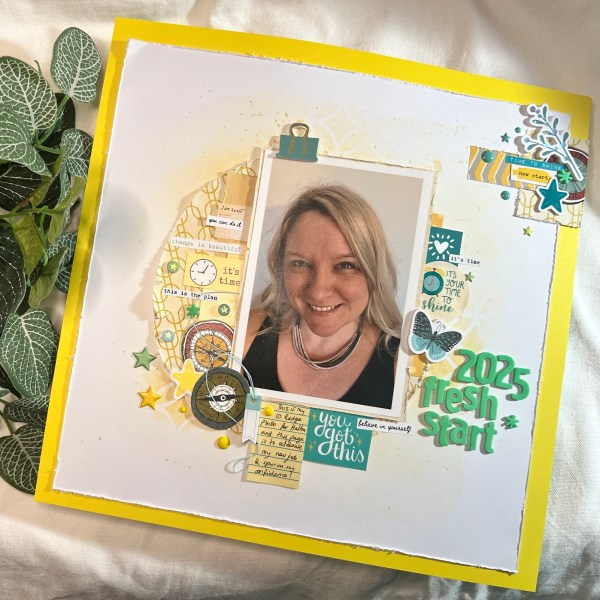
Well on Sunday I decided to join in and scrap the photo of me that is going to be my ID badge for my new role which I started this week and decided to make it a positive page to give me confidence ahead of my first day!
I used scraps from the yellow pouch for the papers and then lots of bits and bobs from the stash to add in words that helped me with the positivity and went with the colours of the yellow and turquoise.
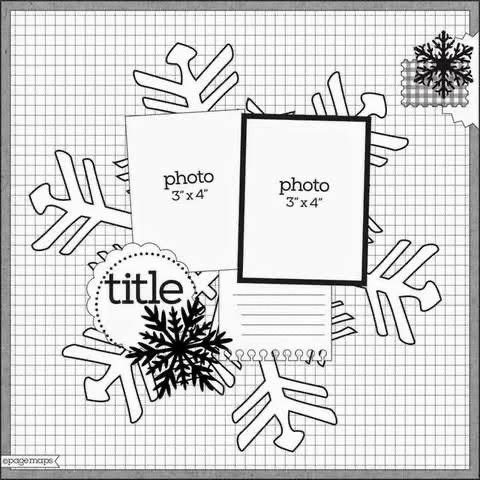
The sketch itself has the big snowflake in the background but I went with the circle and the stencilling underneath as my background element.
I kept the circular element to the bottom left of the photo but reduced it down to one larger photo rather than the two photos.
I kept the border from the sketch and also the location of the journalling and the little top right cluster. It’s handy having the bright solid colours in that Kingston Crafts summer collection paper to create the colourful border!
Once I’d got the main elements sorted I then ignored the sketch and went with whatever I felt worked at the time.
I love the bright colour scheme – again radiating positivity and cheerfulness!
And the little pops of the turquoise I think work nicely. I would have preferred more teal coloured letters for the title but I didn’t have any so made the more green turquoise work by dotting those colours around in other places too!
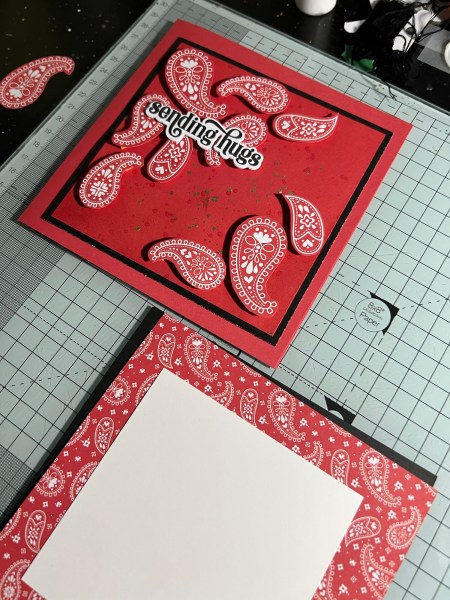
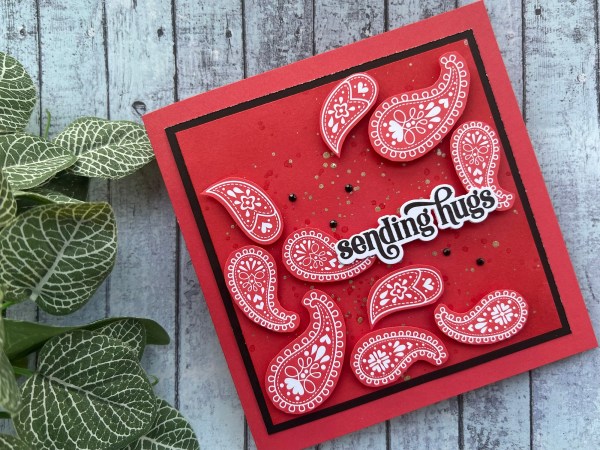
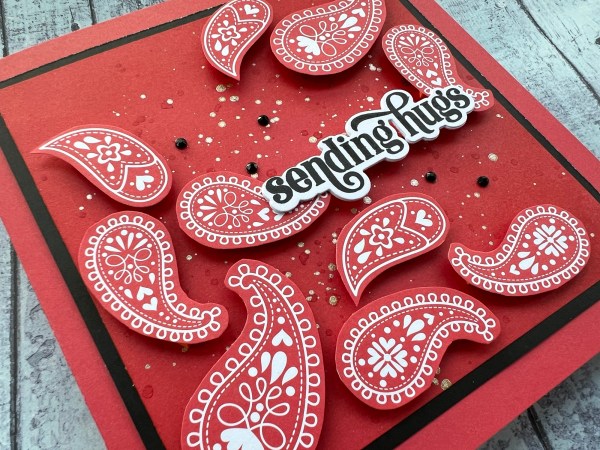
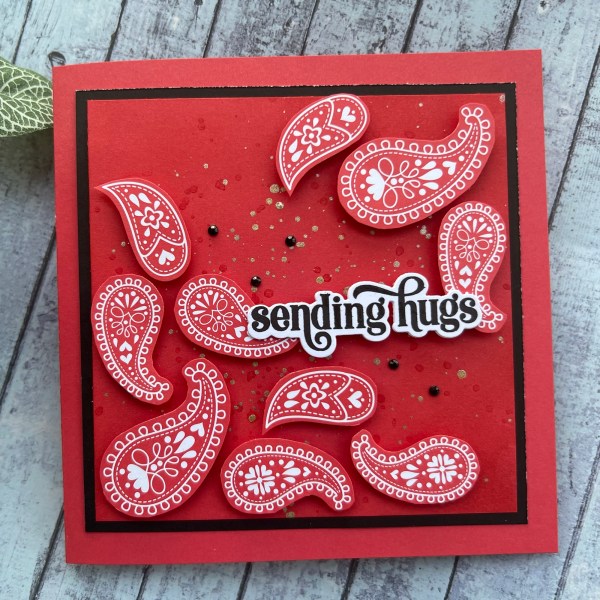
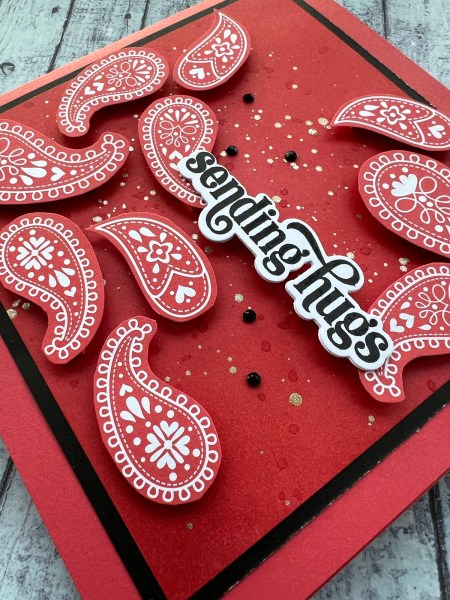
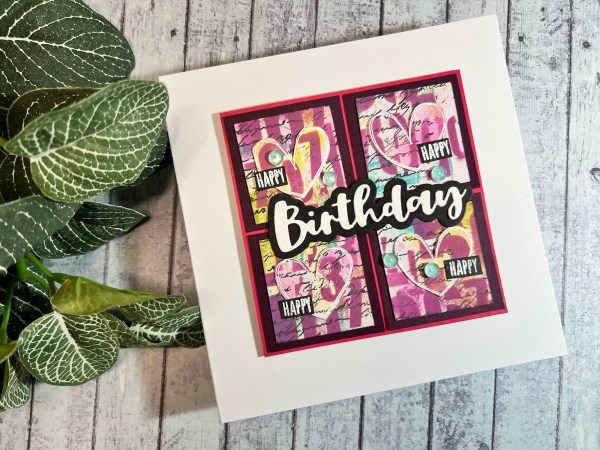
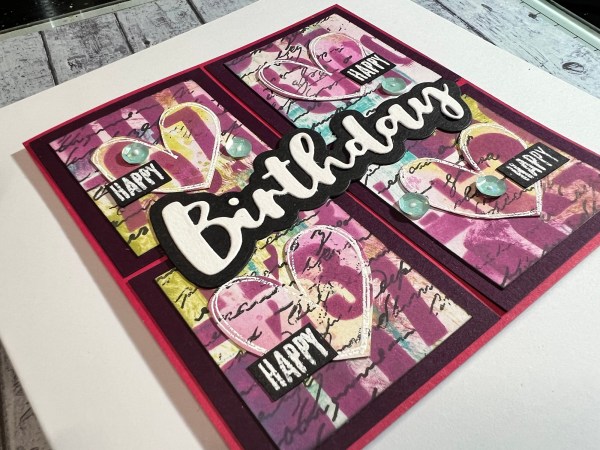
When I saw this gorgeous paisley themed paper I knew I wanted to cut it apart! I just had a vision of the paisley elements raised …not sure why that was but sometimes it’s just how it goes!
I decided it would work well with black too – so I added some mats of the black but for the base under the cut apart piece I inked the solid colour paper from the pack and added lots of shimmer paint splatters.
When I was adhering it all together I decided to rotate the cut apart piece and pop the sentiment in a different place from the original idea but otherwise I pretty much kept to the plan.
I added that Altenew stamped and die cut sentiment to bridge the two cut apart pieces with the same foam adhesive under the middle part to keep it level.
I also added the black gems to tie in a bit more of the black and made the card base from the solid papers in the kit. I’ve said before it’s a thick paper but not quite cardstock but I think when you add the layers on the front and inside it can function as a card base too!
I took one more piece of the cut apart paisley and mounted it on black and cut around that too to add to the inside and a wide border of the smaller print side of the paper.
I love the paper as it came so can’t wait to use it again but for now this was my first thought when I saw it and it came out perfectly!
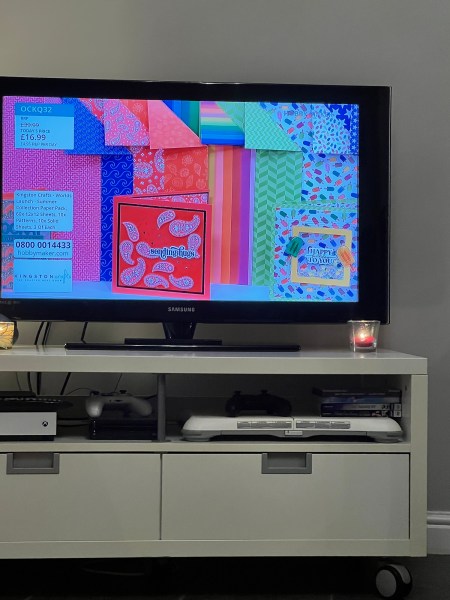
And it got to be seen on the tv on the show 5th January. So exciting!
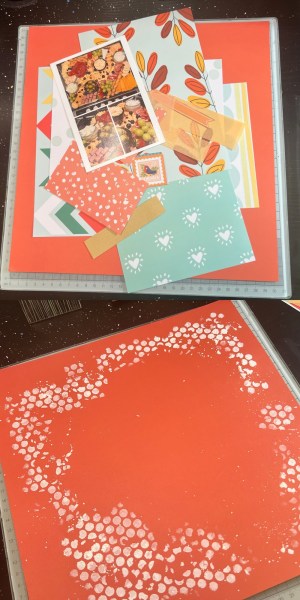
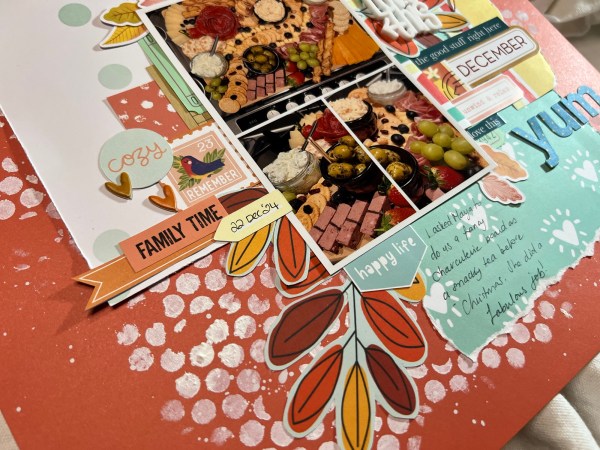
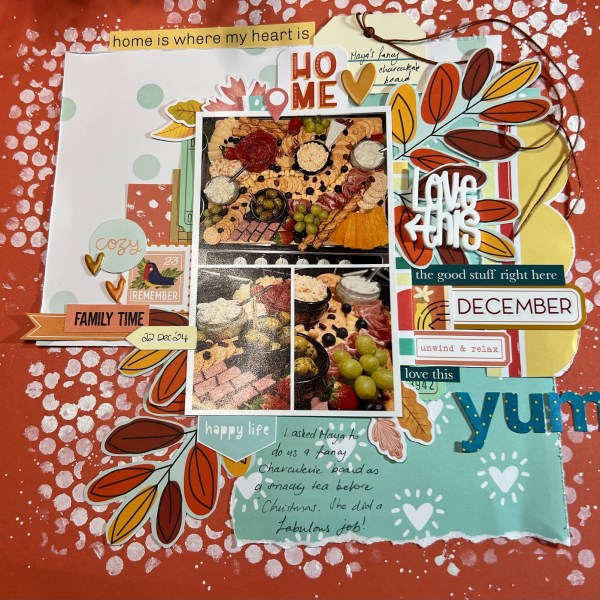
On Friday I did a little tidy up of the embellishment box and it reminded of all the lovely stash I have and that I need to pull that out and not just grab new stash. I also put away the concertina folder that has paper scraps in sorted by colour and decided to pull together some scraps to make a page!
As you can see from above I went for an orange and turquoise theme and I grabbed a picture that is a collage of pics of the charcuterie board my daughter made for us the weekend before Christmas.
I gave myself a vague layout to start with and then using gesso through a stencil I added some mixed media. The background was a piece of the 12×12 summer collection pad from Kingston Crafts but it is a solid colour and I loved the coral/orange colour.
I got this far on Friday morning and then left it as it was to dry whilst I popped over to Manchester to take M back to uni and have some lunch there before coming home!
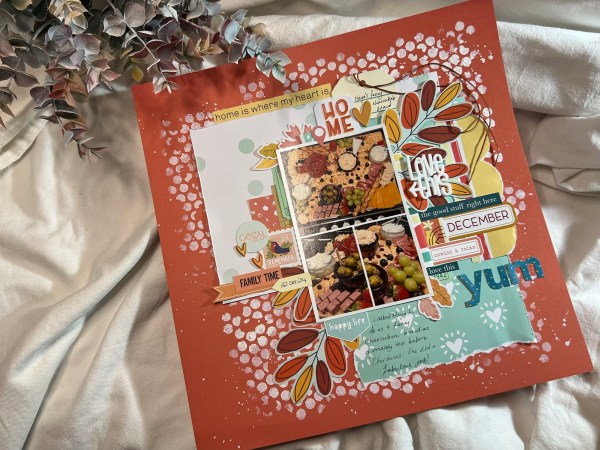
Once home I finished off … I fussy cut those lovely leaves from the patterned paper and layered things up. I then spent a while going through the pouches of embellishments (most which are lollipop box club kits or bramble fox club kits) and adding in things I think worked.
I also grabbed some very old alpha stickers for the yum title!
I love all the textures and bits of interest on this page which is very much ‘thrown’ together.
I added my journalling towards the bottom and made sure I added the date into the page too.
Where I had added the tag at the top I added some twine and looped it to come down the right hand side with some carefully applied glue underneath elements to keep it in place.
Really enjoyed putting this non-person focused page together and using up old papers and bits of stash!
So this is an extra page done for my scrapbook and I’m sharing it on a Monday not a Saturday! This is in part because I already have a page done and ready to post for next Saturday and also because today I start my new job so I think it highly unlikely I will get any crafting done today so this is a much needed get ahead and ready on the blog kind of post!
I went back to playing with the page kit I got from Sarah at Hey Little Magpie and used the leftovers to make an impromptu page! It was also inspired by the challenge for this month over at the Hey Little Magpie Facebook group to use thread!
I added in some bits and pieces from 49th & Market and the bit of stencilling under the main panel too.
Love using up leftovers and this page was a great way of doing that! I hadn’t realised when I started that it was actually a spring photo not an autumnal one but the colours in the photo work well with the papers so it doesn’t matter!
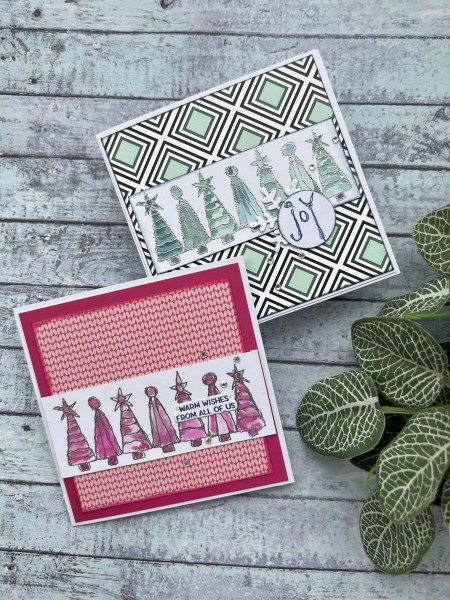
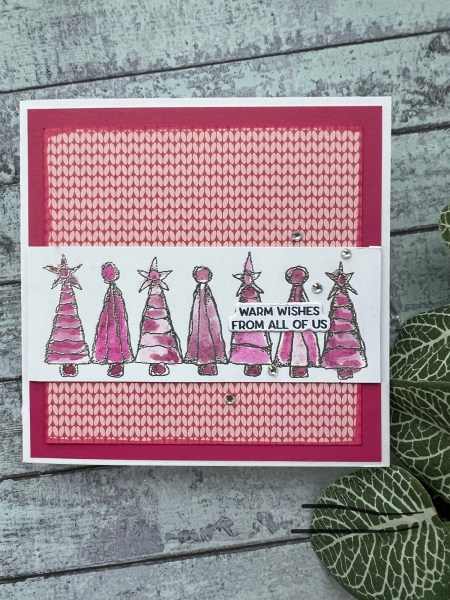
Combined my DT stuff with my Festive Friday today – using supplies from the Everyday Stories kit from Kingston Crafts to make these two smaller cards using the fabulous Kate Crane stamps from Paperartsy.
I actually won the stamps on a competition with UK Stampers Forum so this was my first use of them but can only share them now due to the fact Kingston Crafts didn’t release the Everyday Stories collection until more recently and it was cards from that collection I used to make the card fronts.
I did two choosing different colour scheme for each and I added colour to the stamped images I had heat embossed to match.
I kept both cards quite simple – the stamped panel, a sentiment and a couple of layers of the card panels that were designed for the Everyday stories album but I knew I could also use as card toppers… and once again here I am using products not designed for Christmas for my Christmas card obsession!
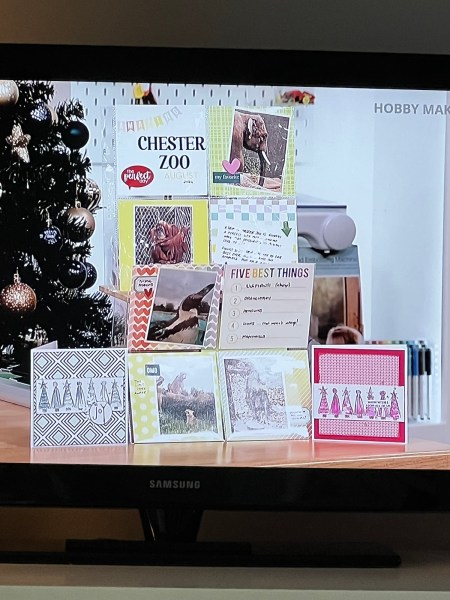
Cute and quick and easy cards! And I got to see them on the tv back on the 5th Jan – sitting on either side of the Chester Zoo pages I made …
An early post for me today as no work today – instead I’m off to take M back to her uni flat and a lunch out in Manchester – so best stop lazing in bed and get myself showered and ready!