I am an on-the-side and increasingly up front papercrafter who loves nothing more than getting inky and creating pretty things with paper and stamps!
I am also a wife to lovely hubby and mummy to a wonderful 14yr old princess.
I’m going to try and join in the challenge to make a decorated tag for UK Stampers Forum every month this year to make a decorated tag – I managed a few last year but not all!
This one I went with some new to me stamps from Altenew that I bought in the sale at Seven Hills Crafts but wasn’t sure exactly what my plan was!
I covered a tag I made from packaging with silver acrylic paint to and it a little shiny and a fun background. Once dry I added some stamping using the arrows and some archival ink to add some fun shapes into the background.
I also added the Aim High sentiment using Versafine which is darker than the archival ink.
I then decided to add a rainbow element with some patterned paper larger arrow stamped images which I fussy cut and then adhered down.
I then decided that a rainbow of butterflies would be fun! So I took the Concord & 9th dies to cut them out of scraps of cardstock and some black for the bodies of the butterflies.
I stuck them down and then covered them with a bit of scrap and splattered the background with some black gesso.
I then worked on the sentiment. I went with the stamped first part and then die cut the letters for the final part. I stacked the letters twice and then added them to the tag with the stamped element layered a couple of times and then added the adhesive foam to give it more dimension.
I decided it needed something more so I punched and stacked some hearts from black and then added the white doodles once I had glued them in place. i also added some white dots to the die cut letters.
I edged the tag with archival ink to frame the tag – I always like the finish this gives it!
I also added the pearl accents for a final embellishment to the tag.
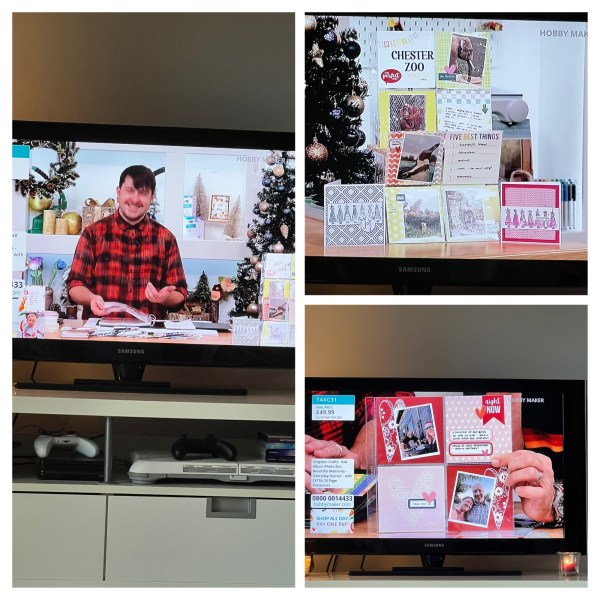
One of the products that Kingston Crafts sent me to play with is Beautiful Moment album with the Everyday Stories papers – an 8×8 album with precut cards, inserts and embellishments (cardstock stickers, rub ons and puffy stickers). Each of the inserts is sectioned into quarters and it is such a simple way to scrapbook your memories – choose a card for each quarter, add your photos and any journaling and embellish as you wish – and the stack of cards it comes with are fab – so many to choose from.
Martin was on hobbymaker.tv with this earlier today so I’m delighted I can start sharing the projects I made!
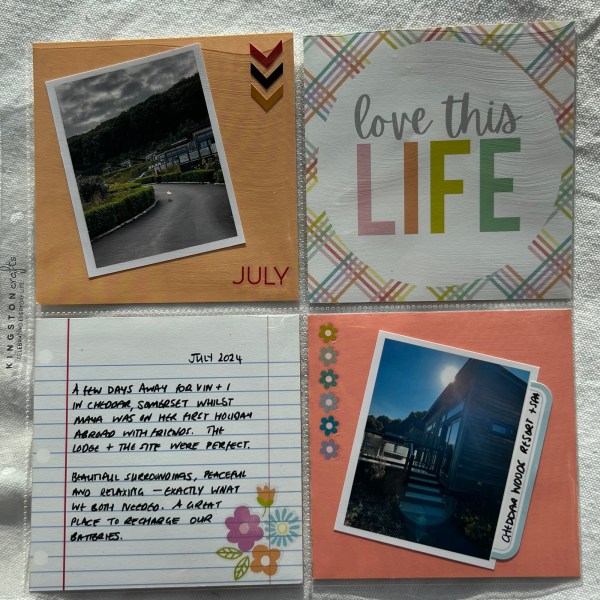
I decided to start off by documenting the little trip to Cheddar in Somerset that me and the hubby took in July. I printed photos mainly two per 6×4 so I could cut them in half for the inserts – I did do a few that were square but just shrank them down so I knew they would be less than 4” tall.
I decided which photos for which page and then found cards I liked to either fit the feel of the photos or the colours in other cards.
Then I set about embellishing and telling the story on each page.
I would normally do them back to back but as they were made primarily for the tv I did one sided only – when I get them back to keep I will combine them into back to back pages to save my inserts for other pages I can make in the future.
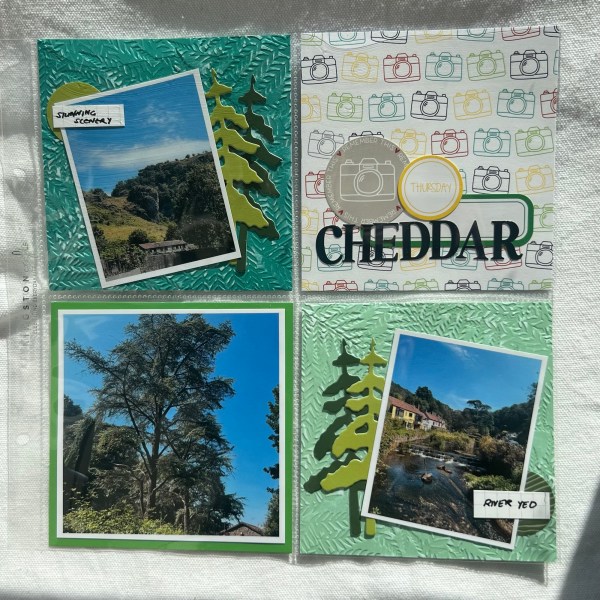
Obviously you don’t have to use the album just with the supplies it comes with – I did some just using the kit and then I started experimenting a little … on this page I embossed the two plain colour panels with a Fern embossing folder and then die cut some trees from other cards to add as embellishments.
And on this page I started grabbing stickers from the stash to add elements and stamped some leaves onto the cards to make them match each other.
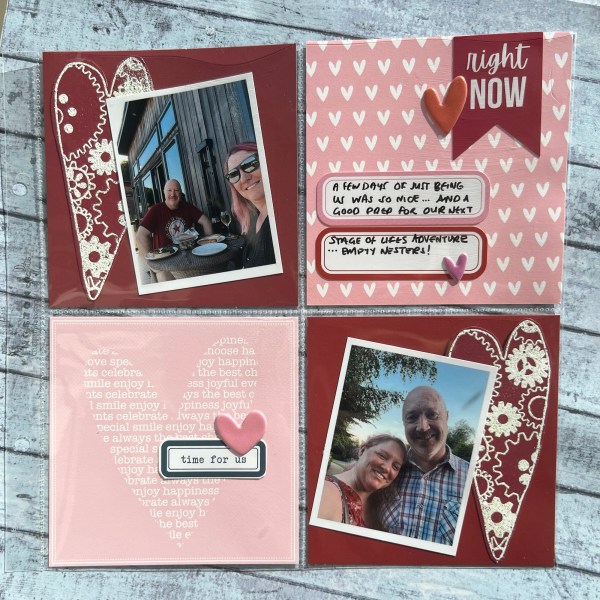
This final page documenting the trip of me and hubby I added in the stamped and embossed hearts as a starting point for adding in extra bits.
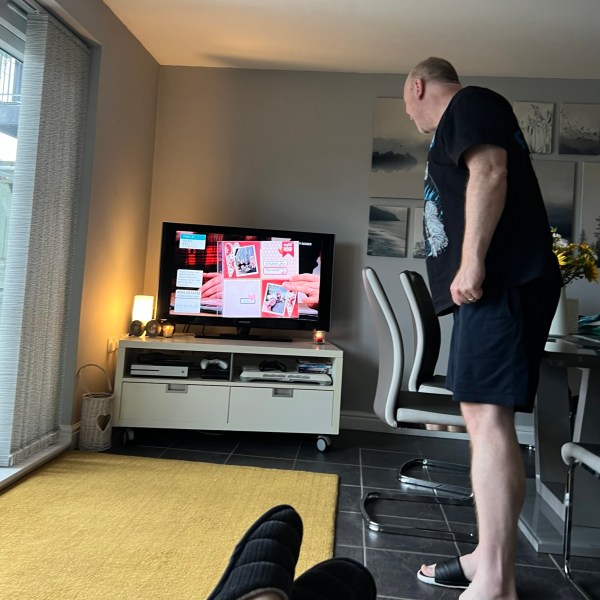
I also had to share this pic of the hubby and I watching the tv and getting to see ourselves … 🤩
I’ll share other projects I did with the kits in another blog on another day … but this was very much my starting point – keeping it simple and using it in the easiest way possible – print photos and stick them in!
Of course you could go even simpler and just print 4×4 photos off and just slot them in too – but you know me – I like to go a little mad and add some bits and bobs!
Now off to do some cleaning before Martin is back on tv again at 5pm for the next show!
I’ve decided to try and share scrapbook pages on Saturday’s this year to keep me in the zone with doing them – so Scrapping Saturday! I’m starting with one I made for my DT projects fro Kingston Crafts.
I decided to make a 8×8 scrapbook page using the Kingston Crafts summer collection papers for the main feature – although I also added some shrink plastic as it worked with the image I thought!
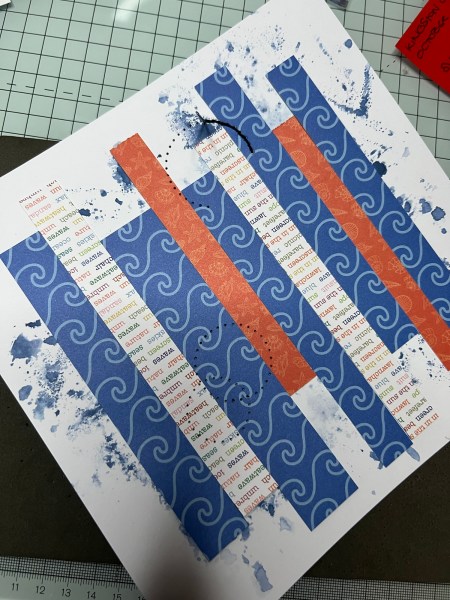
I started with some distress oxide ink using the usual packaging technique and then left it to dry. Then I cut some strips of the paper – mainly the one with the waves and then added in a few strips of the shell and the text one too.
Next I added some stitched circles – I actually ended up taking this up to bed to do whilst I listened to an audio book as I was doing this quite late at night.
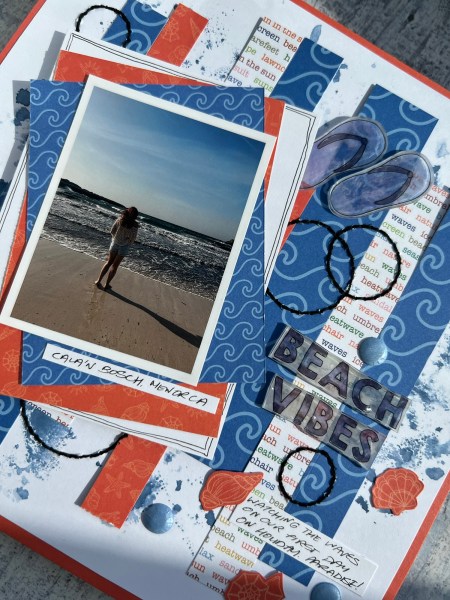
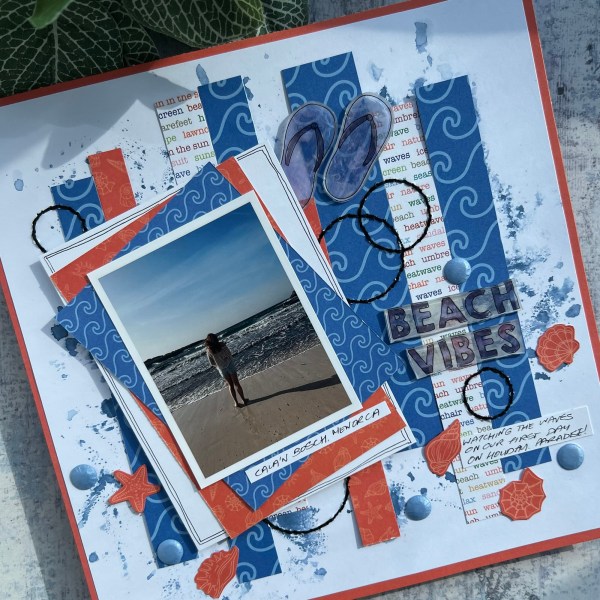
The next day I decided on the papers to stack under the photo which I thought worked well in giving some contrast but still tied in with the background.
I decided to use the same ones but a plain white piece of cardstock to separate the side.
I added them all at angles as it worked well and raised it up with foam adhesive.
I then took the shell themed paper and fussy cut out the shells to add as embellishments.
I added the shrink plastic Beach Vibes words and the flip flops too as embellishments too – and then some blue card candi too. I added in a bit of the journalling onto some white.
Really love how this came together (and it is actually better than I was expecting which is always nice!).
I wasn’t sure if I would keep up my Festive Friday challenge or not for 2025 because I had got a fair few leftover from last years making but I decided I always get so much pleasure from making for the festive season so why the heck not! So yes I will continue with my Festive Fridays and so here we go with the first of the year!
Thought I would start by using up of digital images that I had already printed for todays Festive Friday – I expect that I will do quite a few of these types of projects as now is not the time to start buying new stash for Christmas – I spent a lot on Christmas stash last year – this year I want to try and save to buy a new die cutting machine so going to try and use old stash as much as possible.
So I started with the penguin images that I had got as part of the Mirtillamente Christmas No 1 set and printed a little larger than I expected so only ended up using the one image as my DT project back in early December.
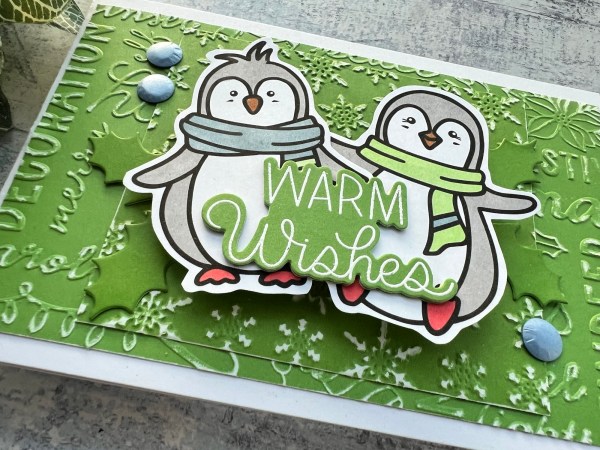
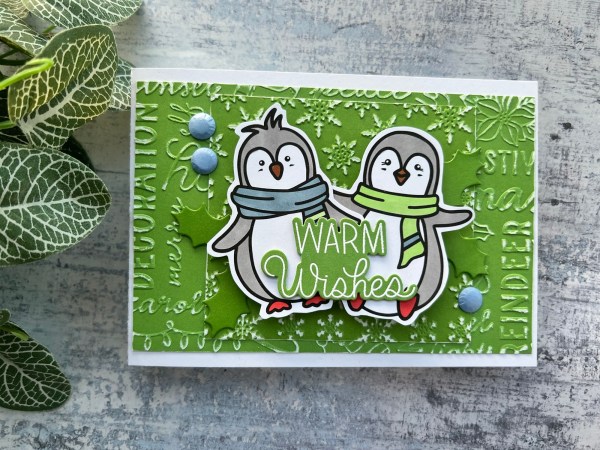
I coloured both the penguin images and decided to use both on the same card. I went to town with embossing green everyday cardstock from Kingston Crafts and created two panels for under the penguins. The great thing about the cardstock is that it reveals the white core when embossing so provides some contrast.
I decided to make the penguins pop up with a little cardstock mechanism (as per Jennifer McGuire videos). I decided to also add in some die cut holly leaves for some additional interest. I did add ink to them to make them just a little bit darker than the background but it’s subtle not so obvious on the photos.
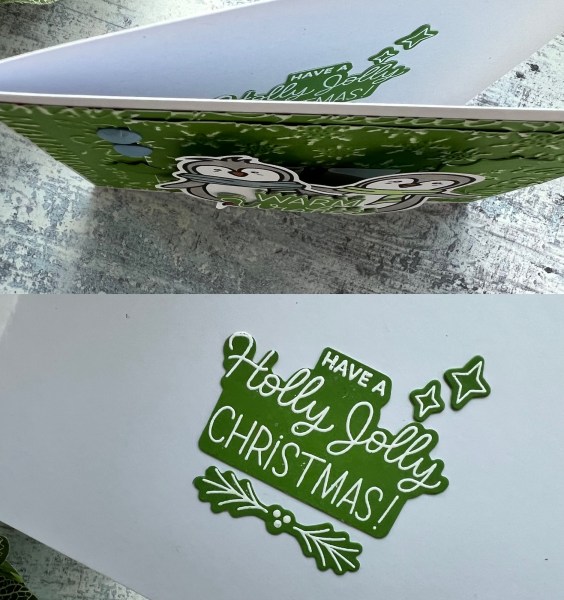
I stamped and embossed some sentiments from Pretty Pink Posh stamps and die cutting them. I added one to the front and then the other I added inside along with some decorative elements from the same set. This created a nice cluster on the inside.
Quite a cutesy card with the fun lineart images and the little interactive pop up element that is flat when in the envelope but then pops up for on display!
So here we go – first card made for this years pile of Christmas cards!
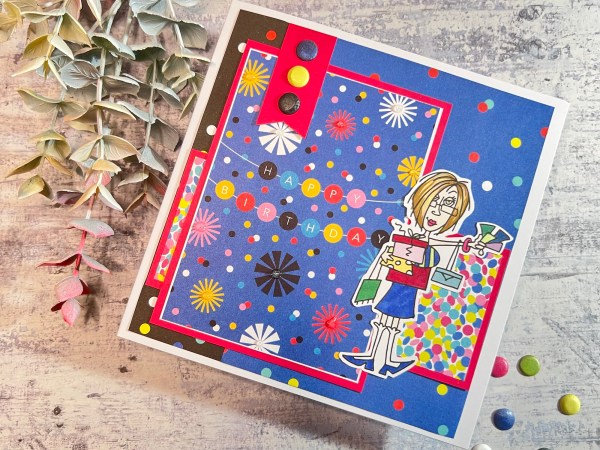
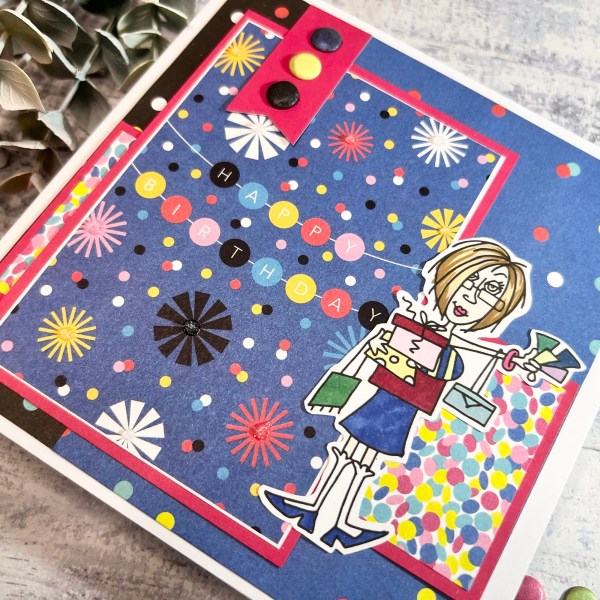
Todays blog post is taking me straight back into my Design Team commitments with one for Creative Knockouts where our theme is Celebrations and I am using an All Dressed Up digital stamp challenged … New Hair Do … which is of course always a reason to celebrate!
I decided to make a birthday card for my contribution – and kept it really simple – the digital stamp I coloured the face and the hair with promarkers and then kept the rest of the image black and white as the paper I wanted to use also had black and white elements.
I cut the image out with a space to the right hand side rather than closely cropped on all sides.
I added this panel onto the background that has those squares of patterns – it’s a really old piece of patterned scrapbook paper I only have a little bit left over so good to find a use for it. The reverse of the paper is the panel I then added on top to the right of the focal image.
I stuck it down with some tape in the middle and then pierced some holes so I could sew it in place – I really like the fun and texture this adds.
Once the sewing was done I created the sentiment cluster with the yellow stitched circles dies and the little banner element with the stamped happy birthday. This came from a lawn fawn set I haven’t used much so it in the ‘use me’ basket at the moment!
Next I punched the hearts from black cardstock and stacked them three deep to create some chunky embellishments. I also added the one sequin to her hair bow for a bit of subtle sparkle.
A fun but I think also quite funky card with the black and white elements and the modern illustration.
Please pop over to Creative Knockouts and join our challenges – they are always fun and lots of inspiration from the DT as always!
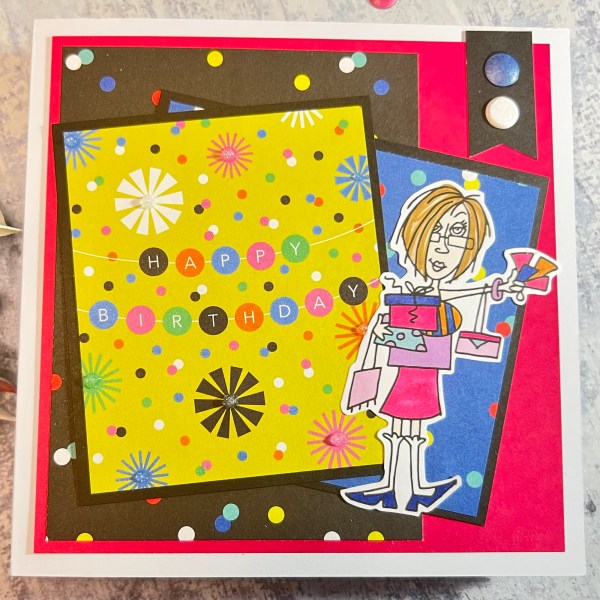
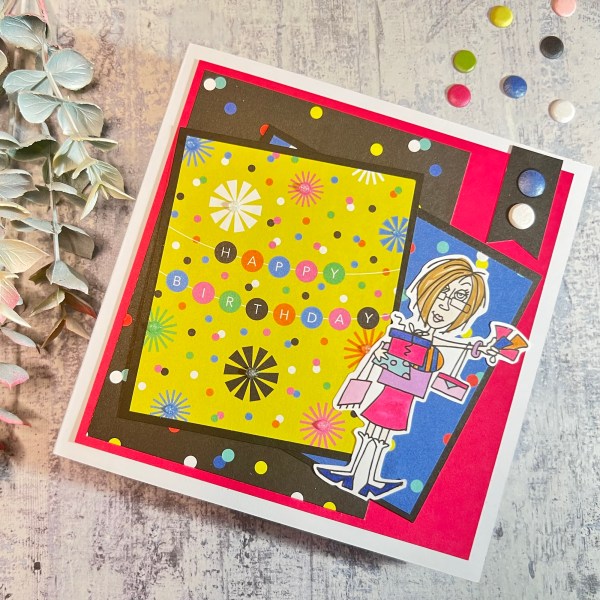
I thought I would start this year with a simple project – using the usual prompt of patterned paper as it’s the first of the month!
My plan for this years monthly patterned paper challenge is to use up as many of the magazine papers I have in the stash as possible and so I started with these party papers!
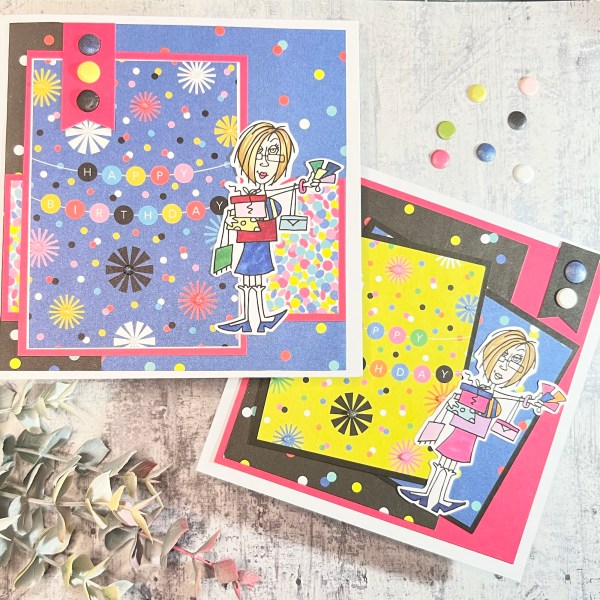
I went with some simple designs and used both the pink and the black cardstock for the layers.
I used a digital stamp image for both of the cards too – these I have had in the stash for ages and they were already coloured. I did change the colouring however to make them match the papers a bit more.
I added some glitter glue to the sunburst elements and some card candi for the embellishment.
I love both of the cards but must admit I think this slightly wonky placement I prefer!
It was fun to make such cheerful and bright cards.
I videoed the process which you can see over on my YouTube channel. Not sure exactly what my plan is for routinely doing either blogs or videos but hopefully I can find some kind of routine this year – and not overwhelm myself with too much pressure!
But for now that’s me starting 2025 with a couple of fun and cheery cards – I hope you like them! Best wishes for this new year!
Well we reached the final day of the year and what a year it has been. Certainly plenty I am grateful for. So I thought I would do a little round up post here to look back on my notable creative parts of 2024! Enjoy!
Design teams
Well I had to start with this – getting to work with Kingston Crafts and seeing my makes on the TV is absolutely one of my highlights of the year (in full not just creatively).
I can’t begin to describe how excited I was seeing things I had created on the tv – but also the stress and the anxiety prior to this point had also been very real. There was a total crash in confidence in my ability to make stuff that happened half way through making, then the box took longer to be delivered than expected so I thought it had got lost and I would have to start again with less time! I have to give a big shout out to Martin who was fabulously supportive and helped me feel less anxious and of course for putting my name forward to Kingston Crafts in the first place. Thank you Martin.
I also wanted to mention here that I am still loving doing Design team work for the challenge blogs – Creative Knockouts and Addicted to Stamps and More. It gives me that bit of focus and keeps me blogging. I know blogging is not the way the world is going in terms of marketing but I don’t care. I love blog hopping for those challenges as I get to visit people’s creative spaces across the world and get ideas for my creativity too.
Scrapping again
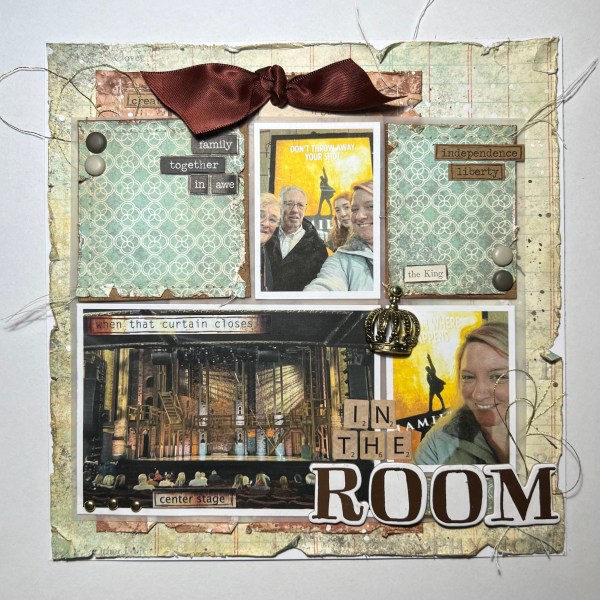
2024 saw the return of the scrapbooking! It started with a page I made for a small frame in my craft room to celebrate a trip to see Hamilton and it spiralled from there!
It had been so long since I had done any scrapping but I have done so many pages since this and really enjoyed making them.
This also brought me back to in person events with attending the Warrington crop. It’s been great to get to see my crafty friends in person and meet new friends. Unfortunately I missed the last one as I was ill but looking forward to more crops in 2025 and more scrapping!
All the 18th’s
This started in 2023 but continued through to the summer of 2024 as my daughter and her friends all turned 18 – so I made a lot of 18th birthday cards for the girls. It has been a pleasure to see them all become adults and now off to ventures new! What has been wonderful though is despite moving to different places or off on different adventures, they have remained close and I often get my FaceTime declined because she is on another call with one or two of the other girls. ❤️
Patterned paper
I have continued my quest to use up patterned paper at the start of the month but I must admit it has been more challenging as I didn’t have that focus I did for 2023 in using a cut apart piece of paper as the starting point – but as I still have so much paper hanging around I think I will keep going on trying to work my way through it! I just need a plan to make it easier – I have some ideas so watch this space to see how it works out.
I think these were my favourite cards coming from the patterned paper challenge in 2024.
I made them from the paper pack I was gifted and using a pattern from Cards by Kendra. Love these delicate colours and the pretty roses.
Mojo finding sessions
I discovered during 2024 that I could find my mojo by having sessions where I just die cut scraps or made lots of backgrounds with no focus on the outcome or what I would use them for. It’s been a freeing experience. Sit and create something – but not actually finish anything or feel the pressure to put stuff together. Usually it leads to an idea and the mojo comes back – but even if it doesn’t it gives you a pouch of bits you can use at another point in time!
So I regularly now sit and die cut scraps, stamp sentiments or make random backgrounds that then get put aside and then can easily be grabbed to use when making something. I think these backgrounds that I then added rub ons to are some of my favourites this year and I can’t tell you how fab it is to just go to a pouch for a sentiment than always having to stamp and die cut when the rest of the card is done!
DYICAD2024
I joined in with #dyicad again and finished it! I think that is a pretty cool achievement to actually get 61 days of index cards done – and this time I chose to mainly collage using up bits that have been in a box for years! I enjoyed the simplicity of just sticking things down and doodling in the main and felt productive to get old stash used. I ended up with a theme of old postage stamps, circles and raffle tickets being on almost all cards but mainly it was just the fact I spent around 15 mins daily putting something together that really didn’t matter what the end product looked like. Imperfection was embraced! And I significantly reduced the stuff in my bits box!
—
There are plenty of other things I could also write about that I’ve made that make me happy but I think this is already a long post so I’m going to finish with this …
Queen of Christmas
I’ve been anointed the Queen of Christmas by Martin (on tv nonetheless!) so I have to of course talk about Christmas crafting!
So throughout the year I’ve been doing my Festive Fridays so made a Christmas based project every single week.
Then I decided to take on Christmas in July – not just on my blog but also on my YouTube and I shared a Christmas project every day in July. My goodness that was an undertaking! My YouTube channel went a little berserk for a while with significant numbers of hits and new followers!
Then I did join in with most (but not all) of Martin’s 30 days Christmas card making challenge in November.
So I guess this does make me the Queen of Christmas! I just love making Christmas themed cards – they make me happy. I certainly don’t need to make the numbers that I do – I end up gifting quite a few to charity shops and friends for selling at charity fairs – but I love making them.
I don’t think I can choose just one favourite card for this year so instead I have a selected a few that jumped out at me as ones that make me particularly happy!
So I think that pretty much covers 2024.
Thank you dear blog readers who pop by to see my little patch of the internet – it is really appreciated. Hope to see you next year for more creative adventures!
Wishing you health and happiness and of course creativity!
Well here we go – I did it – 52 festive Friday projects throughout 2024 – I have no idea how many actual cards I made though as sometimes I did more than one per project – but suffice it to say with that and Christmas in July, the 30 day Christmas card projects and all the other random Christmas cards I had a large stash to both share with my parents and to choose and send out from us – plus donated some to a friend to sell for charity!
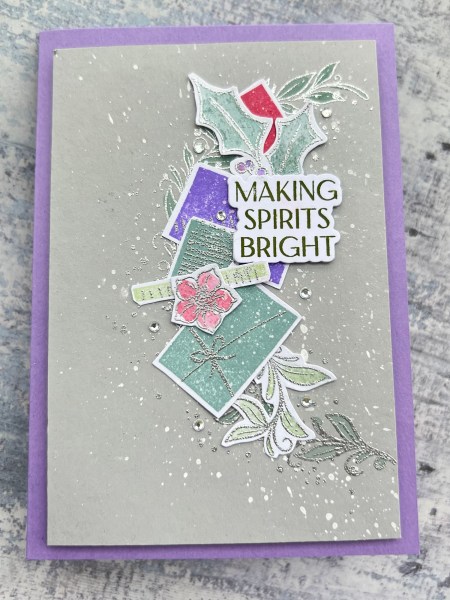
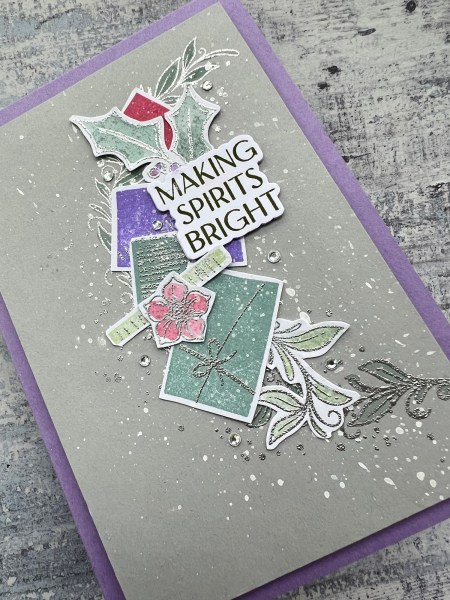
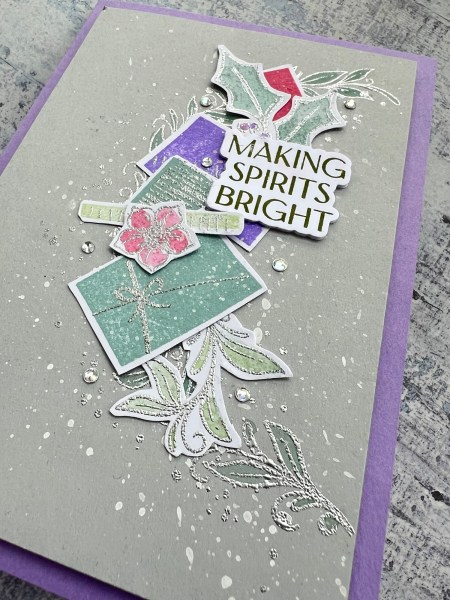
So the final Christmas card of this year … I decided to celebrate with a video and also used it as an opportunity to use up some leftover bits up from other projects!
Firstly some scrap grey cardstock )there was ink on the back of it from putting it on a stamp before I cleaned it in error.
I added some stamped foliage and then used the cut apart presents and foliage leftover from another project.
I added lots of splatters and then the sentiment.
Added the panel on adhesive foam to give it dimension over that bright purple cardstock blank.
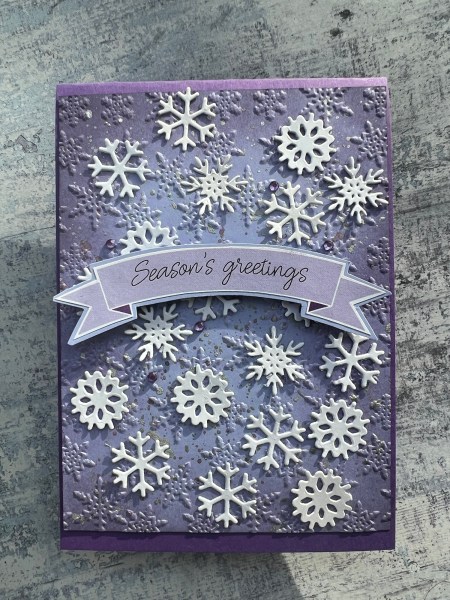
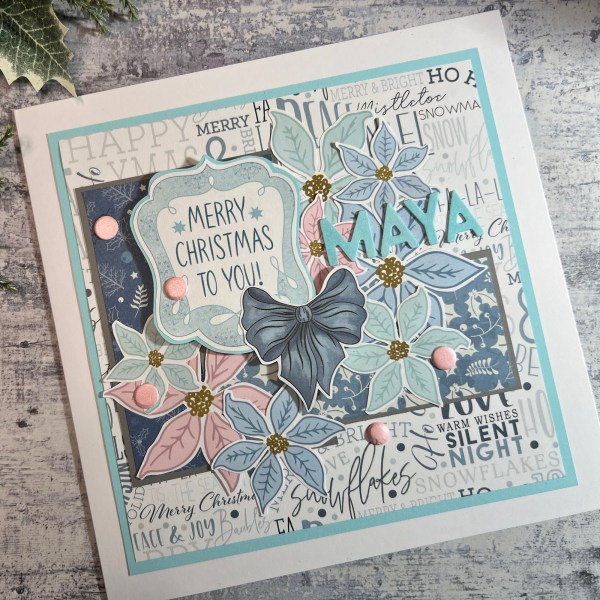
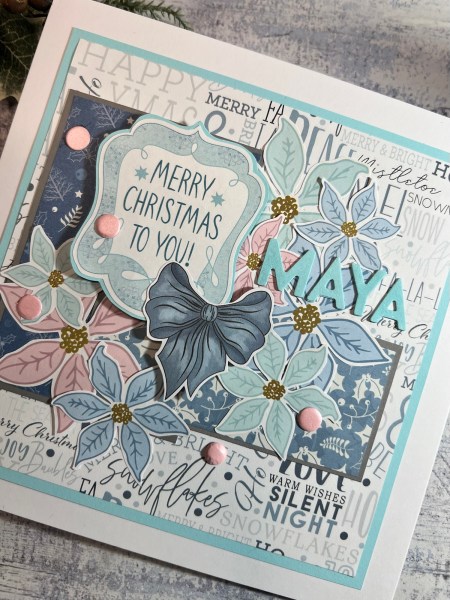
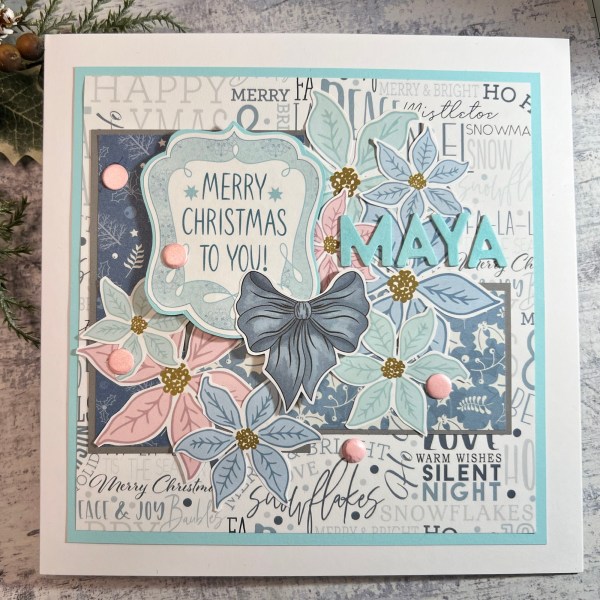
Today I have the card I made for my daughter this year and for some reason I went full on patterned paper which is quite unusual for me but the colours just drew me in!
So it took panels of the papers and mounted them on some pale grey card. Then I added the biggest piece to the panel of blue.
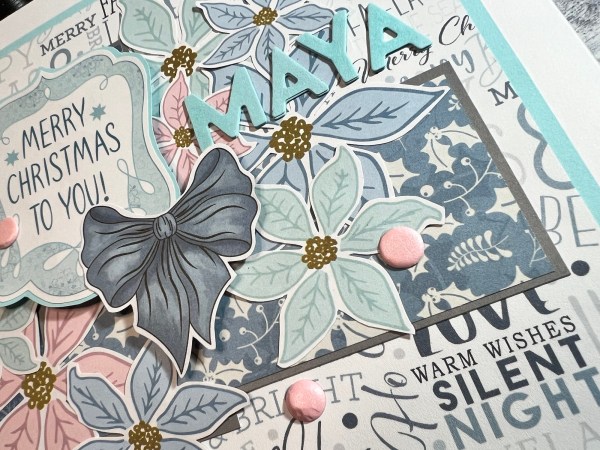
I then fussy cut all the floral elements out.
I layered them around the card and cut out the sentiment panel and layered it onto the blue and cut that out too. I added the foam adhesive under that to give some dimension.
I added the fussy cut bow for the top element too.
I decided to add the die cut letters for her name and then some pink card candi for embellishment!
I did add a little shimmer with the wink of Stella pen on the bow and the letters.
So that’s my card for my gorgeous girl for this Christmas!
Hope everyone has had a lovely few days – we are off for tea out tonight which I’m looking forward to!
Hopefully might get some crafting done in the next couple of days too!
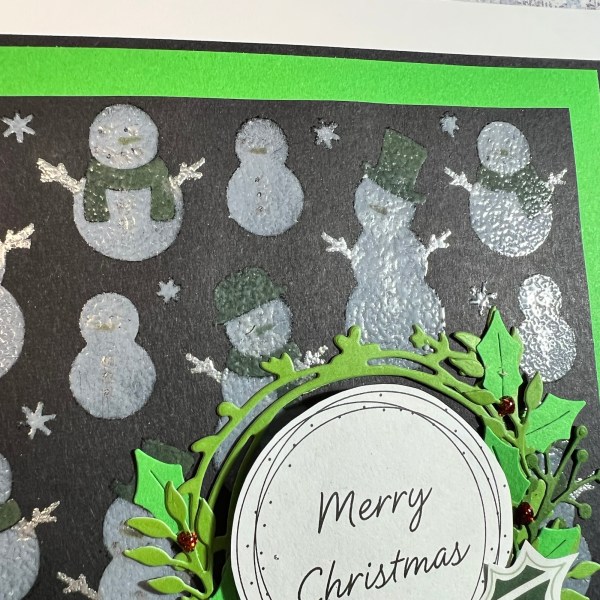
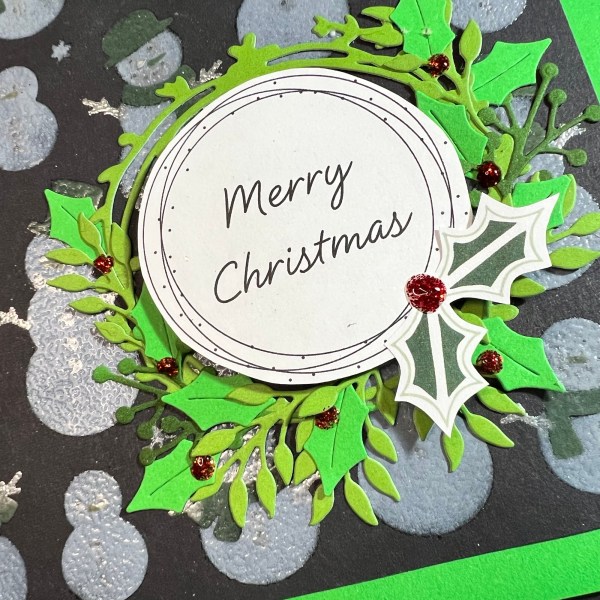
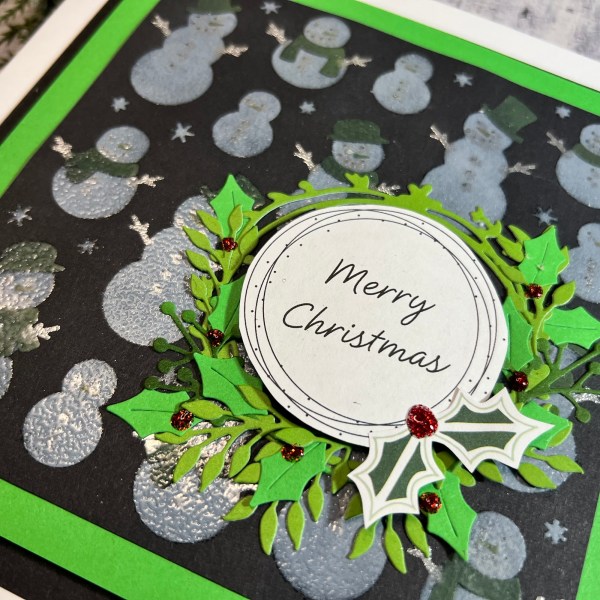
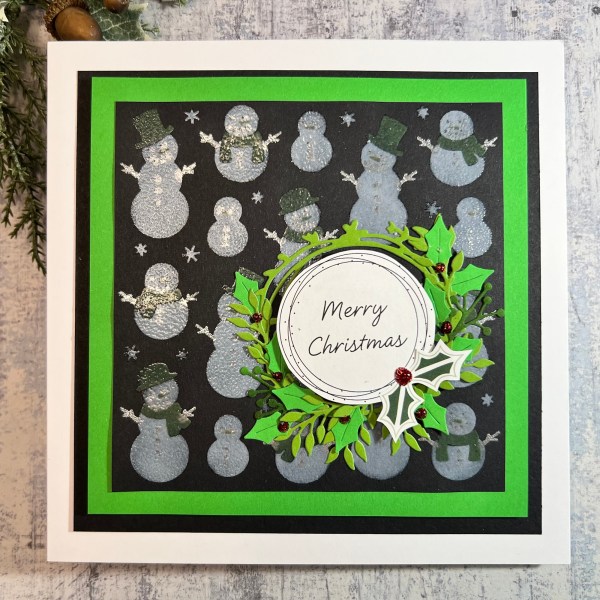
Merry Christmas dear blog readers … just popping on to wish you all the best and to share the last card I actually made for Christmas this year … the one for my lovely hubby! I went for cheery and fun with this card…
I started with the snowflake layering stencil I got from Pink Fresh Studio but hadn’t got around to using. I used white pigment ink for the base and then green distress oxide for the next bit – I added a little orange oxide too but didn’t show so well. I then added the clear embossing powder to the top which gave it a lovely finish. The third layer I added the versafine through and then did silver embossing.
I added the green base panel and then black panel for the bottom layer.
I then die cut some green cardstock with the wreath and then lots of festive fauna.
I then used the cut apart from the magazine kit for the sentiment panel.
I also added the little holly leaves.
I used the glitter glue for the berries!
I added panel to the card blank and called it done! Something a bit different but hopefully hubby liked it.
So hope you have a lovely Christmas and the rest of the festive period! I’m just getting ready to start the cooking and welcome the parents to our home after quite a chilled out morning of gift opening, coffee drinking and pain at chocolat eating!