DT: Kingston Crafts – Everyday cardstock

Todays blog post is another one using the fab Everyday Cardstock for a scrapbook page and I thought I would avoid patterned paper by embossing some pieces of the cardstock instead to bring in pattern and texture for my page!

I started by grabbing the three different green colours from the cardstock and I die cut three circles from each colour. I then did one of each colour with the dotty embossing folder and one of each colour with the alphabet folder. I then sanded them to reveal the white core which I think is a great feature of the cardstock.

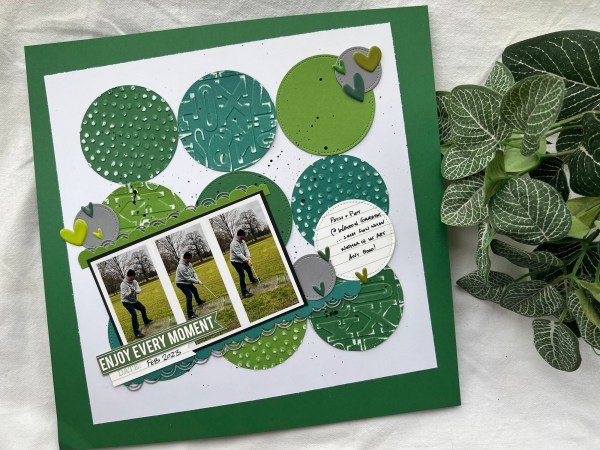
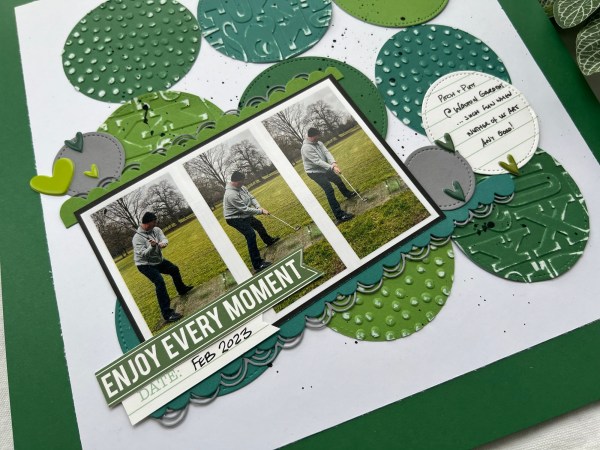
Next I cut a white panel for the circles to sit on and adhered them in place ready for the next layer which was the photo and some embellishments… but I also wanted to introduce some black so I splattered some black gesso across this panel.

I decided that the white panel could sit on the base of the dark green and that I would add in some bumpy borders I die cut from the greens too to sit behind the photo. At this point I wanted to introduce the grey to pick up on the grey in the photo. So I also die cut the bumpy borders from grey too to add those behind the picture. I then die cut three smaller circles from grey too to be the base of my clusters of embellishments.

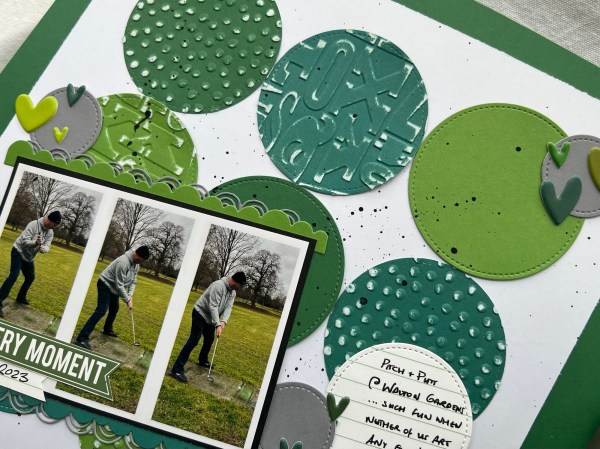
I mat the photo (that is actually three in action shots on one print) with the black and then those bumpy borders and adhered that in place ready- then tucked the other bits underneath.

I decided to use the Everyday Stories cards and cut them apart to create the title and the circle die cut lined panel for the journalling.

I also used the puffy stickers from the Everyday Stories kit for the other embellishments.

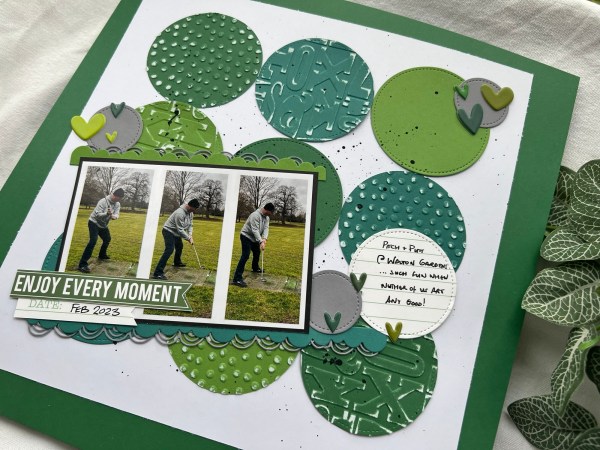
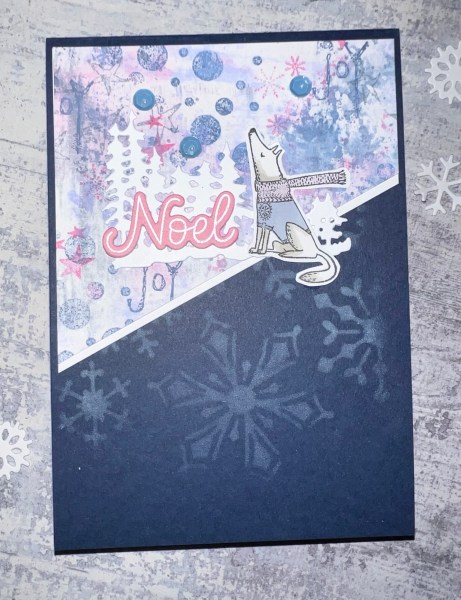
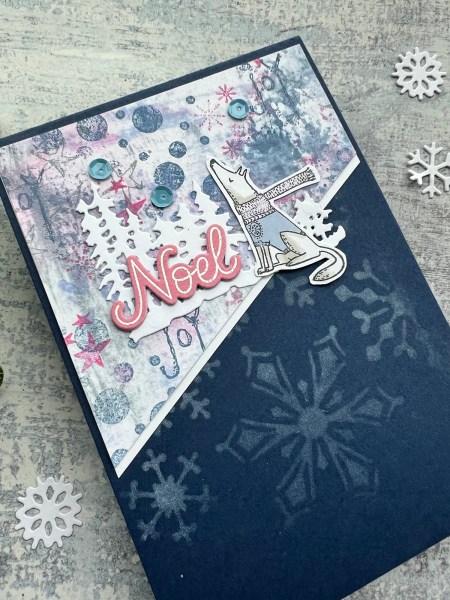
By placing the white panel on an angle it meant it didn’t matter as much if the elements weren’t 100% straight – it’s always a good way to get away from precision!

Loved how this came together and no patterned paper in sight! Just this versatile colourful cardstock!

Happy crafting!

Catherine

DT: ATSM – #482 & Martin’s 30 day Christmas card challenge 2024 – Colour Combo Red, Green & Gold

For today’s prompt Martin gave us a colour scheme which I’ve interpreted as red, green and gold! And I decided to combine it with my DT contribution for Addicted to Stamps and More where the challenge is Christmas!

I decided to do a lot of embossing for the background panel on the red using some magazine leaf stamps and then added some depth to the images with red ink.

I then went mad with lots of splatter with the gold paint.

I took the same paint and coated the oval frame I had die cut – I kept it quite rough with the painting to add texture.

I had already got some die cut holly leaves and the little floral image on the desk so added them to the frame and then added the waffle flower sentiment.

I added a mat of the Kraft before adding it to a green card blank.

Loved how this came together and really enjoyed doing a traditional coloured card with all the gold!

And I did a video of this one so please do check out my YouTube .

Happy crafting!

Catherine

DT: Kingston Crafts – spring wax seals

Another of the projects I made using Kingston Crafts products – I decided to make a smaller scrapbook page (size 8×8) and use some of the cute spring wax seals for embellishment.

I decided to go for a block layout adding some squares of the patterned paper across the page and then added the picture of hubby and the princess walking along the promenade in Cuitadella, Menorca on our way to see Castell de Sant Nicolau.

I added both the sun wax seals (I used a mix of gold and yellow wax beads to make them) and added some yellow glitter glue to the sun element on the seals.

The papers I used were from the summer collection – I used the side with the smaller print as I was just adding the small 1.5” squares. Before I stuck them down I added some distress inks in broken china applied using the packaging technique and plenty of water.

Then after trying to get the blocks straight and evenly spaced I decided to sew across the top part and the bottom part of each row using white thread just to add some interest.

The photo I mat with the blue sea themed paper and then raised it up on foam.

I tucked one wax seal to the left and then the other two placed at different heights on the right.

I decided to stamp the title using old Claritystamps letter stamps – I love the boxes stamps they come with to make it easy! I fussy cut that out and again raised it to be even with the photo.

Next I took the text paper I had used and cut the words out that made sense for the page and added them to the little squares that were not already text print.

I decided it needed a border rather than white to the edge so I trimmed it down a little and then added it to the yellow everyday cardstock – the same colour as the title!

I added my journalling and decided that it was a finished page!

Happy crafting!

Catherine

Martin’s 30 day Christmas card challenge 2024 – Forest Friends

As soon as I saw the prompt Forest Friends I knew it was time to revisit the magazine kit from years ago that I hadn’t used in such a long time!

I couldn’t decide which little forest friend to use so decided to stamp the sheet as a whole by taping it as a sheet to the platform and then inking it all.

Not all of them stamped perfectly but that helped decide which ones I used. I grabbed my promarkers and decided to do some pastel colouring!

Then fussy cut out all the coloured images – and then couldn’t decide what to do with them all!

I decided to make my own patterned paper using lots of distress oxides and a few stamps from random sets that were to hand.

It was half an A4 size piece of card so decided to cut it into two panels for cards and make two cards up for the challenge.

So the panels I cut as a full and then on an angle. I mounted it on white and then decided to choose a purple card base and a navy card base as these were to hand.

For the both I added a little stencilling with white pigment ink through the snowflake stencil to add interest to the other half of the card where the angled panel wasn’t sitting. Then I added the panels.

For the purple card I die cut a panel from a scrap of lilac for the focal images to sit on. Then added some die cut trees, the deer and the gift images.

For the navy one I added other die cut trees image and then the wolf as the focal elements.

For both cards I embossed Noel onto the pink scrap and die cut it. The sentiment is from a new Pretty Pink Posh set I bought a few weeks ago so I had some new stamp and coordinating die sentiments to choose from. This is my first use of them so will have to go and do some mass stamping and die cutting from scraps to get myself a ready made stash ready to go!

I then added some sequins to finish off on both cards.

I have still got a panel of the distress oxide paper left and lots of animals but popped them into a pouch to use another time as ran out of time to make them into something now!

Was great to use these stamps again after all this time!

Happy crafting!

Catherine

DT: Kingston Crafts – Spring slimline

Hi – this is one of the first projects I made for Kingston Crafts using the Spring collection slimline pack.

I also added one of the spring shrink plastic embellishments to finish off the card but the main feature is that beautiful paper.

I used the cover panel die from Creative expressions and die cut three different papers. I’ve the frame leftover for other projects (one of which I used the other day for a Christmas project!) but instead of using the frame element I decided to create and interesting background with loads of dimension straight onto a card blank.

I die cut the frame from white a few times and so I stacked the little elements a couple of times in most cases – although sometimes I varied it and only did one layer – and using one frame for the template I then glued them into place before removing the frame once they were all glued down.

As I used all three different patterns in the same colour way this created a great background – and I’ve also got pieces leftover to do this again with a different variation!

I added a strip of a different colour from the paper set and this became the base for my focal feature – the beautiful shrink plastic butterfly. I love the look of this when it is on the Matt side of the plastic – it gives it a classy feel I think!

I then took a strip of the plain shrink plastic and stamped a sentiment on it before heating it. This shrunk the sentiment (obviously!) and also meant it tied in with the butterfly. I did mount it into white so you could read the sentiment.

I then added sequins to finish off the card.

Happy crafting!

Catherine

DT: Kingston Crafts – Spring Slimline papers

I loved working with the Spring Slimline Papers from Kingston Crafts – they are heavy weight so more card stock than paper in my opinion and I think are more than perfect for diecutting and scrapbooking – so I made an 8×8 page documenting the fab flamingos we saw on our trip to the zoo!

I chose three of the slimline papers that were a muted coral colour that went well with the photo and die cut a range of circle shapes. I made sure I die cut from both sides of the paper as the pattern on the reverse is the same but reduced in size so you get some variation. I then added them in the clusters across the page to go underneath the small picture I had printed out (think it’s around 3.5×2.5 inches in size).

After adhering the circles down in place I pierced some lines across the circles and decided to hand sew with black thread.

I love the contrast this gave with the sweet papers.

Another great thing about this pack of slimline papers is that you get some sheets that are solid colours so used the coordinating coral to mat the picture. I also added a few punched hearts from the same coral colour.

I raised the picture on foam adhesive and then added it to the page. I trimmed the page down slightly and then added it to the black 8×8 panel as the base which helps to secure the sewing too.

I decided to die cut letters from black everyday cardstock as it was easier than trying to find enough letter stickers for the title.

I decided that as a group of flamingos was a flamboyance this made for a fun title – especially as this flamingo was being rather flamboyant!

I added my journalling and then some stickers from Tim Holtz and some more punched hearts from black to keep that contrast going.

Love how this ended up – and a lovely page to document our trip to the zoo.

Really enjoyed this size too and it was good to start populating my new 8×8 scrapbook album.

Happy crafting!

Catherine

Festive Friday – DT Kingston Crafts – Summer collection papers

I’ve gone a bit rogue and made a Christmas card from the Summer Collection papers from Kingston Crafts – because I could! They didn’t share the summer collection on the tv but I wanted to get this card shared now as part of my Festive Friday and prove again just because they are designed with one thing in mind – you can always change it up!

I took the star paper and then a piece of the solid colour paper and created the panel for the back. Then I cut individual stars out of the other side of the paper to include the larger stars and then cut scraps of glitter paper with a small star die.

I took another piece of the blue solid paper and die cut several of the large stars so I could stack the big star up and then added some ink with a blending tool. I then splattered the shimmer ink too.

I added the sentiment from the Peace and Joy set which has the two layers so I could do a sparkly layer too!

I made the card blank from the same solid blue which is a little weak for the base but I know with the insert it makes it a bit more sturdy.

I inked up the edge of the base so it had the contrast and added the top panel with some foam adhesive to raise the dimension.

Inside the card I added the panel of white cardstock and then a strip of the paper and some stars and another sentiment to keep the theme going.

Really love how this turned out – a really fun Christmas card and proof that I can always find something Christmassy to make!

Happy crafting!

Catherine

Martin’s 30 day Christmas card challenge 2024 – colour combo – lavender, midnight blue and silver

Today’s colour combo led me to this card …

Yes pretty clean and simple for me!

Blended some ink with a post it note mask for the sky element and then a soft blend with the mask removed for the ground. I used sweet sugarplum ink for the blending but also went over it with my purple blending brush with whatever ink was left on that to make it more lavender. I did the same for a mat layer to keep the colours similar.

Then I stamped the tree using Starry Sky and watercoloured it with the same ink – I didn’t use watercolour card for this so the card I used reacted strangely to the water to make the ink hold more in some places than others but on such a small image I don’t think it matters.

I then stamped and embossed the little snowflake clusters with silver embossing and splattered the whole panel with silver acrylic paint. Love the effect of this!

I decided to stamp the sentiment in the same starry sky ink to coordinate.

I then edged the top panel with Night of Navy ink before layering it onto the mat and then the card blank is Night of Navy cardstock.

I then added gems around the sky for even more shine and called it done!

I love these Tracey Hey Alpaca Pals stamps so much – really can’t believe it took me this long to buy any Christmas themed ones from her!

Happy crafting!

Catherine

Martin’s 30 day Christmas card challenge 2024 – first snowflake

Hi – this theme seems appropriate as we have actually had snow this week!

I went for a texture heavy card!

I inked some lilac cardstock and then ran it through the snowflake embossing folder. Then did lots of splatter – both the purple inks and silver acrylic paint.

Then I took lots of the snowflakes I had die cut from scraps a few weeks ago when I was have a mojo less just create session – and added those all over the panel – I adhered them only in the centre so they retained some dimension at the edges.

I fussy cut a printed sentiment banner from a magazine kit and added it to lilac cardstock to give it strength and then added it using foam adhesive to give more dimension.

I added the panel to a darker purple base and added a white panel inside. Then the finishing touch was to add some small purple gems scattered around the sentiment banner.

Love how this came out and glad the sun decided to shine when I took the photos! Helps show the shiny splatter and the texture!

Happy crafting!

Catherine

DT: Kingston Crafts – Spring slimline

Hello! Today I have another one of the projects I made for my design team contribution for Kingston Crafts. The main focus for this was the Spring Collection Slimline pack.

I decided to make a rainbow 🌈 themed card – because the paper is so flipping cute! I decided to die cut the letters of happy from the front panel and make a slimline card from the slimline paper!

I then cut the letters again from green cardstock to stack the letters so that they would sit with dimension when I added them in and then added the rainbow die cut letters onto the top.

I then cut the panel down using some slimline rectangle dies and then added a frame of green.

I decided to cut another panel of the slimline papers – this time the diagonal rainbow stripes and then cut another frame from one of the other papers that had a mix of the rainbow colours and stuck that down on the edge of the slimline card.

Next I worked on the rest of the sentiment. I knew that I wanted to use this old stamp I had but that would be too large for the front of this sized card but then I remembered the shrink plastic kit also has 2 plain sheets you can stamp onto and then of course you get a smaller sentiment when you shrink it!

I also chose to use three shrink plastic hearts from the spring kit and added those too!

Inside the card another frame (I am loving these slimline dies for easy layers) using that striped rainbow.

Loved this rainbow themed card and really should remember to die cut letters more for this raised pattern effect as it looks so cool!

Happy crafting!

Catherine