Back with another Kingston Crafts DT project using spring shrink plastic project where I made – a Christmas card!

Yes that’s right I used a spring themed kit to make a Christmas card!
I always like to find something different to make from a specific themed product and as we all know I love my Christmas themed projects!
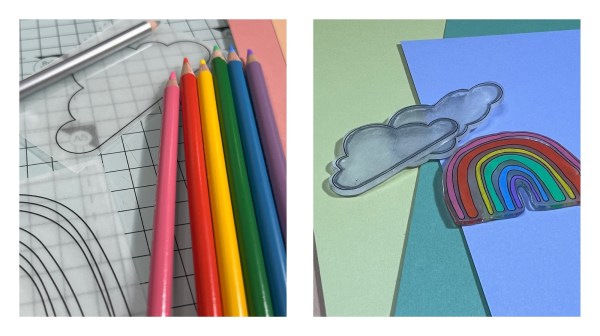
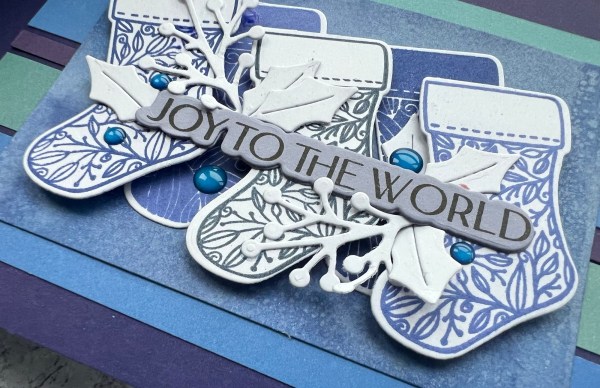
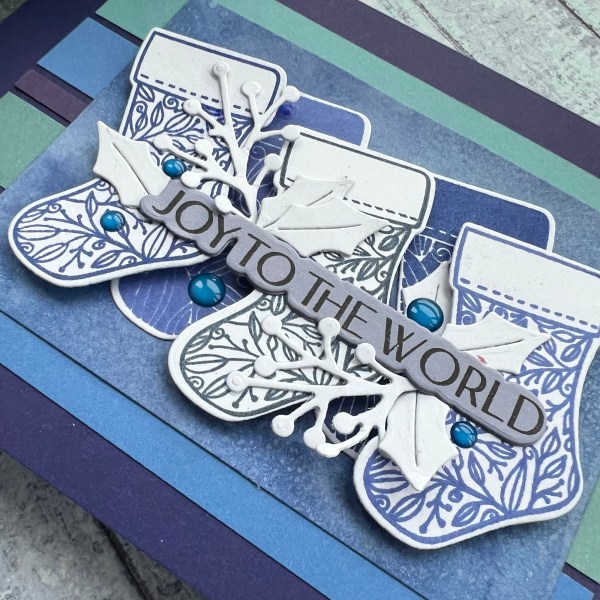
When I saw the word Joy in the shrink designs I knew I would be able to do something with that and then I realised with a bit of additional line art in the colouring the flower images might become poinsettia type flowers.
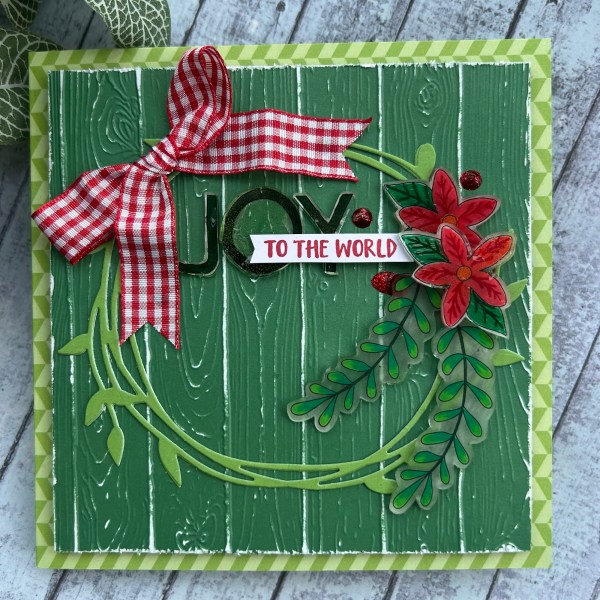
Plus those leaf sprigs could be used for all different seasons so they would work!
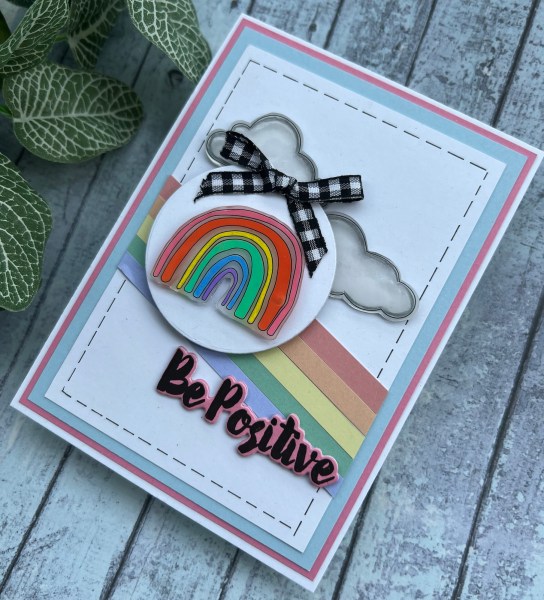
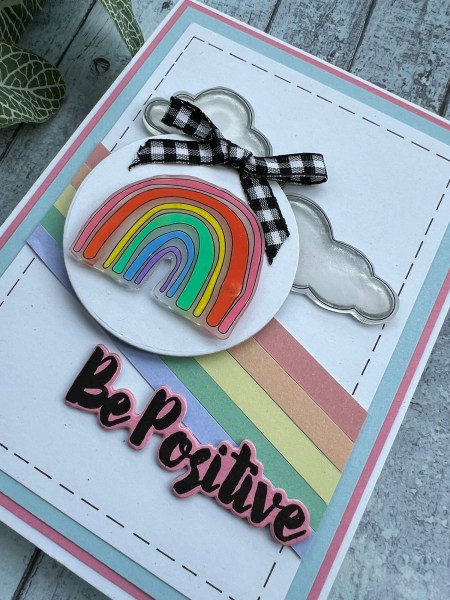
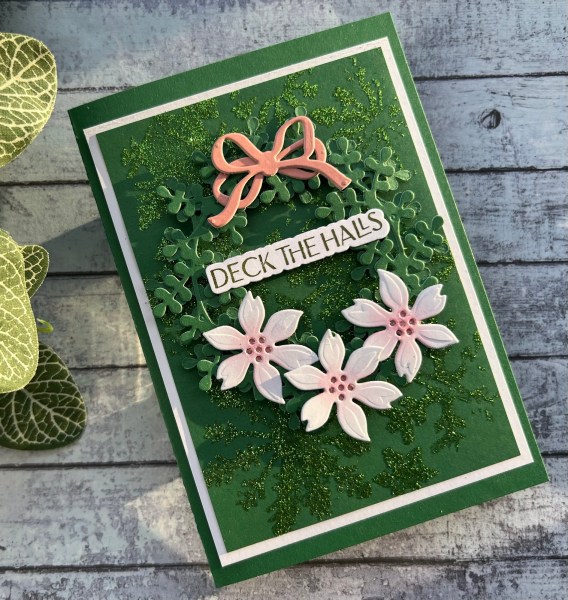
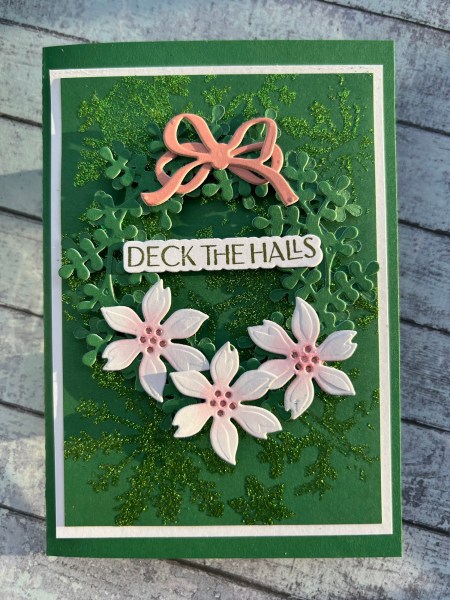
I chose to use a piece of the summer collection paper for the card base. It’s a very thick paper and I just added layers to make it even more sturdy as a base.
Then a piece of the everyday cardstock which I embossed. I sanded the embossing to bring out the white core – I love this technique for adding texture.
To base my floral element on I then die cut the wreath from Spellbinders which worked well for the size of the 6×6 card (yes another wreath card!).
I raised the second flower up onto foam to help it overlap the first flower and the leaves.
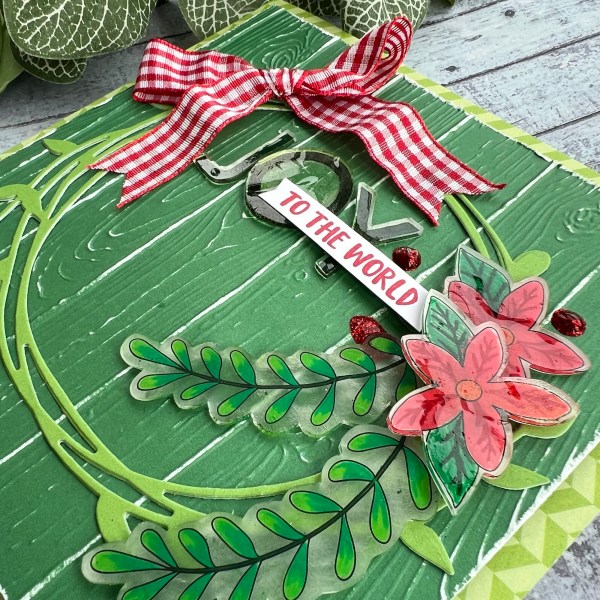
I added the gingham bow to finish the wreath and the stamped sentiment to overlap the words and join them to the floral arrangement.
Oh and I added some red glitter glue drops to add a little sparkle too!
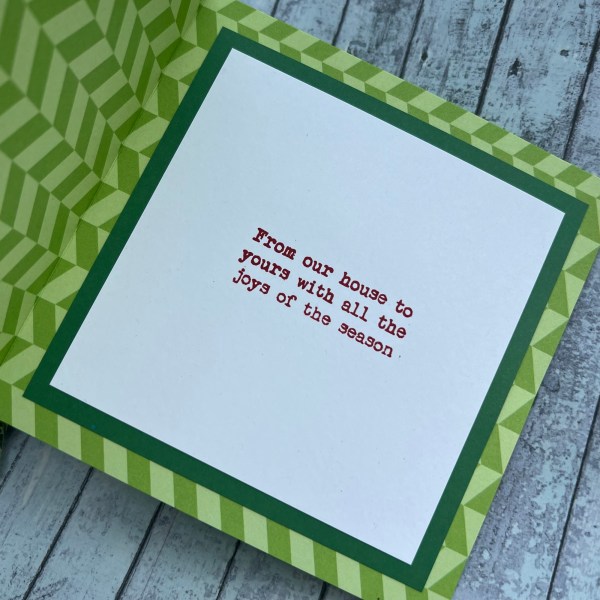
Inside the card I added panels of the cardstock and a stamped sentiment just to finish off!
So there you go spring and summer themed products used to do Christmas! My kind of fun!
Don’t forget that Martin will be demoing and showcasing on Hobbymaker.tv tomorrow the Kingston Crafts products and you might get to see some of my makes on display!
Happy crafting!
Catherine