DT: Addicted to Stamps and More – #483 – Birthday

Hello! Quick project for my design team contribution for ATSM where the challenge is birthday.

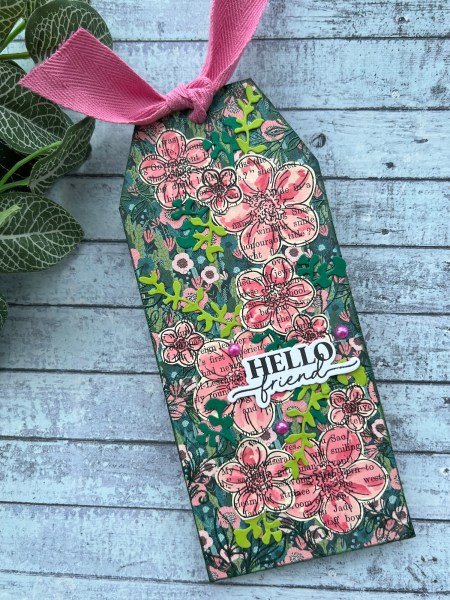
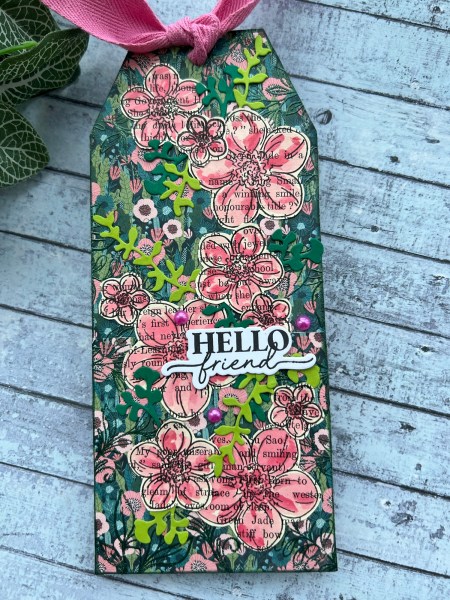
I chose to use some papers up that I’d had in a pouch on the desk for some time and then added in some other papers from another stash where I had already fussy cut the flowers from them!

I added the strips of the patterned paper to the black panel, then the squares of the bright yellow on the top.

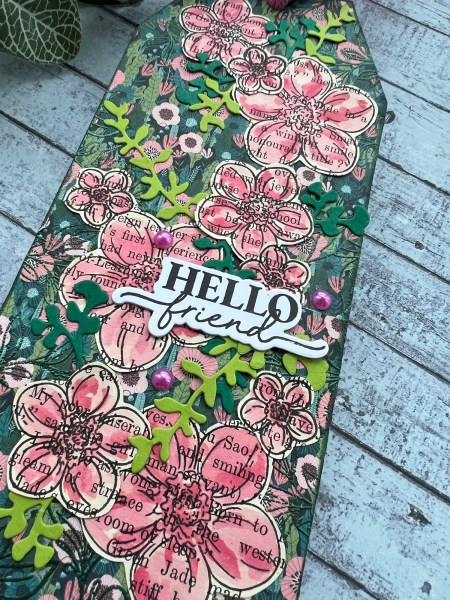
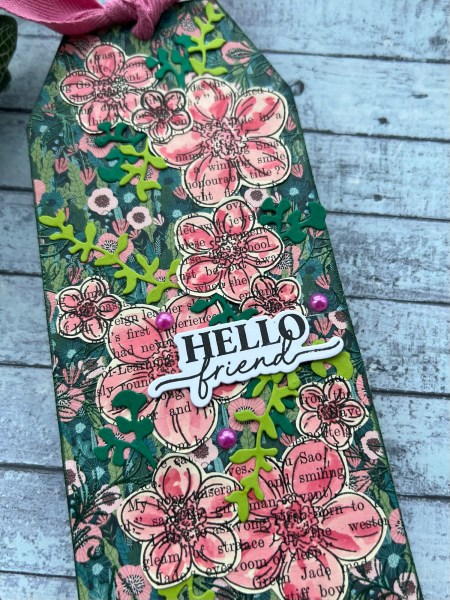
Then I added those fussy cut flowers in a trail down the card and left space for the sentiment to go in the middle of them!

I added some sequins for the finishing touch!

I added the panel to a green card base and inside added the panel of white with the yellow square and the two leftover flowers.

So this got some bits used up off the desk – and made a cute birthday card for the challenge!

Quite different with the bold patterns and the black but with the bright green and yellow and blue I think it works nicely!

Happy crafting!

Catherine

Festive Friday – inspired by OCC

So this card I made inspired by one of the Online Card Classes. I decided to sign up for the classes but couldn’t justify the price of shipping the kit to the UK so I’ve been doing some stash shopping to see what I could do inspired by the classes even if I couldn’t exactly play along. Then I had little time at the point the classes went live to play – but on day 5 I did manage to grab some time to make this card inspired by something Kristina Werner had made! So now I am sharing it as a Festive Friday card!

I used two stencils but I had to do some masking off of both the border and also the two sections to use one pattern in the bottom part and a separate pattern for the top.

I started with the bottom part where I inked through the small section I had left open with Versamark and then used a green embossing powder. After heat setting that I masked the other section and then inked through a snowflake stencil using a darker green ink. I kept this as a flat card so was doing this directly onto the card blank.

Then I grabbed the Lawn Fawn die cut sentiment and added that in red cardstock (well it’s a dark coral / light poppy red colour).

I then grabbed some snowflakes I die cut from white scraps and added those too.

I then added clear glitter clue to the snowflakes and the die cut sentiment as I felt it just needed something extra given it was (for me) a very simple card! I

I feel I could have added a little more white – maybe a white gel pen border around the stencilled panel? But I do really love the two stencil panel – it’s something a bit different!

Happy crafting!

Catherine

DT: Creative Knockouts – time to be merry

Hello dear blog readers! I’m back with another design team contribution – this time for Creative Knockouts where our challenge is full on festive with ‘time to be merry’.

The challenge is sponsored by Mirtillamente stamps and I am using About Christmas No. 1 but only one part of it as it comes with six images in total – but I made an error in printing (must not have used my brain cell!) and it printed larger than I expected so decided to use just the one image on this card!

The line art is so fun for the images and easy to colour – but even better it is good for adding in fun elements like this puffy enamel accents for the hat!

I added some really quick watercolour to the image to bring in the colour and some shading in the beard and then fussy cut out with a wide border around the image (I think with thick line art the wider border looks more proportionate).

Then added the satin white puffy enamel accents and set it aside to dry. This part is important – no prodding at it with your fingers – you will only make a mess!

I looked through the stash of the patterned paper left in my Christmas box and found this fab bold stripe. Perfect for a simple background that has lots of detail.

Then I die cut a scrap of the light green card twice with the label die. I inked up the edges lightly with green ink and then stacked and die cut it with the texture plate die from Waffleflower. This gave it a fun background for the Santa to sit on.

I added a mat of the black and then added it to the 5×7 card. Then added the Santa image and the Tim Holtz sticker sentiments to bring the black into the front too. Again the bold line art meant I wanted the black to go throughout the card front in a few ways.

Decided with the texture from the hat no further embellishment required.

Now to decide what to do with the other images in the digital stamp and how to use them! But first off to see what everyone else did with their cards on the design team!

Happy crafting!

Catherine

UK Stampers Forum – decorated tag swap

Hi

Decided to join in with the decorated tag swap over at UK stampers forum again. Although this is a December swap because we don’t actually swap until Jan I went floral rather than festive with my design.

I started with a tag cut from waste packaging and covered it with patterned paper that was sitting on the desk waiting for use – turns out its use was this tag!

When I was covered I inked the edge with Tranquil Tide ink as I felt that went with the colour of the paper. Then I stamped some leaf stamps all around the edge in versamark and embossed with the dark green powder.

I know it ended up pretty much covered up but up close you can see the texture if nothing else.

Then I took some bookprint and stamped lots of the flowers which were in a magazine kit. I then coloured them using my paint brush, water and ink. I chose a few colours of pink to make them look more interesting and try and keep similar to the colour of the background paper.

I fussy cut them out (they were easy shapes to cut) and then glued them down. I added the die cut leaves which were pre diecut from scraps and with the two colours of green I used this kept them similar but also fun. I also liked them going both under and over the flowers.

I finished off with the sentiment, three pearls and the ribbon.

One decorated tag ready to swap!

Happy crafting!

Catherine

Patterned paper

It’s the first of the month and so it is a patterned paper day today! I took some panels of the magazine kit paper I had already cut into and made two cards from the bits and bobs and some added die cut trees.

I went first of all for a tall slimline card and for this one I just added a ripped element which was a bit different from all the cut blocks.

I remembered to ink the edge of the panel I added the die cut trees to as I wanted to make sure the layer stood out – I used a light grey so it wasn’t too extreme though!

For the second one I did pretty much the same sort of thing!

I decided once I had put them together that I also wanted to make the trees sparkly so out came the clear glitter glue.

Love this pair of cards and it was nice to use up most of those papers that were already cut into … there is still some yellow left so maybe I need to get the last of that panel used soon!

In past years I have done a fair amount of Christmas card making in December but I think having done a fair amount of the 30 day challenge last month I don’t think I need to this December – I have more than enough cards already ready to send. In fact I may end up with a fair surplus this year which makes me wonder about Christmas crafting for next year – but for now the festive Fridays will continue through December but don’t expect a mad amount of Christmas projects from me this month!

Also I think there may be less blogging this month as it was a blog heavy few months and I’ve had to have a crafting pause as I’ve been ill with a horrible cold/flu virus the past 10 days and not had enough energy to get out of bed, let alone craft much! I did do a bit of colouring and fussy cutting on one day, and another day I sorted out cardstock – but otherwise nothing made! So expect a few gaps this month in my blogging.

Happy crafting!

Catherine

Festive Friday – DT: Kingston Crafts – glitter glue

Another glitter glue project to share today, this time for my Festive Friday challenge and I went for some more gift tags because I know that’s probably something I am more in need of now than the actual cards.

I decided to go for some simple tags this time although because of all the glitter glue they did take some time to make to be precise with the glitter glue and then to let them dry somewhere safely out of the way! I do have a tendency to prod at them whilst drying which invariably means I mess them up – so I’m getting in the habit of moving them out of sight and reach now whilst drying!

So I die cut letters from the black everyday cardstock and then coated them in glitter glue – I also created a panel of the glitter glue and left that to dry too…

The letters dried first so I started assembling tags but a couple of letters I thought would benefit from an extra coast so I ended up going over all of them – so more drying time required. I also die cut lots of snowflakes from the white cardstock (I used the red solid and patterned paper from the summer collection papers).

Once all the letters were dry I adhered some snowflakes together and added them to the tags along with ribbon scraps for the top of the tags (this is a great project for using up ribbon scraps!). Then I decided to add glitter (clear) to the snowflakes too so they needed setting aside to dry again!

I didn’t end up using the solid piece that I glittered yet – but I know I will – just need to find the time to finish it off!

But love those die cut letters that are so so sparkly. Think that starting with the black base makes them that bit different too as you get to see a slight outline to each – think they would look good on white too but I really like them on the black.

Happy crafting!

Catherine

Martin’s 30 day Christmas card challenge 2024 – Christmas Post

I was so so tempted to go and buy one if those fabulous sets of postage dies and stencils I’ve been seeing but couldn’t justify it … and then remembered I had this stamp from Carabelle stamps which was a larger postage outline.

I stamped it and then masked off the edge to ink blend a bit of blue then stamped the holly. I removed the masking and then coloured in the holly and berries. Then I stamped the postage cancellation image.

Then I moved onto the card base.

I stencilled the snowflakes and then used a piece of cardstock I embossed to place at an angle. I inked the edge of that a little just to define the edge a bit.

I decided to add the Joy die cut as the sentiment and then some sequins to finish off!

I definitely think I need to use that postage stamp more often – I’d love to make this with different colour schemes as I don’t think this one worked so well.

Happy crafting!

Catherine

DT: Kingston Crafts – Everyday cardstock

Todays blog post is another one using the fab Everyday Cardstock for a scrapbook page and I thought I would avoid patterned paper by embossing some pieces of the cardstock instead to bring in pattern and texture for my page!

I started by grabbing the three different green colours from the cardstock and I die cut three circles from each colour. I then did one of each colour with the dotty embossing folder and one of each colour with the alphabet folder. I then sanded them to reveal the white core which I think is a great feature of the cardstock.

Next I cut a white panel for the circles to sit on and adhered them in place ready for the next layer which was the photo and some embellishments… but I also wanted to introduce some black so I splattered some black gesso across this panel.

I decided that the white panel could sit on the base of the dark green and that I would add in some bumpy borders I die cut from the greens too to sit behind the photo. At this point I wanted to introduce the grey to pick up on the grey in the photo. So I also die cut the bumpy borders from grey too to add those behind the picture. I then die cut three smaller circles from grey too to be the base of my clusters of embellishments.

I mat the photo (that is actually three in action shots on one print) with the black and then those bumpy borders and adhered that in place ready- then tucked the other bits underneath.

I decided to use the Everyday Stories cards and cut them apart to create the title and the circle die cut lined panel for the journalling.

I also used the puffy stickers from the Everyday Stories kit for the other embellishments.

By placing the white panel on an angle it meant it didn’t matter as much if the elements weren’t 100% straight – it’s always a good way to get away from precision!

Loved how this came together and no patterned paper in sight! Just this versatile colourful cardstock!

Happy crafting!

Catherine

DT: ATSM – #482 & Martin’s 30 day Christmas card challenge 2024 – Colour Combo Red, Green & Gold

For today’s prompt Martin gave us a colour scheme which I’ve interpreted as red, green and gold! And I decided to combine it with my DT contribution for Addicted to Stamps and More where the challenge is Christmas!

I decided to do a lot of embossing for the background panel on the red using some magazine leaf stamps and then added some depth to the images with red ink.

I then went mad with lots of splatter with the gold paint.

I took the same paint and coated the oval frame I had die cut – I kept it quite rough with the painting to add texture.

I had already got some die cut holly leaves and the little floral image on the desk so added them to the frame and then added the waffle flower sentiment.

I added a mat of the Kraft before adding it to a green card blank.

Loved how this came together and really enjoyed doing a traditional coloured card with all the gold!

And I did a video of this one so please do check out my YouTube .

Happy crafting!

Catherine

DT: Kingston Crafts – spring wax seals

Another of the projects I made using Kingston Crafts products – I decided to make a smaller scrapbook page (size 8×8) and use some of the cute spring wax seals for embellishment.

I decided to go for a block layout adding some squares of the patterned paper across the page and then added the picture of hubby and the princess walking along the promenade in Cuitadella, Menorca on our way to see Castell de Sant Nicolau.

I added both the sun wax seals (I used a mix of gold and yellow wax beads to make them) and added some yellow glitter glue to the sun element on the seals.

The papers I used were from the summer collection – I used the side with the smaller print as I was just adding the small 1.5” squares. Before I stuck them down I added some distress inks in broken china applied using the packaging technique and plenty of water.

Then after trying to get the blocks straight and evenly spaced I decided to sew across the top part and the bottom part of each row using white thread just to add some interest.

The photo I mat with the blue sea themed paper and then raised it up on foam.

I tucked one wax seal to the left and then the other two placed at different heights on the right.

I decided to stamp the title using old Claritystamps letter stamps – I love the boxes stamps they come with to make it easy! I fussy cut that out and again raised it to be even with the photo.

Next I took the text paper I had used and cut the words out that made sense for the page and added them to the little squares that were not already text print.

I decided it needed a border rather than white to the edge so I trimmed it down a little and then added it to the yellow everyday cardstock – the same colour as the title!

I added my journalling and decided that it was a finished page!

Happy crafting!

Catherine