I am an on-the-side and increasingly up front papercrafter who loves nothing more than getting inky and creating pretty things with paper and stamps!
I am also a wife to lovely hubby and mummy to a wonderful 14yr old princess.
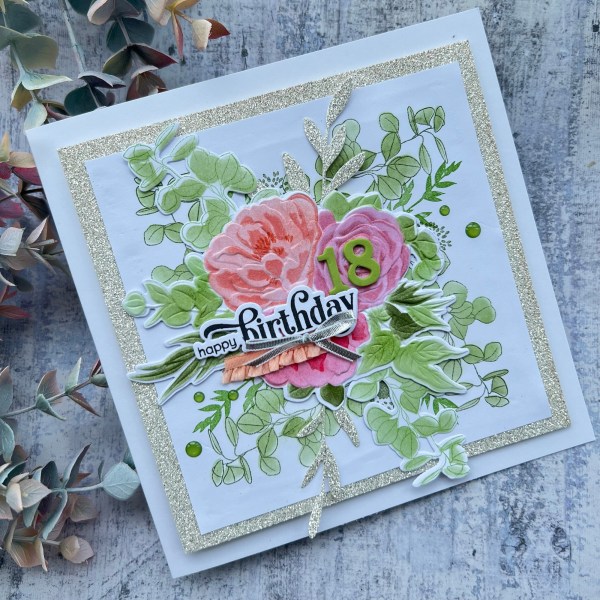
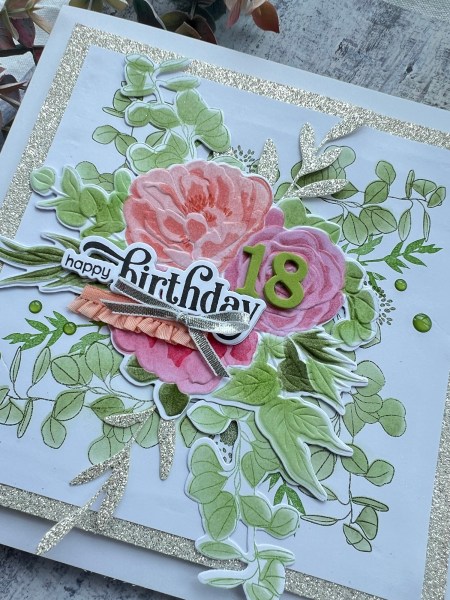
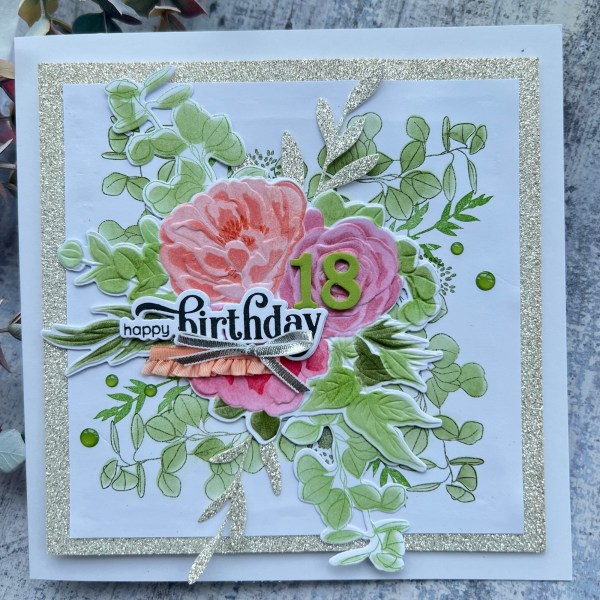
It was the last of the 18th birthday celebrations yesterday and so here is the card I made for my daughter to give to her friend – I know this is in the middle of my Christmas in July project but don’t worry there will be a festive themed project coming up shortly!
Amelia and Maya both love green so there is a lot of green on this but of course I also added the pop of pink and peach on the flowers.
I used the Altenew Eclectic bouquet set for this … the stencil to colour, the die to cut out and the embossing folder for the main bouquet element.
I also stamped and stencilled and die cut two of the leaf elements.
Behind on the panel I created a ‘wreath’ using the wreath builder and the stamps in the set for the greenery.
I then die cut a piece of the silver glimmer paper using the zero waste leaf die and used two sprigs for behind the main bouquet.
I added the background to a piece of the glimmer paper (which I gutted to conserve the paper for other projects). And then I raised it on foam so it had some dimension.
I chose to use some thicker stickers for the number 18 and then a sentiment I had die cut already. I added the scrap of the peach gathered ribbon and the silver ribbon for a bow for embellishing.
I also added green enamel gems for the finishing touches.
So happy birthday to Amelia and hope she enjoyed her celebration!
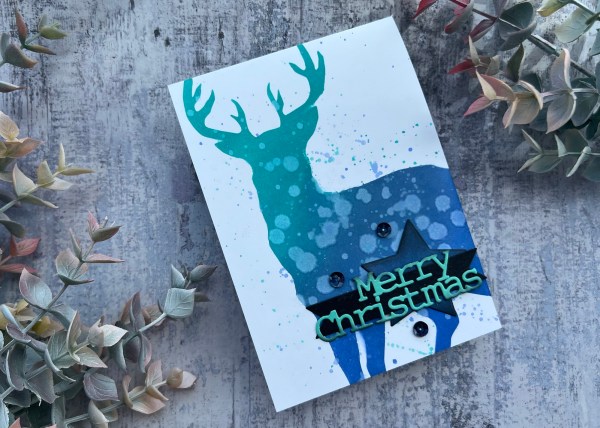
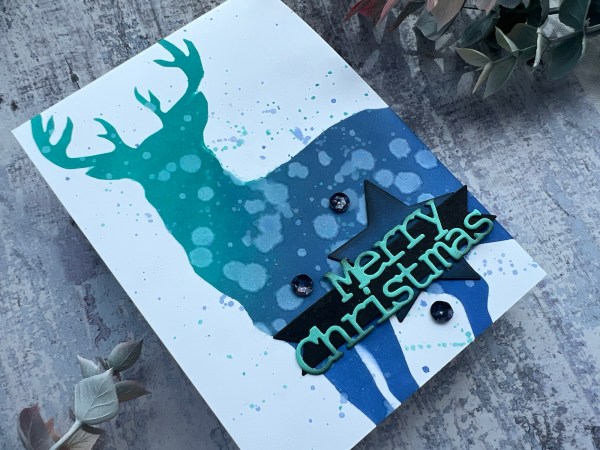
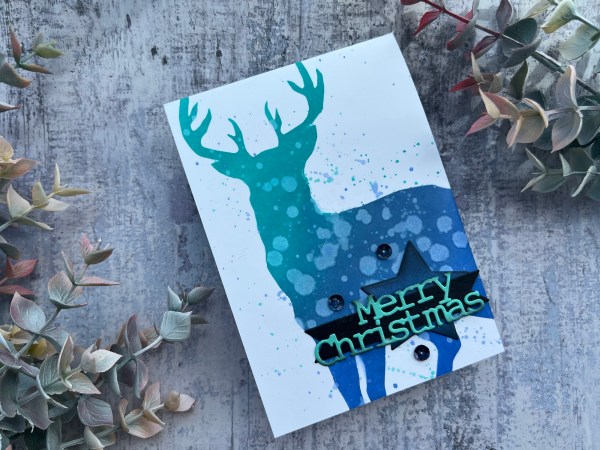
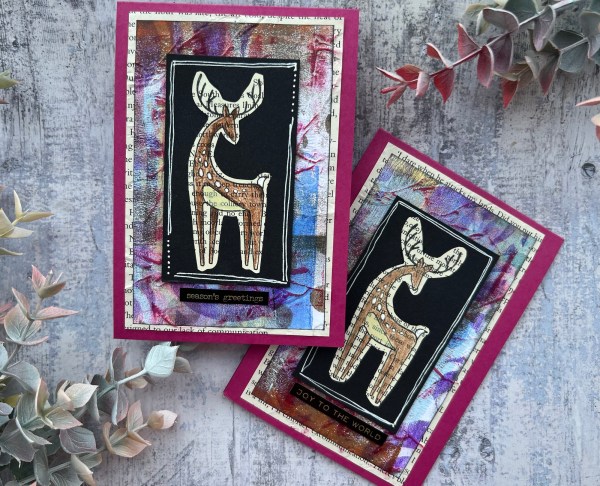
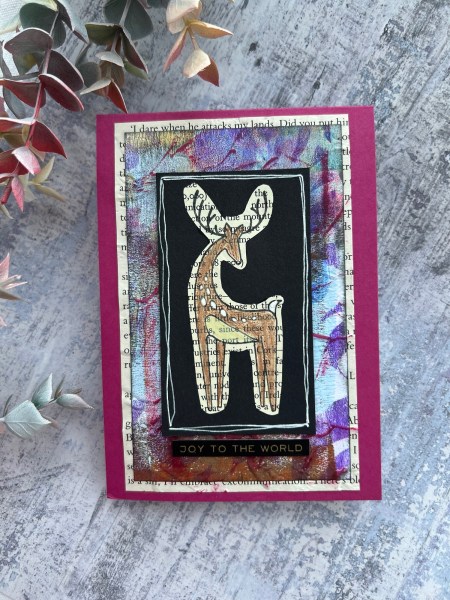
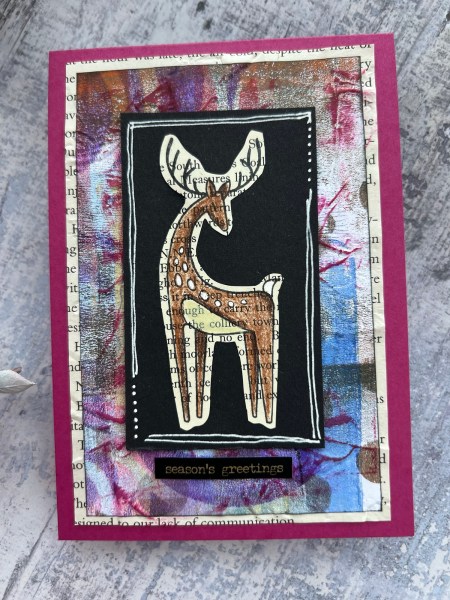
Todays Christmas in July project went mixed media (maybe it is all the #dyicad2024 rubbing off on my festive makes!?!)
I chose gelli print backgrounds, book print and the lovely stamps from Woodware of the deer.
I added the backgrounds to the painted texture embossing folder and then added ink to highlight the texture. This also tied it into the card blank that I chose to make from the Berry Burst card stock.
I used the sticker sentiments from Tim Holtz to finish off.
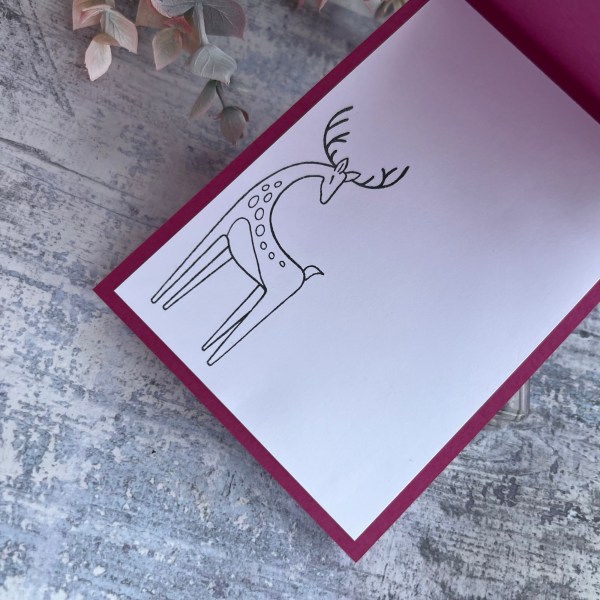
Inside I stamped the deer onto white and added that. The white panel makes it easier to write on than the bold cardstock when the time comes to add those!
As per usual videoed the process. I’ve been getting more followers and views than usual with these videos which is interesting – apparently not just me who does #christmasinjuly
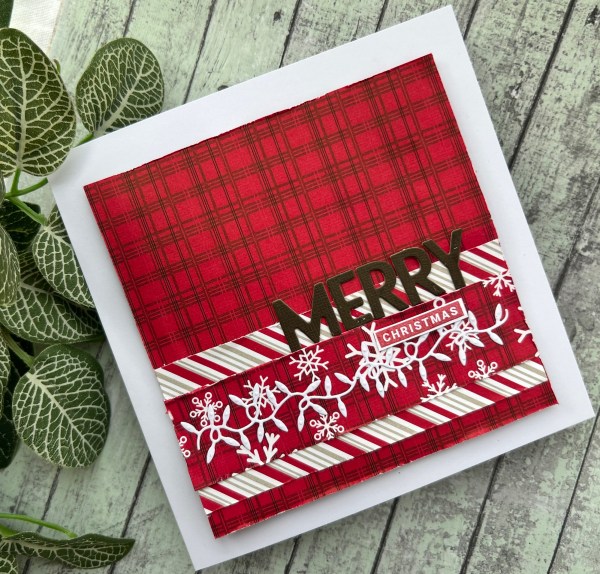
Today’s Christmas project was these two cards with a stamped background using my oldie but goodie set Christmas Season. I really love these stamps. I stuck to a lot of green for these cards and then threw some Blackberry Bliss in at the very end!
I also videoed the process so you can check that out over on YouTube.
I did finish off each card differently but it’s obvious that they were done at the same time with that glorious background.
I love making backgrounds like this – it is such fun to just play and get colour down and layer the images and the text stamps. And of course lots of gold splatter too!
For this one I chose a premade diecut word for the main focal point and then layered the die cut leaves under the label I made. I also added extra inking in the centre of the panel to create some definition for the die cut leaves to sit on.
This one I die cut two labels to provide a layer for the leaves to sit between. I also embossed the sentiment to tie in the gold in the background splatter.
Inside each card I created a panel with the stamping too.
Those Blackberry Bliss berries just pop on the cards – love them!
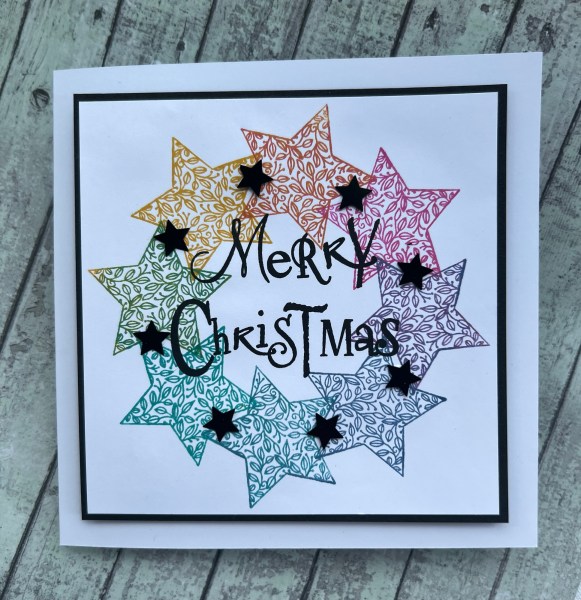
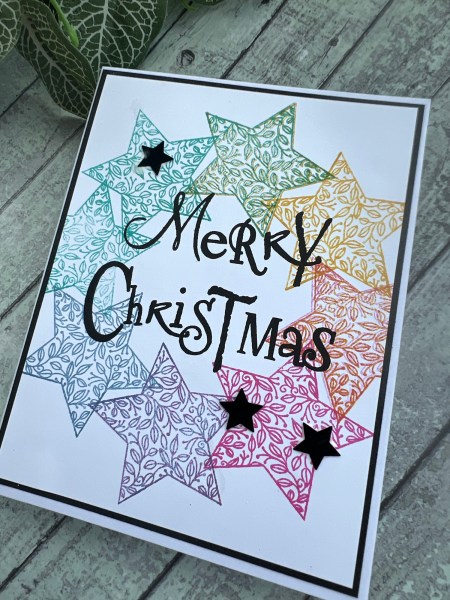
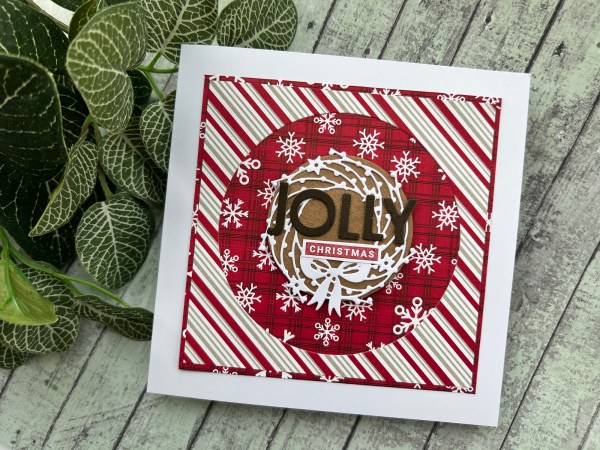
I decided to go back to the wreath builder template/guide and have another try with the Tidings and Trimmings star with the idea that came to me whilst editing the video from day 7!
And I am super happy with what I created. I went rainbow with the stars using four colours of distress inks.
I actually had two goes at it…
I added black flat star sequins on the cards as embellishment and used the fabulous Claritystamps sentiment to finish them both off!
I mounted both onto black and made one as a larger 6×6 card (I added foam for this one to raise the topper) and the other a smaller than A6 card blank.
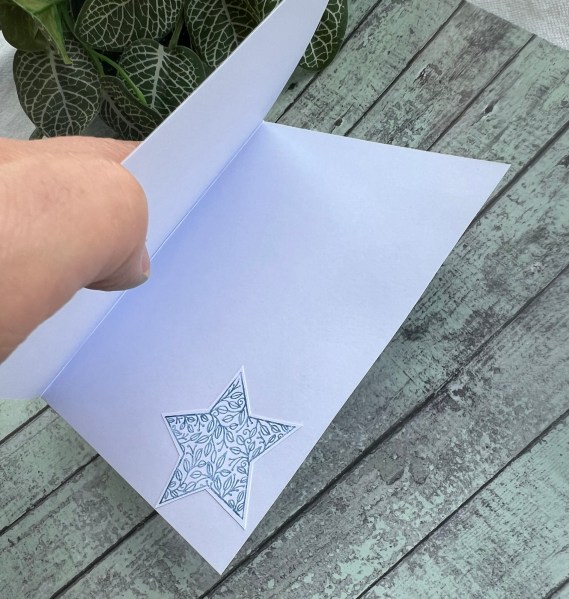
Added a single star that I stamped and fussy cut in the inside.
As per the other ones so far this month I videoed the process!
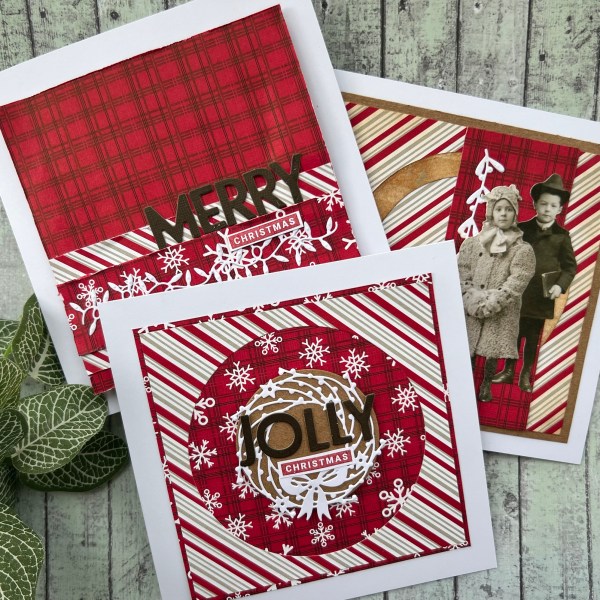
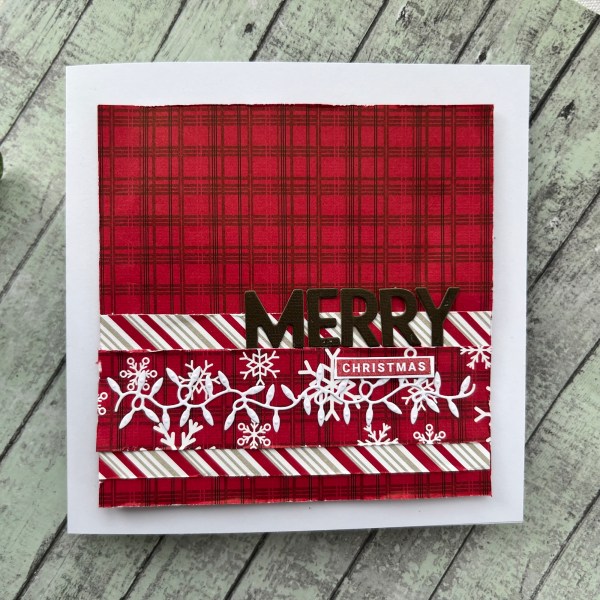
Today’s Christmas in July is the other half of the papers I played with a week ago and again I made three cards.
I again grabbed some older dies that I rarely use to add those on the cards but pretty much just made stuff up as I went!
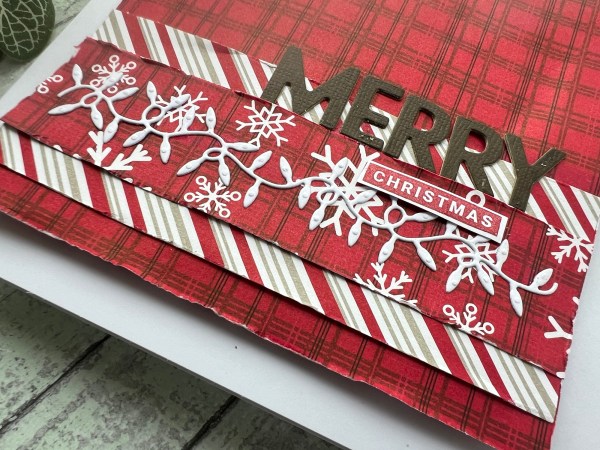
My first card I wish I had changed which paper went on the top to the less patterned plaid as then the die cut would have stood out more.
I kept all the sentiments similar using the Playful alphabets and the Peace & Joy to finish off the sentiment!
I gave this one lots of distressed edges and raised the panel up on foam to give dimension.
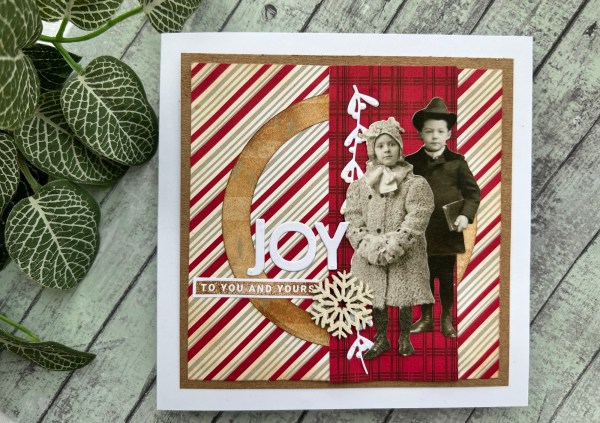
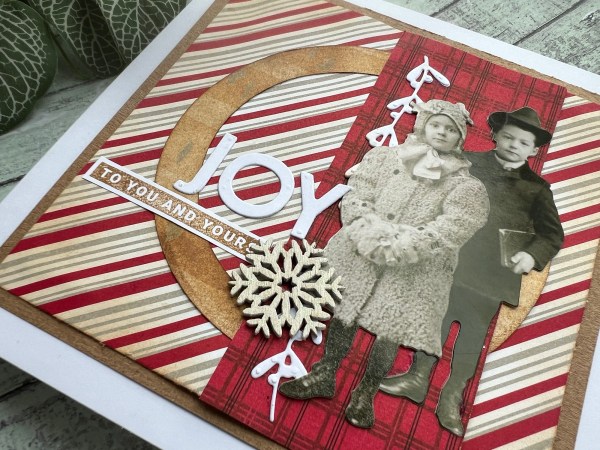
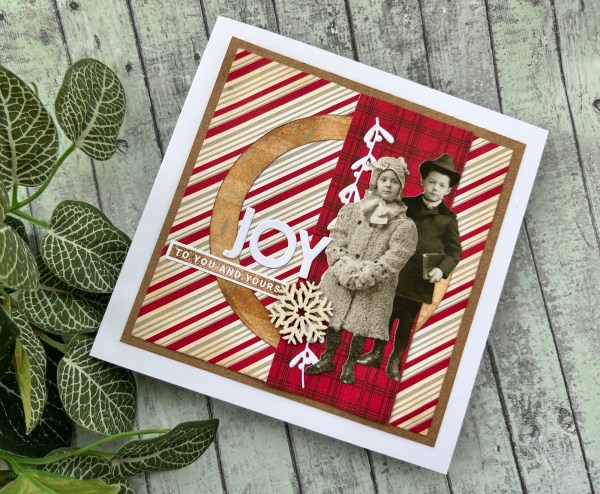
Next up is the vintage one where I added the Tim Holtz Paper Dolls.
I added vintage photo distress ink to the papers and also added the wooden snowflake too.
These paper dolls are so cute but rarely do I think to use them so it was good to get a couple used up!
I then returned to the more modern style for the final one.
I must admit I like that wreath die a lot so may have to keep that on the desk for other makes so I don’t forget about it!
It was also good to use the letters to spell out my own sentiments. Need to remember to do that more often too!
So that is six cards made in total with the two pieces of patterned paper and of course I videoed the cards I made in this session too (actually I made these over two sessions as I ran out of time!).
I’m already 10 days into Christmas in July – how are you doing with your festive projects? Also don’t forget to check out my YouTube channel to watch them being made!
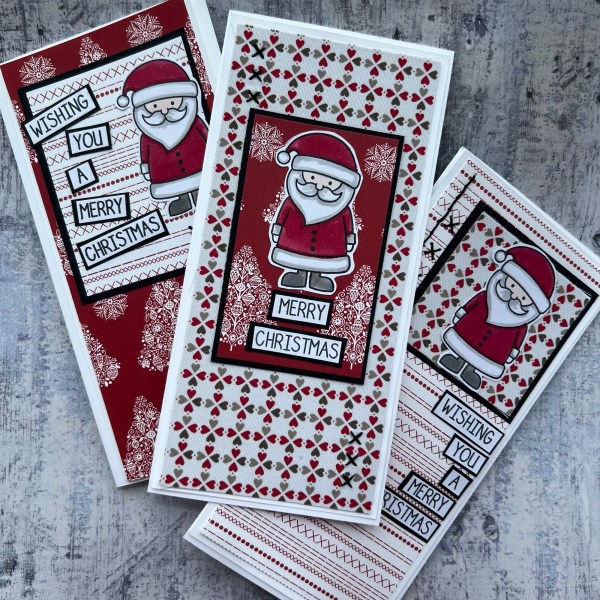
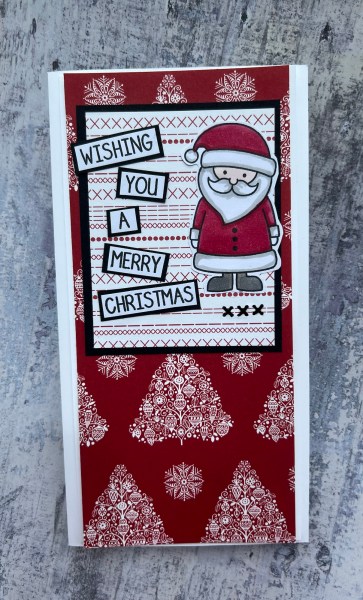
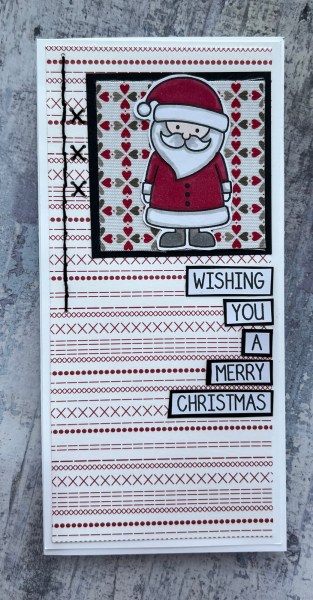
Was so pleased when I realised that the theme for this Addicted to stamps and more was Christmas so I could keep my design team contribution in with the Christmas in July and didn’t have to make two projects today!
I did however end up making three cards in total for this as I had three pieces of paper to use!
I teamed the very old papers with the Avery Elle gorgeous Santa stamp and some sewing for the embellishment.
I used the stampin blends for colouring the image and otherwise kept it all simple.
So a little bit different but a fun set of three slimline cards.
As usual I’ve videoed the whole thing so check out my YouTube channel.
Made the decision I wanted to play with the Mama Elephant snowmen stamp and decided to keep it simple for these two cards.
Stamped the image once and then created the sky with my distress inks, splattered with gessso, coloured the image before chopping it into the two panels.
Mounted both panels onto black before putting on the card blanks. Then a simple sticker sentiment and sequins to finish!
Can’t get easier than that! if you want to watch me do this then please do check out my YouTube video.
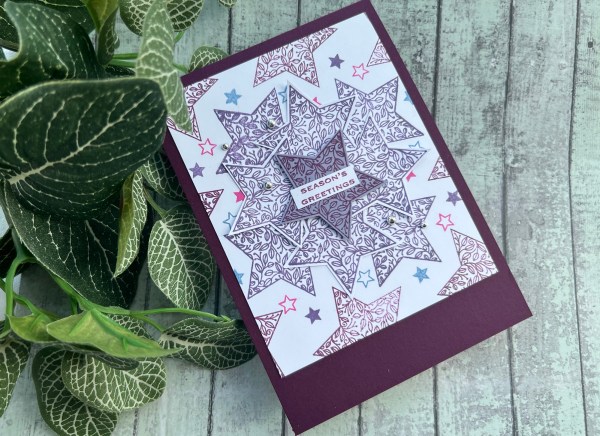
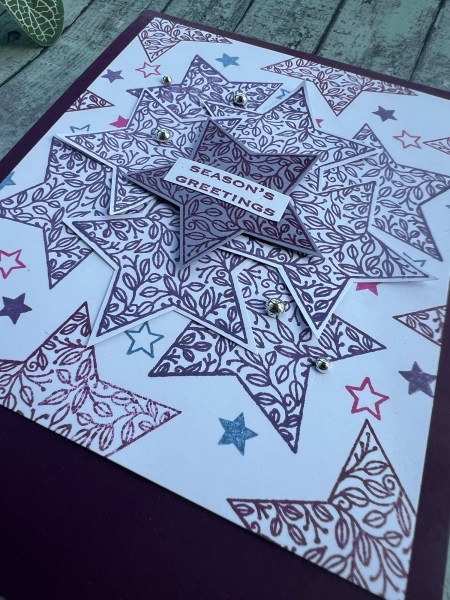
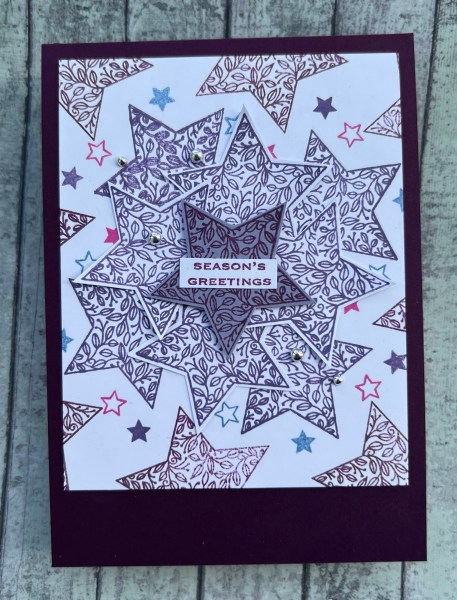
Gosh I made a lot of errors when making this card but it turned out ok in the end.
I used the wreath builder template again but I think because I was tired when making it I wasn’t being particularly careful so a few mistakes were made. Apart from one though you can’t tell on the final card.
To see all the mistakes though please check out the YouTube video.
Love the colours I used and the final card – but will want another go with this stamp set and the wreath builder to see if I can get it to work better and turn into an actual wreath!
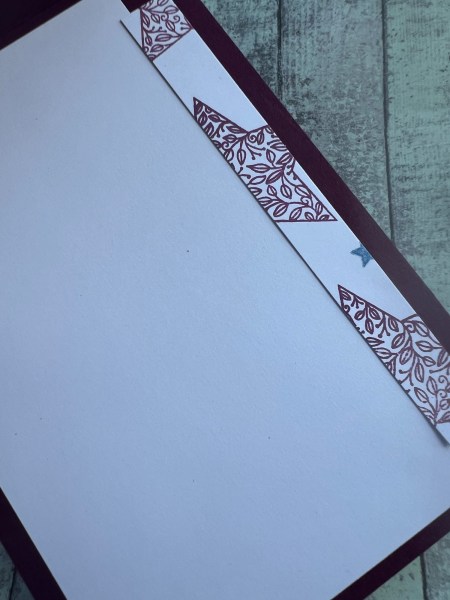
I kept to the same stamp set for the full card and also used a trimming off the side to pop inside the card to finish off.
And the mistake … well the one that stayed visible is that I glued the panel on upside down so the star is pointing the wrong way!
Quick catch up on my #dyicad2024 and this is days 34-36.
No real theme for these although keeping up with the raffle tickets and old stamps. Final one is quite bulky too with those random letters that got leftover when I did an alpha sort a few days ago.