I really wanted to use this quirky stripe stencil so that was my starting point on this card and I started it without any consideration of how I would finish it up … 45 mins later I finished my card!
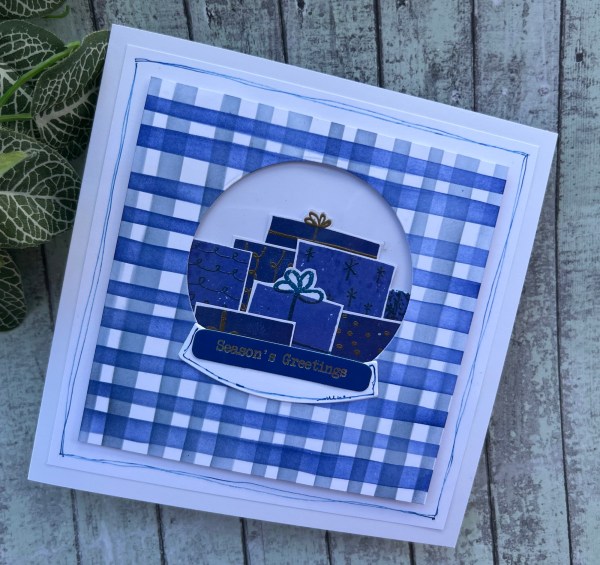
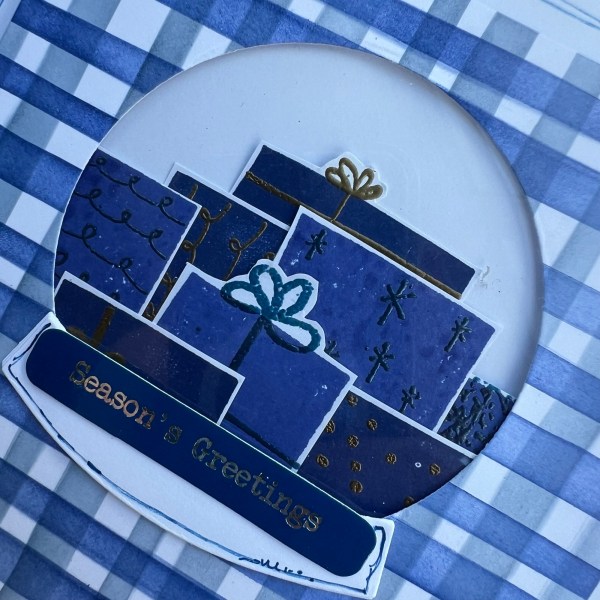
I created a snow globe in the end and filled it with gifts!
I used all blue inks and also grabbed the ready made sentiments from the stash to add those too!
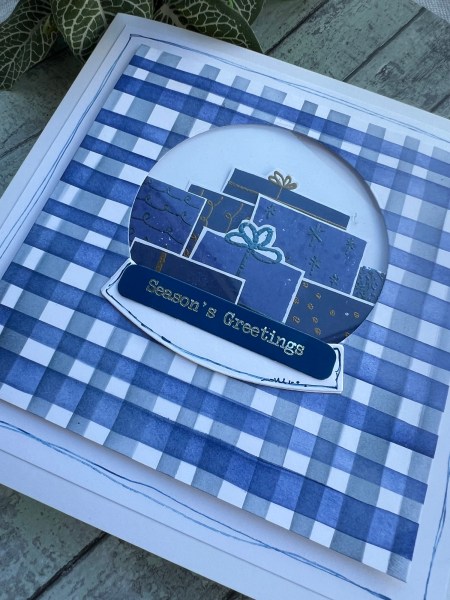
The presents were a Sizzix set where you stamp the base and then stamp additional elements like the bows and decorations afterwards and I chose to emboss the decorative elements in both blue and gold.

I did raise up the base of the snow globe but also added acetate in the hole and then raised that panel up with scrap cardstock to give some dimension.
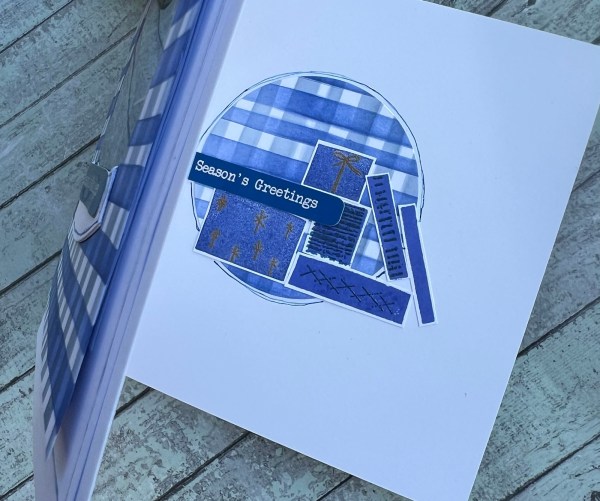
Inside I added the circle I die cut from the front panel and some more presents inside along with another sentiment.
My finishing touch was to do some hand drawn doodle lines.

Love how this ended up but won’t lie I found this a little challenging to work out what to do once I had stencilled that original background!
Fancy watching me put it together – check out my YouTube channel where I am trying to post a video for each creation as well as my blog here!
Happy crafting!
Catherine