I am an on-the-side and increasingly up front papercrafter who loves nothing more than getting inky and creating pretty things with paper and stamps!
I am also a wife to lovely hubby and mummy to a wonderful 14yr old princess.
I say this is the final set because this is where I got to … but doesn’t mean I won’t make more as making these quick and easy little projects using up stash and scraps is so much fun!
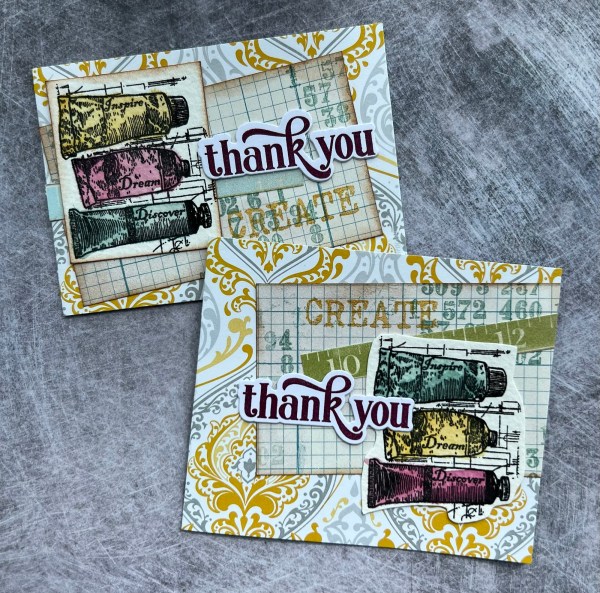
These ones I grabbed pre coloured digital images and fussy cut them out as the focal images. I also added these black chalkboard type stickers I found in the stash!
What has made these projects so easy too is the sentiments … I just stamped lots of the sentiments in one session and embossed them and die cut them and stacked them … all from my scraps and have them sitting there ready to use. In this case silver embossed the Waffleflower ones!
And then one more with scraps of the scraps all made into a little collage …
Then the stamped image and the sentiment … in this case I also added some staples to add to the collage effect!
Normal cardmaking projects to resume tomorrow – but I did enjoy playing with scraps and much loved old dsp to make these little notecards!
Following on from yesterdays I got in the zone and made more little notecards from old dsp …
Some I added die cut flowers which I cut from scraps of cardstock and then added the sentiment…
Others I added the little stamped image I coloured with ink and water…
I also added a little stamping to the panel of grid dsp on these.
I kept going just using up the dsp I couldn’t bear to throw out but knew I needed to not hoard any longer!
This final one for today was simple.
Throughout these projects I’ve been refusing to use anything but scraps and managed to almost clear out the little pouch of small scraps to make them. impressed with myself!
I’ve been trying to have a big clear out in my craft room and came across a box that had offcuts of dsp in that I love so didn’t want to just throw away but I knew I need to start being ruthless with them. As I am currently selling some of my stamps and dies I decided to make some cute little thank you cards from them to enclose when I sell something … this way I’m putting them to use but not hoarding them for projects yet to be determined which may never happen!
These six I used My Favorite Things stamps of the cats and dogs to give them a similar theme!
I added strips of other dsp or bits of cardstock that were in the scraps pouch.
They were simple to put together and inside each I added the white cardstock as a panel to write on.
I also made these two just from bits and pieces I had to hand already coloured…
A simple but satisfying few pieces used up … now really need to get back to being ruthless and tidy up!
Yesterday I had a lovely crafty day with my friends at a crop in Warrington. It has been ages since I’ve crafted with friends and years since it was in person outside of my house! So I packed lots and lots of projects and things to play with. Some of the things I made I will share as and when I get a chance to blog but had to share this one today.
After doing some other projects I had these tiny scraps of patterned paper and part of a flower left but was struggling to throw them away … so Helen challenged me to make a card from them. She also helped choose the background panel from the stash of recently made ones I had packed for the crop.
I added some stamping to the background with an old Craft Stamper magazine stamp and distress oxide and then edged the panel.
I also used a grey pen to edge the pieces of patterned paper. I also found some white die cut leaves in the stash I had taken to finish off the flower.
I then added the sentiment to the cluster. I added a panel of white to back the patterned paper.
When I got home I finished the card adding it to the card blank and then added some gems to finish off.
All in all I made quite a few card panels ready for mounting onto cards and finishing off with gems etc. I also made a few backgrounds and quite a lot of mini notelets … oh and I chatted lots, met new friends, ate yummy brownies and had a thoroughly lovely day!
Today we are celebrating Easter Sunday as we had to write off last week due to illness – so off to my parents for a yummy lunch and some fun! May get a chance to craft later but depends on the energy levels as still not up to 100% yet so will see how I get on!
On Tuesday I discovered some paints had dried up so in a bid to make sure my paints were ok and get rid of those that weren’t I had some fun gelli printing! After all part of the fun of decluttering and tidying is playing with what you find along the way!
Well I may have got rather distracted with the playing…
Well once I had cleared away the paints and trimmed the papers I had made I grabbed the top one … the one with the leaves at the sides and decided to get something made with it!
I first added some more green to the edge using Mowed lawn distress oxide and then splattered with the same.
Then I grabbed old dsp that that I had cut up and layered all the flowers around the panel and adhered them down.
This totally changed up the panel and made it more vintage rather than grungy I think.
I wrapped some green ribbon round the panel with a little bow to one side and then picked out some scraps of text paper and a little bit of leftover dsp (this is reverse of the floral side) and inked up the edge and layered them up over the ribbon.
Then I added the sentiment that was embossed and die cut.
I mounted the panel on cream and then Merry Merlot. I also added some gems that coordinated.
Love how this came together and really pleased with all the gelli prints I’ve got to play with! Plus one whole box cleared out with paints that had gone off which is frustrating and satisfying in equal measure!
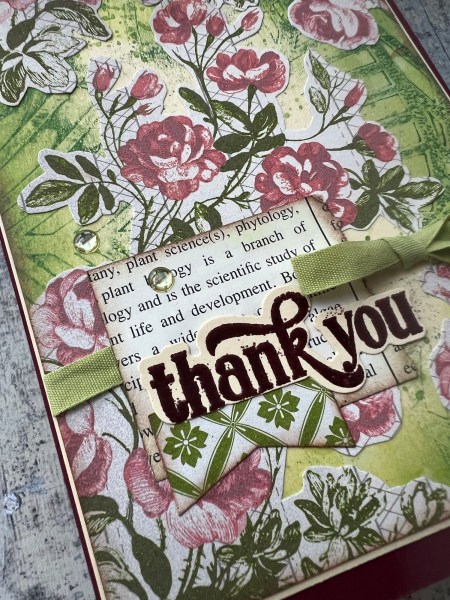
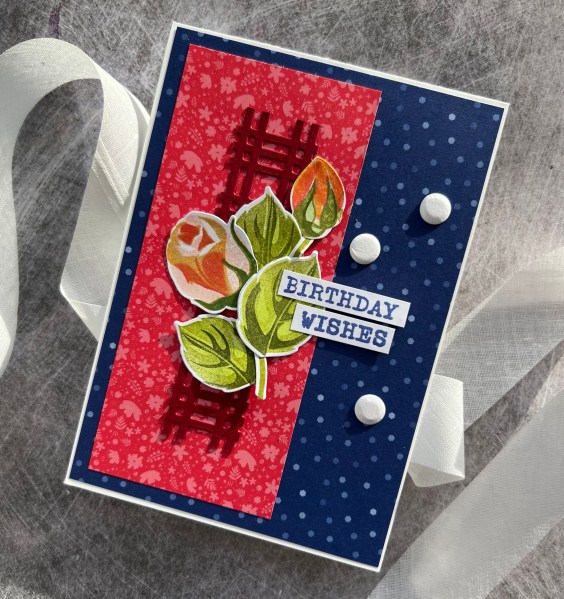
Todays card is carrying on with the stash I used for last weeks cards… I had stamped and watercoloured one more of the floral images and then I grabbed leftover paper strips and a piece of the cream cardstock leftover from the previous cards and made this…
Strips of the patterned paper added and then the floral element connecting them with the sentiment on the background …
Such an easy card to put together and just added the card Candi and some doodled stitches to finish off. Mounted it on black for the frame and then onto a card blank cut to fit.
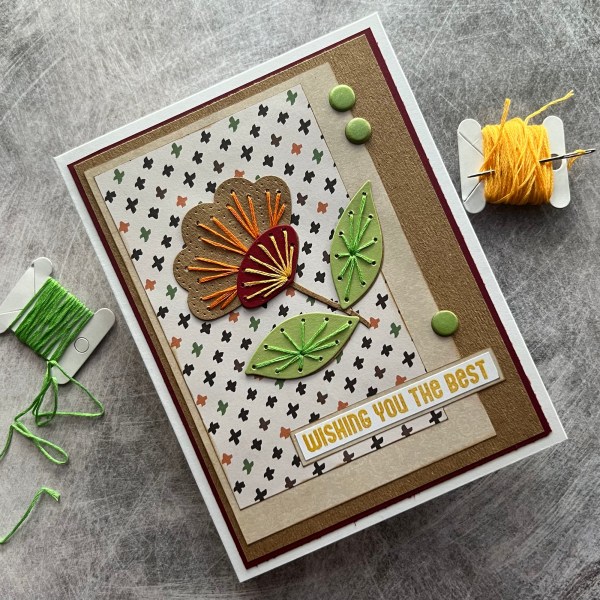
This card I made ages ago but never got round to sharing … better now than never!
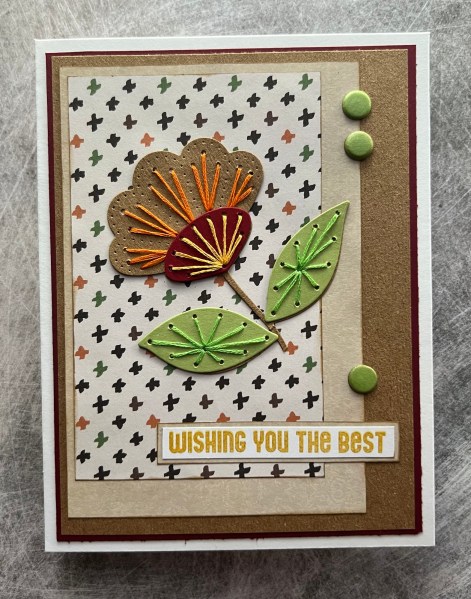
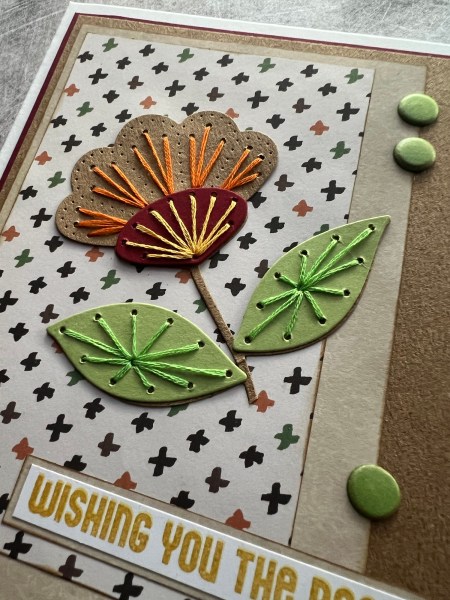
It’s one of those stitched flowers I have had in the pouch of ready stitched elements and on the day I put this together I was in a use patterned paper kind of moods! So I grabbed papers I thought worked ok together and worked with the colours in the flower I had stitched. I actually trimmed this flower as didn’t want the stem to be as long.
I added ink to the edges of each of the panels of paper to give them a frame and stuck them down. No dimension just flat with the inked edge worked fine.
I added the Kraft back panel to tie in the colour of the flower and the stem.
I added the sentiment which I stamped in the Hello Honey colour as I thought that worked well with all the elements in the card.
I trimmed down the card blank so it’s about 6×5 rather than the usual size of 7×5 as that worked better with how the layers looked.
Finishing touch was to add those three card candi on the edge of the middle panel of patterned paper … this pulled out the green of the leaves and from the patterned paper.
Cute card and quite different from the other cards I have made with these stitched flower dies.
Today I have the second of the cards I made from the masterboard piece I shared on the first of April.
Again I die cut a panel using the scalloped die from the December spellbinders die set. This time I teamed it with the wreath from the Natures Prints set and the sentiment stamp and label from the same set. I also added the die cut dragonfly to the centre of the circle.
I again added pearls as final embellishments.
Love this shabby chic background and the pretty way this came together.
I did stack up a couple of extra panels of the scalloped panel so that there is quite a lot of dimension on the card but otherwise kept the card blank clean so that the texture and fun on the main element took centre stage!
I used up some old dsp papers that were on the desk for the background and a piece of die cut that I had cut off a project I made a few months ago for a Christmas card…. This is why I never throw things away – you never know when they will be the perfect little extra element.
I added the sentiment and then some card Candi to finish off the front of the card.
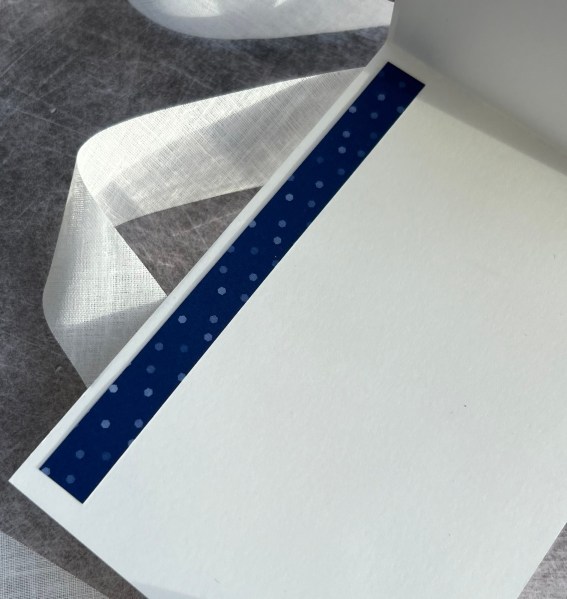
I love how this looked … I added just a little bit of the dsp to the inside to make it link to the front.
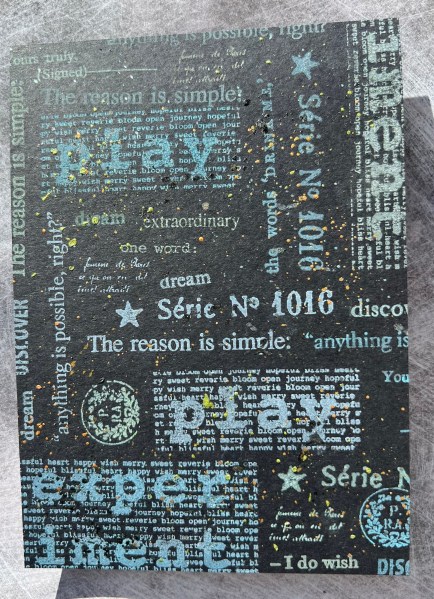
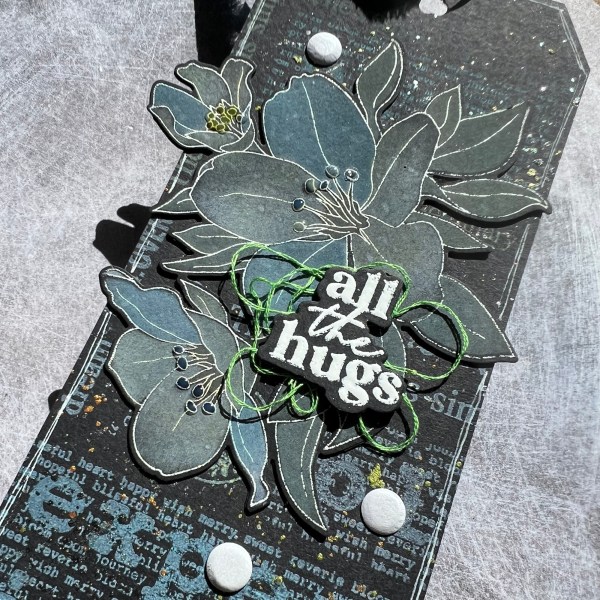
I decided to join in with the UK stampers forum swap again this month as I made a background as an experiment and wasn’t entirely sure what to do with it … so a tag was made.
I am still going through my stash and trying to get rid of things I don’t use and this Paperartsy stamp set is one I like a lot but never really use now I don’t really do art journalling stuff … so I decided to have a play with the stamps and see if I could make something with them before I listed them for sale.
I took some black cardstock and stamped the stamps using white pigment ink and then went over them with the distress oxides in different colours. This gave a colourful but subtle colour to the whole piece.
Then I sorted through my Art Alchemy paints and did lots of splattering. Unfortunately these paints were quite dry so I had to water them down to reactivate a little and then have had to accept defeat on these and get rid! Such a shame but it’s my fault for not using them more often.
Once the paint was dry I trimmed down the panel into a tag shape and had to decide how to finish off … well of course my stamp set of the moment (Altenew Splendid Bouquet) begged to be used … this time with white embossing the stamp image and then blending using the mix of white pigment and distress oxides.
I die cut it out twice to stack it and give it some strength as I knew it would hang over the edge. I also spritzed it with water to activate the oxides a little.
I added the sentiment from Waffleflower again stacked up for dimension with the thread sandwiched between the sentiment and the image and then added some white card Candi for embellishment.
I added some glossy accents to the stamen on the flowers too.
I chose three bits of blue and green ribbon from the stash to add to the top of the tag and then decided it needed something to finish off … white posca doodled outline did the job perfectly!
I do still really like these stamps but they have gone for sale as unlikely to use them often. I do still have a strip of the background left so will have to do something with that soon and share it … but for now it’s still sat on the desk awaiting inspiration to strike!