I am an on-the-side and increasingly up front papercrafter who loves nothing more than getting inky and creating pretty things with paper and stamps!
I am also a wife to lovely hubby and mummy to a wonderful 14yr old princess.
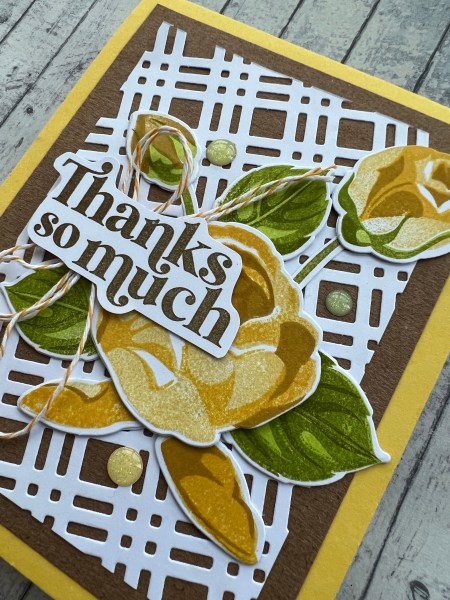
So all those lovely rose images I made for yesterdays card … well there were a fair amount leftover so I put them in a pouch for using at another time.
Well here is the thank you card I made almost straight after.
It’s also using another piece of that background die but out of Kraft which was my original try for the other card but I didn’t like it so stuck it to one side for another card.
I found a piece of the orange that worked with the flower colours and then created this small slimline card to include with some stash I’ve sold.
Clearly still got some flowers left … will pop them back in the pouch and then they are ready for other projects.
I added the sparkly orange gem (it’s rather bright so only added the one) and the sentiment from the Boho Butterfly set from Concord and 9th again.
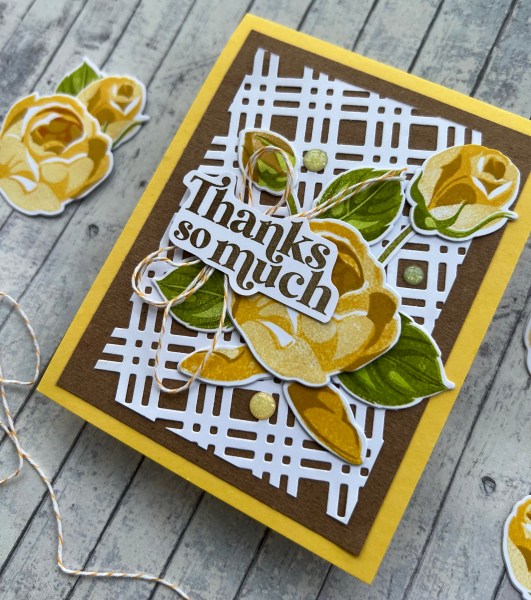
Another Altenew layering stamp set … Rosy Outlook … which I again videoed the first play … and this is what I made.
And yes I am in love with these roses. I had learnt from the lessons of the previous set to stick to using the stamp platform for layering and also to go light colour for the first layer of ink. I love how this came out and how that background die looks at an angle for the smaller panel.
I have quite a few roses left so there will be more projects to come I am sure!
This one I used an extra leaf so suspect some projects will need extra leaves stamping out but the trick of doing four sets of stamping in one go on the stamp platform worked well at giving me lots to play with as well as helping me perfect the layering as I did it!
Added some sparkly gems and the yellow and white twine for the finishing touches.
The sentiment came from a Concord and 9th set Boho Butterfly. I fussy cut it out (wish there was a die) and added it with some foam under one end.
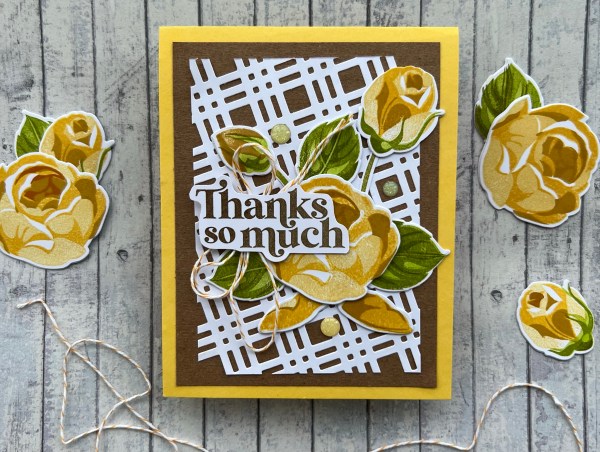
I made a couple of thank you cards with bits on the desk, including the flowers I stamped using the new Altenew set …
Clearly they are similar with the scraps of patterned paper and the Kraft against cream cardstock … and then the gorgeous flower from the Altenew ZigZag floral set.
The smaller square one I added the Artistic stamping and the leaves and thanks from the same set. Also added some splatters of brown ink and then inked all the elements with brown to give it a vintage look.
Love how easily this came together.
The next one I used a punch to add something different … not used an edge punch for ages!
I also added the text from the Very Versailles stamp set, and also the sentiment from that set.
I added sequins to both as embellishment and love those labels that were cut from dsp earlier in the year for my patterned paper project … only got a few left so good to get some used for these little cards.
So I caved and decided to buy some new stash as I was feeling a little stuck and lacking in mojo with my non-Christmas stash after all those Christmas in July projects… so bought lots of Altenew stash which arrived a couple of days ago. Here is the result of my first play!
I mean … really how cool is this?
So this play was quite a long one and I learnt along the way how to use the stamps and decided on the following …
1. Use the stamp platform … it makes layering easier
2. Start with light ink first … it helps differentiate the layers
3. Just have fun and go for it regardless … that’s what I did! Die cut everything once stamped and it looks fab regardless!
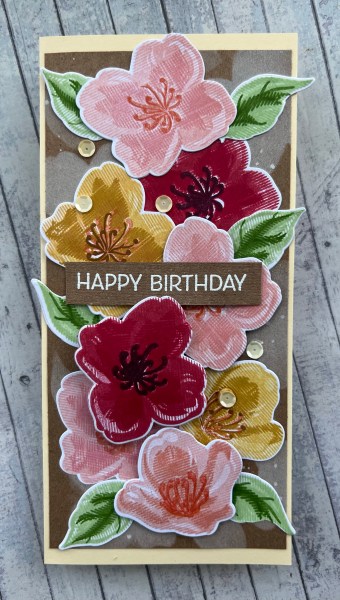
I had quite a lot of pieces stamped and die cut and decided to just layer up lots of the images on this DL long slim card.
I also added the stencilling to the background but you can’t really see it and I didn’t really like it so hey ho!
I ended up adding a sentiment from the SU Artistic set across the front as couldn’t see another one I thought went with it … think this worked ok though.
Then I added the sequins and called it done as it really did have quite a lot added to the front.
I had two flowers left from my session so they’ve been put aside for other projects.
Fancy seeing how I put this together and learn along with me the best ways of stamping the images … well you can watch it on my YouTube channel.
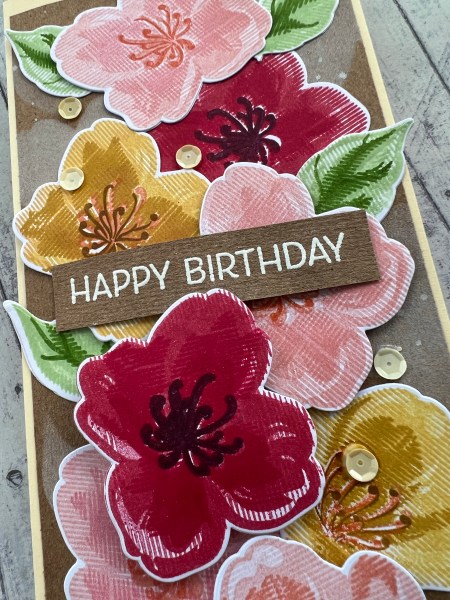
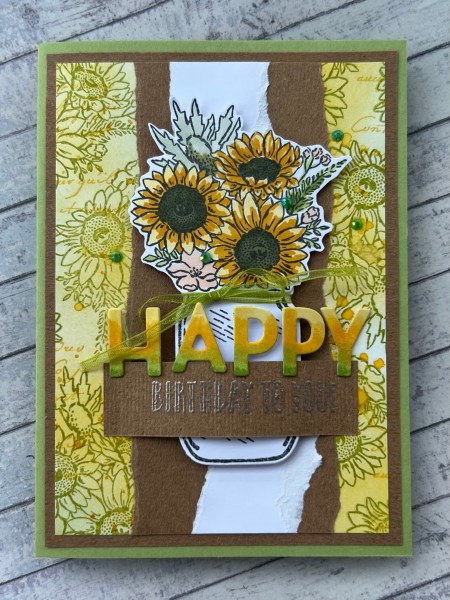
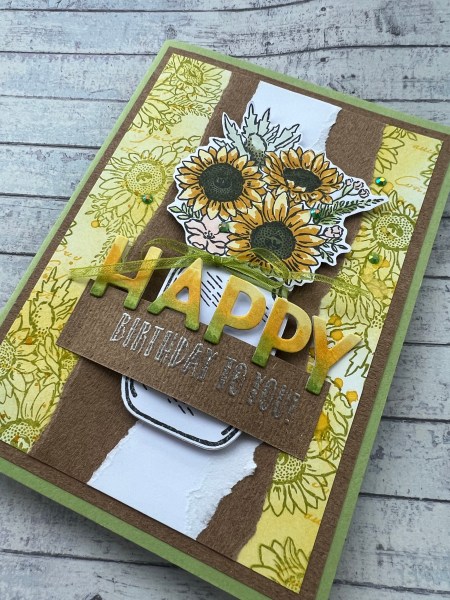
My card was heavily inspired by the card my daughter made for me for my birthday last month…
She had raided my supplies to create this and I had never really thought of using that floral stamp for a background… so here is what I ended up making …
It’s got the same stamp to make the background with ink blending and then torn edges … from there the similarities probably end … but thank you Maya for my beautiful card and the inspiration!
After the background was created I added some strips of Kraft and white torn cardstock and then the focal image of the same stamp and the jar, some pretty ribbon and the embossed sentiment with the die cut letters to finish off.
Love how this finished up… it’s dimensional and fresh looking and I suspect this won’t be the last time I use this stamp to make a background!
This challenge is sponsored by The Paper Shelter who gifted us this cute image for us to use for our creations…
I decided on a watercolour type effect using the inks to colour the image then cut out the image and added foam to give it some dimension. The background I kept simple with some inking through a wavy background stencil so it kept the watery theme.
I then chose a simple birthday sentiment and some sparkles for embellishment.
I also added glossy accents to the glasses to give some more dimension to the card.
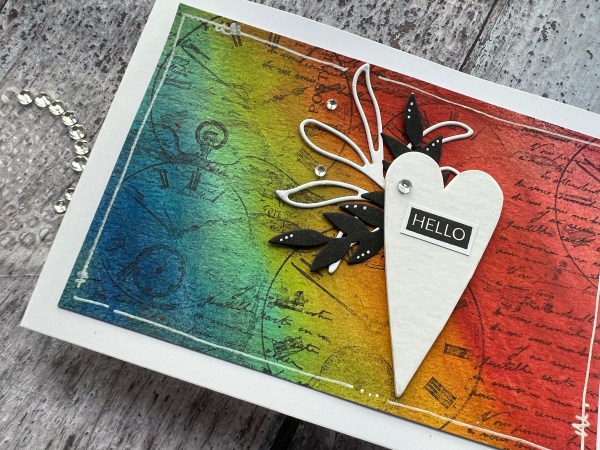
I’ve had a little dig through the preprepared backgrounds and grabbed this one that I made using gelatos and Paperartsy stamps ages ago and decided it was time to get it used!
I’ve had a thing about rainbows recently … and on this I love both the rainbow background and the shimmer from a few of the colours which were metallic gelatos.
I decided to keep this one simple grabbing a chipboard heart some die cut leaves and a little stamped sentiment.
I added a little bit of white paint pen doodling too to finish up.
Simple and another of those prepared background used up! 😀
Hello! Welcome to my blog. Obviously welcome back if you’ve popped by before.
Today is the first of the month, importantly my Mum’s birthday, but the card I have today isn’t my Mum’s birthday card …. I’ll share that another time, instead it is a card I made using elements cut from a sheet of 12×12 dsp. I’ve been doing this every month this year as I got organised last year so I wasn’t having to do too much thinking about what to create when the end of the month comes around and it is time for a patterned paper playtime.
This months dsp of choice was an old favourite … True Love DSP. I must have used this paper for so many projects because I bought a few packs and think it is so versatile with being just black and white and so you can leave it without colour or add colour using whatever medium you fancy.
This time I added colour to the reverse of the paper … and left the flowers plain.
I love adding rainbow colours for a dramatic impact, especially against black. I used the stampin blends to add the colour to the striped side of the dsp and then die cut it using the stitched shapes. Then stacked that up with two more so it was a nice sturdy element. I added some of the black and white gingham ribbon and then two of the flower elements.
I decided that I wanted to add some texture in the background but kept it black. I decided to add versamark to the folder and use clear emboss to add some shine to the texture. This is just like the way that I did it for the recent Christmas card inspired by Jennifer McGuire video.
Inside the card I added white with a strip of the coloured dsp and another floral element.
I finished off the outside with the black gems and a stamped sentiment I raised up on foam.
I do love this way of creating a card by having ready cut out elements ready to go. Plus when you prep it like this you end up with very little waste. But many many elements ready to work with for other projects!
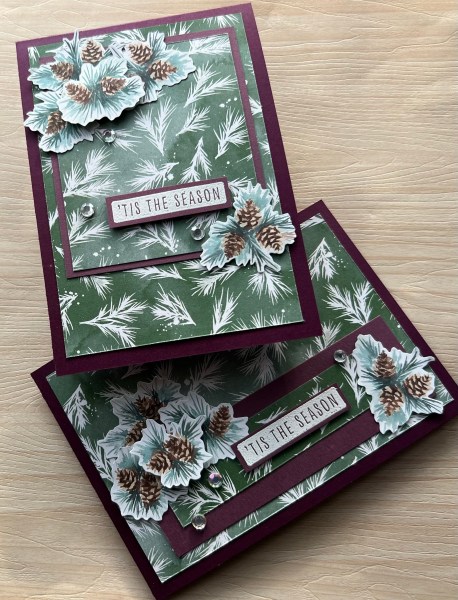
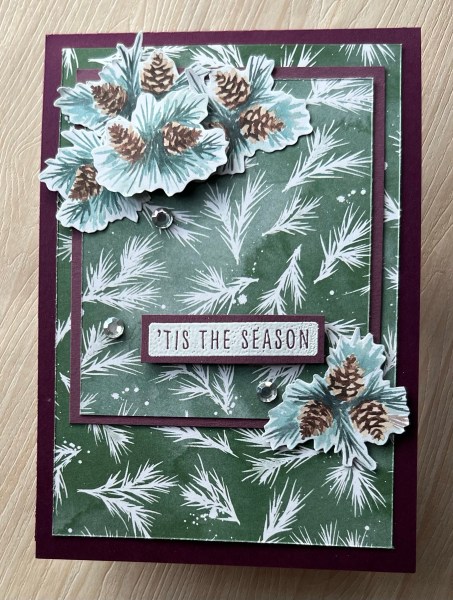
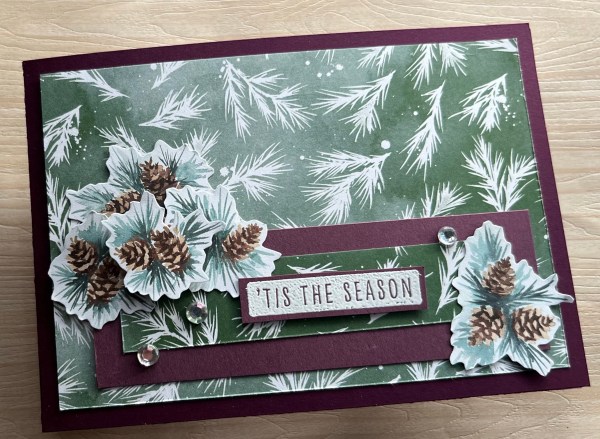
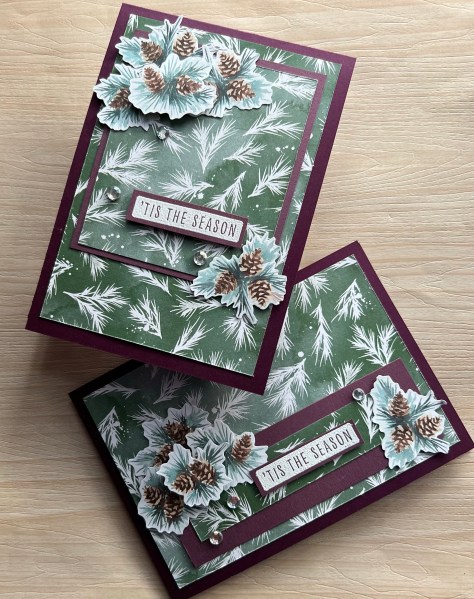
I decided to end this month as I started it with the bits and bobs in the pouch from the patterned paper playtime and created two cards using the leftover pieces.
Kept them both quite simple teaming the lovely spruce and pine cone themed paper with Blackberry Bliss and Rich Razzleberry.
I added an embossed sentiment and some gems for bling but otherwise let the paper do all the work.
Hope you’ve enjoyed my Christmas in July and hope you got some inspiration for your festive projects along the way!
Tomorrow back to a more appropriate for the time of year type of crafting… but you know me Christmas card making happens all year round for me so you never know when snow and Santa may appear on the blog!
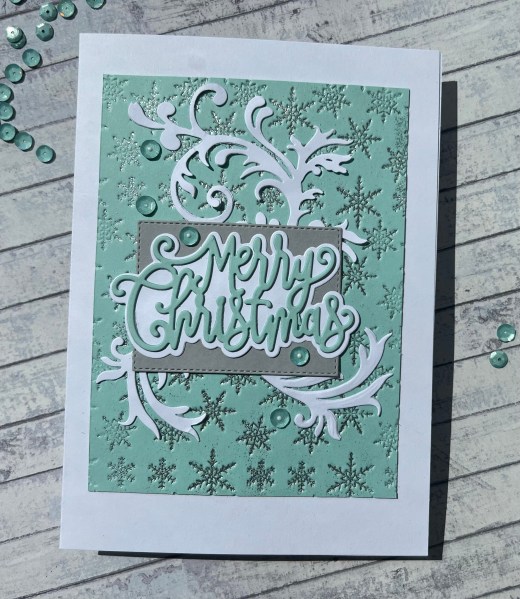
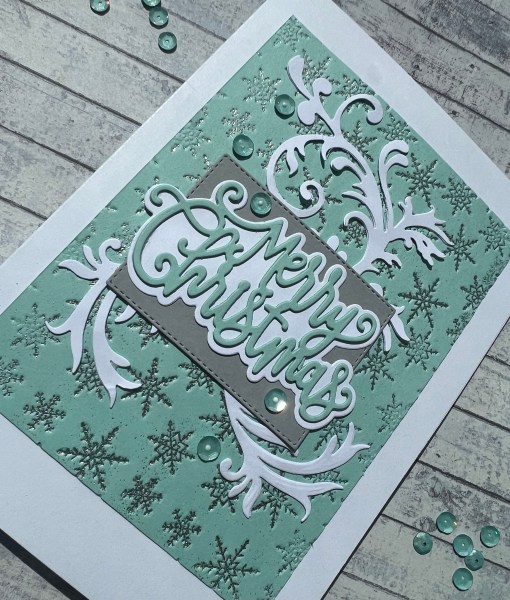
Watched a Jennifer Maguire video … got inspired! No surprise there! The woman just makes the best cards in my opinion!
So the video (hopefully this link works) was all about different ways of embossing and she started by using an embossing folder and debossing with versamark so the embossing powder sits in the crevices… hopefully this makes sense … and if not just go watch the video – she explains it so well!
I grabbed some pool party cardstock that was on the desk and a snowflake embossing folder and then silver embossing powder… and very quickly had a very cute background!
So I kept it quite simple to finish off … white swirly die cuts, a grey die cut panel and the lovely die cut sentiment from Tonic which I stacked for dimension. Then sequins for added shine.
So nice to use the embossing folder in a different way. I actually remember learning this a long time ago but then forgot!