I am an on-the-side and increasingly up front papercrafter who loves nothing more than getting inky and creating pretty things with paper and stamps!
I am also a wife to lovely hubby and mummy to a wonderful 14yr old princess.
After yesterdays fail (ok it wasn’t a fail but it was a card I didn’t love) I decided to challenge myself to use another of the already prepped sheet load of cards layouts and see if I could do something I was happier with … and I did!
Maybe it is the smaller amount of the patterned paper or that fab embossed panel but whatever it is I love this card so much more than the one I made yesterday!
Maybe it is the amount of white that I love more … or just it is a card I feel more is my style than the last one? Who knows?
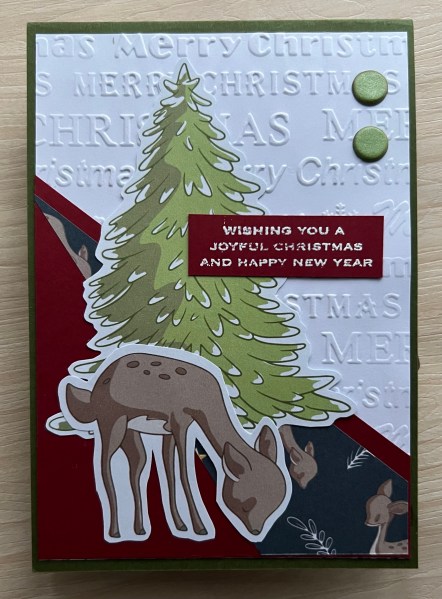
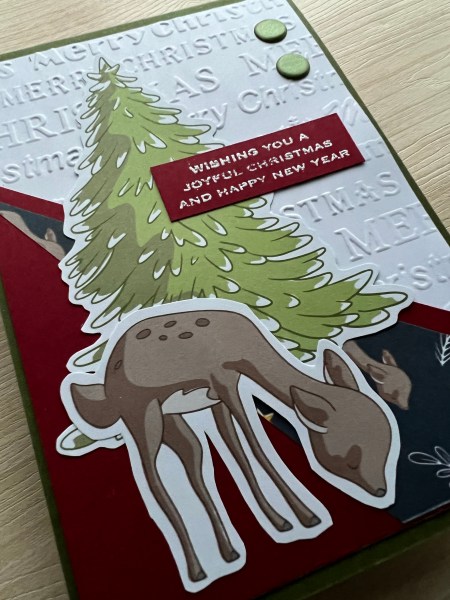
Warning! This is not one of my favourite cards I’ve made so far this Christmas in adult season but I wanted to share it regardless. Once again I’m using the papers from a failed sheet load of cards I had set aside waiting to get used and this time I added the fussy cut tree from the magazine on the top and lots of gems.
In fairness the gems I added to try and detract from the fact I wasn’t loving the card but hey ho! I have no idea why this one just didn’t work for me but I also know it’s a perfectly acceptable card regardless hence it didn’t go in the bin and I am still showing you what I did.
I added the little embossed sentiment and made the card blank smaller to fit the topper.
What do you think?
Well it’s a card made and I never set out to make all perfect cards for this years Christmas in July season! So it’s going in the basket of completed cards to use!
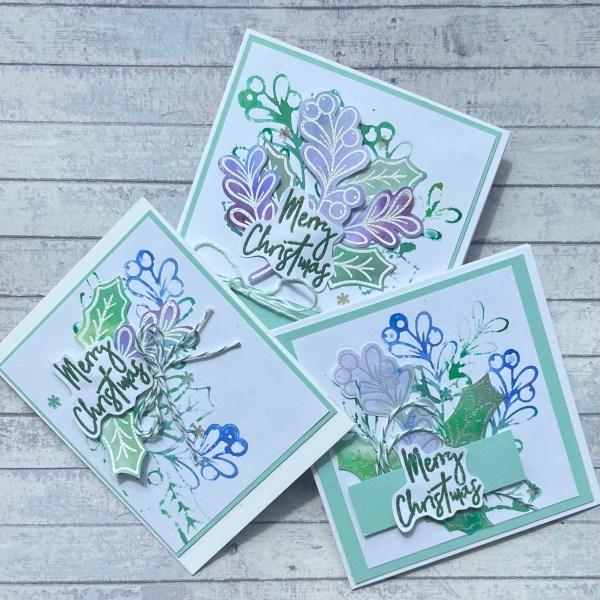
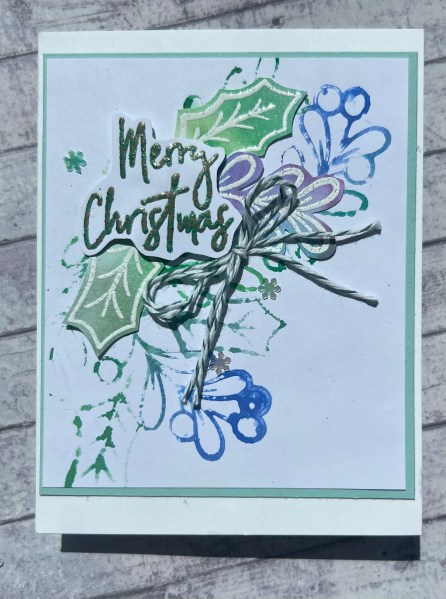
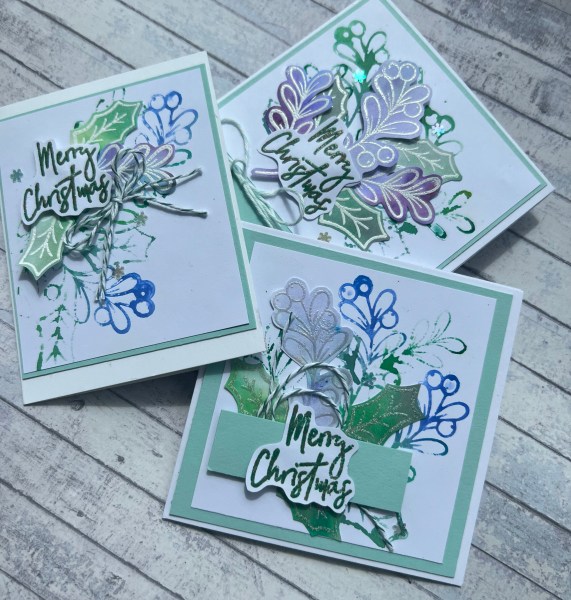
Todays post has three cards made using brushos to stamp with and then wiping up the brushos ink to make a great card to emboss on and cut out the elements. They are also three small cards as I like to make a mix of shapes and sizes for my Christmas cards.
For these I used an old but still favourite Creative Stamping magazine set of stamps … they are modern and fresh looking and I love using them for something a bit different.
I started by sprinkling the brushos in ultramarine and emerald green onto my glass mat and then added some water I then stamped into the puddle of ink as if it was an ink pad… this creates the fluid looking stamping with pools of colour and some imperfect stamping. I love this. I also love that the brusho inks already create variation in colour for the image.
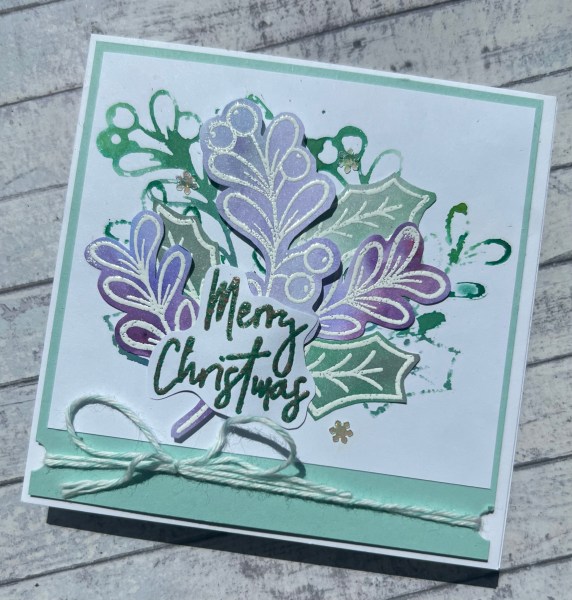
Once I had the background clusters stamped I wiped up the leftover ink with some scraps of white cardstock and then let those dry. Once dry I heat embossed some of the images and fussy cut them out. Some I used white heat embossing but the card above shows those I did pearlescent embossing.
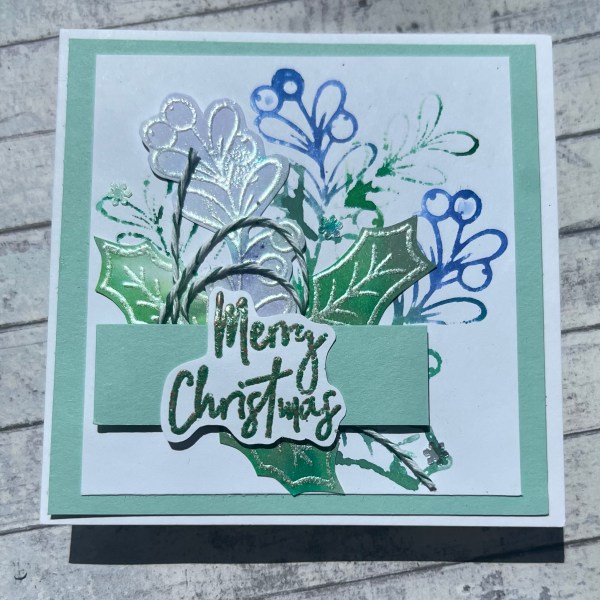
Each of the panels I mounted onto the soft sea foam cardstock and then chose different ways to put the small card together but for each I did the same sentiment which I heat embossed using the Seth Apter Baked textures powder which has metallic elements in the green.
This final one I actually added a little of the purple brusho to the ultramarine in error … but turned out to be a great idea and worked well with the white embossing.
Love how sweet these cards ended up being and this splotchy but fun technique.
This card was made like the one I shared yesterday from an old Making Cards magazine image and some of the paper leftover from another magazine kit. I actually found three of these images in the stash and decided it was good to get them used … so will share the final card on another day when I need something preprepared!
I kept it fairly simple with two panels of the paper cut at angles and the cute Soft Sea Foam cardstock as the base. Then the focal image, a Tim Holtz sticker sentiment and some twine for interest and texture.
Hello there … thought I would start this post with a happy birthday … to me! Yup today is my birthday so unlikely to be crafting today as spending the day with my family. But I did get prepped and so wrote the last weekend when I made this card using old Making Card magazine image and other magazine kit papers.
I kept it quite simple but big in size with an embossed panel and some ribbon for texture and then the image with the paper and some cardstock for mounting.
I used Tim Holtz sticker sentiments and then gems to embellish. Simple but super cute!
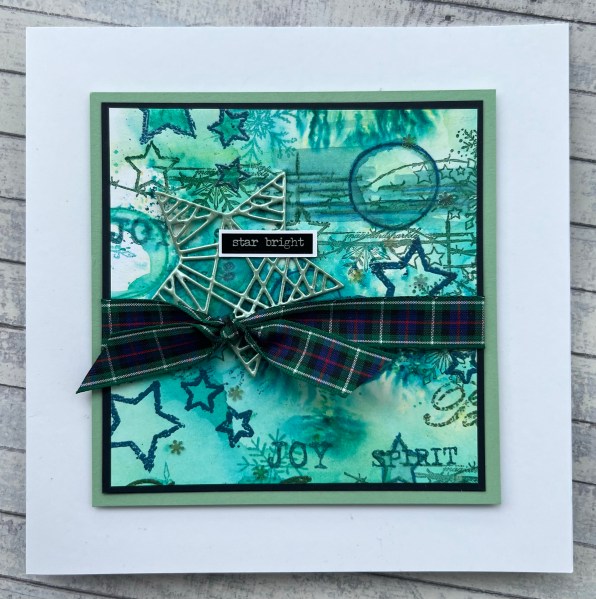
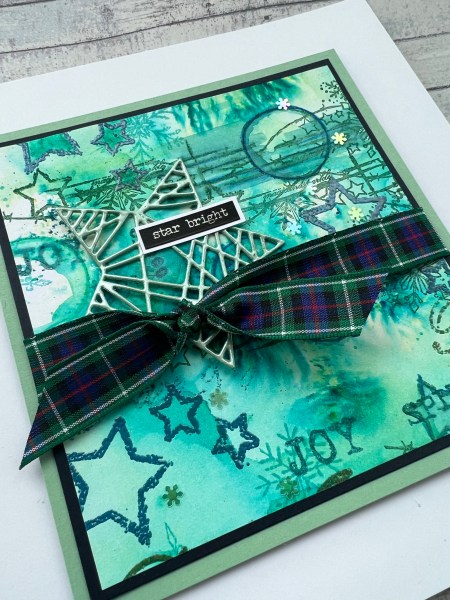
Last weekend I made a masterboard playing with brushos and a set of Indigo Blu stamps I got in a magazine kit. I added some additional colouring with the inktense and some texture with embossing powders too.
Then I cut it up into different sized pieces to make into cards… I only got round to making two so far but the others will no doubt follow!
This is the first one and the biggest piece of the background…
I decided to add this lovely tartan ribbon and then one of the fancy stars from the Trimmings and Tidings set … I die cut this from the soft sea foam cardstock twice and then embossed it with a pearl embossing powder so it’s a really pretty embellishment.
I added the sentiment sticker from Tim Holtz and then added the little iridescent snowflake embellishments across the card.
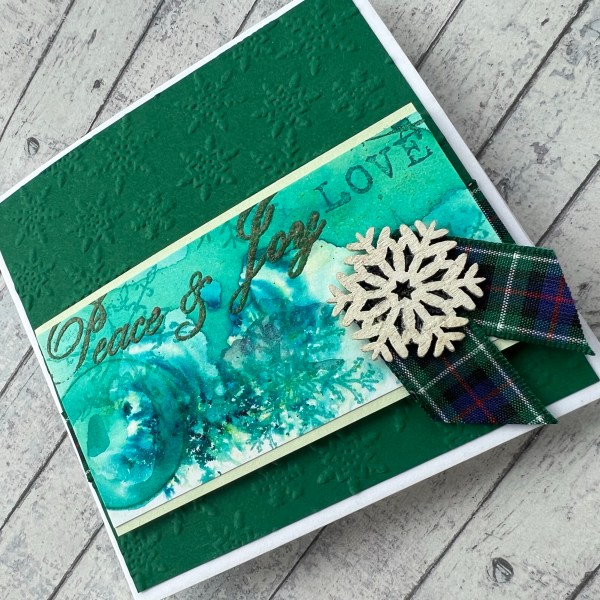
The next card used the smallest piece of the masterboard.
This I turned into a panel on a 4×4 card with a piece of the dark green cardstock which I embossed with a snowflake embossing folder. I again added the tartan ribbon but only a little bit on the front and the rest wrapped at the back but most of it ended up being covered so not really visible.
I also added a sparkly wooden embellishment from the stash that I think I was gifted in a swap.
Decided against added another sentiment as the panel had the embossed Peace & Joy so it worked well as a sentiment already.
So I have two pieces left to play with … might get to them before the month is out … let’s wait and see! I am already wondering if my Christmas in July energy is running out or whether I can keep going for the full month! Again let’s wait and see!
Another delve into the preprepared backgrounds pouch and more of the painty backgrounds today but I wasn’t as keen on showing much of this one so had fun with the Merriest Moments die cuts and stamps and created this card instead…
So the painty background is still very much there but now added in is the die cut and embossed frame and the stamped and die cut flowers and sentiment.
I decided the flowers would look better in the Rich Razzleberry rather than red for the background to work. I also added two layers for the diecuts so they were a little sturdier. I added some white doodled lines and also the gems and ribbon too for some added texture.
The strip with the sentiment on is a different cardstock but in real life the different white doesn’t look as different as it seems to do on the picture.
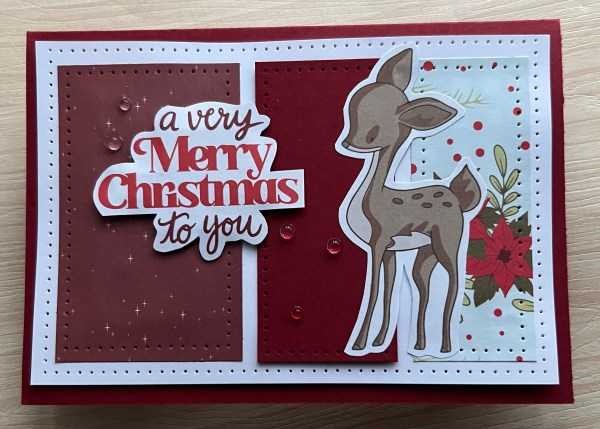
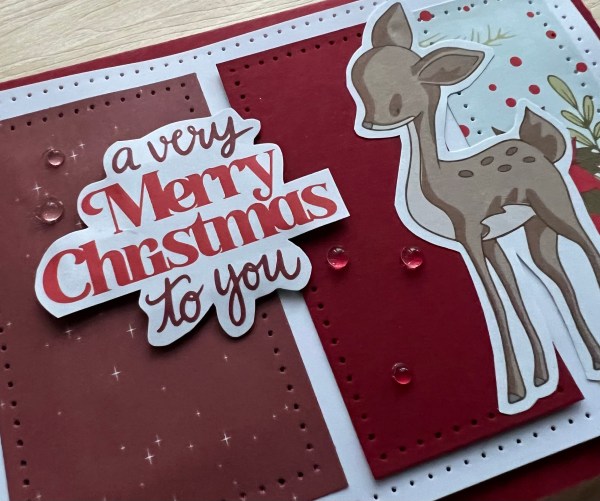
Once again I am back with the papers I cut into using a sheet load of cards template from ages ago and never ended up using until now. Quite pleased I’ve managed to use three backgrounds up so far … only about 10 more to go!
This one I decided to go piercing mad on! I pierced round not just the edge of the topper but each of the three panels on the inside … why? Well just cos I fancied it! 😂
Once I had done that I had little energy left for the rest of the card so went for fussy cut image and printed sentiment from the card kit. I did raised up the panel onto foam though and added some clear gems as embellishments.
I am a little bit stumped on some of the remaining layouts I have left to play with but going to try and get at least a few more done this July.
I’m back again with another Christmas card for my self imposed Christmas in July challenge. Today I have a card made for a ‘special’ recipient. I won’t share who as yet but the reason it is considered worthy of the special recipient is because it is a bigger 7×7 inch card.
I made the card as follows…
A piece of dsp from the stash as the backing. Then a panel of mixed media cardstock on which I added some stencilling using the texture paste.
Then some gorgeous die cut flowers and an embossed sentiment.
I added the glittery card stock trims and then some clear gems for the flower centres.
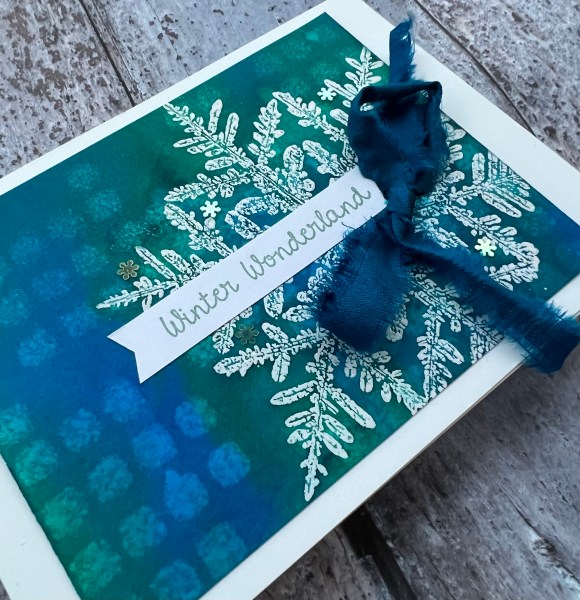
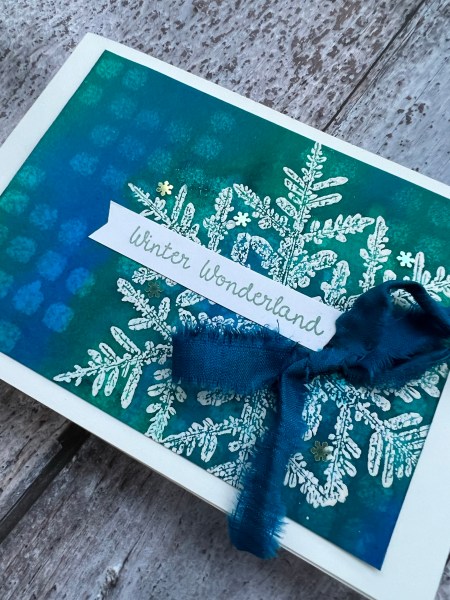
Following on from yesterdays projects here is another one of the inky backgrounds using distress resist and the gorgeous Snow Crystal stamp.
I used Dylusions spray inks for this one and although I adore the effect I do not enjoy the mess that using these sprays creates … there is blue EVERYWHERE as a result of this one project and my cloths just constantly run blue!
Anyway after drying I then did the ghosting technique with a stencil and water and this makes it look like a tartan in my opinion… so cool.
I kept the card design itself quite simple with a sari scrap ribbon bow and a little banner sentiment. I also added some iridescent gems for sparkle.
How gorgeous?
If you fancy watching this come together I did video it for my YouTube channel.