Christmas in August – Christmas florals

So over in the Facebook group for Christmas in July we decided to go with a monthly prompt to keep people going for the other months of the year! And this month I chose Christmas Florals!

I let people know at the beginning of the month and finally got around to doing my response! It is a video to keep my YouTube followers in the loop on this too as not all the followers have chosen to join the Facebook group.

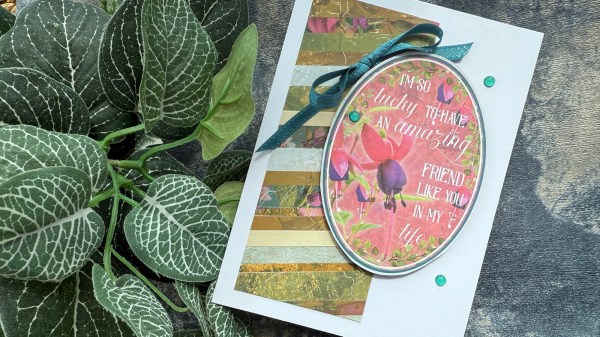
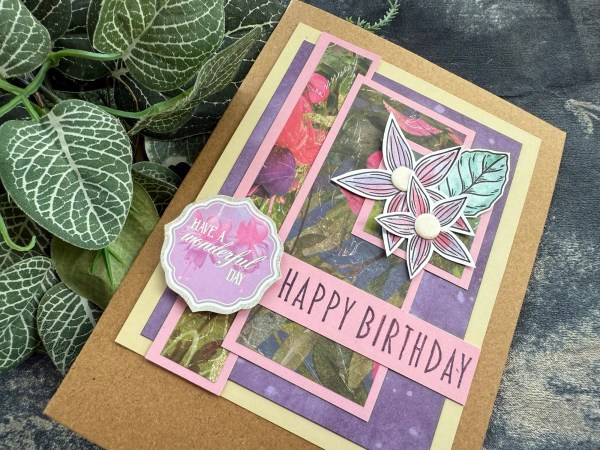
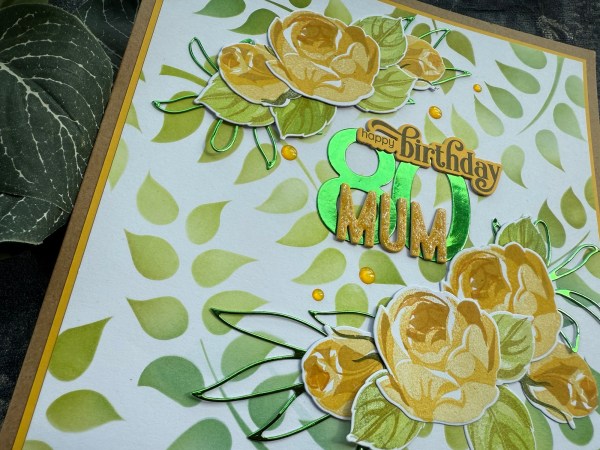
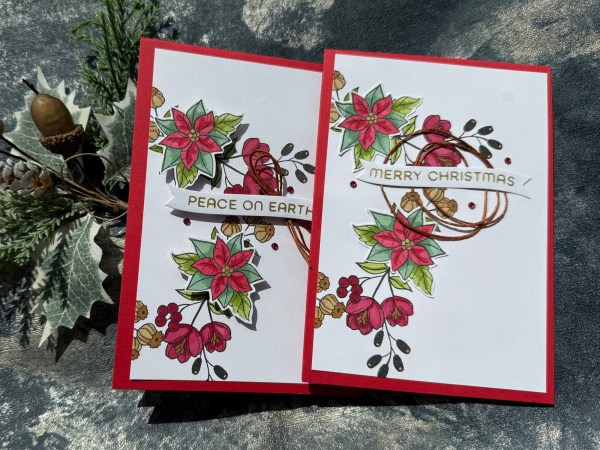
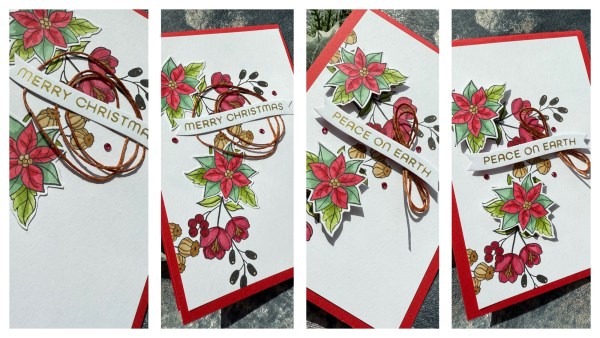
I wanted to use my new stampwheel to create a wreath but didn’t think it through when I placed the cardstock in the stampwheel so as the wreath was then not central I decided to cut the panel in two and make two cards instead!

I used three stamps from a Spellbinders stamp set and created my wreath but didn’t have the stems from two stamps overlapping the main poinsettia image but decided rather than faff with the masking to then stamp those images again, fussy cut them and add them as a separate layer.

I love how they came out!

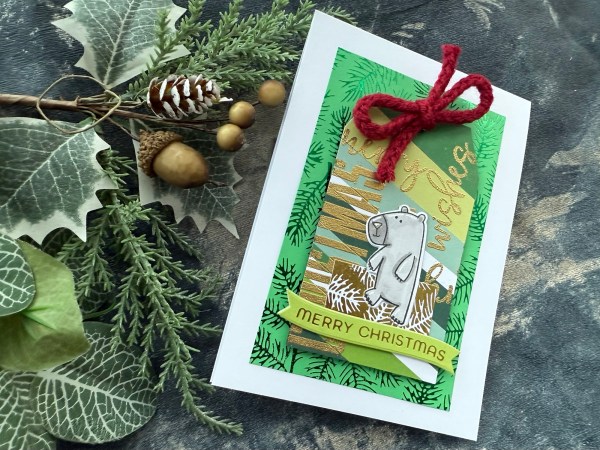
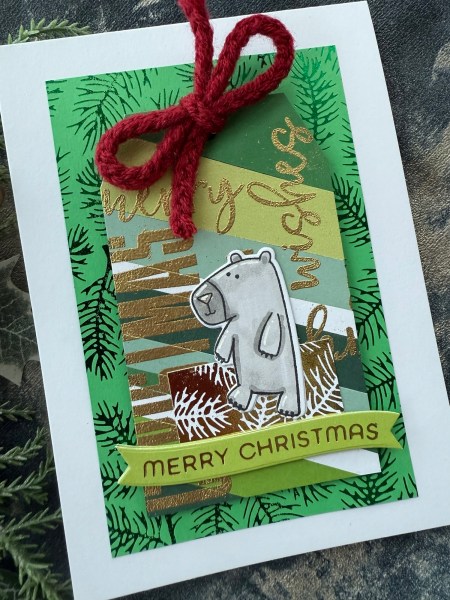
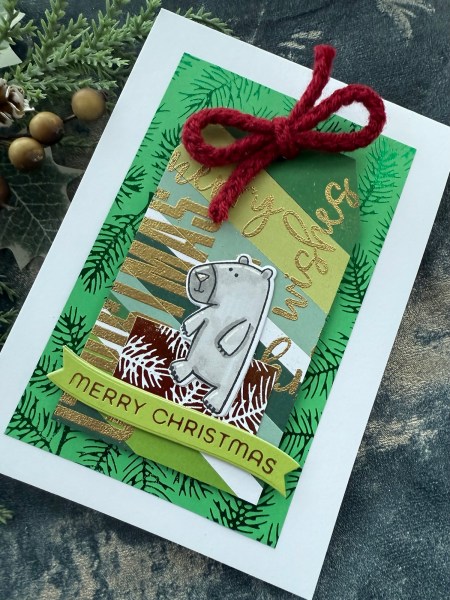
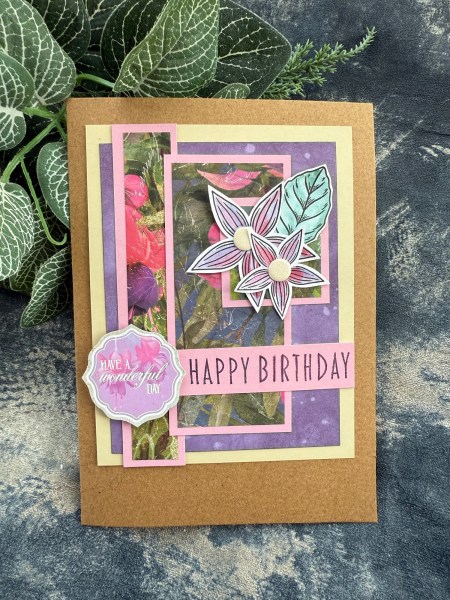
I finished both differently although clearly very similar! This first one I added dimension with both the poinsettia elements and the sentiment raised up on adhesive foam.

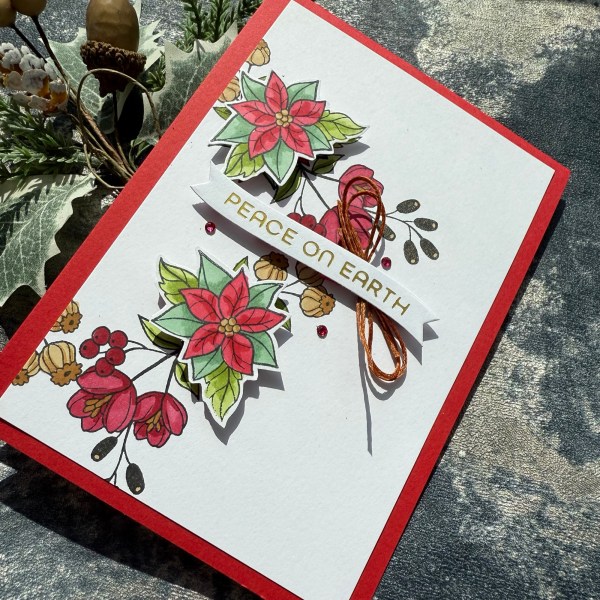
I also tied the waxed thread into a bow for under the sentiment strip.

I kept the rest of the card very simple with just some gems (which I coloured with the alcohol markers to make them red).

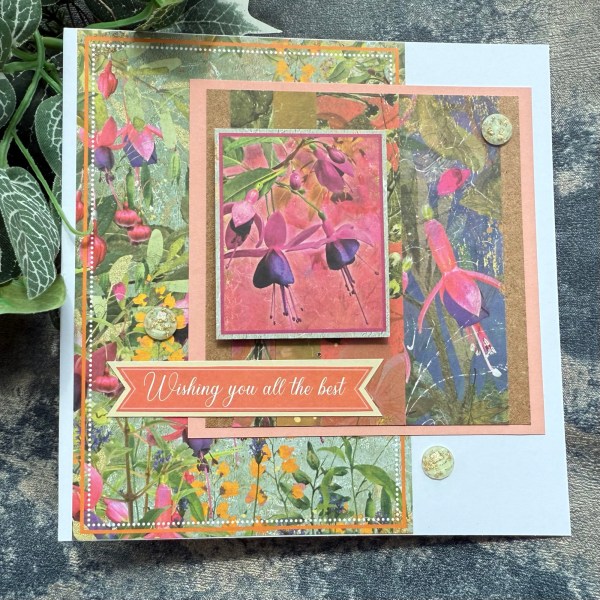
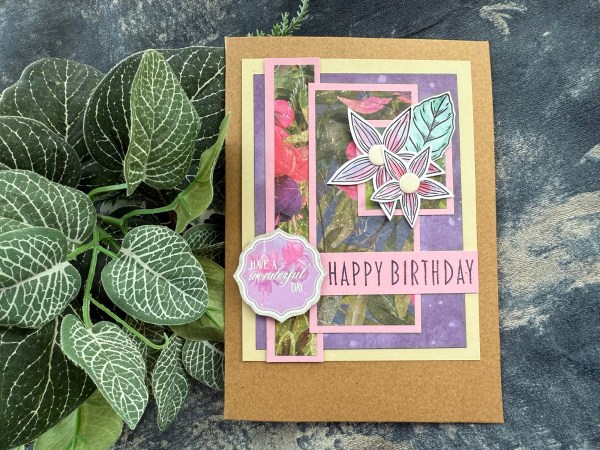
The second card I kept flat – I used glue to adhere the poinsettia and then glue to add the sentiment with the thread nested underneath. This does give a little dimension to the sentiment but not much!

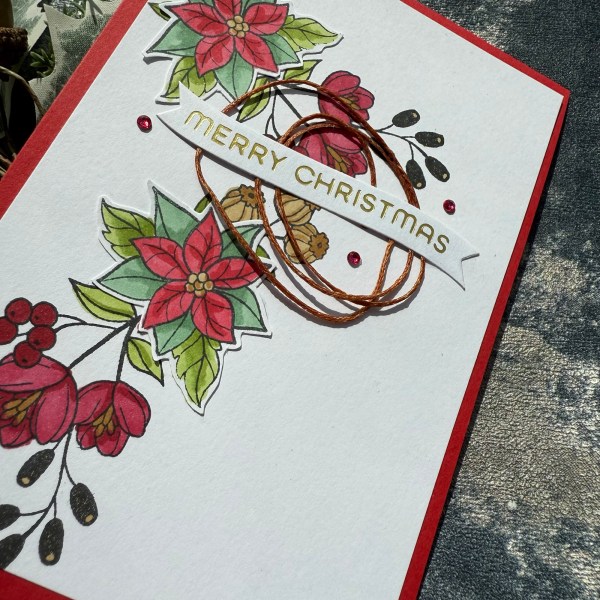
For those concerned about postage thickness this is the reminder that you don’t need to add dimension! My issue is that I love it so much I just have to take the hit and pay for the large letter postage on most cards I make and send by post!

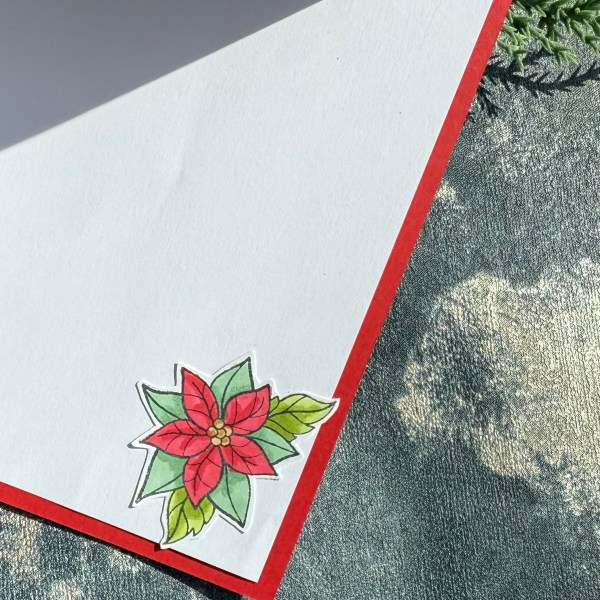
As I had an extra poinsettia stamped and coloured (my ‘in case it goes wrong extra’) I added that to the inside of the flatter card on the insert panel.

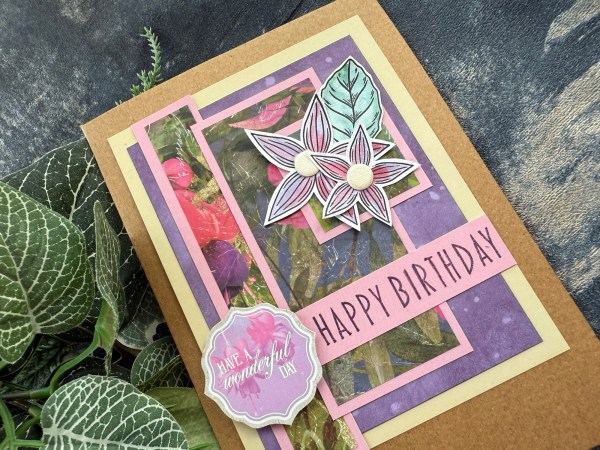
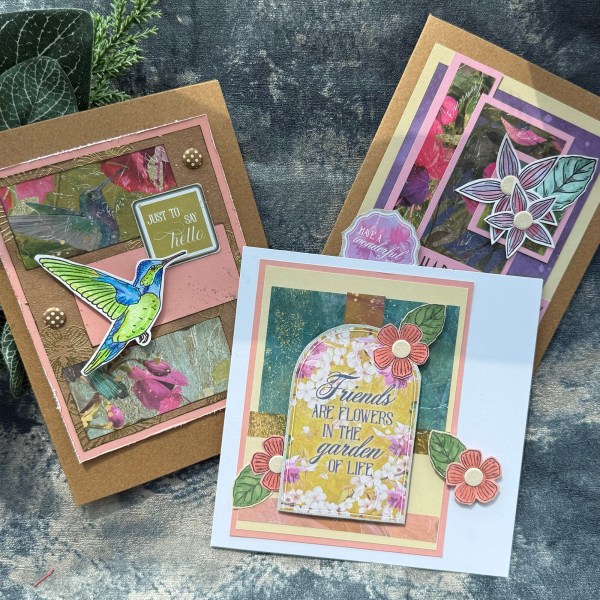
A lovely set of cards using florals (always my favourite type of card to make).

Please do come and join us over on Facebook as I would love to see how you interpret Christmas Florals too!

Happy crafting!

Catherine

Use up a magazine kit #12 – using up the scrap strips of paper

You will absolutely have seen me use this technique with scraps before but when tidying the desk I had a lot of strips of paper and rather than throw them away or keep them in the pouch and possible bend or tear them I decided to make a quick card using them!

Because I have made quite a few cards recently using the magazine kit using the KCC19 sketches this was a nice change of pace to just do something quick and simple!

After creating the panel with the strips I mounted the oval cut apart onto cardstock and cut it out. Then raised that on foam adhesive.

I then added the ribbon bow and some gems to finish off!

Don’t think many cards come together as easily as this and it was great to use up the scraps and then be able to tidy away the pouch with the magazine kit in to come back to another day!

If you want to see my series – here is the playlist on YouTube!

Happy crafting!

Catherine

Scrappin Saturday – Sunshine & Good Vibes

Today is another Scrappin Saturday where I went back to using up scraps from the pouch from other previous pages to make up this page!

I added stencilling to the back and then used the larger panels of the patterned paper (this definitely was old SU paper in the main but some little elements from other pages.

I videoed the process of putting it together. Love how the colours worked together with the photos of the woodland walk.

Happy crafting!

Catherine

Festive Friday 2025 #34

Another tidy up project from Christmas in July for today’s Festive Friday … and actually it is a few different projects!

Firstly two cute tags … using up Painted Christmas papers and the two Santa stamped images I had left over … added some die cut scraps and some scrap ribbon I stapled to the top!

I added a little green punched circle behind the Santa images – ideally I would have used a larger circle but it is too late now! 🤣

Next up I used leftover black cardstock embossed with the stars and some splatters. I created a tag and then added a die cut circle frame leftover on the desk and then some scraps of paper stacked behind the stamp and die cut bear leftover from another make!

I found this scrap of patterned fabric and it was perfect for the tag!

And finally remember the stripy tags … this one I added to foam and to the panel of pine needles foiled cardstock … I added the knitted red rope for the top of the tag and then added a foiled die cut sentiment. Fun to put together this card using the leftovers!

Obviously these four projects have one thing in common – MFT stamps! These cute images really make for fun focal elements on all sorts of projects!

Happy crafting!

Catherine

Use up a magazine kit #11 – KCC19

Back again with three more cards from the KCC19 sketches I used with the magazine kit to make my 11th installment of Use up a magazine kit for my series on YouTube.

This time I used sketch 4 for this lilac themed card.

I added the die cut leaves from other dies in the stash and also the sentiment is another magazine kit.

Next up is sketch 6 but this time I totally changed it up and I wanted to use the large card topper from the cut apart in the background which meant I only used the patterned paper parts of the sketch as a square card topper.

I also rotated that part of the sketch – sometimes the sketch is just a jumping off point and I don’t keep to it very faithfully – but the sketch elements are there!

I also added another card topper and raised it on foam and then added the sentiment below. A fun and quite special looking card with all those fun patterns!

Sketch 11 had the five blocks of patterned papers – and because all my papers are similar with larger prints to them they didn’t look so different but still look fun arranged like this – I added the flowers as a cluster to the top to embellish – otherwise a fairly faithful rendition of the sketch!

I chose to ink and splatter the background panel which made it special – even though I did have to do it twice as stamped the sentiment too far left originally as it got covered by the paper pieces! Doh!

So that’s another three made (9 more sketches to work through at some point) and my 11th play with the magazine kit!

Really love how different this kit is from my usual style and it is good to play with the rich colours of the papers and mix in the pastel cardstock too!

Happy crafting!

Catherine

UK stampers forum decorated tag swap

Hi

I am back with another decorated tag swap for UK Stampers forum and this time I’ve decided that I am done with this hot weather and ready for autumn!

I’ve gone for lots of the autumnal colours using a mix of paper scraps and cardstock in the background- plus the ruler ribbon and some die cuts and created a very mixed media type background.

I’ve added stamping and also gesso through stencils – both white and black – and then mounted the background onto a deep red coloured base.

I then chose to stamp succulent flower images into the centre of the Carabelle stamp stamp after masking the edge off and blended ink through the mask.

I then added lots of die cuts in both the gold cardstock and the green and black.

I added lots of splatters and then finished off with the 49 & Market sentiment chipboard and some brown string for the topper.

A fun autumnal themed tag for the swap! Hope the recipient doesn’t mind the US name for autumn! 🍂

Happy crafting!

Catherine

Use up a magazine kit #10 – KCC19

I decided to revisit KCC19 again but this time with the Use Up A Magazine kit series I am doing over on my YouTube. So first I filmed the cutting and organising part of the project and then I started making some of the cards – I still have quite a few to go (there are 15 card sketches in total so may take me a while!) but it’s a good project to pick up and put down as each sketch element is in an envelope ready and I have a pouch of bits and bobs ready to coordinate in terms of leftover cardstock I used for the mats and layers. I actually made the cards I am sharing today over a couple of days – proving the point that it is easy to work on this over time!

I started with sketch 15 (why not start at the end!) and this is the card I made!

This had three panels of the patterned paper and suggested the placement for the sentiment and the element to the left.

I chose a Kraft card blank for this one, a cream base layer and then lilac and pink card stock for the next layers.

After adhering the patterned paper to the pink I then decided to ink up the lilac cardstock with the plum ink and splatter water to give it a fun finish.

I stamped a sentiment (from a different stamp set) onto the pink panel and adhered it all together. I then decided to take some stamped elements that were leftover from another project and water coloured them with ink before fussy cutting.

I then added them to the small square panel.

I used card candi for the centres of the flowers.

And there is the first card done!

Card two I added a large panel and then those flowers as extra but you can still see the sketch underneath.

By adding the card topper to the 6×6 card blank it does give it a very different feel – but I think it works – especially when adding the elements off the topper panel.

Card candi for the flower centres also work well!

Card three I went with the hummingbird element instead for the focal feature.

The background Kraft layer I added gold embossing to with the floral stamps – a lovely but subtle touch.

This is such a simple but effective design with just two panels of patterned paper – and really shows why I love creating with Kendras sketches – so much fun!

So that’s the first three cards of the fifteen made! Wonder how the others will come together and how long it will take for me to work through them!

Happy crafting!

Catherine

Scrappin Saturday – Together time

I was tidying the craft room last weekend and found the pouch I had popped all the scraps leftover from the last few scrapping projects I’d made and decided to see what I could make from them – and a scrapbook page emerged!

I did video the process and so you can see how it came together.

Really love using those squares that had come from when I had die cut a film strip at some point from the paper … amazing what stuff I save sometimes!

I used all sorts of scraps from the pile to create the cluster and once I had adhered all the bits together before I added to the base I moved them all to the side and did some stencilling!

I used the Arden creatives stencil and some smoky slate ink to create the little ledger and then some splodges which I created using the packaging technique. Of course I also added some splatters.

I then stuck everything down including adding some of the cute little sequins from the Hey Little Magpie embellishment kit.

I then had a hunt through the acrylic elements in my box and chose the Together Time for the title and the seagulls to add to the page (no seagulls in the pictures but promise there were loads in Paignton!).

Loved how this came together and got to use up some of the scraps!

Happy crafting!

Catherine

Festive Friday 2025 #33

I suspect most of my Festive Fridays for August are likely to be tidy up from Christmas in July where I had bits and pieces leftover which weren’t worth putting back in the box or too big to throw away! At least it makes it easy for me given how I don’t really fancy making lots of Christmas projects this soon after Christmas in July’s mammoth effort!

This card came from the patterned paper left from the fun fold card I made – including the die cut circles.

I also added the words left from the red, green, gold colour scheme card.

The moose – which is the cutest thing ever – is one of the leftovers from the Night Sky cards.

Perfect set of ingredients for this card drawn from so many other projects!

I added the card candi to finish off and then added some strips of the patterned paper to the inside to coordinate it!

Happy crafting!

Catherine

DT: Addicted to stamps and more #499 – any occasion

It was my Mums birthday at the beginning of August and I made her a pretty special card – and as I get more blog views when it is a design team I saved sharing it for this post for Addicted to Stamps and More!

I used a stencil for the background and then Rosy Outlook for the stamped images.

I added in a bit of special shine with the foiled die cut leaves.

I also die cut the numbers from the same foiled cardstock and then die cut the letter Mum from yellow.

Then I added glitter glue to them to give them extra sparkle and added a sentiment from Altenew.

I finished the front with the little clear yellow gems.

Inside I printed some sentiments and then cut them and layered up some panels with an extra rosebud image and some leaves.

Then on the other side I added the three layers for the place to write the rest of my greeting with a bit of stenciling in the corner and the larger rose image.

And another sentiment!

A pretty special card for my special mum on her special birthday!

Happy crafting!

Catherine