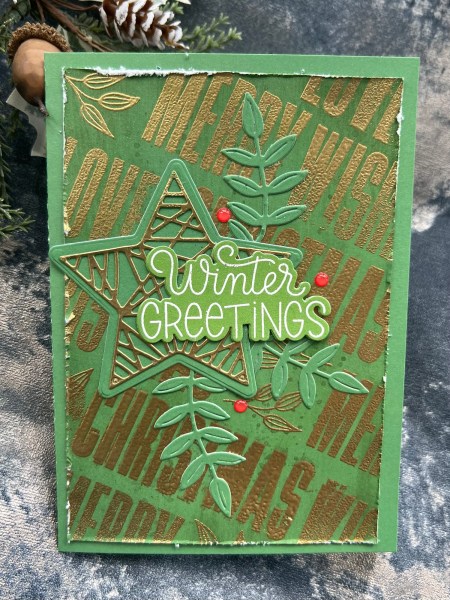
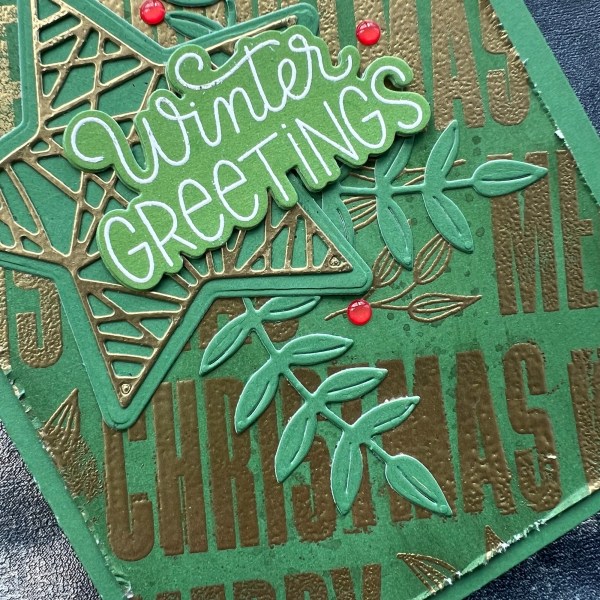
So I thought I would challenge myself to make a card without using the glimmer machine or even something that had previously been foiled – and ended up going OTT with the embossing powder instead! 🤣 apparently I can’t move away from gold and shine!
I created the card blank and a panel to go on the top from green cardstock from Kingston Crafts (perfect for exposing the core with a distress tool to create a bit of interest!) and then went to town with the More Wishes stamps that I love so much but actually haven’t used anywhere near as much as I expected! I added them across the panel with versamark and then added gold embossing powder!
In some of the gaps I added the leaf images from Tidings and Trimmings and this added a softer feel.
After embossing the full panel I added inking and splatter to the panel – this gives it a little bit of a different colour to the base and the other die cut green elements but it’s only subtle to it works.
I then die cut the star from the Tidings and trimmings set from the green and those sprigs (which are from a spellbinders set).
Next I embossed a panel of the leftover green with the gold and once it had cooled and set I die cut the fancy star to layer on the background star.
I then added a sentiment that was already embossed and die cut – it is in a lighter green than the rest of the card but I think that works ok.
The red gems I added as a nice contrast to the rest of the green and gold card!
Loved how this ended up – and no foiling – but major amounts of embossing instead!
Not had any posts the last few days as life has been so busy and not had much time to create (apart from my index card moments) but today I have managed to get this sorted and uploaded from my latest play with the magazine kit. So check out YouTube for the video of me putting this together.
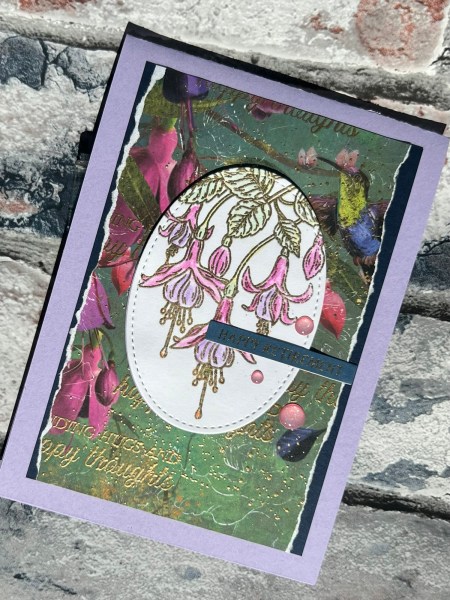
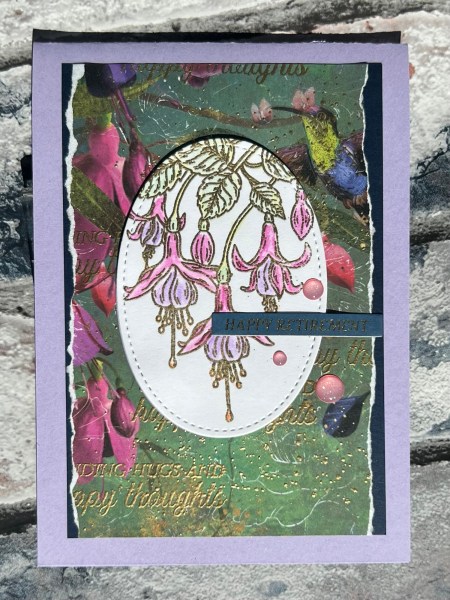
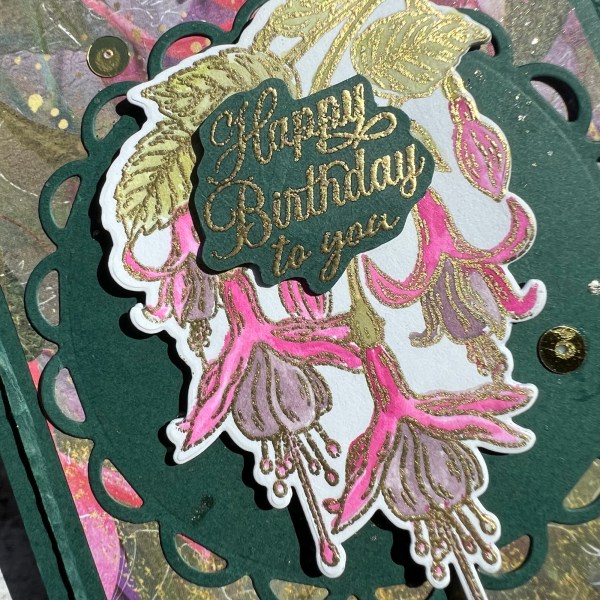
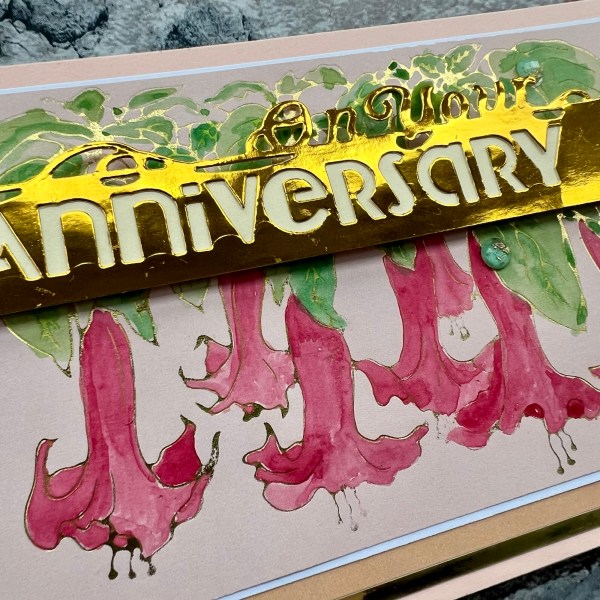
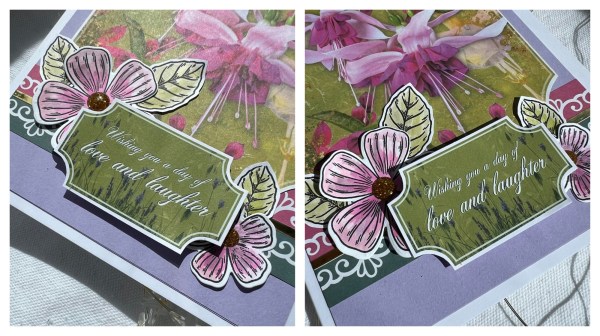
The last card I made using the kit I stamped two of the fuschia images and never got round to using the second image so I had to use that for the next card in the series – mainly because I needed to use the stamp platform and couldn’t whilst the stamp was still in there in the right place for stamping embossing after colouring!
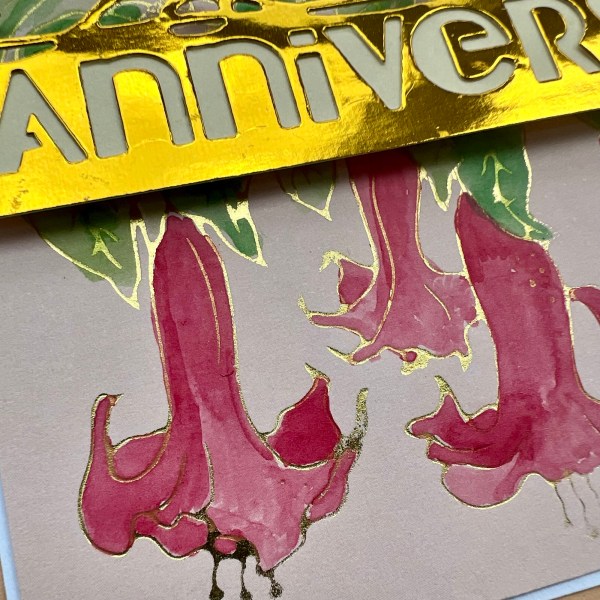
So I coloured the image with watercolour pencils and then embossed with the gold. This time I decided to die cut the image out with the oval stitched shape die rather than use the coordinating die from the kit.
I then took the same patterned paper as last time but the reverse side and decided to add texture and the text with more gold embossing. I then tore the edges of the panel for a different look and edged it with the navy.
I then adhered that to the base which I had made from a lilac cardstock.
I die cut a few more of the ovals from the lilac and stacked them under the floral oval to give it some dimension.
I then chose to add a foiled and die cut sentiment from the stash rather than using the kit – mainly as I was short on time making this card so went for the grab and go element instead!
I added some pink glitter gems from my stash to then finish off.
All that embossing in the background gives interest to the paper and of course ties in with the embossed focal element. Love it!
I decided to carry on with the magazine kit as I was a little inspired when I started working with it for the card last week but have delayed blogging releasing the video over on my YouTube for this series until now as had other projects to share.
This time I focused on one of the stamp images I had yet to ink up – and I went for the usual messy watercolour and embossing technique I use quite often for floral stamped images as it’s just so easy and always looks good!
I decided the dark green was a good colour along with a panel of the patterned paper for this one. I used an old spellbinders die cut to give a base for the focal point and then also added the embossed sentiment to the top of the floral element.
I added sequins to finish off the card – and I like the fact I distressed the edge of the background panel to give some additional texture.
I also added some splattered shimmer ink to the whole of the background so the whole panel has some shine and shimmer when it catches the light!
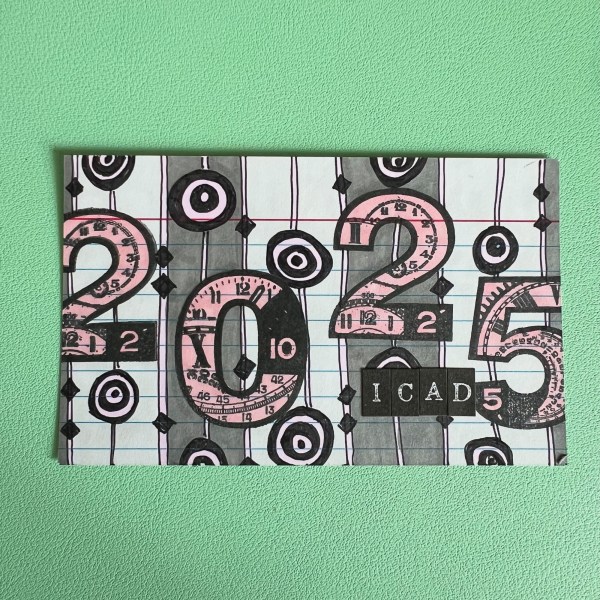
Once again I decided to join in with the #indexcardaday challenge for June and July. Last year I managed the full year – who knows if this year I manage it – but hopefully if I keep things simple I can!
To try and keep simple I’ve decided to concentrate on stamps and doodling this year and although I will try to post daily on my instagram I will only post weekly or thereabouts over here on my blog.
I’m not following prompts or anything like that although the prompts are fun to see when you see how people interpret them – but I’ve decided to keep it really simple and just focus on pattern and colour instead!
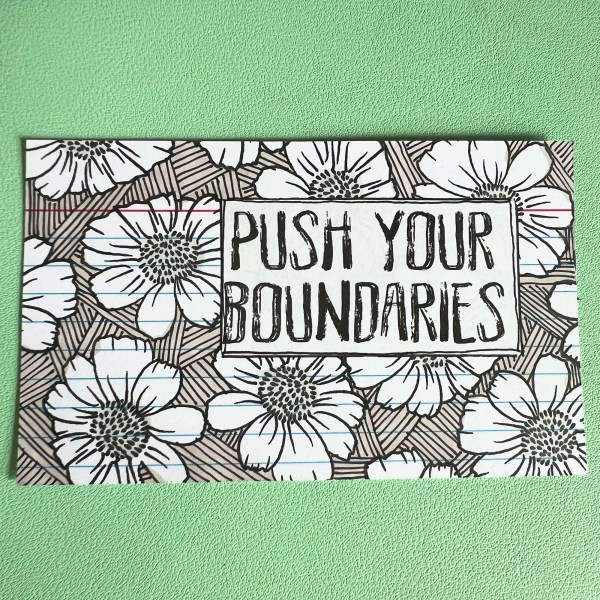
I started with an Altenew stamp which was on the desk – one of the lovely florals from the Smile More stamp set. Stamped it in versamark and then coloured the background area and the centre of the flowers with grey promarkers and then had fun doodling the background area. I then added the Art By Marlene sticker as my sentiment and doodled the edge of this as a frame.
Next I used a very old wood block stamp of an eye. I doodled a connection between the eyes to create some wavy lines across the card. Then coloured the background with the two alternate colours of promarkers. Again a sticker sentiment from the same Art by Marlene set.
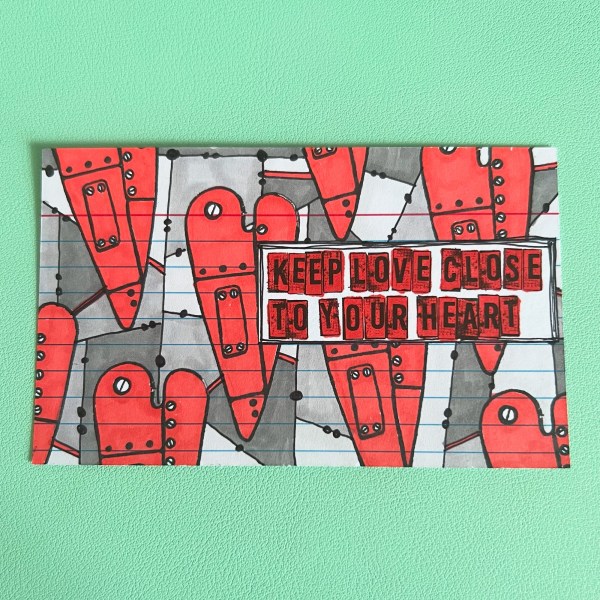
For day three I used one of the stamps Darcy designed for Paperartsy for the hearts as a repeating image, then doodled the background elements and added the colour with three greys and the claret colour using the promarkers – definitely feel like this worked the best so far. But then added the sticker sentiment and chose to colour that – not a fan of how that ended up but hey ho!
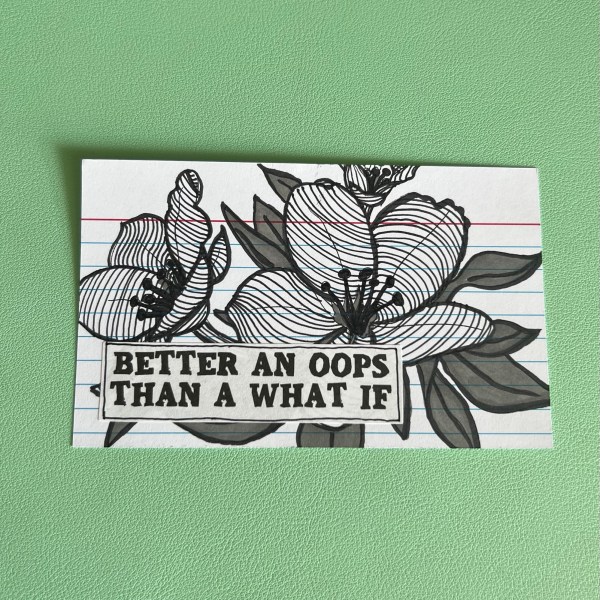
On day 4 I chose one large stamp – Splendid Bouquet from Altenew.
I doodled inside the petals, thickened the outline and then coloured the leaves with grey … wasn’t entirely sure about it … so chose the sentiment sticker accordingly. Now I quite like it but it took time to grow to like it!
A bonus on day four was that I also made the cover card … again Paperartsy stamps and then doodled the background elements and used my promarkers to colour. I chose some stickers to finish off for the ICAD part.
Quite pleased with how that turned out!
Onto day 5 … this time I did my card over the course of two sessions – one before and one after work!
The circles were stamped using a Kim Dellow Paperartsy stamp and then coloured with my promarkers and then I doodled the wavy lines and added some doodles to the circles – and of course the sentiment sticker!
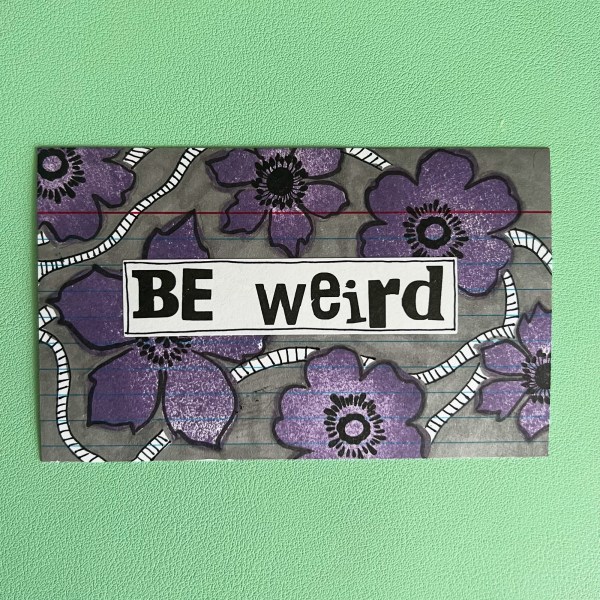
Day 6 I changed it up a bit by stamping the flowers using different shapes and with the Purple coloured distress ink.
I then went back to stamping in black using the versafine for the centre of the flowers. Then I used promarkers to outline the flowers. I added the doodles and then coloured the background with the dark grey promarker.
Love the mottled and varied depth of colour in the flowers from using the distress ink. So pretty!
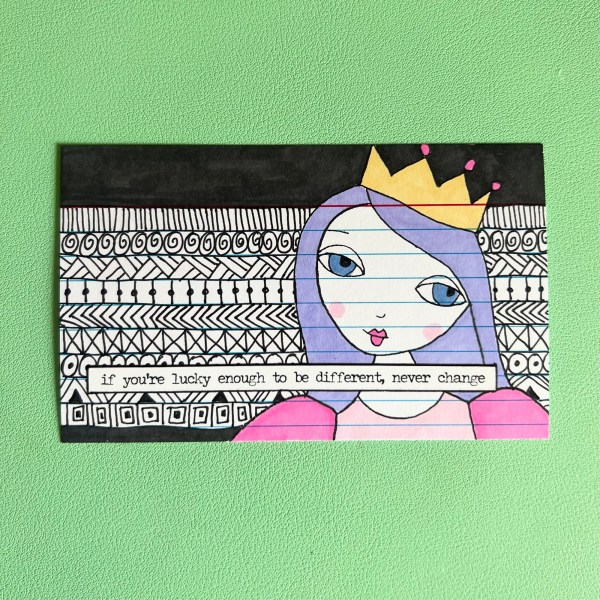
Day 7 I did a lot more doodling – the benefit of it being a non working day! I also chose a different style of stamp for the focal image with this old stamp from Stamperia.
Loved this! I also delved into the sticker stash and chose a Tim Holtz one to change it up from the Art by Marlene ones I have been using!
So that is week one done and dusted … I’ve just finished day 8 … so will start off the blog post for next weeks collection in a minute ready for sharing next week.
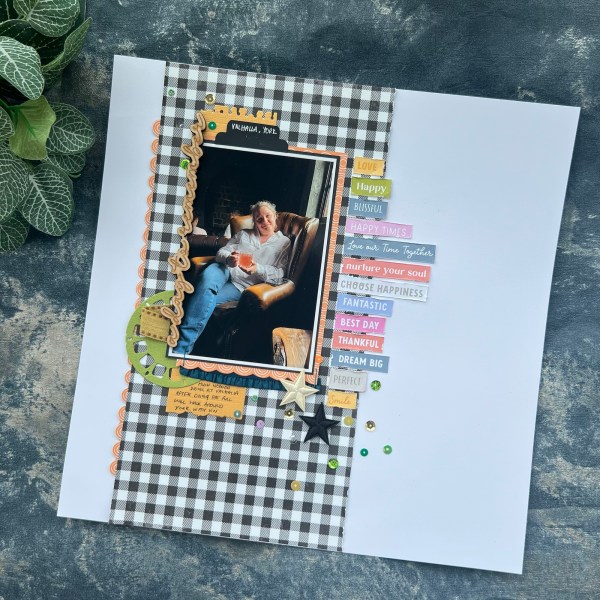
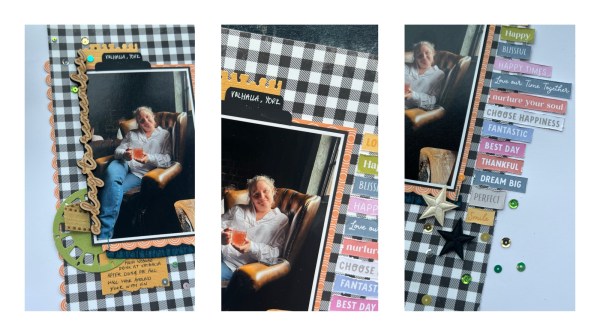
I’ve not done a Scrappin Saturday project for a while that wasn’t made weeks ahead of time but today I had nothing made that I could blog – so it meant when I got back from the hairdressers I had to get scrapping. But I was struggling to work out what to do – so I decided to go easy on myself and do a page kit.
I buy my page kits from Hey Little Magpie and love that they have everything there ready for me to choose a photo and get creating. Usually I don’t stick to the kit but today I did just that and pretty much followed what Sarah had designed! So she absolutely gets all the credit for this lovely page!
I did stick the video on so if you want to see me put this together (along with a little bit of a waffle) check that out over on YouTube.
Love the gingham style paper and the clever use of the sentiment strips ❤️
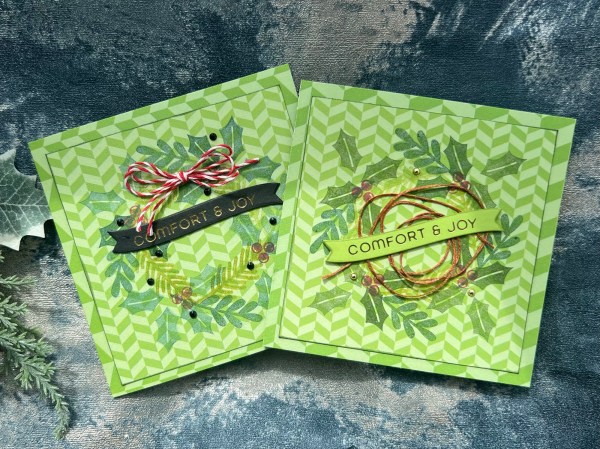
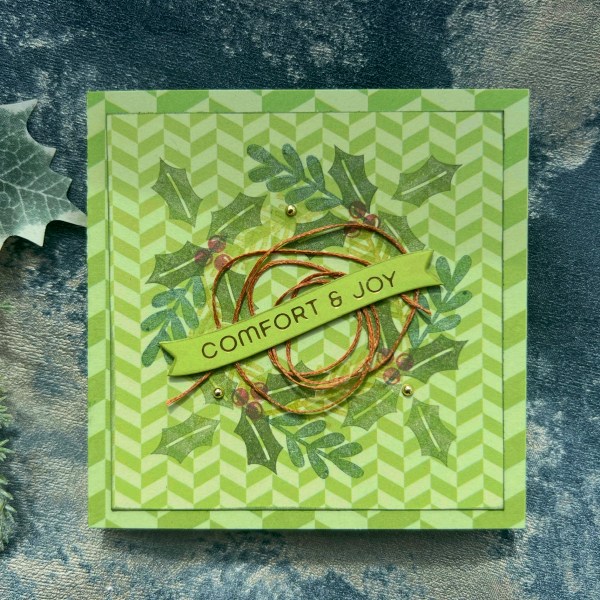
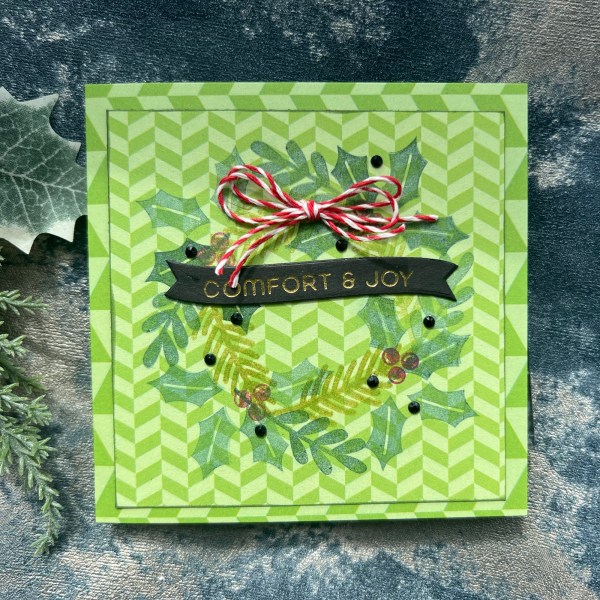
I thought I would go back to the fab wreath builder stencil design as I hadn’t used it in a while and also I went with Kingston Crafts summer paper for this pair of cards – I’ve now cut into all sheets of the green paper from this pack (which is the first of the papers for me to use up!). I guess it’s probably because it is not specifically themed and can be used for Christmas as well as summer themed projects!
I used the leaf stamps from the Peace & Joy stampin up set and created the two wreaths using a mix of green inks and the wildberry from Concord & 9th for the berries.
I then inked the panel before adhering it to the card blanks I made from the same paper.
For both cards I added foiled sentiment strips from the Spellbinders glimmer and die cut set – we all know I love a matching sentiment and die set and obviously I am also now obsessed with foiling so these are perfect.
I made loads in this session as it was my first use of the set and as usual I did loads in one go to pop in a pouch for future use!
After much fiddling I decided on the same sentiment for both cards but for one on the green and the other on the black. I stacked them up and also edged the green one with a stampin blend marker to give it some definition.
Next I chose some twine for each card and added that and then the gems for each.
Obviously the colour change of the sentiment, twine and gems give them different looks but love how they worked well for each!
If you fancy watching these come together I did pop my camera on so please check out my YouTube channel.
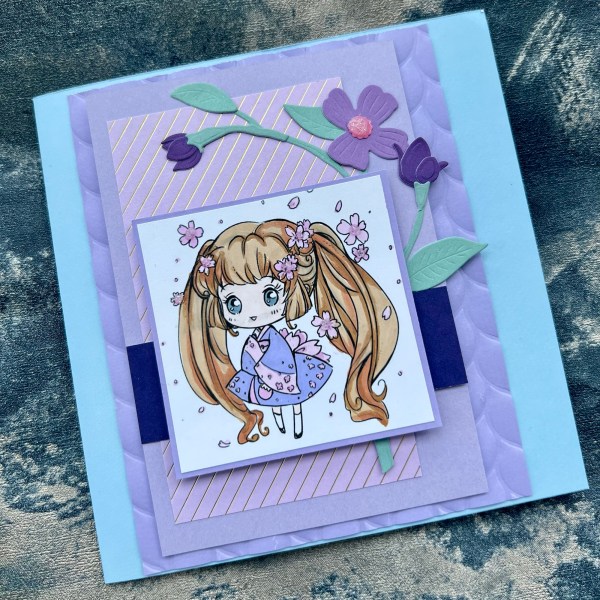
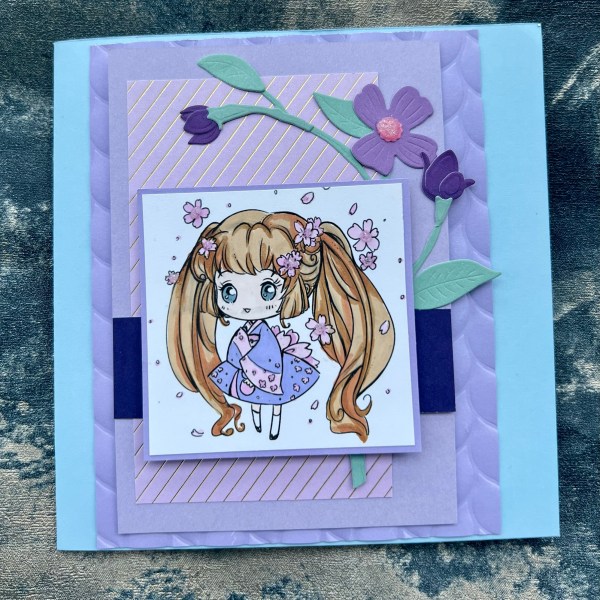
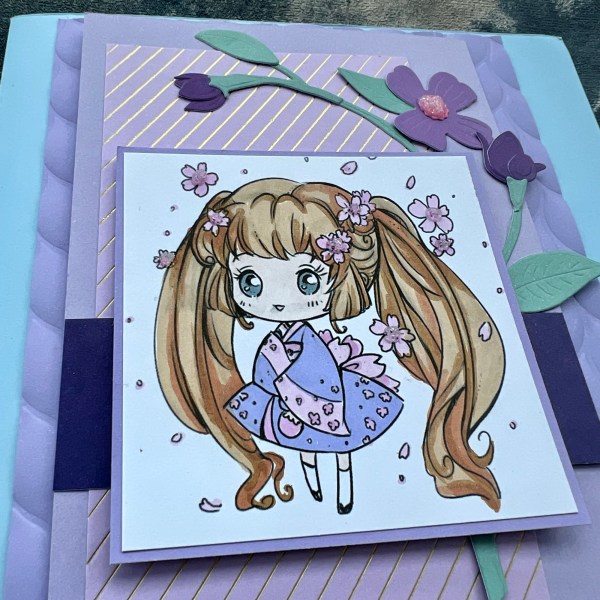
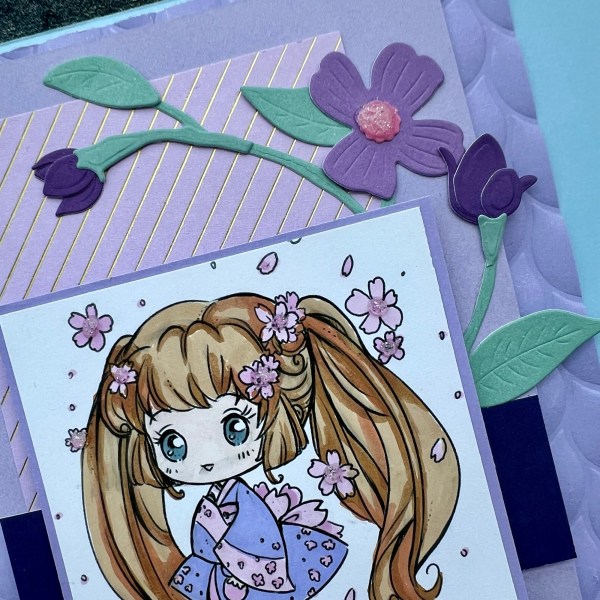
Hello! Back with a design team contribution for the Creative Knockouts blog where our theme is to use dies (or punches) and we are sponsored by Star Stampz. I used this Sakura Blossom image for my card which is so cute!
After colouring the image using my promarkers I chose layers of lilac, blue and deep purple. One of the layers I had tested a new to me foiling plate with the gorgeous fine diagonal lines on and I thought it made a nice touch!
I also added a layer of embossing in the background too with a spellbinders folder.
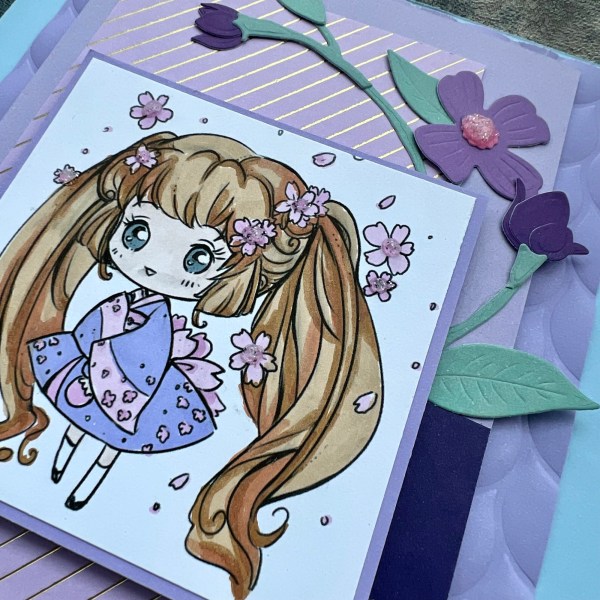
For the die element I added a floral element I die cut from the scraps in the scraps pouch but keeping to the theme of the card I kept with purple flowers and then a nice soft green stem and leaves.
I added some glitter glue to the flowers on the image and also to the centre of the open flower die cut. I just thought that added some fun sparkle to the card.
Unusually I haven’t added a sentiment to this card yet as undecided as to what I might use it for – but will probably end up with a foiled sentiment to tie in the gold on the foiled panel.
I love the different layers and the colour tones in this card. Cute! Also this is a sneak peek in some way of some of the gorgeous Kingston Crafts cardstock I have been playing with recently – so watch out for those coming soon!
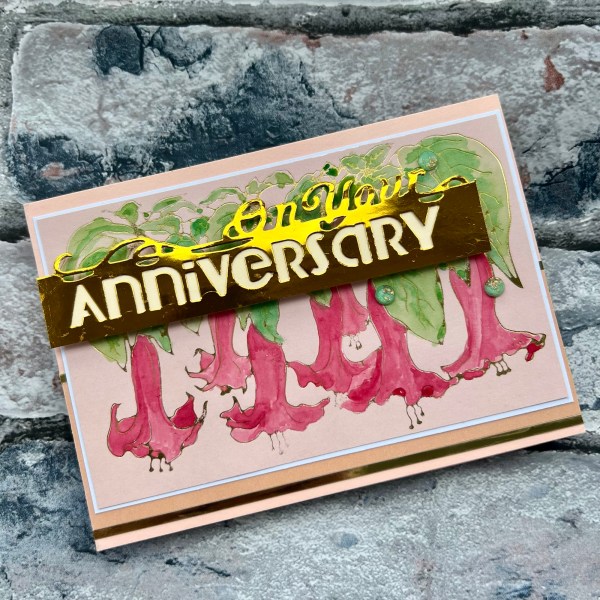
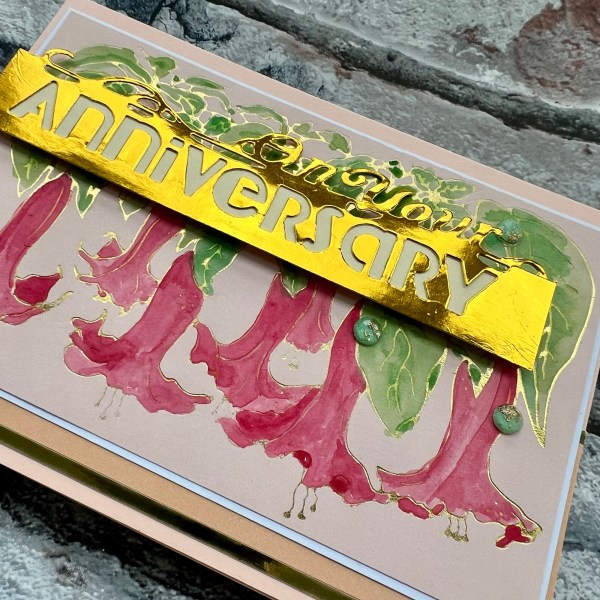
For my Any Occasion card for this fortnights challenge at Addicted to Stamps and More I played with a new to me Alex Siberia foil plate I bought from a destash group. It was part of a bundle and isn’t really the reason I bought the bundle – but it is a really fun plate!
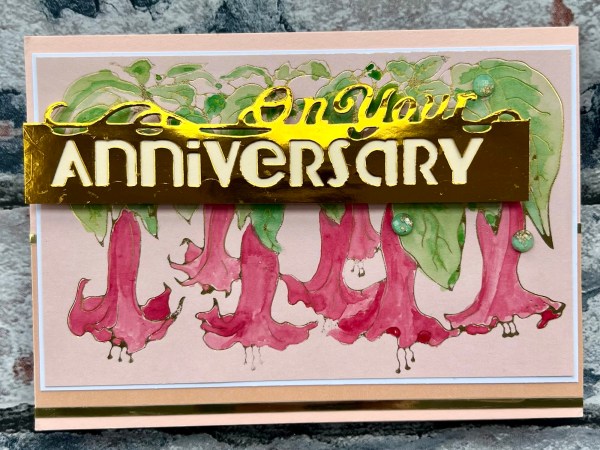
It is called Angel Bells and I believe comes with a layering stencil and maybe a die to cut it out – but I only have the foiling plate so decided to test it with this pale peach cardstock (Sneak peek of Kingston Crafts cardstock coming soon!) and gold foiling. It came out beautifully and I decided to colour it using watercolour paints.
The cardstock is a little bit coated so although it works with the water coloring it does sort of sit on the top so it can look a little powdery when dried but I think that’s fine!
After colouring the image and letting it dry I then mounted it onto white and then chose the different peaches for the background. I also added those very thin gold strips to bring out the gold.
Next I die cut from the foiled cardstock the Crafters Companion sentiment, backed the open letters with the cream and added that on top using foam adhesive to raise it up.
I love the shine on the foiled cardstock and this sentiment is fun for adding to a card with the different elements to it.
I chose to add it to the left and then added three glittery green gems from the stash to finish off.
This is such a lovely large image – and next time I might try it on a larger card blank to make it more of the feature rather than a background – also going to see if I can get the stencil that goes with it as that will be easier than colouring them myself!
So this is my fifth session where I have sat down to play with a magazine kit I bought where I’ve turned it into a series on my YouTube channel to see how I use up the kit.
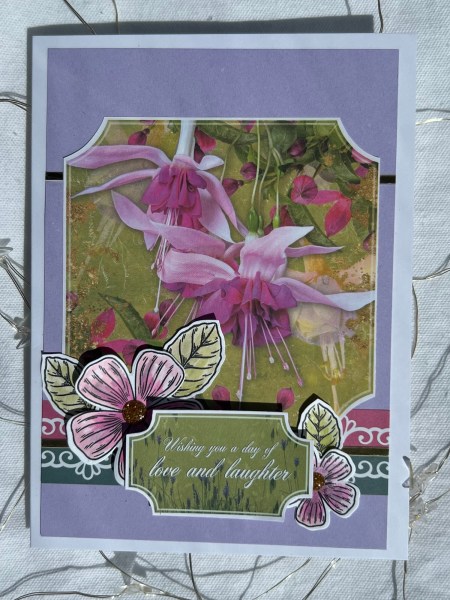
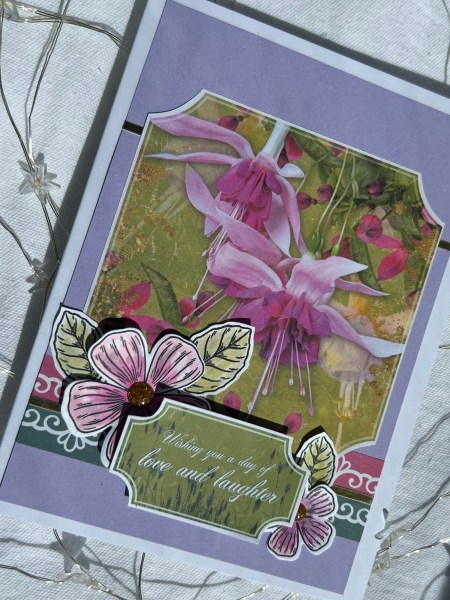
This time I made a card using mainly the cut apart paper from the stash and then added in some stamped flowers and leaves which were in the kit.
I added the lilac cardstock and the gold trim elements from my stash along with the glitter gems in the flower centres.
This is not my go to type of crafting and I think using up these panels which are like card toppers might be the most challenging thing in this series but I like what I made here and think I did a nice job on something that isn’t in my normal comfort zone!
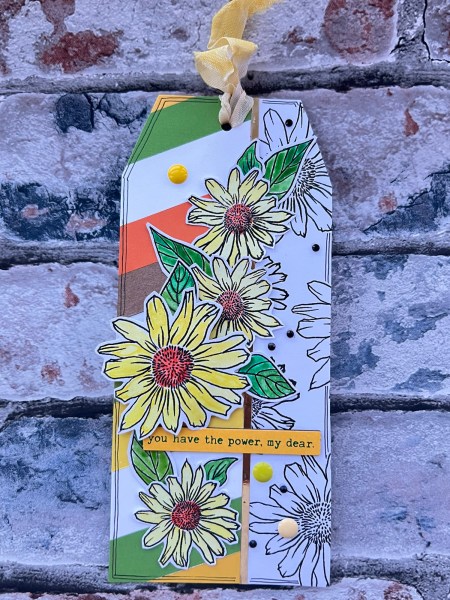
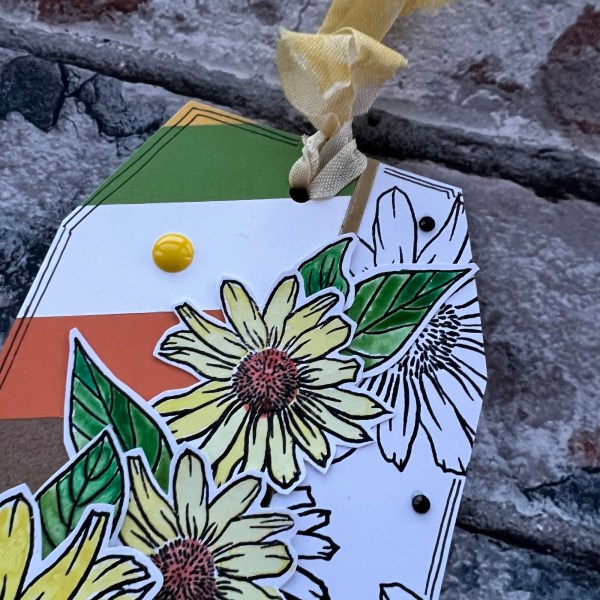
I few days ago I made some stripy panels using scraps of cardstock and whilst I was making them had no idea how I would end up using them – but then on Saturday I had an idea for my UK stampers forum tag of a half and half tag – so that is what I made!
I used one of the stripy panels to cover just over half of the tag and then stamped a piece of white with the daisy stamps and embossed them and covered the other half of the tag with that!
I added a very thin strip of gold to the seam which helped finish it off nicely.
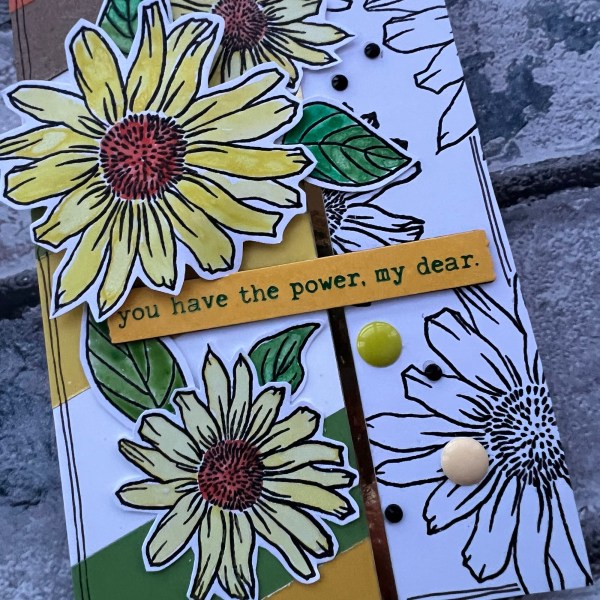
I then stamped and embossed the individual flowers and leaves and fussy cut them out.
I added colour using my watercolour paints and once dry I added them to the tag. The largest flower I added using the foam adhesive to raise it up for dimension.
I chose a Dina Wakely press plate sentiment I had foiled in green on yellow. I stacked it up with some more of the die cut shape in black for underneath – I thought the black worked with the bold stamping.
I then finished the tag with three large enamel dots, the black sparkly gem and some yellow seam binding. Oh and also doodled the lines around the edge of the tag to frame it.
Really happy with how this came out and pleased I’ve already got one of the stripy panels used – I have quite a few more to use up so no doubt some more stripy projects will happen soon!