Festive Friday 2025 #14

Today’s festive friday project was a quick one because I already had the sewing done! But obviously if I had been sewing these as well as assembling them it would have been a longer job! So please take this as a reminder that you don’t always have to make a project start to finish – do them in stages so it makes the final job of putting them together easy!

And easy was needed as I put these together last weekend when I was feeling rough with the start of the cold that then knocked me out for days and wasn’t able to sit for long at the craft desk but wanted to get a bit of making done!

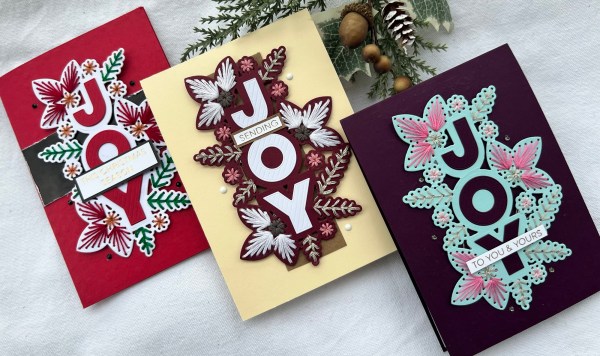
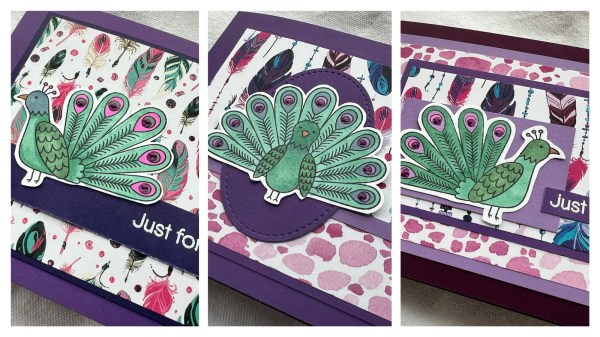
And so three cards made!

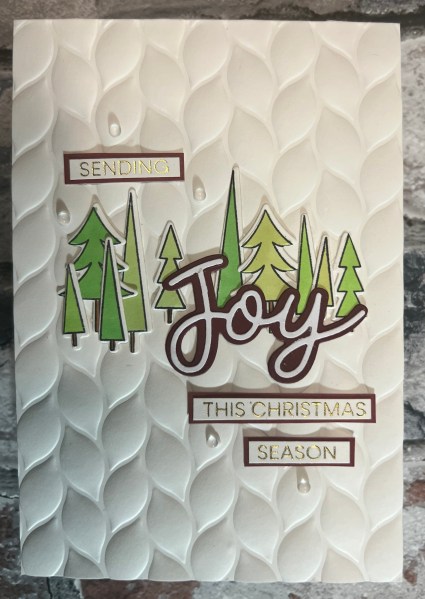
I had to die cut the letters for the centre of the joy which on the red one I stacked a couple of layers for dimension – but the other two I kept flat.

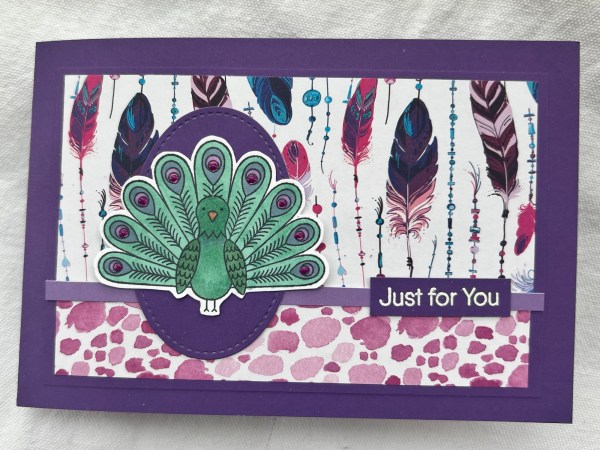
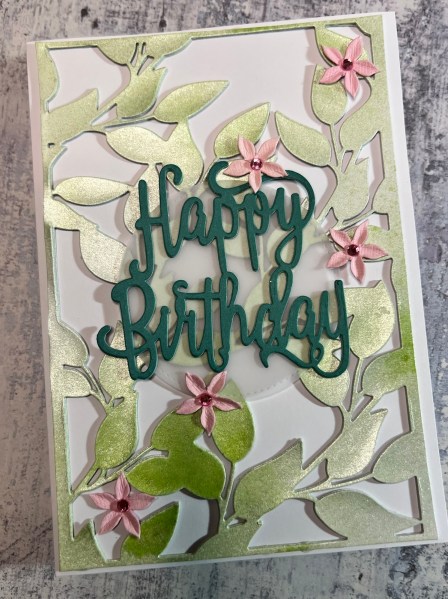
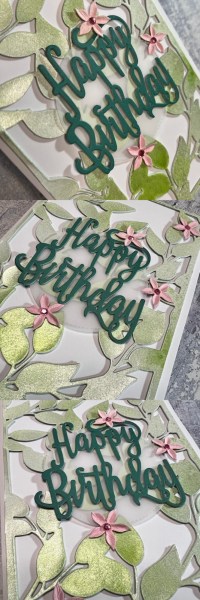
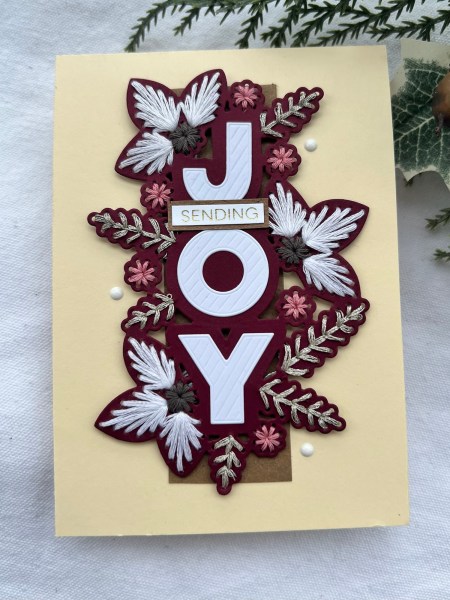
I started with this one – the pale colours pop against the dark blackberry bliss background.

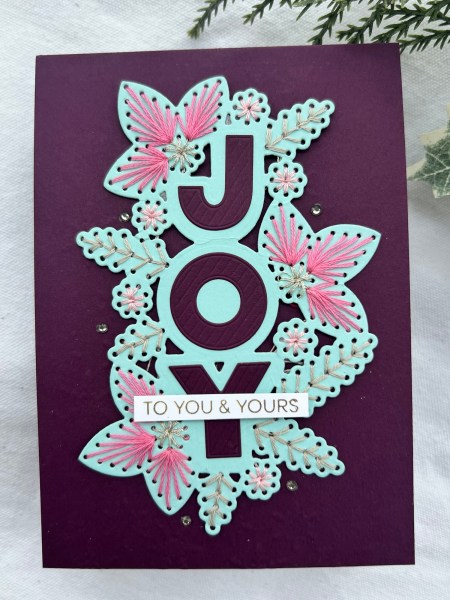
I actually dry embossed the background but didn’t quite get the sandwich right in my spellbinders platinum 6 so it is only subtle – I am still learning how to do each sandwich for the many types of folders I have!

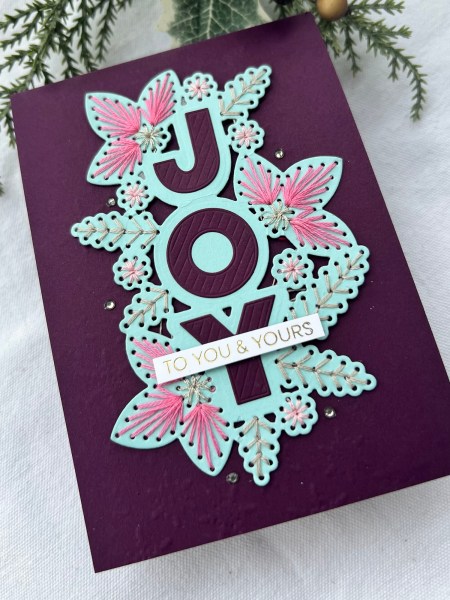
I then kept it simple – glued the sewn piece into place and then added a foiled sentiment which I used a spellbinders press plate to create and then trimmed into the strip. I added some scrap cardstock under the strip to just make it a little dimensional above the sewing.

I then added some dark grey gems that I thought worked with the sewing.

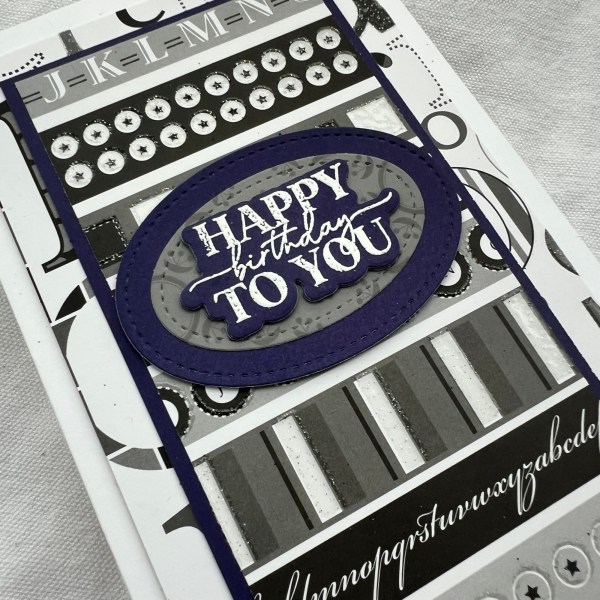
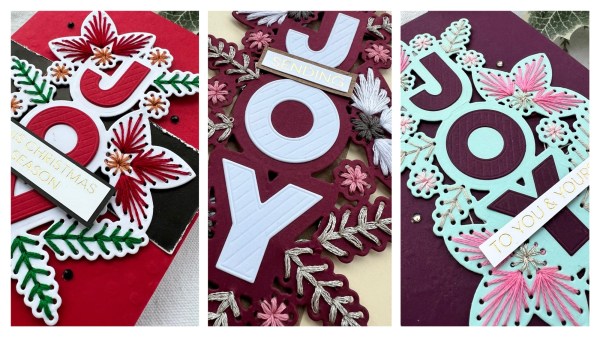
Next I chose a red card base for this more traditional looking card. Again I embossed the card front – this time I think the sandwich worked better with the shim I added and so more of an impression – this time some dots.

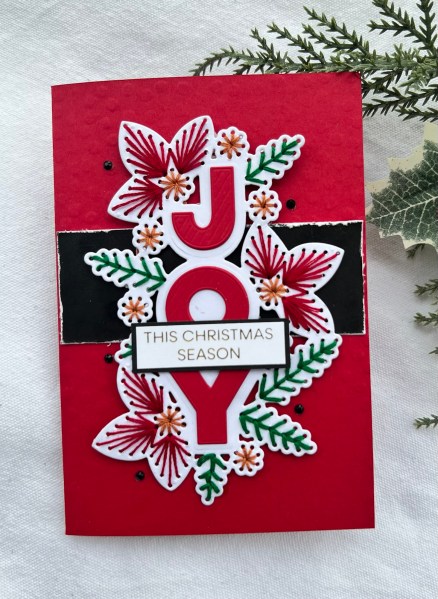
I added the band of black cardstock which I distressed to reveal the white core.

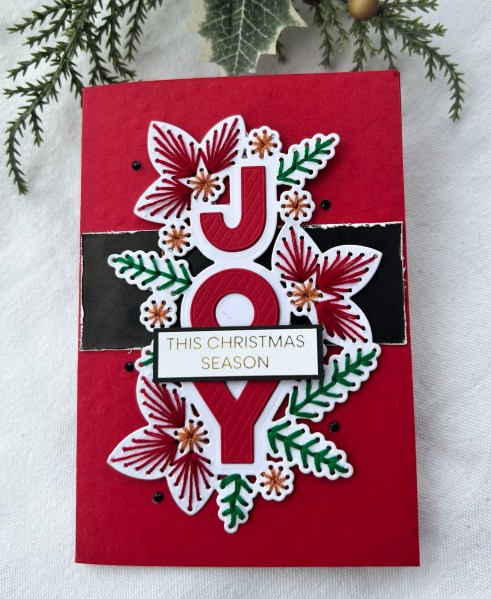
The sentiment (same foiling with the press plate) I added onto a layer of the black to bring connection to the background.

And of course the black gems.

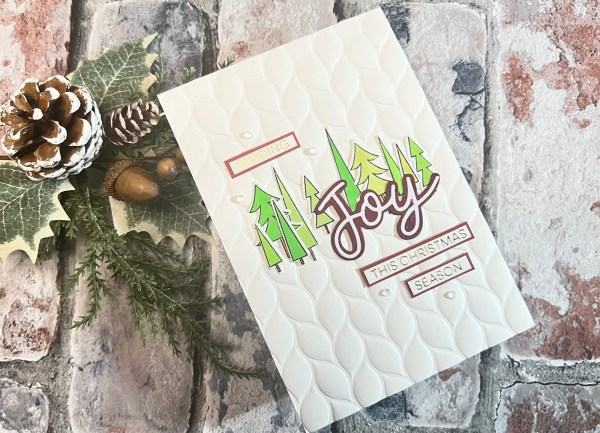
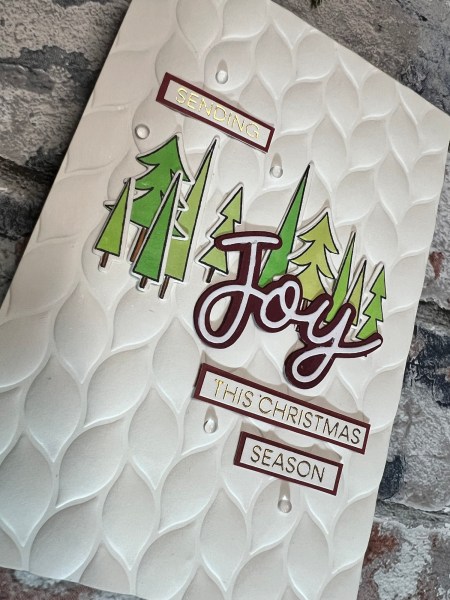
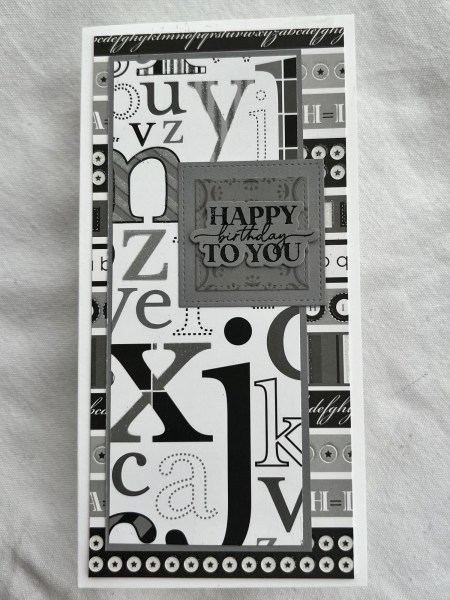
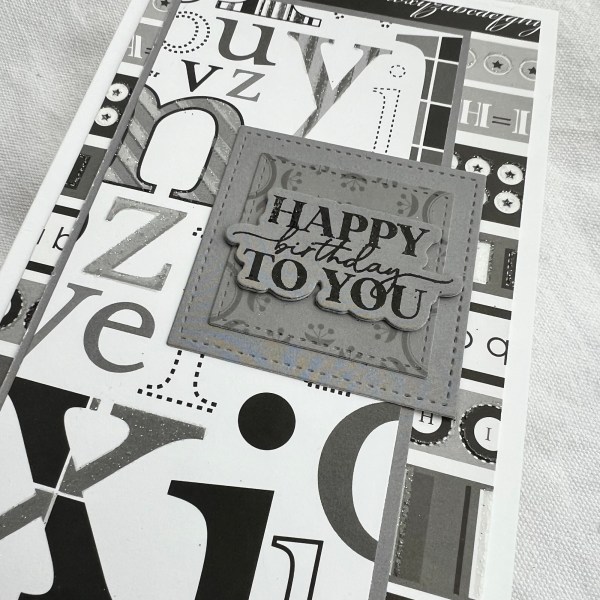
Finally this one was very simple – a cream card base and a panel of Kraft under both the sentiment and the sewn element.

I think with the bright white letters and some of the sewing it added a nice contrast with the cream card.

Adding the white enamel accents also helped to keep that theme going.

So three cards that were simple to put together – but mainly because all the impact comes from the sewing and I did that months ago so they were ready to grab and get assembling!

Now I just need to feel better so I can sit in the craft room again – not managed more than a couple of hours awake at a time for most of the week – it’s not been fun!

Happy crafting!

Catherine

DT: Creative Knockouts – embossing

Today’s challenge at Creative Knockouts is to use embossing – so I did both types for my card. I used a digital stamp from Sheepski designs who unfortunately no longer is selling their designs – sad to see a creator close their business – but you can still follow their creativity at their blog.

Anyway I used the butterfly image that has the cogs and steampunk type design – so I created a background using the cogs stencil in my stash. After inking it I added clear embossing powder to it which gave it a fun texture.

I then took a separate piece of card and inked it with the same colours but heavier inking and ran it through an embossing folder with the letters. I then inked over the top of that to bring out the dimension and texture.

I coloured the image with stampin blend markers and then die cut it. I added two more die cuts behind it to stack it up and then lightly inked the edge.

I then used the die cut thank you that was already on my desk which is one of the dies that came with the spellbinders machine.

Simple and I think quite fun!

Happy crafting!

Catherine

DT: Kingston Crafts – foil cardstock stock

A black and white picture is always fun to scrap because any colour goes well with it – so I chose this selfie I took New Years Eve 2020 and decided to scrap it with all the colours of the super bright and shiny foiled cardstock from Kingston Crafts (except the silver and gold).

I kept it simple with die cutting some rings from each colour in a few sizes and then worked out how I wanted to arrange them onto a piece of white 12×12

Next I decided for the background I wanted to stamp happy using a few different stamps in shades of grey.

Once I had done this I glued each foiled circle down in place.

I also added some coloured stamping with the little crosses from the Biggest Wish stamp set.

I just used colours of distress ink I thought went with this rainbow of colours from the foiled cardstock and scattered them over the page.

I then framed the picture with the black foil and raised that up over the circles with just a small piece of the black and white patterned paper to the right with the tab I also cut from black paper and hand wrote the date on it.

I die cut the New Year from an old Waffleflower die set from the black foiled cardstock and then the letters for the title from the same – that black foiled cardstock is fabulous! I can see I will run out of that first!

I added my journalling with pen all about how I was glad to see the end of 2020 but how we celebrated having survived the first part of the pandemic (my hubby and I had spent most of December poorly with COVID-19 so this was us being grateful to be feeling more human by this point! – it’s odd that I am blogging this now when I have been so poorly the last few days with another cold virus that I am suspecting was actually Covid!)

I also die cut some tiny hearts from the black foiled cardstock and added those as little tiny embellishments all over the page.

Shiny cardstock isn’t normally my thing for scrapbooking but this page may well have converted me! It is so shiny and really brought the fun to my page!

I hope you like this! And it is one of the ‘as seen on tv’ projects … so funny to see my own face popping on the tv!

Happy crafting!

Catherine

Patterned paper

Today’s first of the month patterned paper project resulted in three cards.

I knew when I saw those My Favourite Things peacock stamps I bought in the sale that I wanted to use them with these papers – they work so well together I think!

I made up the three cards whilst videoing the process so please check that out on my YouTube channel.

They are all so cute and bright and cheery!

I made sure to use up some more of the paper on the inside of the cards too …

I also love the little purple enamel accents I added to the peacock tail feathers.

A fun project and I am absolutely in love with those peacocks! Expect to see them some more! Although I did buy quite a few stamps in that haul so it maybe a little while to work through them before I come back to these!

Once again I want to say how glad I am that I sometimes work ahead on my challenges and so these were created a couple of weeks ago – this weekend I have come down with a bad cold which has floored me – so pretty much horizontal with zero energy (standing for three mins waiting for the microwave to heat some food yesterday made me woozy!) – so I am thankful at least I managed to get ahead enough so this challenge was met!

Happy crafting!

Catherine

DT: Kingston Crafts – rainbow shimmer spray

Another project I made as a sample for the Kingston Crafts design team using the Rainbow Shimmer spray kit. I had fun playing with these and expect to see more shimmery shiny projects again – I am not usually a big fan of spray products but the shimmer from these made it worth it for me – just advise you to use a box to spray into to minimize mess!

It may be safe to say I went a bit mad with this one as I really got into some fun with the mixed media feel and went a bit grungy but also kept it bright with the colours! I thought it would make a special birthday card with a masculine feel.

I started with a panel of cardstock in the bottom of the box with a cogs stencil over the top and sprayed using both the fern and the Dalia coloured sprays. I was quite generous with the sprays and also did some drips too so there were some more intense spots on the panel.

I then left it to dry.

I then grabbed some of my random old wood mounted stamps and stamped them on the background with Archival Ink. I also edged the panel with the same ink to give it a frame.

I splattered some black gesso across the panel and again set it aside to dry.

Next I took a different panel of cardstock that I had been using as backing for spraying other elements and die cut it twice using a stitched frame from the shiny card. Again I used archival ink to edge the panels before adhering them together.

Next I took some old Paperartsy stamps and embossed them for the 60 and fussy cut them. I also took an Altenew stamp for the congratulations sentiment. This one I added to another piece of that sprayed background.

The colours in the sprays although they are floral based still work for some fun backgrounds which can then become more masculine in style with the right decoration. So much fun playtime with these!

Once again this is an ‘as seen on tv’ project … I’m glad I could try and get a bit of grunge into the samples for something a bit different!

And I also have to say I am glad I craft ahead sometimes as currently poorly with a horrible cold. Got gradually worse over the weekend and not really left bed all day. Have managed to watch quite a lot of crafting on YouTube in between napping though so that was nice – albeit it would have been nice to have been able to create whilst watching like I normally do but never mind! Fingers crossed I can be back tomorrow health quickly!

Happy crafting!

Catherine

DT: Kingston Crafts – Rainbow Shimmer Spray kit

I’ve got a whole host of new products to play with from Kingston Crafts – all of which went live on Hobbymaker.tv on Saturday – I thought I would start with sharing the rainbow shimmer spray samples I made!

I started with this gorgeous green die cut leaf card.

I die cut the panel out three times from white cardstock and stacked it up so it is very chunky and then sprayed it with two colours of the rainbow shimmer spray – the lettuce and the hydrangea. They are so so pretty and so shiny!

Once the die cut was dry I added it to the front of the card base. I then die cut the Happy Birthday sentiment and stacked that up too before adding it to a vellum die cut circle.

I added it to the card and then added some pink flower embellishments.

They gave the special background some pretty extra pops of colour.

I’ve got plenty of other projects I made using these sprays so please keep following my blog.

And as the saying goes this project is ‘as seen on tv’ …

Happy crafting!

Catherine

Scrapping Saturday- snapshots

This was another one of those use up the scraps type of pages and teamed it with lots of 49th & Market embellishment bits and pieces.

I videoed the process of me pulling this together!

I particularly like the stencilling in the background and the soft ink smooshing!

It was fun to use these very old Polaroids of me and my Mum!

Happy crafting!

Catherine

Festive Friday 2025 #13

Gosh it has been a busy week in my life and this project was only finished late on Wednesday as a result – I really feel a little behind on my blog posting. Partly it’s because I spent a good chunk of early March doing projects I can’t quite share with you yet – but will start doing after Sunday (Kingston Crafts are back on Hobbymaker.tv on Sunday! 🤩)

But also work is super busy at the moment and haven’t had much time to grab time to craft in the evenings. Wednesday night though I made sure I had an hour at the craft desk and this is what I made!

Firstly I used the new to me spellbinders embossing folder that came with my new Soellbinders Platinum 6 machine – I thought it looked like a chunky knit jumper so perfect for a fun background on this card.

Then I grabbed the My Favorite Thing stamps and stamped and coloured and die cut them all out twice to create a little fun forest scene across the card.

Next I added the Joy die which is from the pouch of ready die cut elements so it was an easy grab and go.

And then the main thing I wanted to try was foiling the sentiments. This came from the Joy press plate set I bought and I had tested out but failed when I tried it to get a good finish … so this time I tried it out on scrap cardstock and it worked well. I don’t have a die that fits these specific sentiments so I just cut them into strips and then mounted and cut the strips with the dark red behind them.

I just love the gold foil on these detailed sentiments – looks really fancy!

I finished off the card with some clear gems scattered across the card and called it done. Happy that I got to play and especially pleased that I got to play with new goodies – and for those that don’t know about the goodies please check out my far from professional influencer unboxing video!

Happy crafting!

Catherine

PS the foiling definitely takes some practice and I’m not sure I’ve totally got the hang of it yet but the finish is amazing – the better press turns out to be not as fool proof as they say as I seem to get rather inky and end up with ink where it shouldn’t be so need to do more practice with that – but having a diecutting machine that works as well as this platinum 6 machines does is amazing to me! Everything cuts so well! I love it!

Make it Masculine – typography

Third month of making at least one masculine card each month for my ‘Make it Masculine’ challenge.

This time I went for some really simple cards letting the paper do all the work!

The DCWV paper has some texture with encapsulated glitter in it so that adds some interest along with all the alphas for the pattern!

I kept both cards simple with just the colour of the mat changed for each one – one grey and the other a dark purple/blue.

I used the same sentiment but this time different die cut shape underneath.

I then adhered the panels to the DL shaped card blanks I made.

Simple and easy! Not exactly my usual style of card making (very much missing a flower! 🤣) but at least that’s another two cards made for the stash.

Happy crafting!

Catherine

DT: ATSM – #489 – any occasion

Hello!

Back to that pouch of digital stamps that are ready printed and ready to play with for today’s Addicted to stamps and more challenge.

I went with this gorgeous Octopode image. I teamed it up with some Spring Slimline papers from Kingston Crafts.

I decided it would work best as a slimline card with the long slim image! I created the panels of the patterned paper for the base and then a little tab for the left hand side. I decided to add in a few die cuts.

I coloured the image with promarkers – tried really hard to get some highlights and texture to the image.

I then added an Altenew sentiment that was die cut and stacked a few deep to make it chunky and give some dimension.

I then added the gold gems to finish off.

Love this image and love the colours I chose to go with those spring slimline papers.

Happy crafting!

Catherine