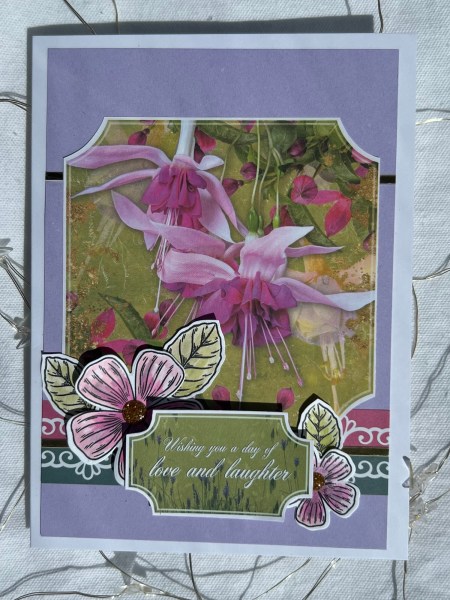
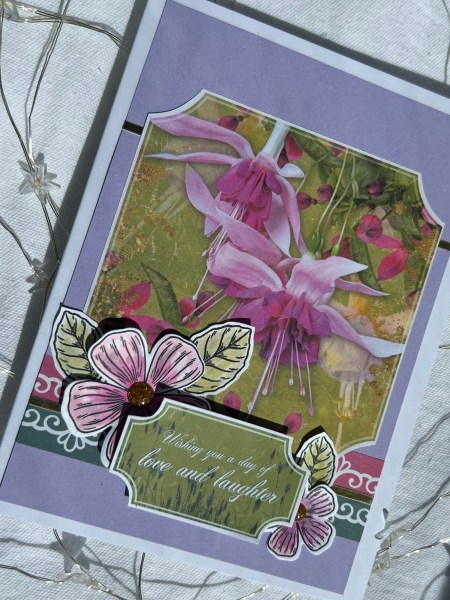
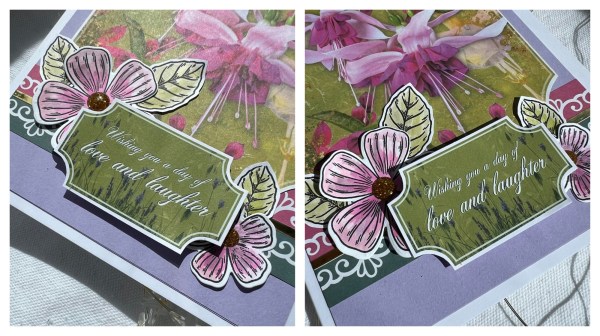
So this is my fifth session where I have sat down to play with a magazine kit I bought where I’ve turned it into a series on my YouTube channel to see how I use up the kit.
This time I made a card using mainly the cut apart paper from the stash and then added in some stamped flowers and leaves which were in the kit.
I added the lilac cardstock and the gold trim elements from my stash along with the glitter gems in the flower centres.
This is not my go to type of crafting and I think using up these panels which are like card toppers might be the most challenging thing in this series but I like what I made here and think I did a nice job on something that isn’t in my normal comfort zone!
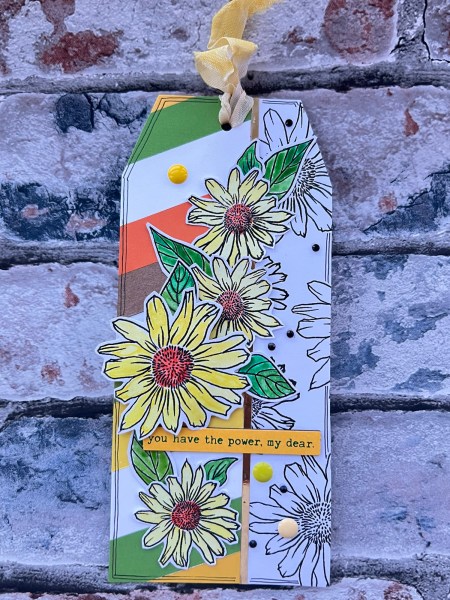
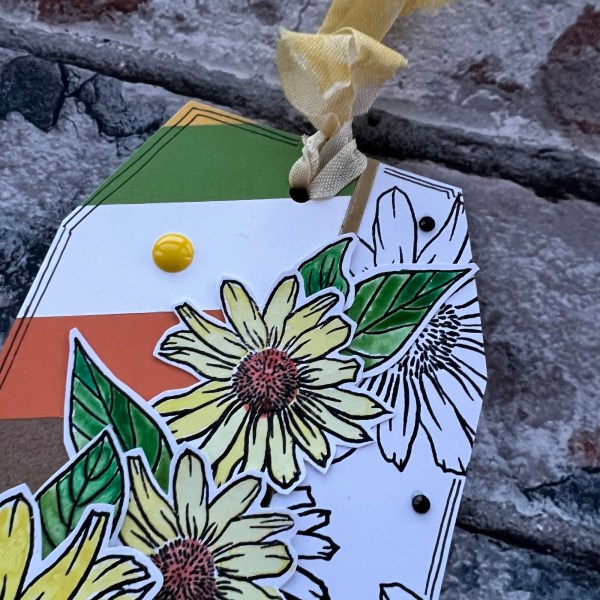
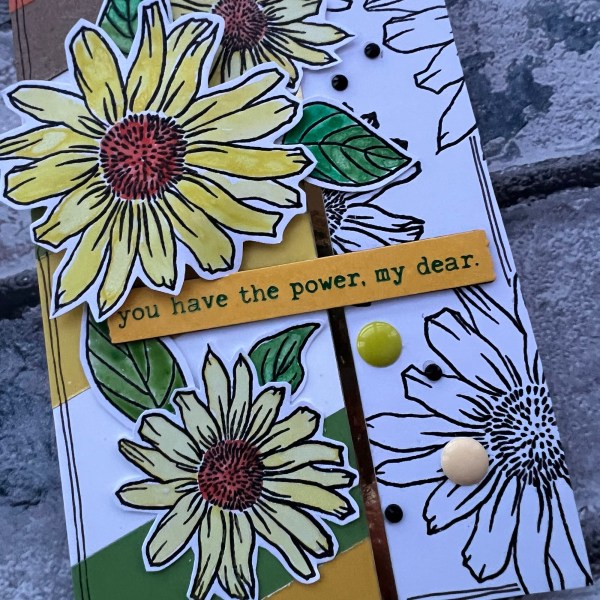
I few days ago I made some stripy panels using scraps of cardstock and whilst I was making them had no idea how I would end up using them – but then on Saturday I had an idea for my UK stampers forum tag of a half and half tag – so that is what I made!
I used one of the stripy panels to cover just over half of the tag and then stamped a piece of white with the daisy stamps and embossed them and covered the other half of the tag with that!
I added a very thin strip of gold to the seam which helped finish it off nicely.
I then stamped and embossed the individual flowers and leaves and fussy cut them out.
I added colour using my watercolour paints and once dry I added them to the tag. The largest flower I added using the foam adhesive to raise it up for dimension.
I chose a Dina Wakely press plate sentiment I had foiled in green on yellow. I stacked it up with some more of the die cut shape in black for underneath – I thought the black worked with the bold stamping.
I then finished the tag with three large enamel dots, the black sparkly gem and some yellow seam binding. Oh and also doodled the lines around the edge of the tag to frame it.
Really happy with how this came out and pleased I’ve already got one of the stripy panels used – I have quite a few more to use up so no doubt some more stripy projects will happen soon!
First of the month means using up my patterned paper – and so I made one larger card this month using the gorgeous floral papers and a cute Lily of the Valley digital stamp.
I stuck the camera on to record the process so you can see that over on YouTube.
Teaming the pretty florals with the black and the pink foiled cardstock made the card quite dramatic but I love it!
I used a magazine die for the sentiment and then a Tim Holtz die for the flower on the right.
As a 7×7 card this is quite a special one so will be sending this my friend for her birthday in a few months time.
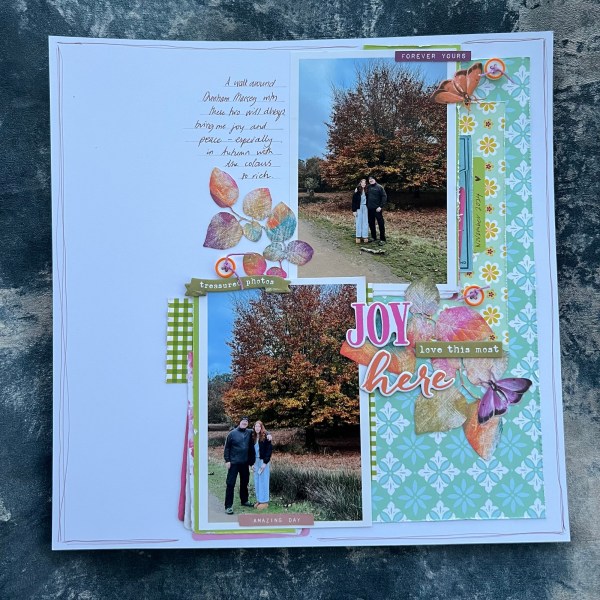
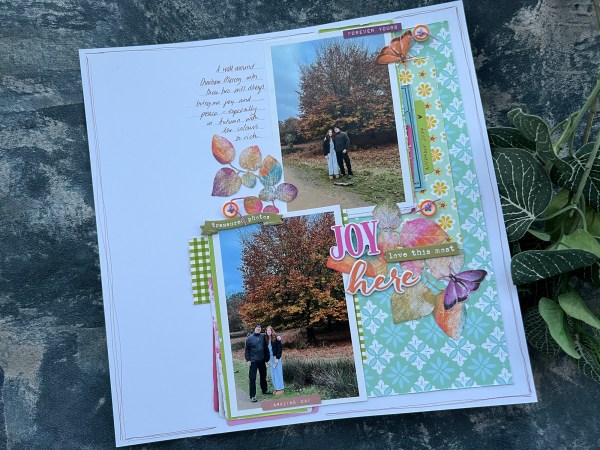
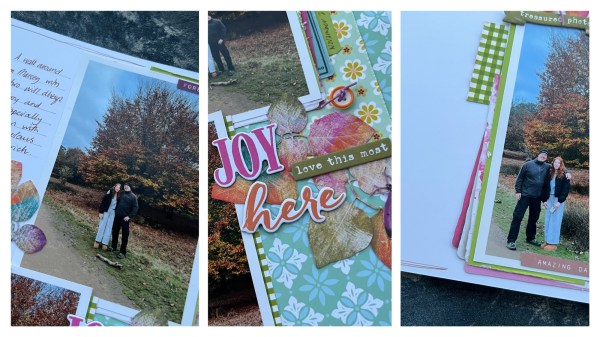
Used up the scraps from the page I made for last weeks Scrappin Saturday for this page and given the photos are from the same day it almost seems like I made a double page – although as I don’t really do double page layouts I didn’t really do it with that in mind!
Quite a large portion of that turquoise paper was left but smaller strips of the other papers. I did add in a small amount of green cardstock for under the photos but otherwise it was those awesome 49th & market spice embellishments and the gorgeous leaves!
Kept this one quite simple with some doodled borders around the page and then the journalling.
I did have a little bit of scrap leftover from this – enough for a card – I shared this the other day! So that is all this paper done! ❤️
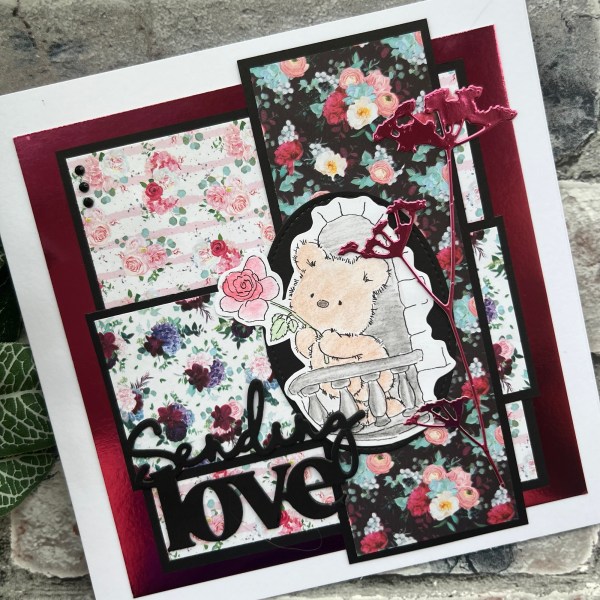
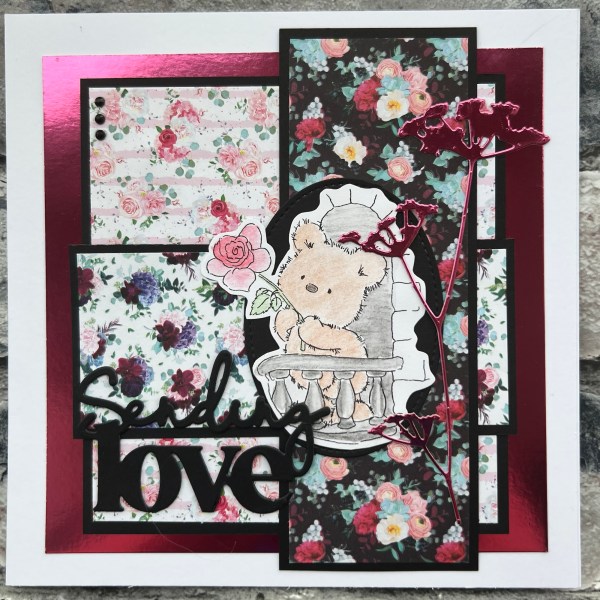
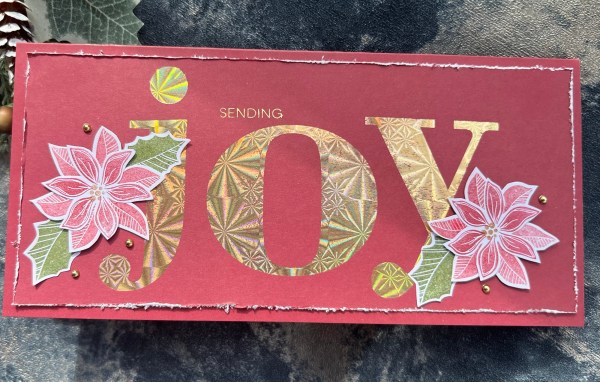
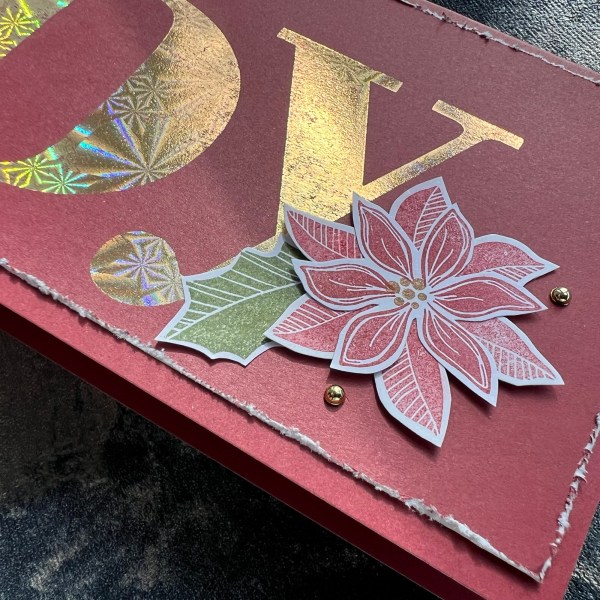
Well I made this card a few weeks ago and I have to say I squealed with joy when I was making it! I know that sounds really sad but the reality is foiling brings me total joy!
I bought the press plates at the same time as I bought my machines but had a fail with foiling the smaller sentiment at the time when trying to layer the plates like the design on the packet and hadn’t tried to use them after that. But then I had a day when I did quite a bit of foiling and thought – oooh the kaleidoscope foil with those letters – must try!
And I was delighted with the results!
So I made a DL card with this panel I had foiled. I had used the Kingston Crafts cardstock so perfect for distressing the edge to frame the panel and then used the Merriest Moments stamps to create some flowers to add to the card.
To be honest I could have left it with just the foiling as that would have been a glorious CAS card but decided to go for my usual ‘add more’ type of crafting so hence flowers and leaves!
I added these by stamping and fussy cutting them out and then glueing them into place.
Inside the card I added a white panel onto which I stamped two leaves and then added another fussy cut flower on the top.
But seriously that foiling is just the most joyful thing ever! Will every card from now on have foiling on it? Quite possibly! I never thought I would find something I love more than embossing but it turns out foiling is just that! ❤️
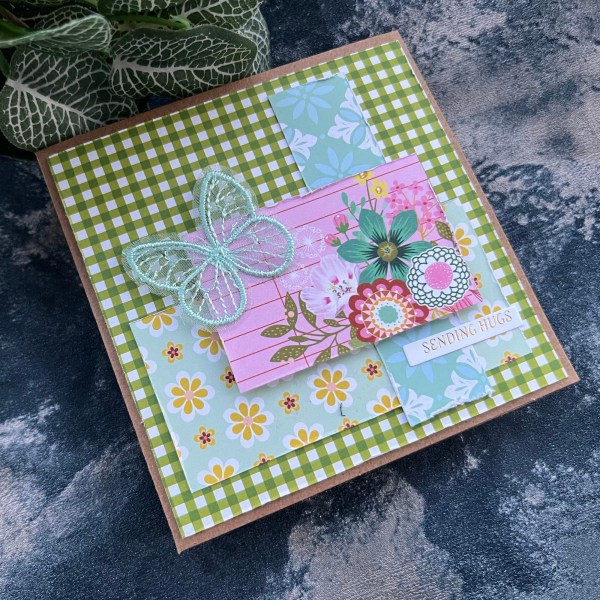
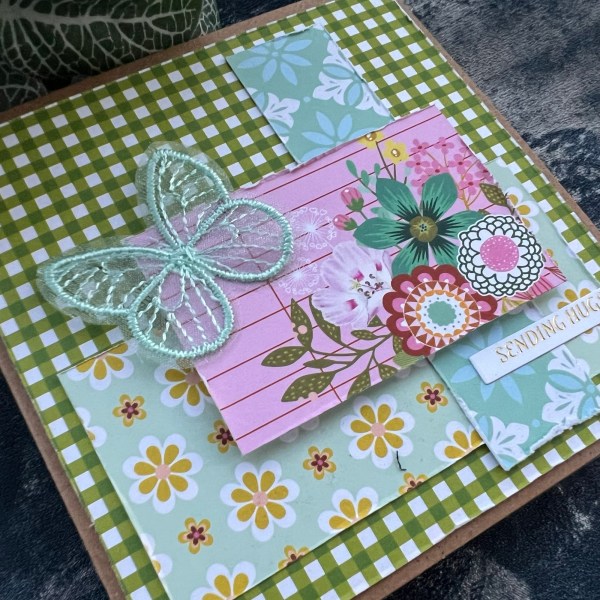
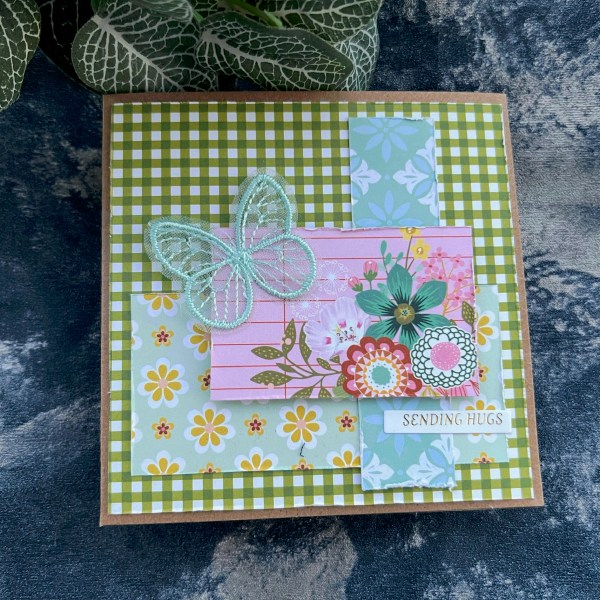
I had some scraps leftover from the pages I had made (one of which I will share on Saturday) and so I made a card.
All I had to do was add the butterfly embellishment and then the foiled sentiment.
The pink card is part of the cut apart that was on the back of one of the papers and I loved it when I saw it so I thought it made a good card topper.
The butterfly came from the April Hey Little Magpie embellishment kit.
I raised the pink section up on foam adhesive. This gave the card some dimension. I then made the card blank from Kraft cardstock.
This weekend I have planned to work through the scraps of plain cardstock I have in the pouch on my desk and get some used up – so expect there will be a lot of sentiments foiled and stamped and die cut – but the scraps of cardstock is getting out of hand!
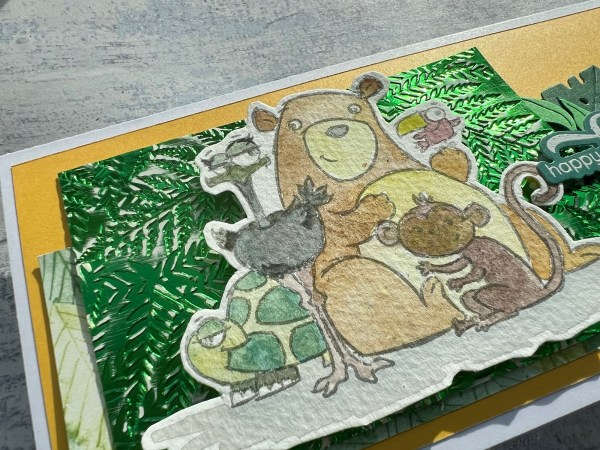
My first design team project I made with the foil cardstock was this because I wanted to see how well the cardstock held up to embossing and sanding … I wasn’t disappointed! But bizarrely I left it until the last one to share – just because I had so many other projects to share alongside my DT work!
Now first thing to say about the foil cardstock is the colours are vibrant! They are so gorgeous and I went straight to this gorgeous green and cut a panel and then embossed it with a 3d embossing folder (Fern). It coped well with that and I could have left it as it was but I wanted to see how it would sand as I love the look of sanded embossing.
This took off some of the foiling and revealed the white and I Love it!
From there it was simple – I chose an old but cute stamped image and cut that out to sit on the panel and then added the layers of the patterned paper and some die cut leaves to sit under the sentiment.
I added dimension with the image and sentiment raised.
I decided it was perfect for the long thin card design and this was so easy to put together but looks really cool with that texture and shine.
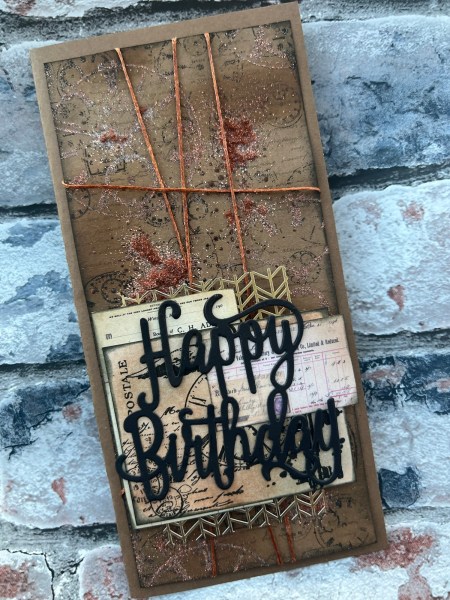
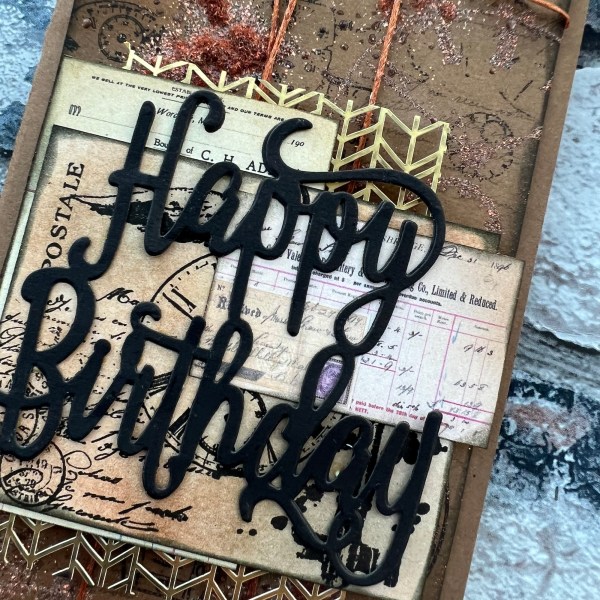
My self inflicted challenge is to make one masculine card a month but until this month I had managed two each time – but this time I decided to just make the one!
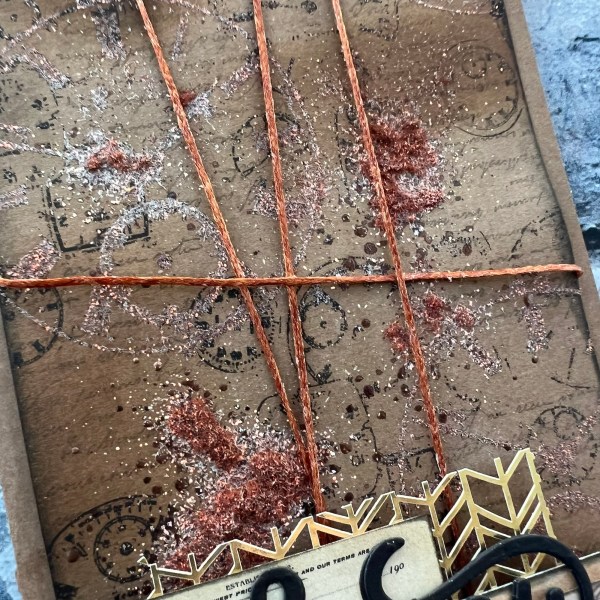
It was actually fun to do a bit of a mixed media type card and get a bit grungy with my vintage theme and chose Paperartsy clock stamps I’ve had for ages and rarely used.
After stamping and inking the background I then played with the Seth Apter baked textures embossing powder both to add to stamping and then I did little puddles on the background to really play with the texture these fab powders give.
I then added twine and created a lovely little vintage cluster for the bottom section of the card using both stamped images and the vintage ephemera bits I have in a book.
I then added the die cut sentiment on the top.
Inside I added an inked panel of paper with a bit of stamping on it and then called it done!
What do you think? A fun but grungy vintage themed card for a male! I think I did well with this one. Five months done – seven to go!
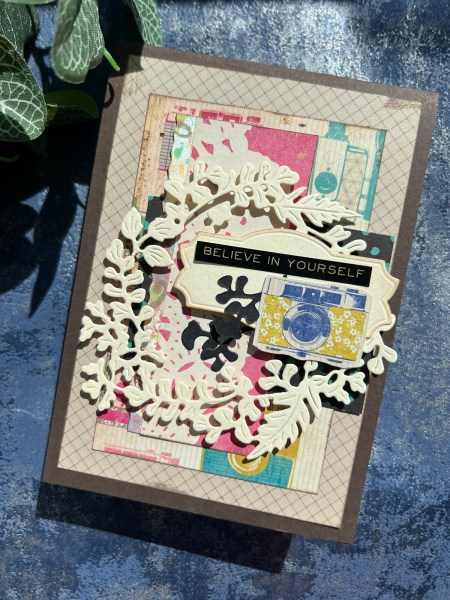
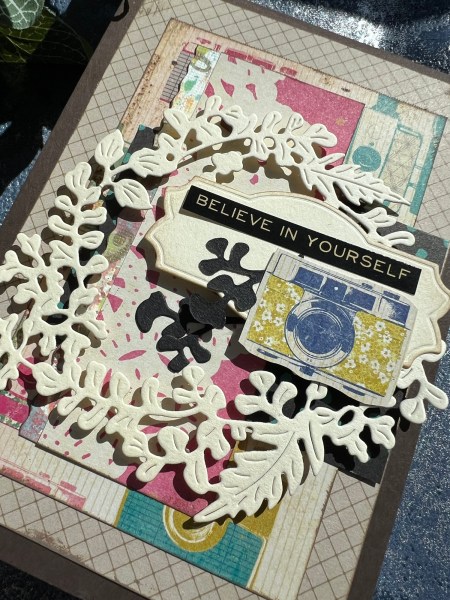
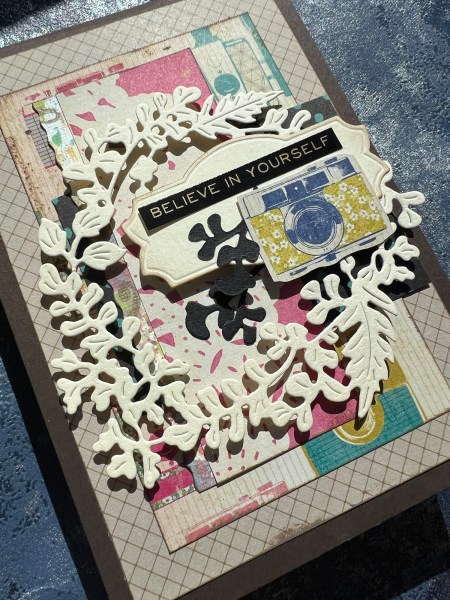
Those who know me and have followed my crafting will know I try and use up as many scraps as I can when I’m crafting! And this card is using up scraps from a few scrapbook pages I made.
I layered up the scraps in the background, inking the layers with some Walnut Stain distress oxide and then grabbed my pouch of ready cut die cuts to see how I could finish it off.
I chose the Natures Prints die cut wreath, some sprigs and the label. I added foam adhesive behind the wreath to give it some dimension and then used the last bit of the camera paper to fussy cut a camera out – this was the last complete image I could cut out – I think I have used the paper well!
I then grabbed the sticker sentiment from Tim Holtz to finish off the outside of the card.
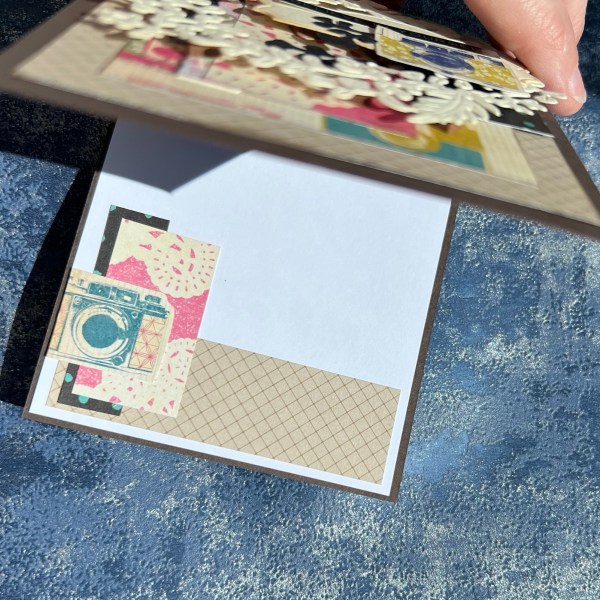
Inside I added some remaining scraps and called it done!
I love using up scraps and really like this vintage/ slightly grungy card I created. A little bit of a different feel to my more recent makes I think!
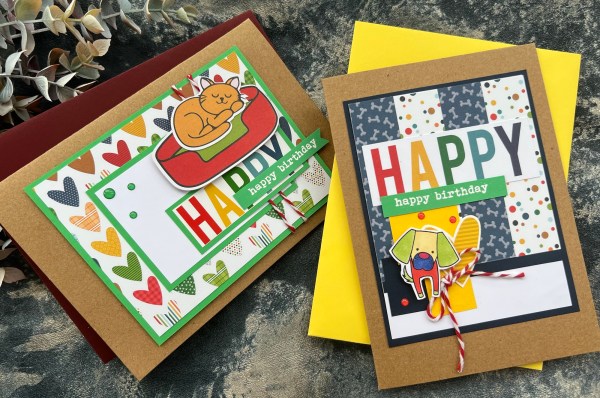
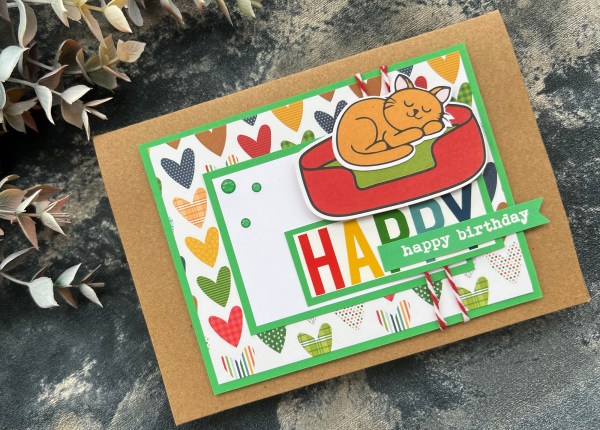
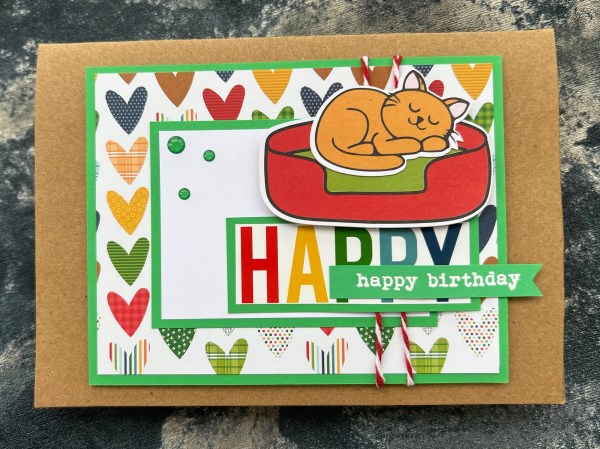
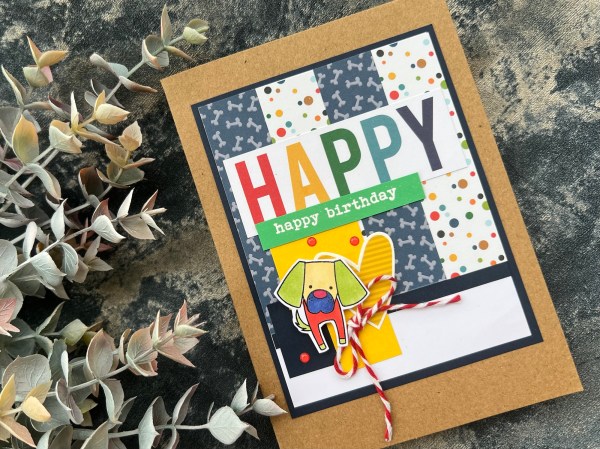
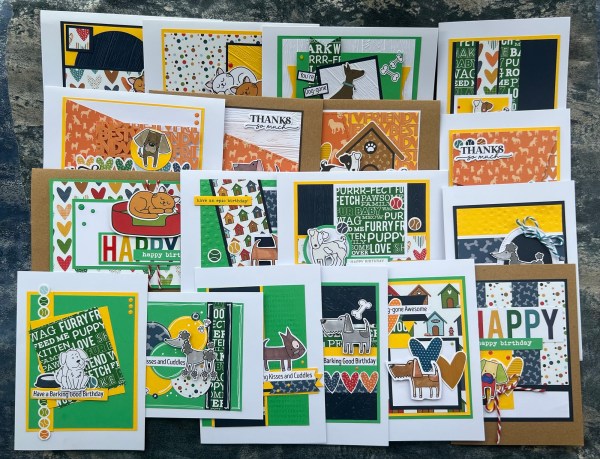
Final two cards made from the Kendra’s card challenge number 18 which I’ve made using papers, die cuts and embellishments from the Kingston Crafts pet collection kit.
I grouped these two together to make as for both of them I had the rainbow happy word which was cut from a sticker for the first card and a die cut for the second. I can’t remember what the whole sentiments said but I just wanted to use the word happy for form part of the birthday sentiment for each card so I chopped them apart!
Both of them I chose to add to Kraft card bases which gave them a fun look.
I did have to change up the sketch for the first one as the cat and the bed took up a lot of real estate on the card! Plus I loved the background so I cut the middle panel smaller so less of it was covered. I obviously also rotated the sketch somewhat as the paper was directional with the hearts and so couldn’t have it as a portrait card.
Once I started changing it up it became almost unrecognizable from the original sketch and so I also decided to bring in the twine too!
The second card looks a little more like the original although again I changed up the sketch a bit with the cluster moving further down to accommodate the big sentiment.
On this one I added in a My Favourite Things dog stamped image which I chose to colour with all the colours to match in with the rainbow feel of the sentiment and the joyful papers. A bit of fun and why the heck not?
For both these cards I added the twine from the kit but I had run out of the gems so instead I pulled in gems from my stash but I think the colours went well.
I also heat embossed a Paperartsy sentiment (I love this font) to finish off the cards.
So there you go that’s all 18 cards finished! I think it is quite an achievement for me to finish as I know that the last few KCC’s I tried I never quite got around to finishing them all. In fact I may have a few random envelopes with bits of cut apart cardstock still hanging around somewhere in my craft room – should really dig them out and get them finished!
Hope you’ve enjoyed this series of cards – as much as it’s been fun and I’ve enjoyed playing with the bright colours and patterns of this kit – I now am looking forward to not doing a cat or dog themed card for a while! 🤣
Think I might set to on playing more with the Rainbow kit soon – or getting more of that magazine kit used up – or maybe prepping for Christmas in July! Gosh so many things going on – I don’t think I will ever run out of crafting ideas and things to play with!