Festive Friday

Well that has been a week of crazy busy and I really didn’t manage to get much finished in my crafting (plenty of bits in progress but nothing finished to share) but fortunately before the week had started I had managed to get the Festive Friday ready!

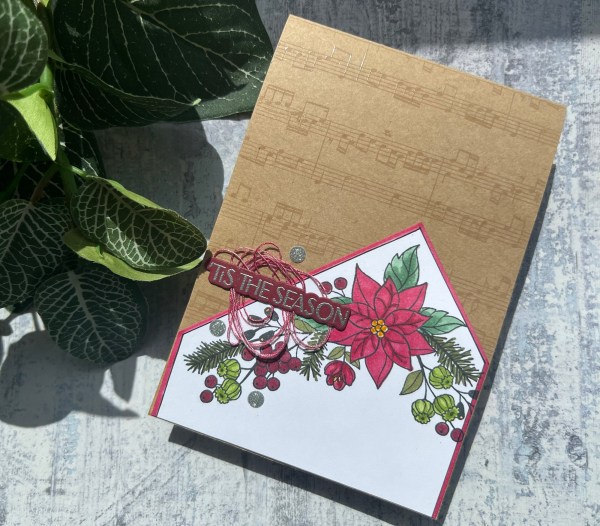
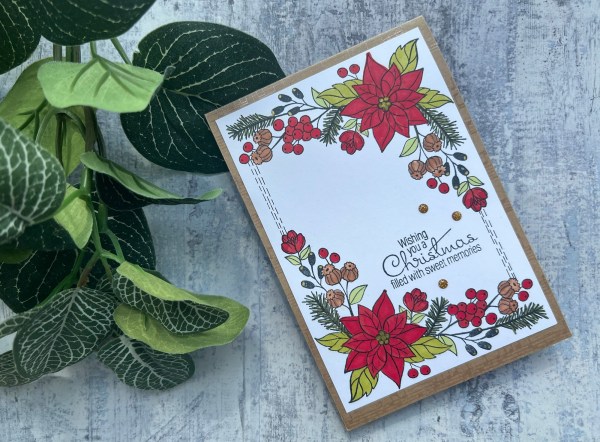
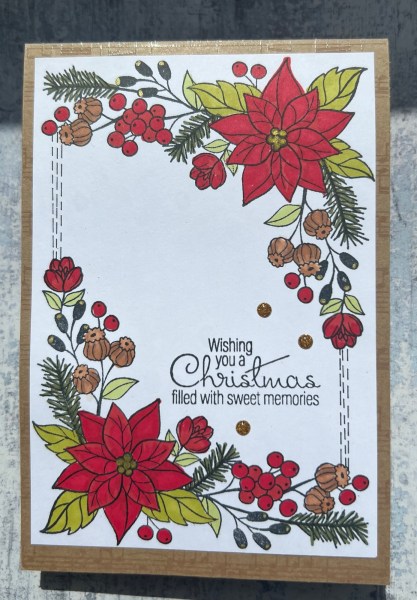
I went back to the Waffleflower pointsettia background but used it totally differently this time and combined it with those fab overlapping Christmas words stencils and dies.

This project was definitely a bit messy with both the texture paste and the ink all over my fingers – it meant I spent a fair amount of time cleaning up!

I did make a video of the process (but cut out most of the cleaning!) so check that out!

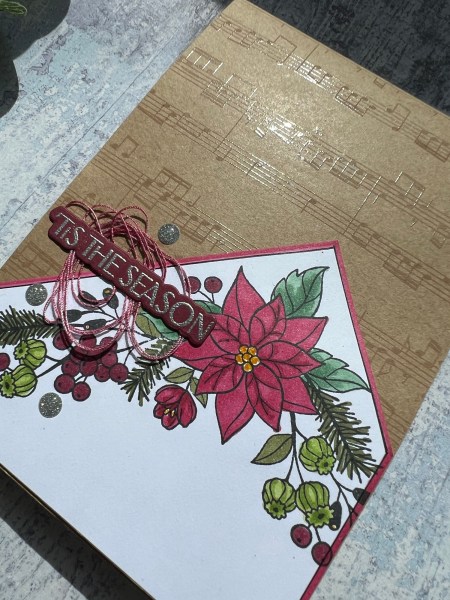
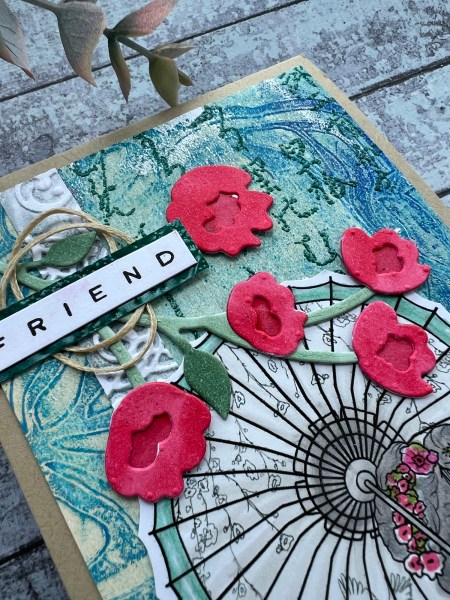
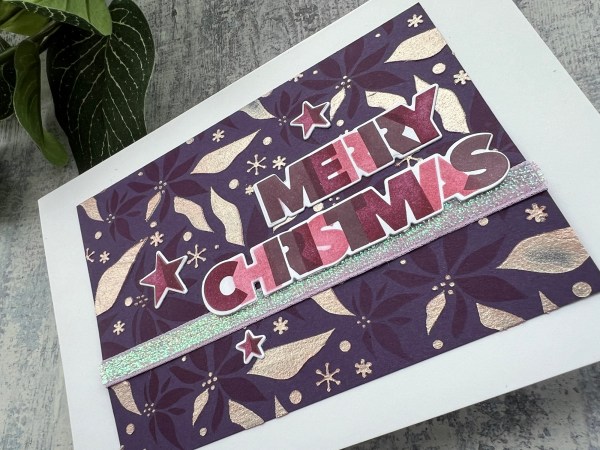
I used two pieces of purple cardstock to make the panels and inked both with Rich Razzleberry – one of them I went heavy with the ink, the other lighter just using the ink on the stencil and the brush.

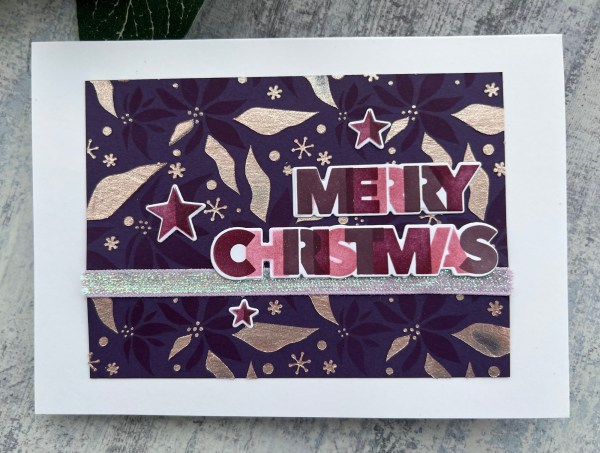
For both I added the second stencil layer using iridescent texture paste – on the first I kept it as is, on the second I tinted it pink with some shimmer ink to keep the colour sparkly!

I then used pinks and purples for the words (this took two attempts as I messed up the first with a shifting stencil and inky fingers!)

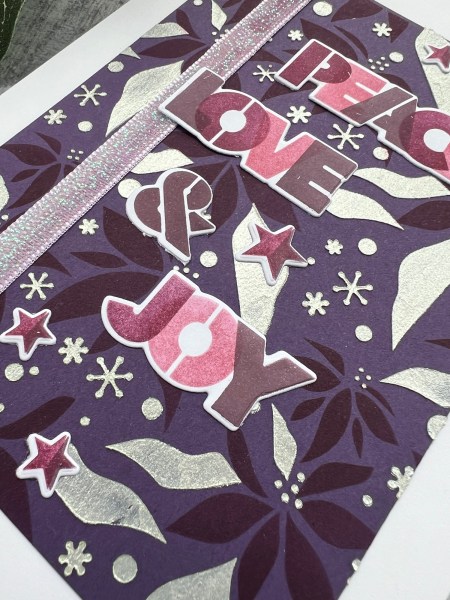
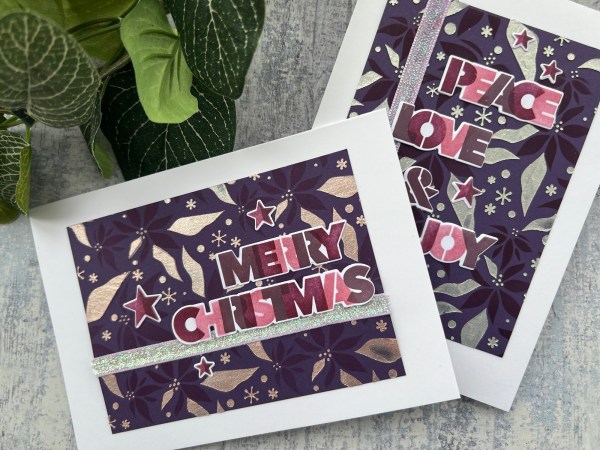
I added some sparkly ribbon across the panel and then added the words and the stars to the fronts – one landscape and one portrait.

Added these toppers to the front of 5×7 card blanks and kept it simple as they really are so patterned and textured already with that background and the bold words!

Love how they came together (even if they did take a lot of cleaning up to make them!)

Happy crafting!

Catherine

Quick stencil card

Sometimes you just want to add ink through a stencil and make an easy card … this was what this was!

Yesterday evening, after a trip to Manchester to see my daughter I wanted to craft but wasn’t sure what to make … well I started by using some new to me slimline rectangle dies and cut out a panel of white and a frame of black. But then wasn’t sure what to do with it until I remembered this fabulous large 12×12 stencil and decided it was perfect for this shape of card to just do a section of the stencil.

I inked through the stencil with distress inks (fossilized amber, spiced marmalade and fired brick and love the gradient of colour across the image.

I kept the card itself really simple addigg no the black frame which I stacked three times for dimension.

I felt like the sentiment needed grounding so I also cut another two strips using the smallest of the slimline dies, stacked them and added them in the left hand side to the top. I felt this helped in giving the sentiment a home.

I then added the black card candi to embellish as I thought that helped tie in all the black frame and strips too.

So a simple but effective card that satisfied my urge to be creative.

Happy crafting!

Catherine

Partial die cutting with Eclectic Bouquet

I made some simple cards using up painty backgrounds and the fabulous Eclectic Bouquet set from Altenew.

I kept the layers down but made it a little different with the partial die cut edge.

I kept the backgrounds the same with the petal pink cardstock as the card base.

I heat embossed onto the painty background and then die cut. I also did a run of the embossing folder too to add to the texture.

I added the petal pink thread for the ribbons and to add a different texture and then added the sentiments and gems to finish off.

Love how the painty backgrounds gives the cool and funky finish to the cards – certainly adds interest!

I did video the process for these too – so check this out to see more!

Happy crafting!

Catherine

Festive Friday

I went back to the Spellbinders stamp that I used last Friday and the leftover speciality cardstock to make this card for this weeks Festive Friday.

I decided to just use the edge of the stamped panel to add to the bottom of the card. I edged it with the same stampin blend pen I used to colour the main floral image and a fine black pen to define the edge – this makes it look more like a mat layer.

I love all the little elements in this stamp image and it’s a pretty easy image to colour.

I decided to add the Waffleflower sentiment that was embossed on the dark claret colour cardstock and then some silver gems so they coordinated.

I also coloured the thread to coordinate with the same alcohol marker.

A simple card but that background of the cardstock helps make it something special along with the angled panel.

Really happy with this card.

Happy crafting!

Catherine

DT: Addicted to stamps and more- Christmas #477

Today’s challenge at Addicted to stamps and more is Christmas so I made another card for my festive stash …

I grabbed a stamp and die set I bought a while ago from Spellbinders to play with it. Unfortunately it doesn’t stamp as well as I would have hoped – it’s like the stamp isn’t flat – but after much fiddling I managed to get an impression that’s good enough to use. And this is the card I made…

I die cut the stamped panel several times and stacked it up with a middle layer using the stencil waste so that there was some dimension behind that panel.

I added the sentiment from waffleflower in the middle of the stencil waste panel and then some gems to the stamped image and a bow.

I added it to a red card blank to make it even more festive as the black and white stamping was quite stark.

Quite a modern card and I like it – just need to fiddle with the stamp for next time I use it to get a better impression and then can change up the colours or even try embossing!

Happy crafting!

Catherine

Adventure awaits notecards

Told you I had more things made with the Big World stamps and dies … here you go!

I grabbed the Big World stamps and dies and some Making Cards magazine papers to make some coordinating notecards to give to my daughters friends as they all embark on new adventures post college.

I popped the camera on to record the process so please pop over to my YouTube channel to see that.

Of course I didn’t really have a plan as such – just to make some notecards using these supplies. I started by stamping six world images but when I went to make two into globes the die cutting went wonky so I only ended up with five focal images so have put the other background panel I had made to one side for another project.

I added black waxed string and the card Candi to each card as embellishment.

I mounted each card topper onto either blue or green card bases.

I did end swapping out the sentiment on one card because I lost the one I stamped and cut out somewhere along the way!

Inside the cards I used the mini atlas stamp and then leftover scraps of the patterned paper.

But the one I like the most is definitely the one where I made up the globe.

Definitely need to be careful die cutting the stamped image so you don’t offset it by accident – but that globe is just so cool!

Love it!

So five cards in total and it took about 90 mins to do which I don’t think is too bad!

Happy crafting!

Catherine

Happy anniversary to us!

Yesterday was our wedding anniversary (17 years!) but our focus was on moving our daughter into her university accommodation so not exactly romantic! So we decided to pause and celebrate a little late – in fact we won’t be celebrating until next week! However rather than pause the blog I’m doing it today as he doesn’t read my blog anyway!

Because I’ve been very focussed on the big move I didn’t get round to making the anniversary card until Friday night – hence the bad light for the photos!

Anyway the card I made was fun to do and turned out quite well!

I used the Altenew Big World stamps and dies I’ve been loving using recently (some more projects coming up on the blog in a few days) and I made an interactive card.

I decided the world would be a perfect stamp to make a spinner card. I saw Jennifer Maguire make one recently on a live she did with Kristina Werner (whose new line of stamps, stencils and dies I adore and am longing to buy but can’t quite justify the spend at the moment!) and really wanted to have a go at it!

I added a bit of stencilling for framing the world and also a little extra stamping with the little hearts and the anniversary sentiment.

I added a panel to the inside with the same stencilling too and some more of the stamped hearts.

The world stamp is so great as it has two different views so makes it perfect for this spinner!

I loved making the card and I know that with the world stamp it is perfect for my hubby as he loves globes so even though I didn’t use the globe element to the set I know the interactivity will amuse him!

I did do a few things slightly wrong making it (the string isn’t quite central to the hole in the card for example and you can see one of the black stamped hearts through the hole by accidentally stamping too far to the left) so look forward to trying it again with other elements as a fun different card to make!

So happy anniversary to me and him – especially as we have become empty nesters and start the next phase of our lives together!

Happy crafting!

Catherine

Festive Friday

Today’s Festive Friday was my first make using the Spellbinders stamp set I got in the sale a while ago.

I kept the card so simple with the image stamped twice and coloured with alcohol panes and then the sentiment stamped onto the same panel.

I did add the little stitched type lines with a pen as I felt like it needed something to connect the two stamped images.

I added this to a card blank I made from some speciality cardstock I found which has embossed music paper design on it.

I added a panel for the inside in white and then some gems for embellishment and decided it was done!

Sometimes simple is all that is needed!

Happy crafting!

Catherine

DT: Creative Knockouts – embossing delight

Today at Creative Knockouts our challenge is embossing fun – well I ended up with two different types of embossing for me card. I chose to use the Geisha Girl image from SheepSki designs for my card and they are sponsoring this challenge.

I decided to colour my image with promarkers and stampin blends. Then I fussy cut her out ready to add to the card once I’d sorted the background.

I chose the gelli print background that looked like it would work with the image colours I had chosen and the pattern looked fun too.

I then used a Japanese stamp I’ve had in the stash a long time (no idea what it says so I hope it’s nothing offensive!) and embossed that in the background with a green powder.

Then I cut a strip of white cardstock to run through the embossing folder with some ink for a stripe down one side.

Next I added the girl and decided she needed a flower to add to the card.

I know the die I chose isn’t a cherry blossom but I think it looks nice regardless!

I die cut it from white but then used stampin blends to colour the pieces to create something that was the same colours as her outfit and parasol.

Next I stamped the friend from a cut mini Altenew set and decided it needed a border so I embossed a piece of scrap with the same green powder and used that as a mat for the sentiment.

I tucked some linen thread behind the sentiment just to add a different texture.

I added the panel to the crumb cake card blank I made which is a slimmer card than normal. This worked well with the feel of the card I thought.

Inside I used another print out (this one has less detail on it than the one I used on the front) and cut the panel so the girl was to the side of the inside. I used a bit of the cut off gelli print at the bottom and stamped the sentiment at the top in distress oxide to finish off.

So three types of embossing – dry with a folder, heat embossing stamping and heat embossing for a background mat panel. Challenge completed!

Happy crafting!

Catherine

More Visible Image gelli print cards

Yes I did more cards like the one I shared yesterday but even more simple!

Gelli print, embossed stamping of the two cards, a mat and a card blank! Jobs a good’un!

Each of the gelli prints has its own thing going on so its own personality and with the bold black stamping and mat they each look fab!

Well I think so anyway!

This time I used the Biggest Wish for the sentiment and stamped and embossed directly onto the gelli print.

Some of the gelliprints have some gold paint in them too so that makes them shiny already – I love tilting them in the light to see the shine!

Just gorgeous!

Seriously why have I not been using this stamp set until now? It’s so simple and so pretty! And perfect for grungy funky backgrounds like these gelliprints!

Linking these cards up with the triple B challenge

Happy crafting !

Catherine