DT: Addicted to Stamps and More – Make your mark #471

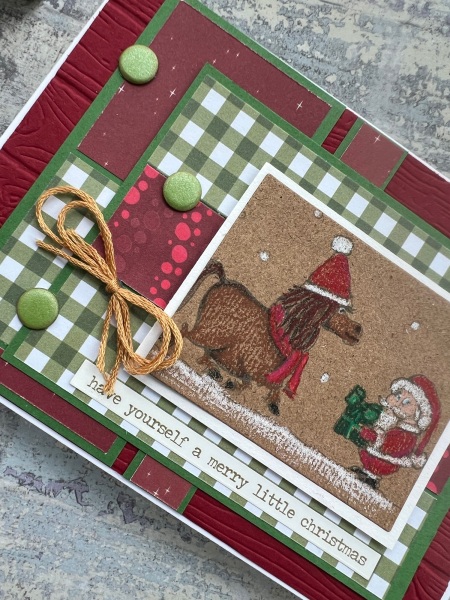
I’m back with my design team contribution for Addicted to Stamps and More and this time the challenge is Make your mark … which refers to colouring mediums! And well I used a few different mediums and techniques on this card to add colour!

I’ve realised I used the same focal image last DT too (I love Altenew floral elements!) but this is a totally different style of card!

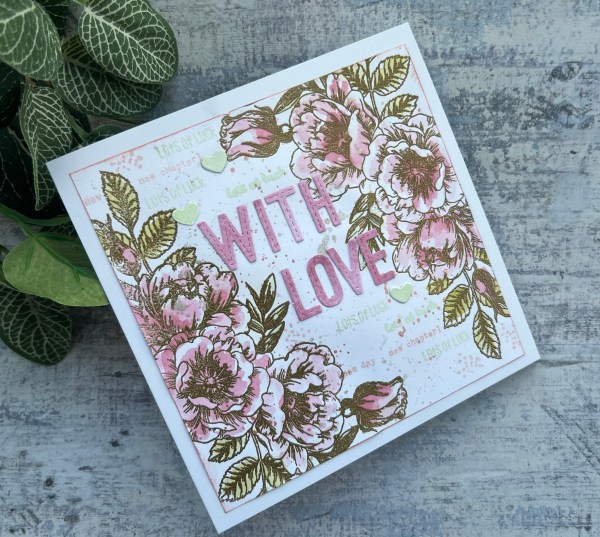
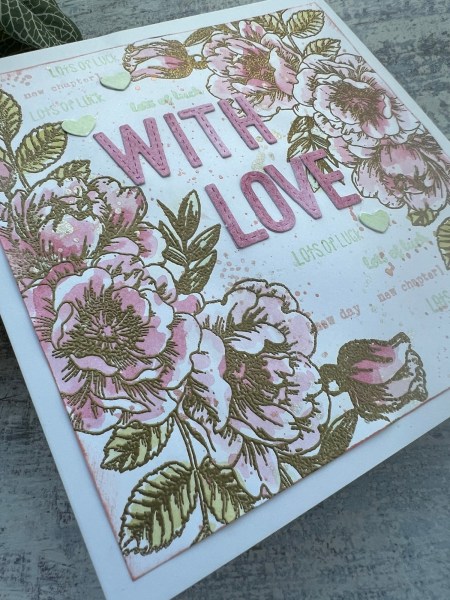
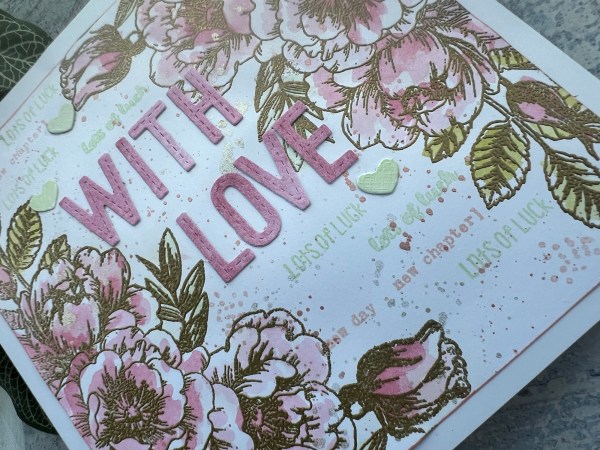
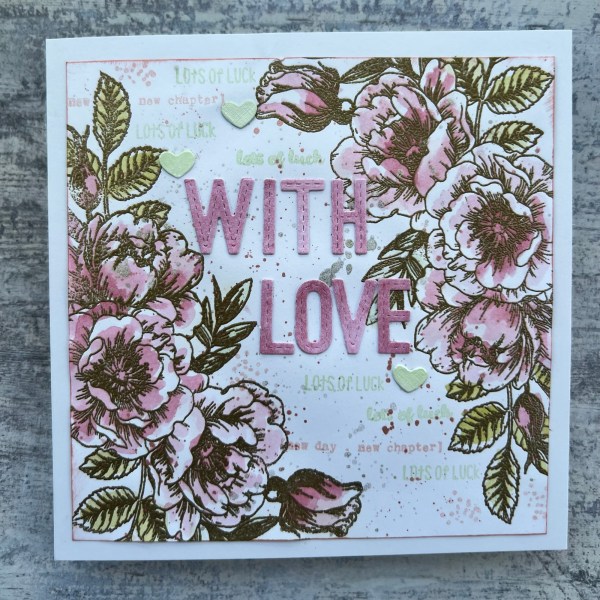
Ok let’s start with the focal image … Altenew Eclectic Bouquet. I stamped and embossed in gold, die cut it and then used the stencils and blending brushes to add the colour.

And then ran it through the coordinating embossing folder – which everytime I do this it blows my mind because the texture is amazing!

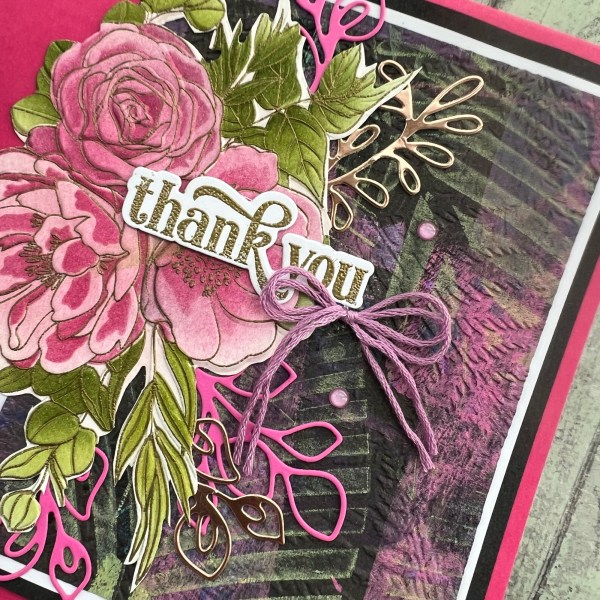
Then I found pink and gold die cuts that were cut waiting to be used (I do the whole die cut all the scraps in one session and put them in pouches to save time and also get my mojo flowing when I’m not sure what to make!)

Then I found in my stack of premade gelli print backgrounds this one that had pinks and greens and the black and I thought worked well with the focal cluster I had made.

I decided to add another layer of something to it though and embossed it using the Fern 3d embossing folder.

So I mat and layered that onto white and black and then made a square card blank to add my painty panel on the right with the floral image spilling onto the left.

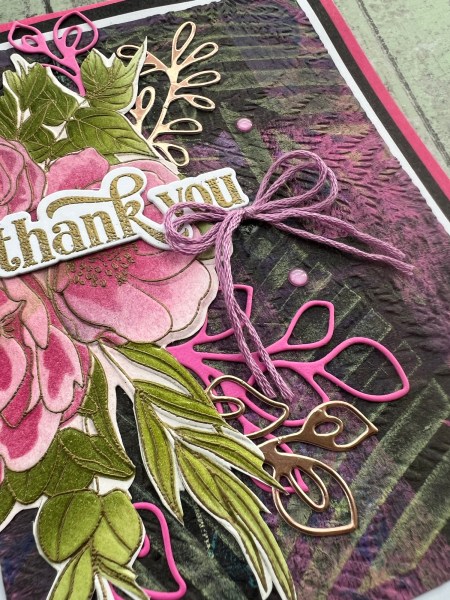
I then chose some floss to make a bow and the gems from the stash and added the gold embossed thank you sentiment (again pre stamped and die cut and waiting to be adhered to a project!

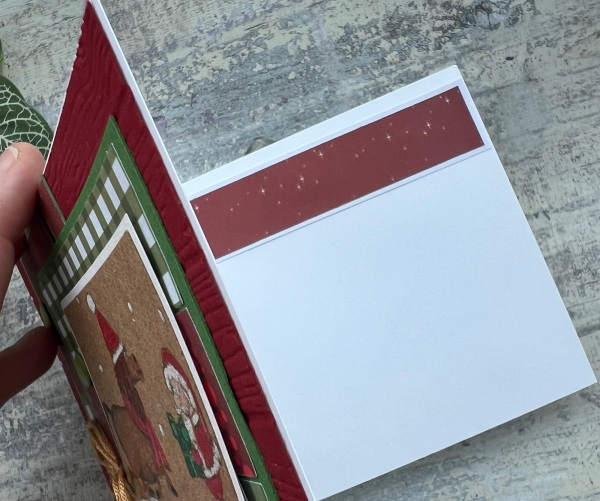
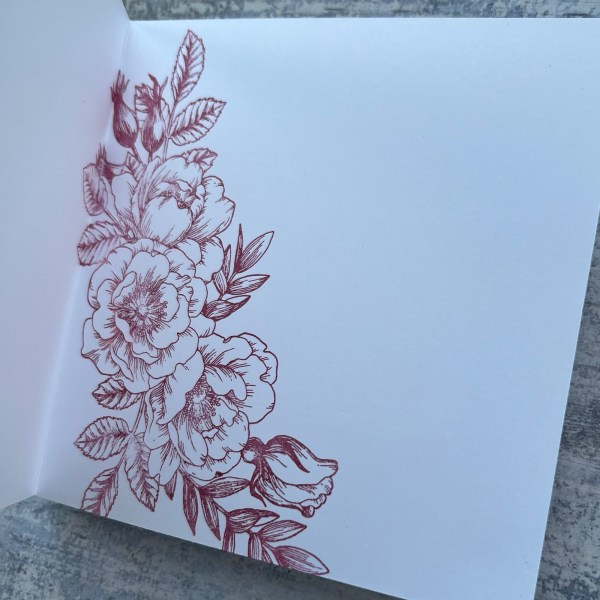
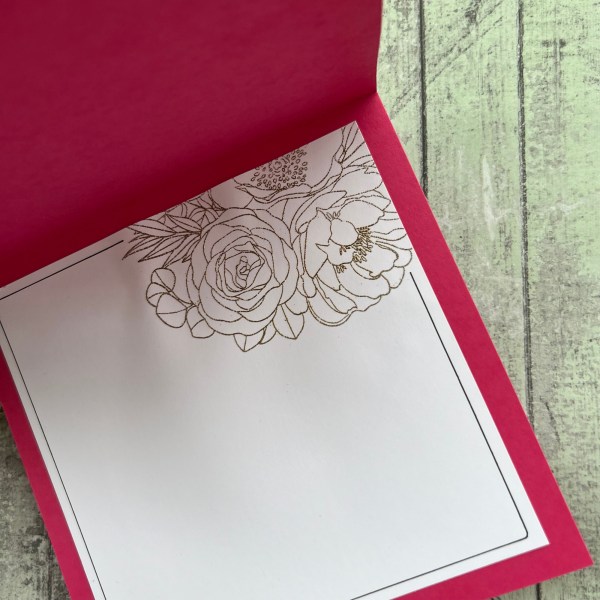
Inside the card I added a panel of the white and onto this I heat embossed in gold the image in one corner to match.

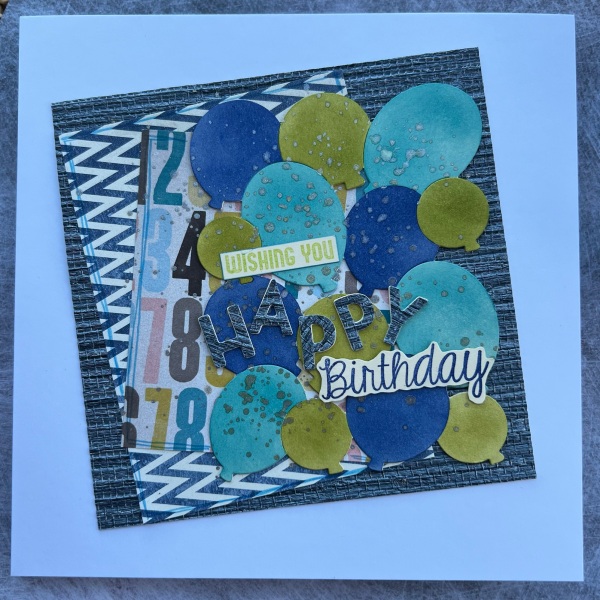
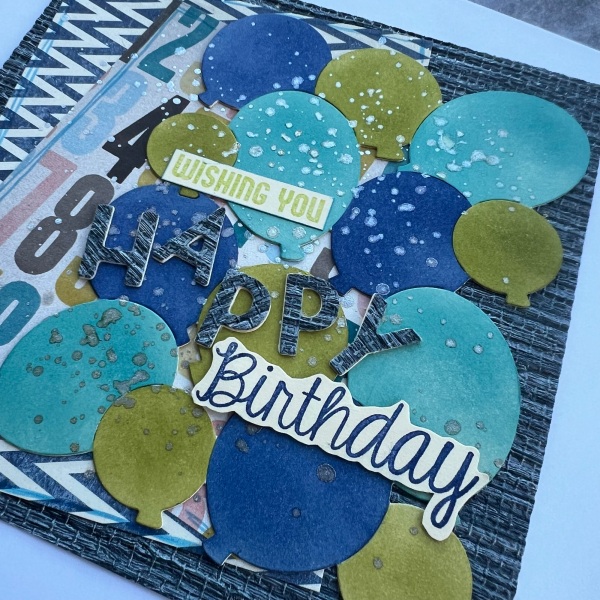
Love this graphic and bright card!

Happy crafting!

Catherine

#dyicad2024 days 19-24

Hello … another quick round up of #dyicad2024 from the past few days …

Genuinely delighted with how well I’m doing on this and how great it has been to make a little something, usually in less than 15 mins each day.

And to use up bits and bobs of stash that’s been hanging around for ages because I stopped art journaling too & didn’t really feel like they worked for card making.

But then also bringing in elements like the stamped butterfly that I stamped and die cut some time ago – good to find a home for it for this!

Some days are easier than others to put the cards together – for example day 24 was hard to find the final elements and get them to work together – but day 22 was simple and came together so easily!

Happy crafting!

Catherine

Beach time scrapbook page

Hello! I did some scrapping yesterday! It was nice to take a little time out of the day and get a page done!

I used up the scraps from the kit that I got from Sarah at Hey Little Magpie and made two other pages from at the crop the other week.

I also added in some stamping using the new Hey Little Magpie stamps too!

Loved using this kit and if you want to see the page come together I did video it for you!

Happy crafting!

Catherine

Happy birthday Dad!

Today is my Dads birthday. Here is the card I made for him… again as he’s on his holidays he hasn’t seen it yet! So don’t let him know you saw it first!

I used some random stash to make this… a wallpaper sample, some old dsp from the stash, the die cut and stencilled balloon and some die cut letters and some stamped sentiments.

Oh and some splattered shimmer paint!

I love that balloon die cut and the stencils to apply the inks which means it can coordinate with whatever you put it with.

I also love the texture on the wallpaper sample which I added as the background layer and the die cut letters.

Inside the card I added scraps of both the wall paper and the dsp I used and then some stamped sentiments from Altenew.

I love how this card came out … a fun different way of creating a card but it worked!

Happy crafting!

Catherine

Festive Friday

On the day I made this card I decided to get all the Christmas stash out of the boxes and have a sort …

Yes lots of mess! Well actually not too much was mess it just needed organising and once I had done that I had a neat little stack of projects I could easily put together … and this card was one of them!

The image was already coloured and cut out and just needed a white mount and the background papers and panel were already stuck together from an old Kendra’s card making challenge that I never finished … literally was a case of assembling and sticking to a card base.

Added the sticker sentiment, the thread bow and the card Candi… called it done!

There was even a piece of the paper with a mat I could stick inside the card!

Quick and easy festive Friday make … and yes in the same session I managed another few cards so that’s future festive Friday projects I can share with you and feel good I got some bits and bobs from the stash used up!

Happy crafting!

Catherine

DT: Creative Knockouts- fun fold

Hi I have a design team project today for Creative Knockouts where our theme is fun fold and I’ve used an image called It’s snowing from All dressed up as they are sponsoring this challenge.

I’m not a big fun fold person – I love seeing fun folds and how they look but they require a bit too much precision for me so I rarely do them and stick to big standard card blanks – so to keep in with the challenge I instead turned my big standard card blank into an easel card! So not exactly groundbreaking but it met the challenge!

I chose to print the image onto book print and then enjoyed a lovely little colouring session using my prismacolours and a white posca pen to colour the image.

I then tore around the image so it is very organic looking and mounted this on a background I had made using embossed card on one side and a brayer roll off painty piece that I die cut with the stitched snowflakes die from waffle flower.

So quite a mixed media card with the book print, colouring pencils and paint and then the texture from the die and embossing folder.

For the ledge for the fun fold mechanism I used a strip of the paint, a scrap of the book print and then a printed sentiment cut from a second smaller print off of the image.

I added some fun foam behind the strip to raise it so it could act as a ledge for the easel.

Happy crafting!

Catherine

Beautiful Flowers – SSS

I’ve been wanting this stamp set for years thanks to all the videos I’ve watched of Amy using it! But since I’ve owned it I’ve barely used it – so it seemed like the right one to grab for making my friend a card sending her love as she finishes work for maternity leave.

I added in the little sentiment stamps from Alpaca Pals too and then the die cut letters and hearts.

If you want to watch the process – here is the video as I remembered to put the camera on whilst making it!

I love these flowers and how easy it is to loosely watercolour them and because it is such a big stamp it’s perfect for making a background.

I added some lovely splatter using both the rose gold and platinum shimmer ink.

Inside the card I added the same stamped image but just kept it simple stamping in pink.

Enjoyed making this and looking forward to making more cards with this stamp.

Happy crafting!

Catherine

#dyicad2024 days 16-18

Hello!

Thought I’d pop back in with the next three days worth of #dyicad2024

Day 16 I didn’t add any circles to – but I did keep to the old stamps as the consistent – not sure why no circles – guess that day I didn’t think of it at the time!

I am still using raffle tickets though as a fairly consistent collage element.

Loving getting bits and pieces used up and elements that have been just hanging around for ages!

Happy crafting!

Catherine

Happy Father’s Day Dad

It’s Father’s Day but not spending it with my Dad today as he is on his holiday at the moment – so we will be celebrating in a couple of weeks. So keep this secret as he hasn’t seen it yet! lol!

I made a background paper using lots of alpha stamps with different green and blue inks.

I then die cut some letters which I added some ink to the bottom to give a nice ombré finished.

I die cut a circle and some ready die cut labels for making the central feature. I then added the hearts which I had die cut from scraps as little embellishments.

I made the sentiment on the label by stamping the tiny words and then the tiny alphas for the Fathers.

Added a strip of the paper I had cut off the edge to the inside with some more hearts to finish off!

If you fancy seeing this come together I did remember to video it!

So happy Father’s Day Dad and also a happy Father’s Day to my lovely hubby who is the best Dad my princess could ever have!

Happy crafting!

Catherine

#dyicad2024 days 10-15

Another quick round up of my progress so far for #dyicad2024 and I’ve managed 15 so far … which I think means I am one quarter done (or I will be just over that tomorrow!)

I’ve kept up with the use of old stamps and circles! I’ve also used raffle tickets a lot too!

I’m starting to run out of ready prepped cards so a couple of these started as blank canvases which has been fun – especially the day 15 with those bright inks!

46 days to go!

Happy crafting!

Catherine