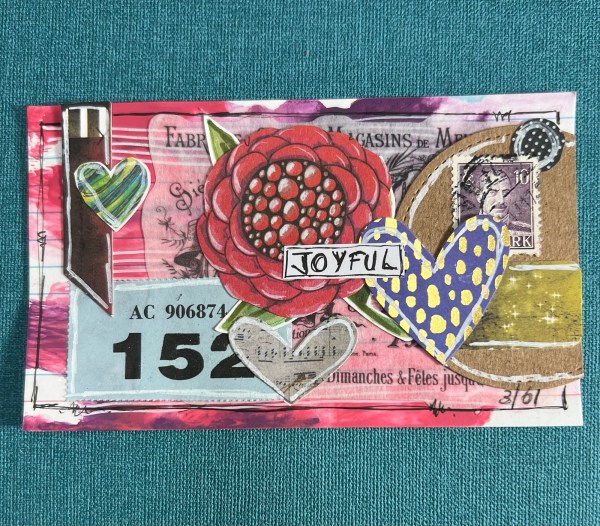
Another quick round up of my progress so far for #dyicad2024 and I’ve managed 15 so far … which I think means I am one quarter done (or I will be just over that tomorrow!)
I’ve kept up with the use of old stamps and circles! I’ve also used raffle tickets a lot too!
I’m starting to run out of ready prepped cards so a couple of these started as blank canvases which has been fun – especially the day 15 with those bright inks!
Continuing from last weeks post I did manage to make another card using those backgrounds I had added the rub ons to.
This time I chose that grungy brown and amber coloured one.
I mean … I am so in love this!
Firstly those oxides make the background amazing. Love it!
I decided to use the die cut trees and do layers of embossing to make an amazing dimensional textural tree.
To do this I used both the Seth Apter baked textures embossing powder and then the top layer is using the frantage that has blobs of white and gold.
This gives it a really unique texture.
I kept the card simple … a wrap of a scrap of lovely satin ribbon, a mat of black and some gold gems.
Then I also mat a Tim Holtz sticker onto white to add to the tree.
The tree is adhered with foam tabs to give it some dimension over the ribbon.
I just love this and doing this with the different embossing powders was also fun as I wasn’t sure how they would all work together … but they worked magnificently!
I’ve popped the other two rub on backgrounds away for now though and will play with them in a month or so to make sure my Festive Fridays don’t all look the same!
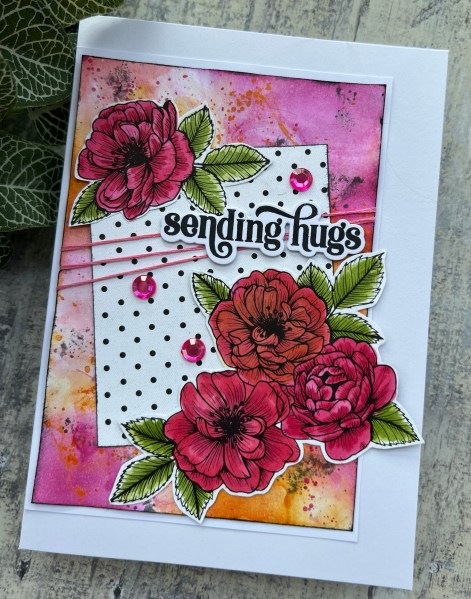
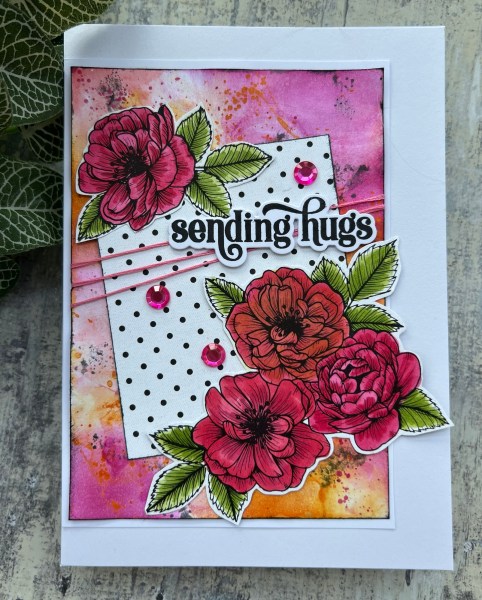
So at the start of the month I started sharing the cards I made using the last bits of the True Love dsp and I still had this and one other card to share because I took them in a slightly different direction. This one I picked out a bright inky background I had made and decided to make the flowers reds and pinks to go with it.
The background also has elements of black in it so it went well with the dotty dsp panel too.
I decided to wrap some thread around the panel to add interest and texture and added the Altenew sentiment on top of that to ground it.
I mounted it to the left of the card blank to all the flowers to go over the edge of the panel and then added the gems to finish off!
Delighted with how this turned out. Especially as whilst I was colouring the flowers my yellow pens decided they had dried up so had to turn the yellow rose into a pinky coral one… can you tell which that one is?
One more of these to come … and then True Love dsp has officially gone away!
I’m back with another design team contribution for Addicted to stamps and more where the challenge is die cuts/ stencils. And on this card i used a few die cuts.
Let’s start from the back up … I die cut the large leafy background panel die from Honey Doo. It’s slightly larger than the card blank I added it to but I just trimmed it down after adhering in place. This gave some interest to the background.
Then I chose a piece of inky background I had made. It’s lots of yellows and greens and all smooshed together. I added a green edge to the panel but otherwise left it as it was.
I found in the stash the gold laser cut panel and adhered that down to create another layer of leaves.
Then I grabbed the Altenew Eclectic bouquet stamp and white embossed the image. Then I watercoloured it loosely using pinks and greens I thought would work with that background.
Then I embossed it, and wow what texture! The 3d embossing folders are just amazing!
I added that onto the main topper and then decided to place that top right on the card so that the leaves could trail off the topper.
Finishing it was easy … a stamped and die cut sentiment from Waffleflower, an embroidery floss bow and then some gold gems!
Perfect!
Inside I stamped the image again this time using pink and added one of the sentiments from the same set.
A really pretty card!
Pleased with this and all the layers … and that embossing folder is just glorious! ❤️
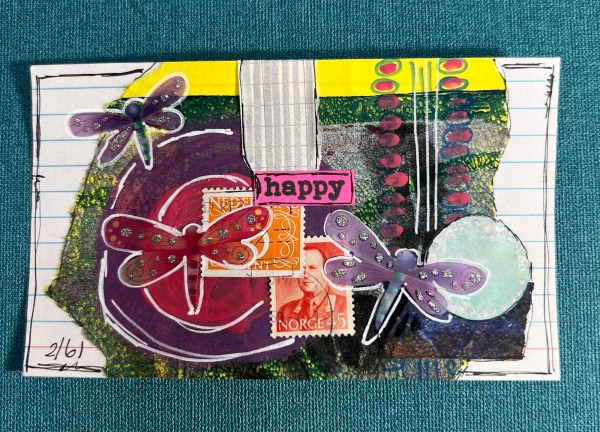
Hello again… back with another #dyicad2024 round up!
Days 4 to 6 looked like this …
Lots of collage bits and stickers and some randomly created shapes too.
I’ve kept on with the adding an old stamp to each as the connecting element but otherwise pretty much just creating as I fancy from the bits on the desk and in my box of bits and bobs – feeling good to use up this stuff and get it onto some finished collages!
Days 7-9 are as follows…
Another common feature I am noticing is circles – not all but a lot have circles on them … and those raffle tickets also keep making an appearance – well I do have just under 2000 of them to use!
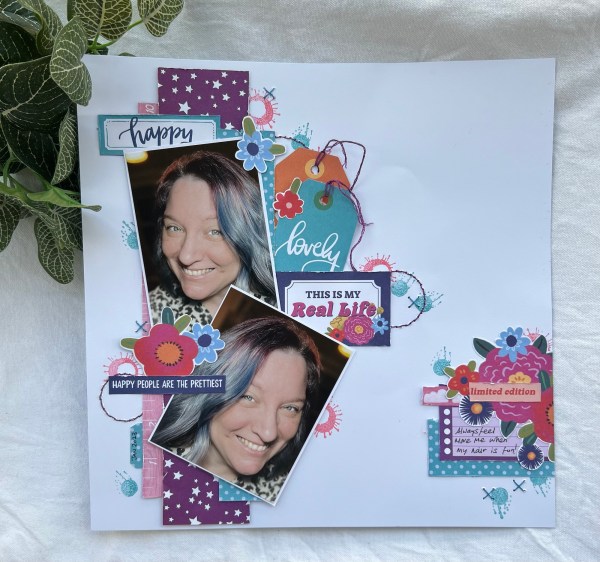
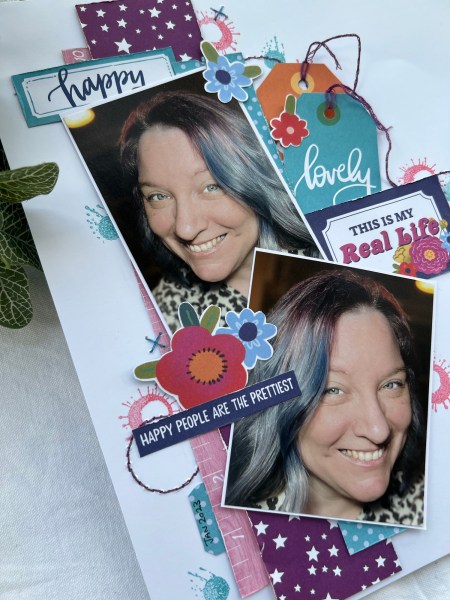
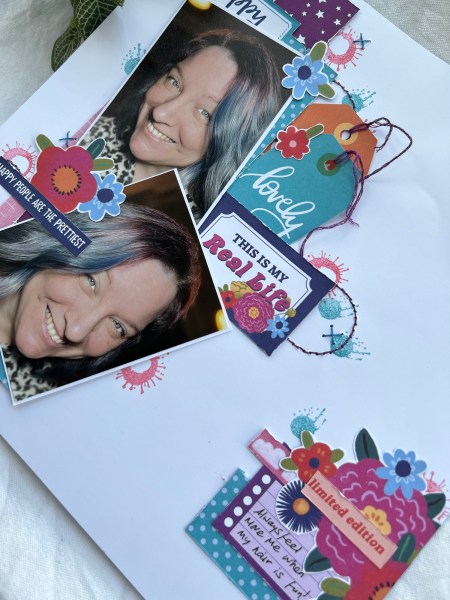
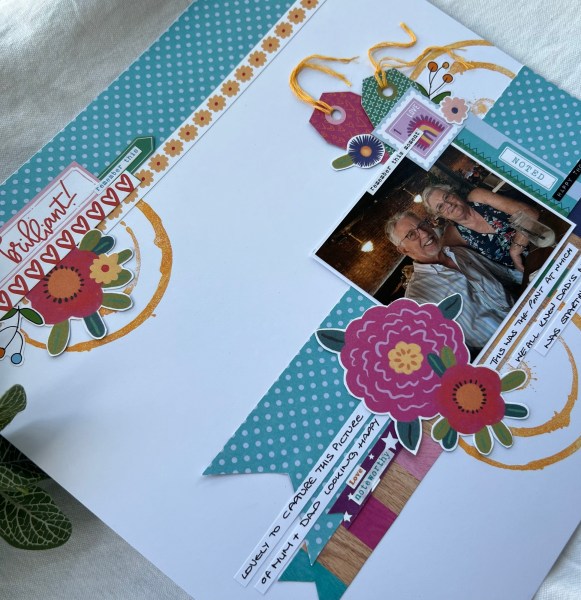
Yesterday was the Warrington crop day and I got the pleasure of crafting alongside friends (new and old) and made two layouts from a kit Sarah at Hey Little Magpie had put together.
The first one is relatively similar to the inspiration Sarah provided but the second one I turned to #30dscbl15 and loosely followed that!
So page one … Sarah’s inspiration was this which I’ve lifted from the shop page hence the magnifier icon!
And my page – well I think you can see the original in there a bit but I added sewing and stamping to the background, adjusted the photo on the right and also changed up the quote panel in the middle.
I also added more fussy cut flowers and dotted them around the page too.
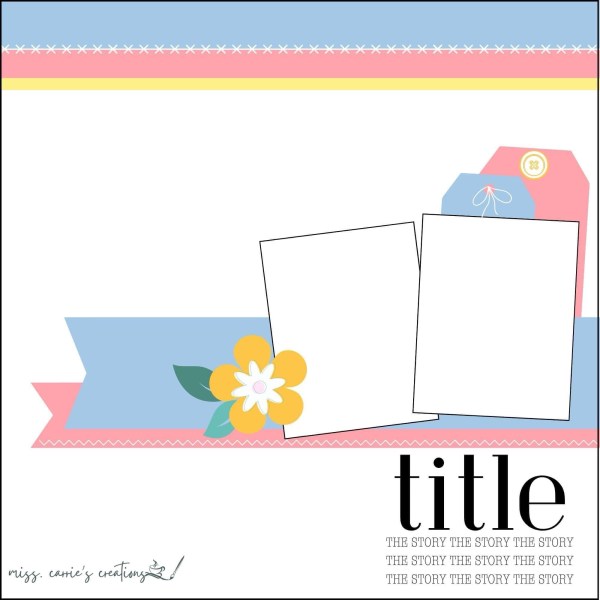
I then used scraps to make the second page using this sketch from day 20 by Miss Carrie.
And ended up with this page
I added the cluster top left as I wasn’t keep on just the strip flat across the top and also added in more stamps.
The stamps I used on both layouts are new Hey Little Magpie ones (yes I spent a “bit” of money at the crop too!) and in both cases stamped with my oxides.
This still needs some kind of title but I ran out of energy so didn’t get to finish it off- will do that this next week when I get round to tidying up and putting away my stuff from the crop!
Pleased with both these pages and how I made them my own and also still at least one more page I think I can get out of the papers that are left so maybe that will also happen when I get around to putting things away!
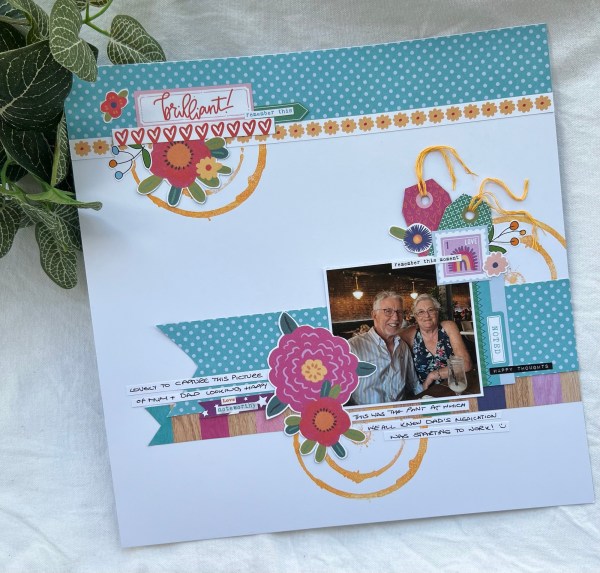
This week we marked the end of an era in our household as the princess finished her ALevel exams and so the end of school/college!
I made a card to mark the occasion of course with a little gift for her to receive when she got back from her exam.
It’s an arty one (well she is arty!) with a painty background on the text paper. Then the main feature is of course the gorgeous Altenew floral (Eclectic bouquet) which is stencilled, die cut and embossed!
Loved using the translucent fresco finish paint on the background so the text is still visible.
I added the sentiment that was already die cut and stacked (easy) with some copper thread underneath to add texture.
Mounted the panel on the aqua card and then a layer of embossed white to again add texture.
So congratulations to our girl on finishing this stage of her life – now onto the next. Pending results we are hoping for her next step to be Fashion Marketing at Manchester Fashion Institute. 🤞🏼
I’ve had a bit of a break from blogging this week – well I did say at the beginning of the year I wouldn’t blog daily this year (but pretty much have for most months!) – anyway this weekend I have a crop to go to so might get a few projects done and ready to blog about in coming weeks – so maybe I’ll be back more routinely – but sure you’ll forgive me for being a little more absent this past week!
Today I have an interesting project that is similar to cards I made a few months ago using rub ons. On the previous projects I used the white rub ons … well this time it was the black ones and I used the full sheet across four different inky/painty backgrounds in one session.
Aren’t they lovely?
Well I didn’t have time to make four cards but I did manage to make this one using the panel in the top right…
By putting rub ons in different parts of the background (this one is a gelli print) it leads the eye around the panel and then that white die cut deer stands out in contrast.
Love how this worked.
I kept the actual card very simple… mounted on white and black to frame and wrapped some floss for a bow for the area that seemed like it needed something. Then added some enamel accents to create ‘gems’ as embellishments.
Love this moody looking artsy card and looking forward to using the other backgrounds when I get time to do something with them.
So I said I probably wouldn’t blog my #dyicad2024 all the time but thought I would share the first three days as I don’t actually have another project to share today!
Day one
Day two
For all three I basically am just grabbing a card that already has something on it and then adding random bits and bobs from either the box of collage materials I have, or things I’ve previously stamped or die cut and having fun adding colour or doodles.
Absolutely no planning going on – just doing whatever I feel like at the time.
At the moment the only connection they have are the old stamps I’ve added to all three so far but not feeling the pressure to keep that up – we will see!
Yesterday I promised you other projects using the True Love papers that I made at the crop back in early April.
Well here is one of them … rainbow of flowers with some pieces of the reverse of the dsp and a sentiment! Done and dusted! And perfect for Pride month don’t you think?
With having chosen the mix of colours I kept the background neutral with just the black and white and then the large expanse of white. I did bring in a colour for the card base but with such a small amount visible it didn’t dominate the card and allows the flowers to be the focal point.
Used a Waffleflower sentiment and a single black gem for embellishment!
Two more True Love dsp flower cards to come – watch out over the next couple of weeks!