Stag with an inky background

I made the background for this card months ago as part of Christmas in July but never got round to finishing it at the time. But finally I got round to finishing it.

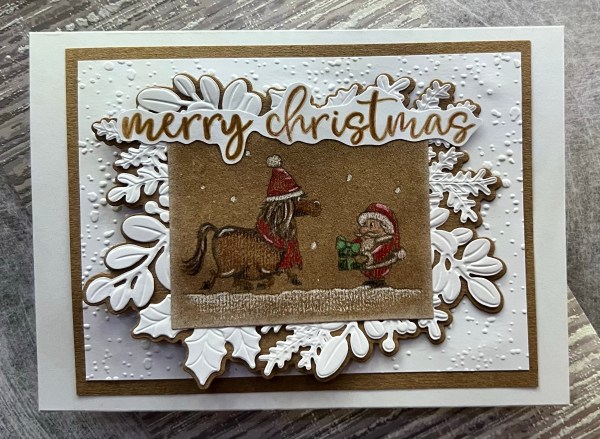
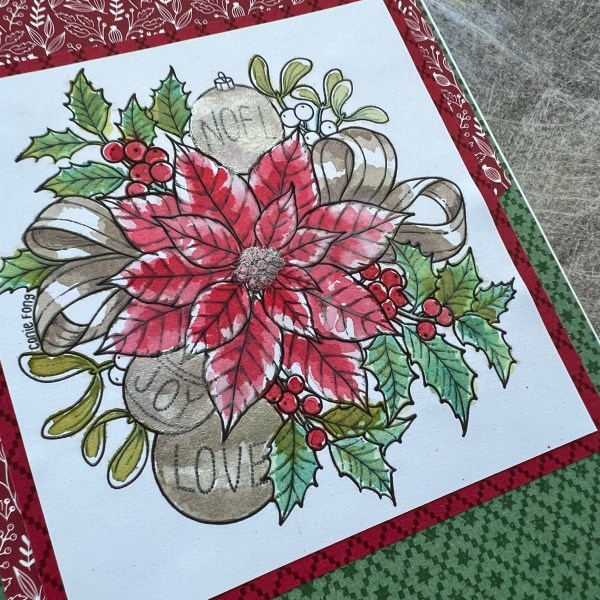
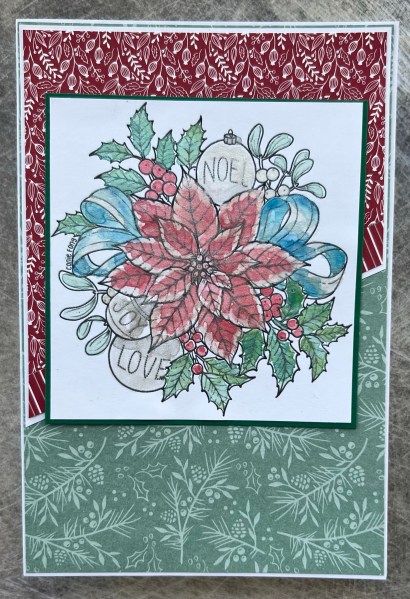
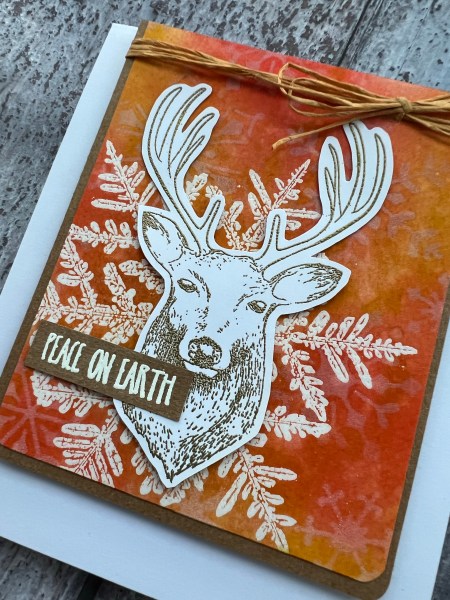
So the background was made using distress stains and the Snow Crystal embossed for an embossed resist background. Then I added more distress stain as I wasn’t keen on the dry piece and then I added even more with some stencilling and white pigment ink. Then I liked the background a whole lot more!

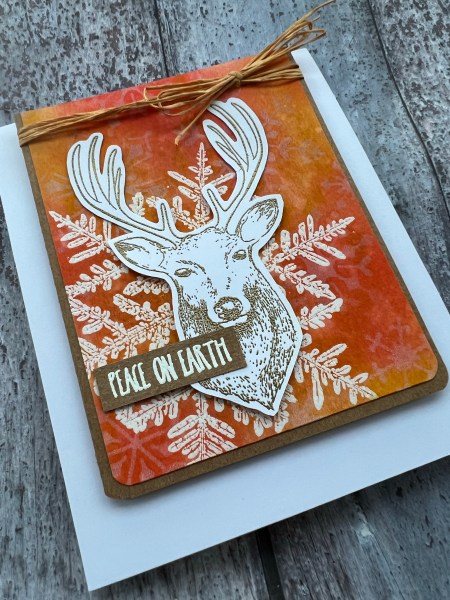
I trimmed down the background. Mounted it onto Kraft and rounded the corners on the bottom.

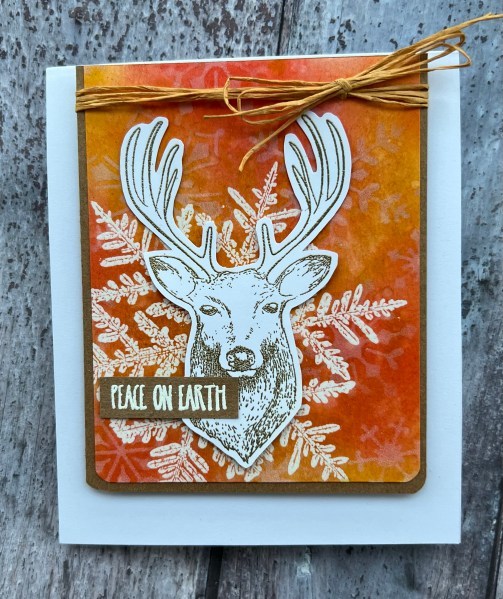
I found some paper ribbon and wrapped that round the top and added the bow.

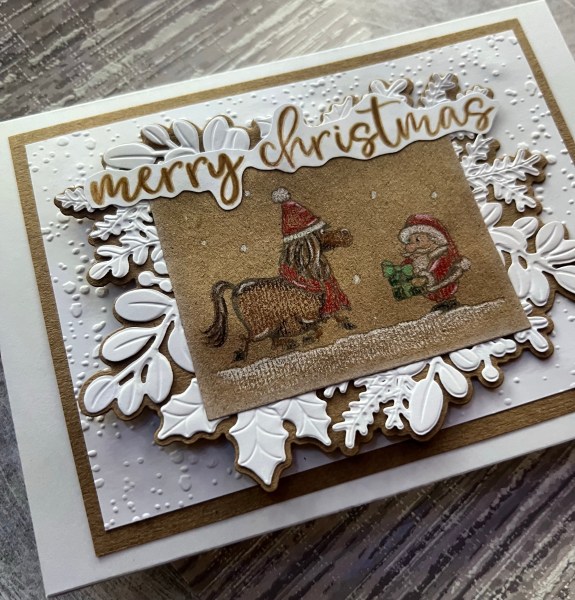
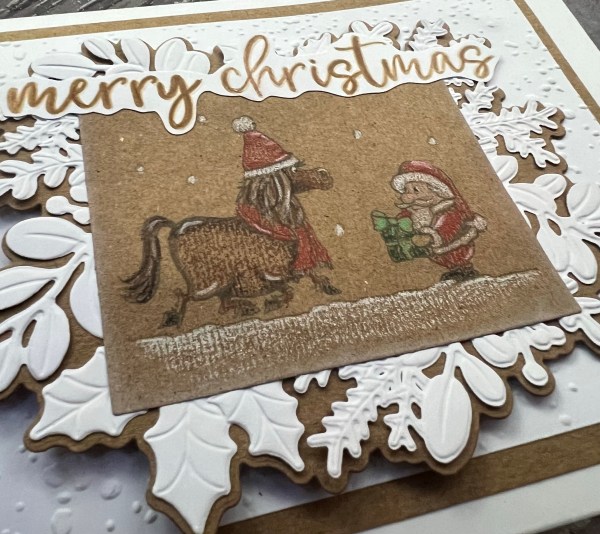
The focal point then was the fabulous stag which is a very old magazine stamp that I adore.

I embossed him in gold and fussy cut him out.

I did raise him up on some scraps of the same cardstock to give him dimension and then added the white embossed sentiment onto Kraft.

Love how this came out. I did end up making an odd shaped card which is 5×6 but it fits ok in the 5×7 envelope.

Happy crafting!

Catherine

Floral card making

Today I have a floral Christmas card.

I made this card using some leftover patterned paper from a magazine kit and the stamps were from the same kit as I wanted to keep it pretty simple and traditional.

I stamped the flowers in memento ink and then coloured them using my stampin blends markers. I then heat embossed the sentiment using white powder.

I decided once I had stuck the card together that the flowers needed some sparkle so added wink of Stella to the flowers and some glossy accents for the centre of the flowers to give some dimension and of course the gloss!

Love how this came out. Beautiful floral image and quite pleased with my colouring.

Happy crafting!

Catherine

Another scraps card

I am still in the process of clearing up my desk and coming across bits of patterned paper I can’t quite bear to part with so I turn them into a card. This one I teamed with a wooden embellishment and a laser cut piece leftover from some very old stash!

Kept it pretty simple and on the lovely soft suede card stock as the card blank.

Hoping to get more crafting in today but first coffee!

Happy crafting!

Catherine

DT: Happy Little Stampers anything goes with Dies challenge

Hello!

I kept to the advent theme with my Happy Little Stampers design team challenge for the anything goes with dies … and made a Christmas card!

I started with a sheet of white cardstock and added stamping using the Christmas Season stamp set and different shades of green and Cherry cobbler. I then embossed this using the Fern folder which gave it beautiful texture.

Next I die cut the holly leaves and berries and the label panel to act as the focal point and then the Joy stamped word using the Colorado Stamps. I doubled up the word so it was a little more sturdy and then glued this all together as a focal point.

I then grabbed a piece of the wide cherry cobbler ribbon and added that to the panel before adding the focal cluster.

It’s difficult to see in the picture but I also added glossy accents to the berries to give them dimension and shine.

Added it to a 5×7 card and decided this was enough! What do you think?

Unfortunately though this is the last month of HLS as Kylie who has steered this ship for so long is having to rest the challenge blogs at the moment. I really hope that she only rests them but totally understand her need to do so. Hope you’ve enjoyed my contributions as much as I’ve enjoyed making them.

Happy crafting!

Catherine

Using up bits of patterned paper

So this card came about because I found on my desk some scraps of patterned paper that I had previously put together as a card topper but never finished off with a focal image or a sentiment … and so I grabbed a preprinted digital stamp and coloured that in to add to the front of the card. Simple!

I added some glossy accents to the decorations on the tree and then added the stamped sentiment from Altenew and called this done!

As I said … simple!

Happy crafting!

Catherine’s

DT: Creative Knockouts – Snow much fun

I was a little on the rushed side for this DT as I forgot all about it! So popped this one together this morning (thankful I had the day off work) for the Creative Knockouts blog.

Will come back and edit the blog soon so I can tell you all about it but first I’m off out for lunch with my friend!

Some time later

Update … firstly lunch was lovely 🎄secobdly about this card …

I printed the image I received from Hetty Clare onto Kraft and then die cut it out … I actually printed and die cut it four times so there are three others sitting in my stash now to be used!

Then I used my Prismacolour pencils to add colour to the image. I kept the colouring quite simple mainly as they are quite small images and they didn’t need much!

I did add wink of Stella to the snow falling and the ground to make it slightly shimmer but that doesn’t really come across on the pictures.

I edged the die cut rectangle with a little white Kraft ink … not much … but it was enough to soften the edge of the panel. Then I had fun grabbing the merriest moments embossing folder and die set to create the panels underneath. I decided to then go with a panel of white embossed snow and the mat of the Kraft to finish off the card topper as it needed the additional frame I thought to ground the images.

I then chose the sentiment from More Wishes and stamped that and fussy cut and added a little bit of pencil to tone it in with the coloured image.

Definitely a little different to colour in on Kraft a digital image for me … need more practice with my prismacolors but think I did an ok job. Especially given I had forgetten entirely about this DT contribution! Ooops!

Happy crafting!

Catherine

Cutest Christmas card

I delved into the box of stuff that was half made and just needed putting together or finishing off and came up with this card.

The background I had already put together probably around 12 months ago so I just needed to add that to a card blank with the ribbon, the cute bear and the sentiment strip.

It was good to get this card made from all bits and pieces in the stash.

Happy crafting!

Catherine

Embossing on embossing take 2

So after I finished the card I shared a few days ago I decided to have another go at embossing with the Merriest Moments set and getting the debossing embossed! And got it the right way round! To give credit where it is very much due this is inspired by a Jennifer McGuire video.

I used the white sparkly embossing powder and this time on Kraft cardstock … and then went to town with stamping and embossing to keep the card to the white and Kraft feel.

I know on the main pics of the card the embossing looks cream but really it is white … not sure what happened with the pictures as it was natural light I took the pics in! Ah well you win some you lose some as they say!

I love how this card came out … the little flowers I just die cut from the Kraft to add contrast and the rest is all embossed.

Finished off the flower centres with the iridescent snowflake embellishments which change colour as they catch the light.

The background piece I decided to use the scoreboard (an oft neglected piece of equipment) to create the debossed stitch line… it just broke up the background and gave a subtle finish.

Happy crafting!

Catherine

One image three ways

Today I’ve got three cards all using the same image and all kept pretty flat for a change!

I used a Connie Fong digital stamp that I had been given for a Design Team a few months ago and had printed a few times so thought why not use that and colour it three different ways to make up some cards that were similar but different!

I used patterned paper from the stash and this time kept the sentiment off the front and instead stamped the inside of the card instead.

The first one I coloured using stampin up inks and water with a brush.

The colours are really vibrant and as I had used teal type colours I went for the blue toned greens for the background paper.

For the second card I used distress inks and more water so it is a little bit lighter. I also added some shimmer ink for the baubles and the centre for the flower.

This time I chose browns for the ribbon rather than blues. So the green background is garden green which matches with the leaves I think. I really like the pop of the shimmer and the brown ribbon.

The final one I went all in with the shimmer watercolour and did the whole thing with them. This gives it a much softer look and clearly everything shimmers!

I went back to the blue for the ribbon though as I wanted a bit of contrast. But this time I went with the soft green of soft succulent in keeping with the softer look of the painting.

So that’s three cards using the same image but each coloured differently for three slightly different looks!

Happy crafting!

Catherine

DT: Happy Little Stampers Anything Goes with birthday challenge

Hello!

Just breaking up the christmas xard overload with something fresh and different … a birthday card made as my design team contribution for Happy Little Stampers Anything Goes Birthday challenge.

I decided to go all Blue with this card, using an image I coloured ages ago (one of the digital stamps I had printed out and stored in a pouch!)

Then I chose some Blue patterned paper from the stash and scraps of different blues I had lying around.

I added in a bit of Crumb Cake too for contrast.

I decided to embellish it with pierced blooms die cuts and made a layered flower.

Of course inside I had to add some more paper just to add a little something.

And so just like that another year if contributing to the HLS design team for the Anything Goes Birthday challenge. Loved this challenge as any style goes and can just play and make the always useful Birthday cards!

Unfortunately though this is the last month of HLS as Kylie who has steered this ship for so long is having to rest the challenge blogs at the moment. I really hope that she only rests them but totally understand her need to do so. Hope you’ve enjoyed my contributions as much as I’ve enjoyed making them.

Happy crafting!

Catherine