I kept this one quite simple with a die cut inlay and then the sentiment raised above.
I say simple … but actually sometimes these simple ones take a fair amount of work. First die cutting the shape. Then diecutting the separate piece which is actually doubled up so a little thicker. Plus this die creates zillions of tiny bits so lots of cleaning up!
Then decided to put a patterned paper behind it and then adhering the leaves in place!
Next I added the banner strip on foam with the paper twine underneath and some sequins and then stamped and fussy cut the sentiment.
Inside the card I used paper scraps to finish off.
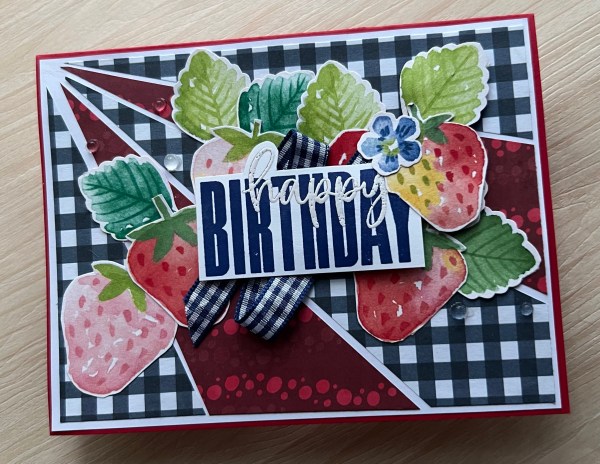
Today I wanted to play with a background I made up quite some time ago for a sheet load of cards project but never ended up finishing and decided to give it a different twist by not making it a Christmas card.
Instead I grabbed some fussy cut strawberries and made it into a sweet birthday card instead.
The design used the gingham paper alongside a not obvious Christmas paper and so I thought the gingham worked well as a sort of picnic blanket look!
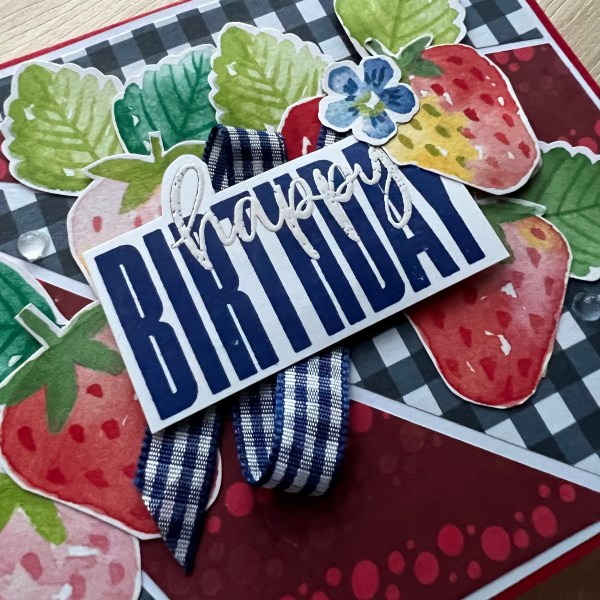
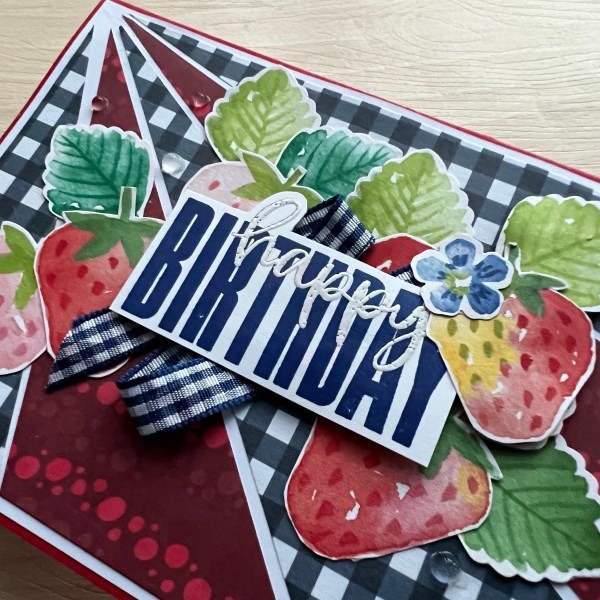
After arranging plenty of the strawberries and leaves leftover from the patterned paper playtime session at the beginning of the month it was time to choose a sentiment so I reached the usual Biggest Wish stamp set using the Starry Sky ink for the birthday and embossing the white Happy. I added in a ribbon too that worked well with the papers.
Love how this came out. Added some clear gems too for a bit of bling.
I have another of these backgrounds left in the to be played with stash where the papers are reversed but still not ready to make with it so will have to wait until the inspiration strikes!
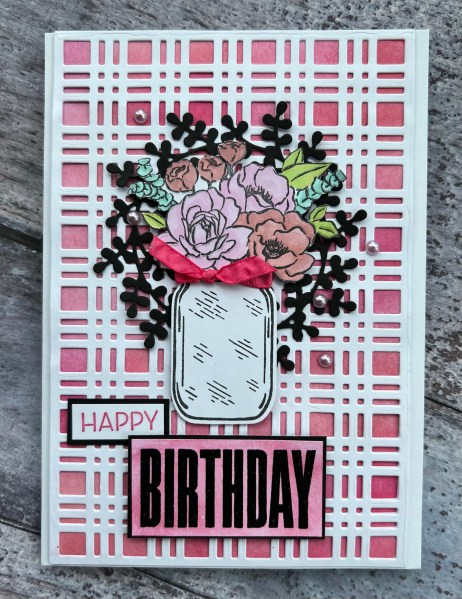
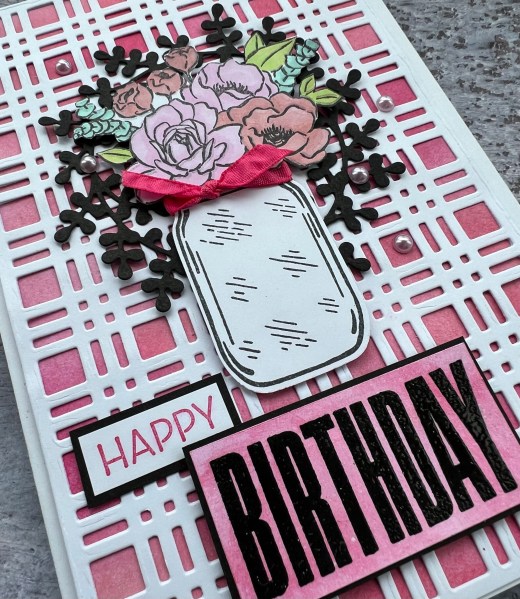
Hi! Today I have another design team contribution for Addicted to stamps and more where our challenge is die cuts and stencils. Well I ended up combining the two by making a stencil out of the die cut!
I started by die cutting the background out of white cardstock and then making an inky background to go behind this … this created a pretty pink background on which I knew a floral element would look best.
I thought I would go for a wreath first of all but then decided not to stay with a wreath but to just put one down as a base and then I chose Jar of Flowers for the main feature. I coloured in the flowers with my promarkers before fussy cutting them out. I then punched the jar and added the little bow to it. I added a little foam behind to give it some dimension before adhering it to the background panel.
I decided it need tie in the black more so used the biggest wish stamps for the sentiment and used black for framing them.
Inside the card I used a die cut scrap to create the stencil and used the same pink inks to add a little interest inside the card.
I added the panel to the front of a 5×7 card and then added gems to finish off.
Pleased with how this came out. Must admit that background die creates a lot of little bits of card and the carpet is now rather in need of a vacuum but I do love the background regardless!
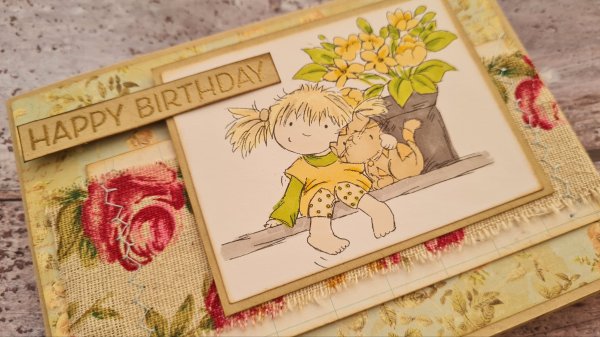
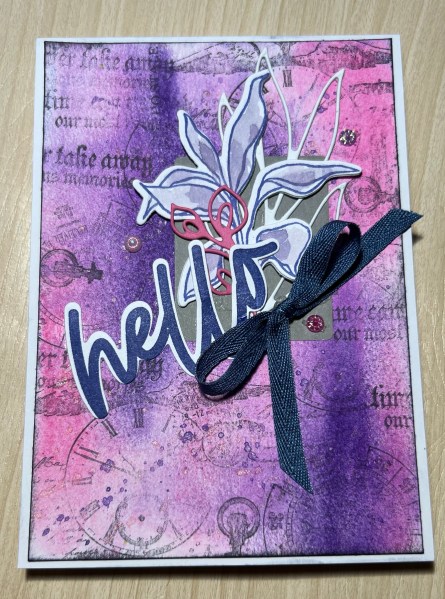
It is quite a vintage looking card and a bit of a change from the more modern cards I usually make. It was nice to use browns and more earthy colours to be honest.
I also added some sewing and this gorgeous wide linen ribbon too.
The image I have had for years …. probably about 10 years! It’s a Lily of the Valley one and I remember getting a pad full of images and this is one of those! So not just vintage in style but vintage in terms of stash!
I kept the whole thing quite simple… some patterned paper, inked edges and the fabric sewn on. The sentiment is embossed in gold and the card base made from Crumb Cake.
The image I coloured in with promarkers and my stampin blends so it is a bit of a mix. Inside I just added a strip of the paper to continue the theme!
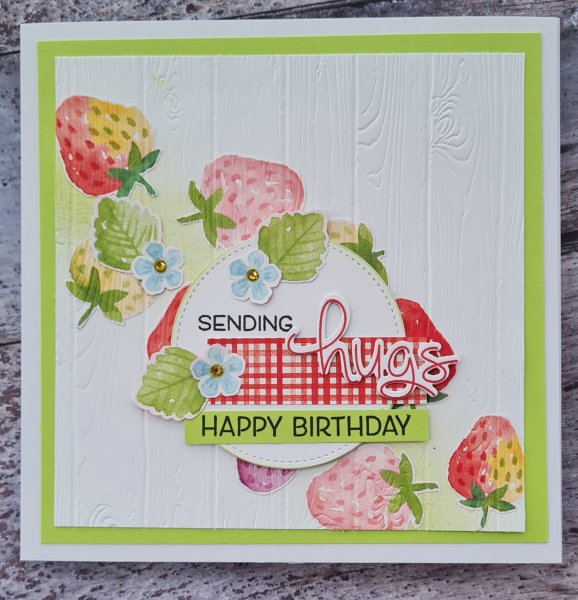
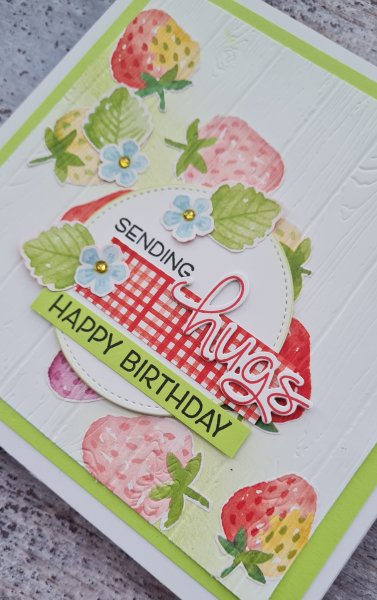
Well hello… as its the first of the month it is time for my patterned paper playtime and this time I am sharing the card I actually made for my auntie for her birthday in March.
It uses the Berry Delightful dsp that I cut apart to get all those lovely strawberries and the flowers and leaves. The reverse is the picnic blanket style red paper. As with the other cards I’ve been making for this challenge this year I’ve been taking a dsp and fussy cutting out elements to make good use of the dsp. Well this particular one has given me lots and lots of fruit, leaves and flowers to play with!
I wanted to make a bigger card for my auntie so this is a 7×7 and I created a curve across the page with ink blending and the lovely Parakeet Party ink to ground the strawberries. I then stuck them on and embossed the panel using the pinewood planks embossing folder. I love the effect this gives. It pushes the images into the paper as it if was one panel not pieces stuck together.
Next I die cut the stitched circle three times and stacked it up for dimension before adding the stamping, the strip for the sentiment and the strip of the dsp. I then stamped and die cut the Hugs from Lawn Fawn again die cutting it a couple of times for dimension.
After adhering it to the main panel I also added the three leaves and flowers as additional embellishments.
I added a mat of the Parakeet Party underneath to frame it and tie in the sentiment. I also coloured the gems and added them to the flowers to finish.
Love this special card for my auntie. She is passionate about growing things and gardening so I know she would have appreciated this fruity card!
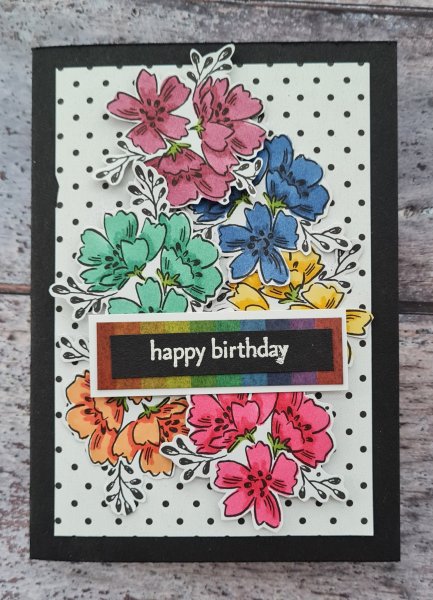
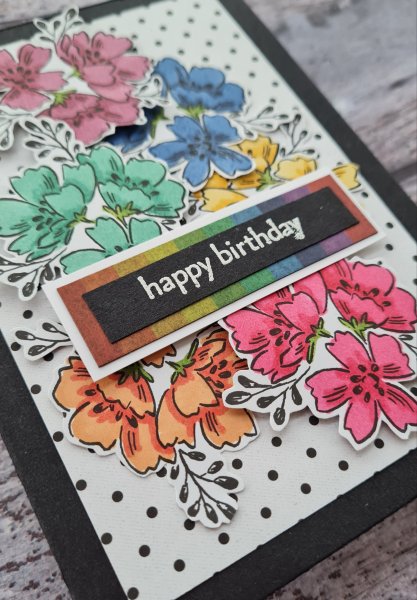
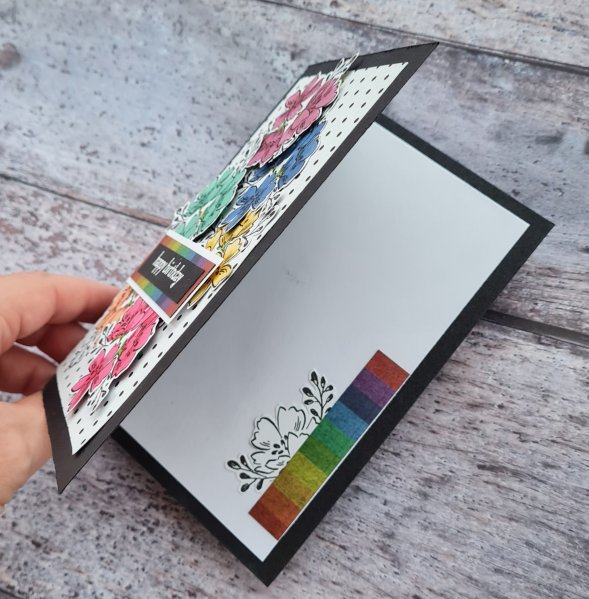
I’m back with more floral elements from the perfectly penned and this time rainbow themed.
I coloured each of the clusters a different colour of the rainbow using stampin blends and promarkers. I added them to a dotty background (leftovers from the True Love dsp) raising some up on foam for dimension.
I then created my sentiment layering it on some rainbow washi covered cardstock.
Finished off inside the black cardblank a white insert with an added floral element and washi strip.
Yesterday I shared a card I made with a gelato background and some Paperartsy stamps … well I made four backgrounds in total so I have another three cards I can share once I’ve finished them. So far I have only finished one so that’s what I have for you today!
This one I finished in a similar way with the bits and bobs off the desk and an Avery Elle sentiment … this time it had a Splendid Thoughts as the focal elements though.
Love how different in feel the different colours look between this and yesterdays card.
Looking forward to seeing how I finish off the other backgrounds I made at the same time.
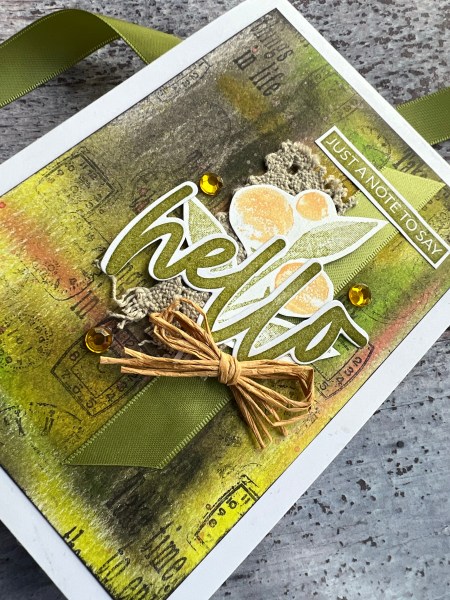
I have another design team contribution for Addicted to stamps and more and this time the challenge is ‘any occasion’.
I made a series of hello cards having a play session with gelatos and this is one of the cards I made.
Once I had added the colour to the background I added stamping using Paperartsy stamps and then grabbed bits and pieces from the desk to add the focal piece … old olive ribbon, linen lacy trim, a stamped berry and leaf twig and paper twine. I stamped and die cut the sentiment and then added the gems to finish off!
Love the earthy colour to this and the pops of bright yellow and lime.
Off to see what the rest of the design team have been up to making for this too.
I decided to play with decoupage after printing and colouring the image three times and then cutting different parts out to layer up.
I then added some layered cardstock and the ribbon and the embossed card base. I then decided to diecut the letters for the sentiment and stamp the final part.
I decided to add wink of Stella to each of the flowers and this made it really shiny!
At the beginning of the month I used some perfectly penned dsp to create a black and white card… this time I made it colourful with added yellow.
Firstly a yellow card blank and secondly I coloured all the images using my Stampin Blends in daffodil delight. And how cute does this look?
I kept the card fairly similar in design (this time larger flower clusters not single flowers) with the products used but with the pop of yellow it looks so different. I also added yellow gems (I coloured them using the stampin blends) to embellish.