Scrappin Saturday – Together time

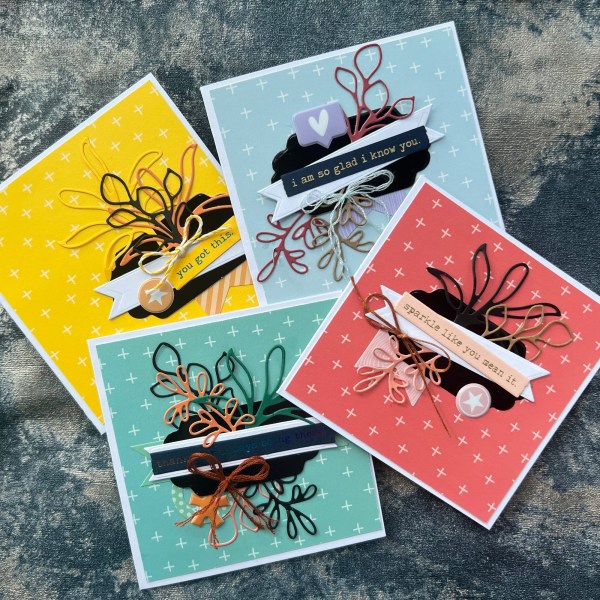
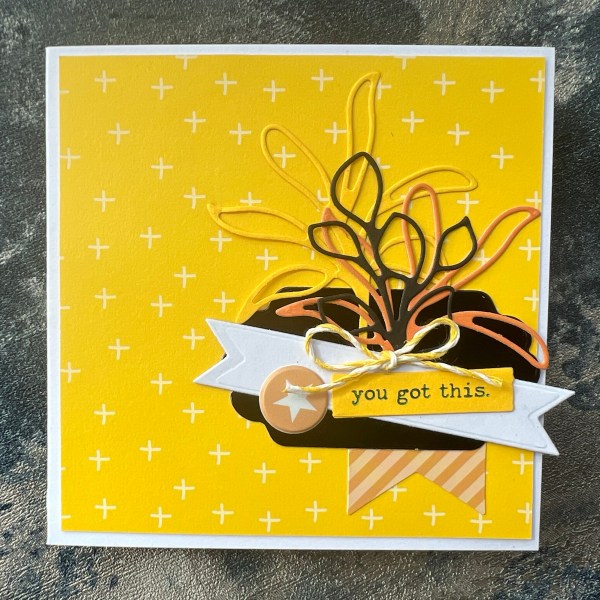
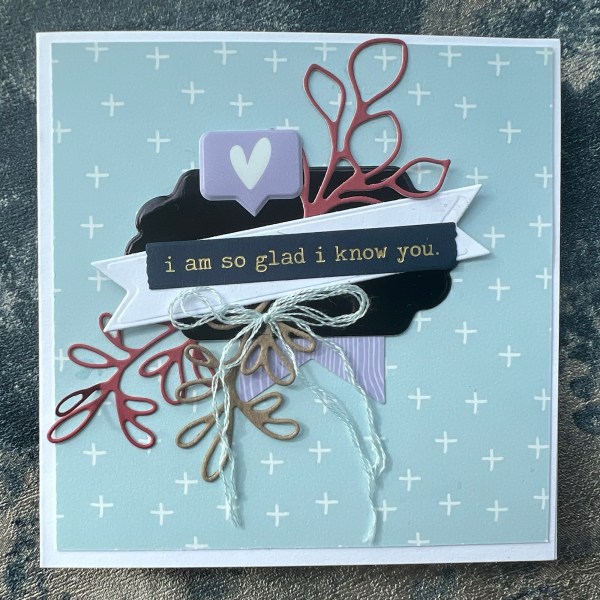
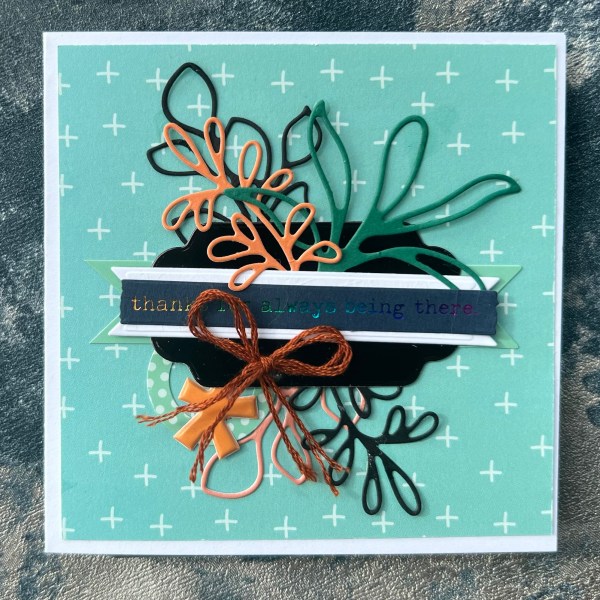
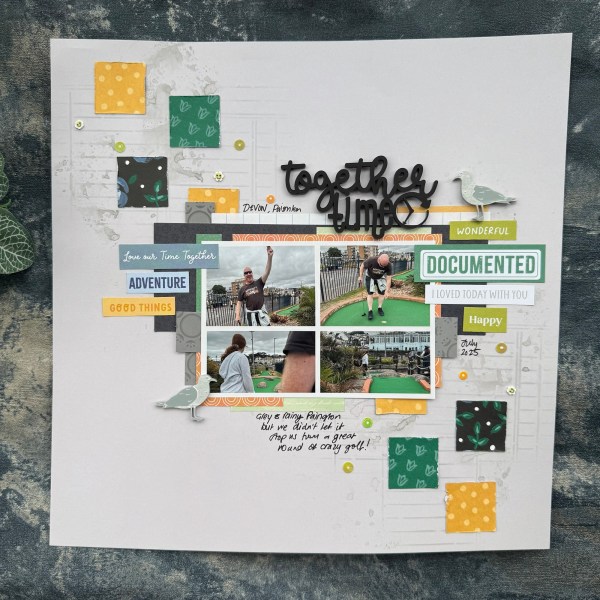
I was tidying the craft room last weekend and found the pouch I had popped all the scraps leftover from the last few scrapping projects I’d made and decided to see what I could make from them – and a scrapbook page emerged!

I did video the process and so you can see how it came together.

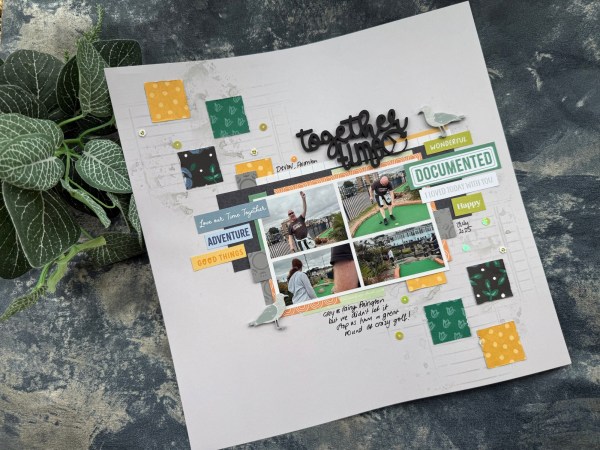
Really love using those squares that had come from when I had die cut a film strip at some point from the paper … amazing what stuff I save sometimes!

I used all sorts of scraps from the pile to create the cluster and once I had adhered all the bits together before I added to the base I moved them all to the side and did some stencilling!

I used the Arden creatives stencil and some smoky slate ink to create the little ledger and then some splodges which I created using the packaging technique. Of course I also added some splatters.

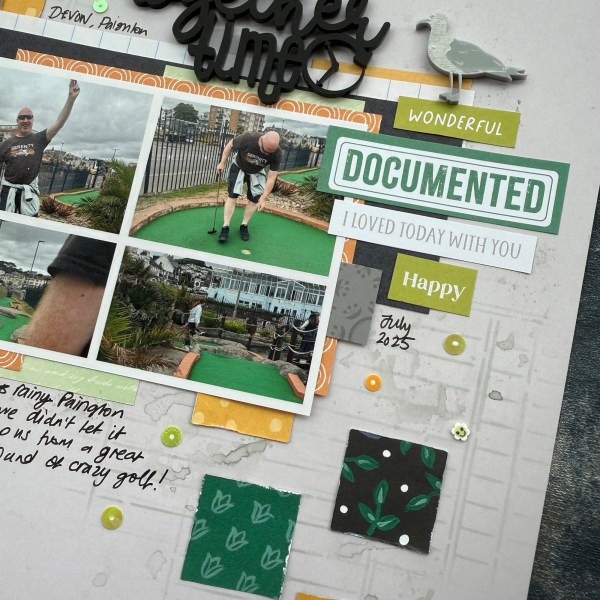
I then stuck everything down including adding some of the cute little sequins from the Hey Little Magpie embellishment kit.

I then had a hunt through the acrylic elements in my box and chose the Together Time for the title and the seagulls to add to the page (no seagulls in the pictures but promise there were loads in Paignton!).

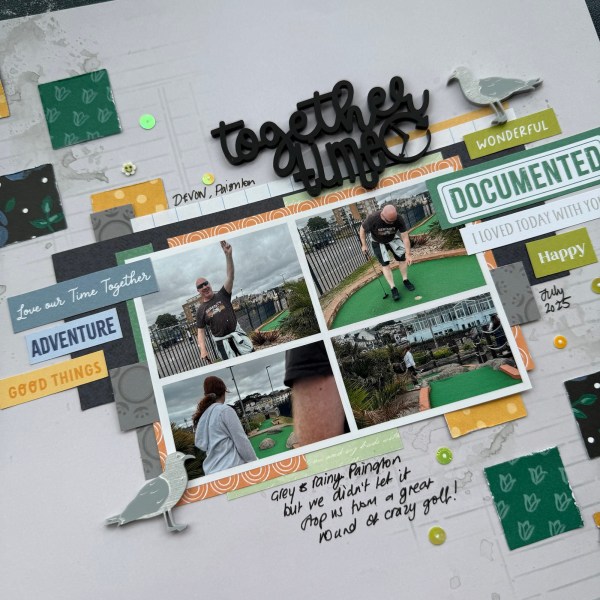
Loved how this came together and got to use up some of the scraps!

Happy crafting!

Catherine

Festive Friday 2025 #33

I suspect most of my Festive Fridays for August are likely to be tidy up from Christmas in July where I had bits and pieces leftover which weren’t worth putting back in the box or too big to throw away! At least it makes it easy for me given how I don’t really fancy making lots of Christmas projects this soon after Christmas in July’s mammoth effort!

This card came from the patterned paper left from the fun fold card I made – including the die cut circles.

I also added the words left from the red, green, gold colour scheme card.

The moose – which is the cutest thing ever – is one of the leftovers from the Night Sky cards.

Perfect set of ingredients for this card drawn from so many other projects!

I added the card candi to finish off and then added some strips of the patterned paper to the inside to coordinate it!

Happy crafting!

Catherine

DT: Addicted to stamps and more #499 – any occasion

It was my Mums birthday at the beginning of August and I made her a pretty special card – and as I get more blog views when it is a design team I saved sharing it for this post for Addicted to Stamps and More!

I used a stencil for the background and then Rosy Outlook for the stamped images.

I added in a bit of special shine with the foiled die cut leaves.

I also die cut the numbers from the same foiled cardstock and then die cut the letter Mum from yellow.

Then I added glitter glue to them to give them extra sparkle and added a sentiment from Altenew.

I finished the front with the little clear yellow gems.

Inside I printed some sentiments and then cut them and layered up some panels with an extra rosebud image and some leaves.

Then on the other side I added the three layers for the place to write the rest of my greeting with a bit of stenciling in the corner and the larger rose image.

And another sentiment!

A pretty special card for my special mum on her special birthday!

Happy crafting!

Catherine

Make it Masculine – Leaves & Use up a magazine kit #9

So I did mention this a couple of days ago but when using the magazine kit and making the brushos background I did for the flowers I also made a green leaves based one too but saved it for a Make it Masculine card!

Here it is!

I only ended up using half of the panel of A4 I had created so there is some leftover!

I embossed the leaf images and then added the brushos in Emerald and Leaf Green colours and then left it to dry. A few days later I cut it into the square for the card background and stamped over the whole panel the sentiments from the magazine kit in two colours and then added the brown splatters too.

I chose the brown coloured paper for the mat layer and then layered them up. With the remaining part of the half of a4 I coloured a few leaves with brown and then fussy cut all the leaves out to sit under the banner.

I stacked the banner up with the patterned paper on the top level and then decided it needed something to separate it from the background. I chose the orange/bronze coloured foiled cardstock and ran it through the embossing folder from the kit and then glued that into place on the card. I added the cluster of leaves and banner and then chose a sentiment from my stash as I wanted a different font for the sentiment that was more bold.

I love how this card came out – fun to use the supplies from the kit to make something that was suitable for males as well as females!

So this was my delayed Make it Masculine make for July with the theme of leaves. Now to get my thinking cap on for the one for this month! Hmmm! I will come up with something I am sure! Also 9th blog/video for using my magazine kit and the first time I brought in a different stamp with the sentiment. Wonder how many more makes I will get from this kit!

Happy crafting!

Catherine

UK Stampers Forum ATC swap

Hi – decided randomly to make some ATCs as I hadn’t made any in ages. I went to see what the swap theme was at UK stampers forum and immediately knew what I wanted to do – so went for it!

The theme was Food and Drink and I went with pumpkins 🎃 – which are both food and with the fast approaching Pumpkin Spice Latte season are also a drink! 🤣

I decided to do little framed panels with the orange foiled cardstock and the white cardstock and then stamped little scenes using the Pumpkin scene stamps my daughter bought me last year for my birthday.

I did ink them with a little vintage photo distress ink to just give them a more vintage look too.

I added a gem and also a Tim Holtz sticker sentiment for their titles.

Really love the little cute pumpkins and I hope the recipients also love them too!

Happy crafting!

Catherine

Use up a magazine kit #8

I went back to the magazine kit that I was using for my series on YouTube where I show everything I manage to make from the kit and made four cards.

I made myself a masterboard that worked with the card toppers in the kit so the video has me making the masterboard, mounting the card toppers onto cardstock and then choosing how to put together the cards.

Such a pretty set with the artsy backgrounds and then the more traditional themed toppers.

This one I chose quite a large topper so needed a larger card size so went 6×6. I also kept the whole thing quite flat as the topper and the sentiment rather dominate and didn’t think it needed anything else!

This one more of the masterboard is on display and it is very cute with the sentiment and gems having the peachy colouring to them. I raised up the sentiment on this one but kept the other layers flat. I love the big border on this card too!

The two smaller ones I went with traditional sized card bases and some dimension for the toppers. For the one above I used craft foam under the whole topper to raise that and on the one below adhesive foam on the sentiment banner.

I did cut a couple of flowers from the background for this one as embellishments and love how this looks.

I added gems to finish them off and then inside the purple cards I added a panel of white with an off cut of the masterboard to just bring the same element through to the inside.

So that’s four more cards made with the magazine kit – not sure how many more cards I will be able to make without brining in extra supplies as apart from mediums, gems and cardstock everything so far has been done using the supplies in the kit – I am thinking I may start adding other sentiments stamps or dies in – or maybe some foiling at some point but we will see!

For now though there was a second thing I did when making this set and that was to do a full sheet of green leaves which I haven’t used at all but have an idea for Make it Masculine which I missed last month with all the Christmas in July craziness! So watch this space on what I do with that!

Happy crafting!

Catherine e

DT: Kingston Crafts – Everyday Stories – Hello Life kit

Had a few weeks break from sharing my city breaks album but back again and this time Cambridge is the city I am sharing.

I made way more pages than I was expected to do for my design team commitment but I couldn’t stop adding the cities as I found photos I had already had printed! So my final city I added in was Cambridge which is one of my favourite places to visit.

Once again I added in a section divider using the flip its to create it with the 8×4 one and some of the Spring Slimline collection cardstock which coordinates so well with the Hello Life Kit.

Next for my pages I just did the double sided spread with a 4×8 flip it – I think I must have used a lot of the photos I already had printed from our trip to Cambridge on scrapbook pages in the past! Must remember to print some more off to add in future!

The flip it on this one I went horizontal across the bottom so it flipped up. Love how this worked!

I’ve thoroughly enjoyed making this city album so far – and now I want to go on another city break so I can add more cities in future!

Happy crafting!

Catherine

Festive Friday 2025 #32

Today I have a little project for my Festive Friday using up supplies from a Christmas in July project. I had the afternoon off work to sort out something with the bathroom fitters (snag list needed discussing) and so I’m treating myself to some tidy up projects in the craft room! Starting with this!

I had made a masterboard to make loads of tags with the MFT polar bear stamps and but I had a few off cuts and a few extra images I had coloured and die cut so I set them to one side.

I decided to carry on with the tag theme and so made these two tags.

I used the off cuts to add strips across the tag panels which I made with dark green cardstock that was another scrap! You will have seen this technique before using scrap cardstock on quite a few projects previously including other tag projects in Christmas in July – well this worked just as well with the masterboard off cuts too!

The lovely masterboard has so much lovely shine and texture from the shimmer spritz and love the different colours from the oxide inks.

I added the cute polar bears and then the sentiments and then added the ribbon.

I then added the gems too as wanted to add that bit of sparkle.

A fun little project – and added to the collection of tags ready for the present wrapping stage some time in December!

Happy crafting!

Catherine

DT: Creative Knockouts – fun fold – Sheepski designs

Today’s card is a fun fold … yes I’m actually being brave and doing another fun fold! But that’s because that’s the challenge at Creative Knockouts and so my design team contribution of course had to include one!

I included the lovely Daisy Panel from sheepskidesigns who sponsor the challenge over at Creative Knockouts this fortnight.

I actually included it twice … on the front and in the centre.

I don’t have a name for this fun fold as I made it up as I went along with a partial die cut to the right hand side flap which overlaps the left hand side flap and a book fold to the left hand side too for the ribbon!

I used a couple of large circle dies for the partial die cutting and then fussy cut the elements of the focal image that stuck out and then inside the image I fussy cut the whole image which is quite large as a panel.

Alcohol markers used to colour the image but kept the colour scheme quite simple as I was using the bright papers from the Kingston Crafts Rainbow kit for the whole card.

I added a die cut sentiment that I stacked and glittered with the Kingston Crafts glitter glue so it’s sturdy enough to hang off the circle and then a scrap of ribbon for the left hand side.

I also added three of the card candi to finish off!

I love this bright and cheery card. And proud of myself for attempting a different type of card with another fun fold!

Happy crafting!

Catherine

DT: Kingston Crafts – Everyday Stories – Hello Life kit

I always like to do something a little different from any kits I get – and although obviously the Hello Life kit is made for the pocket pages and memory keeping – I decided to use some of the card as backgrounds for notecards and add in some of the stickers as embellishments along with some die cuts and a sentiment!

The colours in this kit are so cute – so I took four of the cards and then die cut some elements for popping on the top as fun clusters.

For each I added a sticker like the banner or the star above – or the heart speech bubble below to add to the clusters.

I did add the foiled sentiments and then the larger label is cut from the black foiled cardstock from Kingston Crafts which adds a different texture in!

I love that the kit has those stickers and the puffy stickers in that are quite generic so work well for adding to a cluster type card.

I made my card blanks just slightly bigger than the four inch cards and these were so simple to make.

This is a good way of using the cards in the pack as there are so many (it’s a massive stack of the cards!) – and I know I wouldn’t use them all for the album pages I was making!

These cards did get to be on the tv back in June …

… so I can say “as seen on tv” once again!

Happy crafting!

Catherine