DT: Creative Knockouts – embossing delight

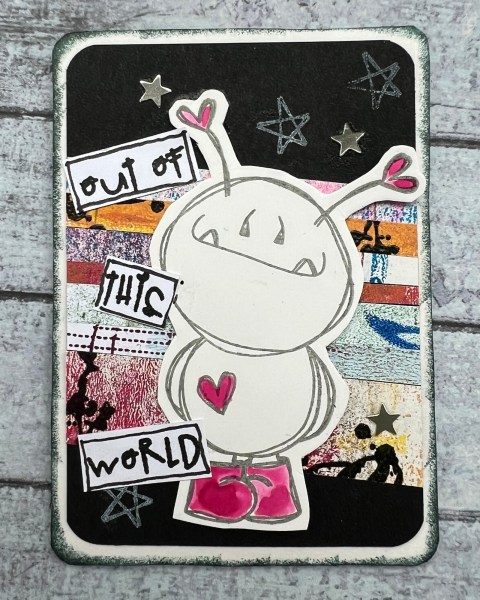
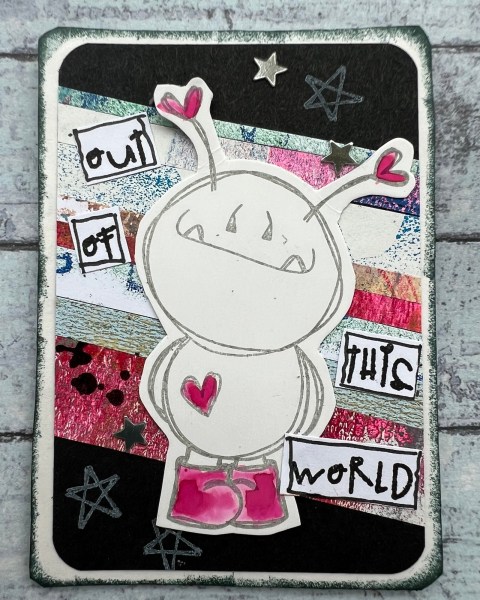
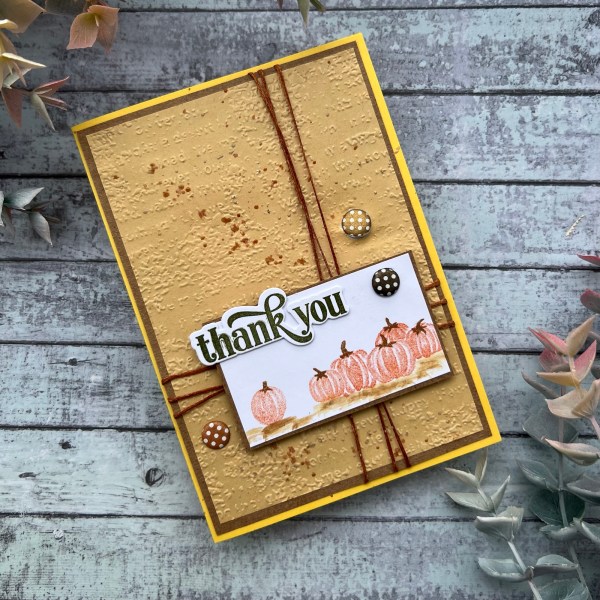
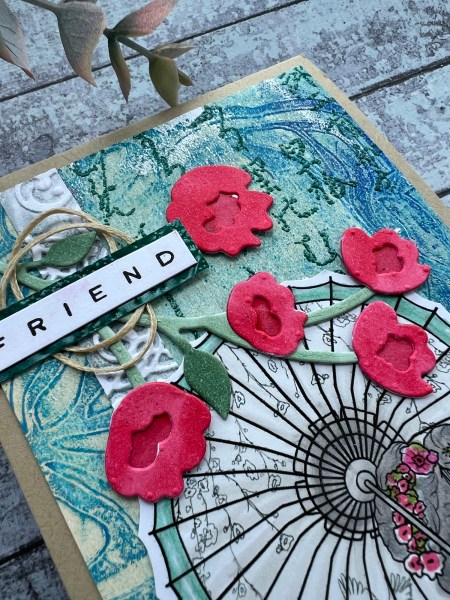
Today at Creative Knockouts our challenge is embossing fun – well I ended up with two different types of embossing for me card. I chose to use the Geisha Girl image from SheepSki designs for my card and they are sponsoring this challenge.

I decided to colour my image with promarkers and stampin blends. Then I fussy cut her out ready to add to the card once I’d sorted the background.

I chose the gelli print background that looked like it would work with the image colours I had chosen and the pattern looked fun too.

I then used a Japanese stamp I’ve had in the stash a long time (no idea what it says so I hope it’s nothing offensive!) and embossed that in the background with a green powder.

Then I cut a strip of white cardstock to run through the embossing folder with some ink for a stripe down one side.

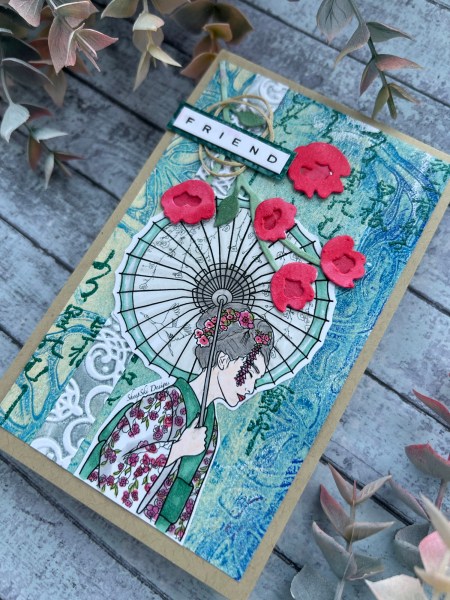
Next I added the girl and decided she needed a flower to add to the card.

I know the die I chose isn’t a cherry blossom but I think it looks nice regardless!

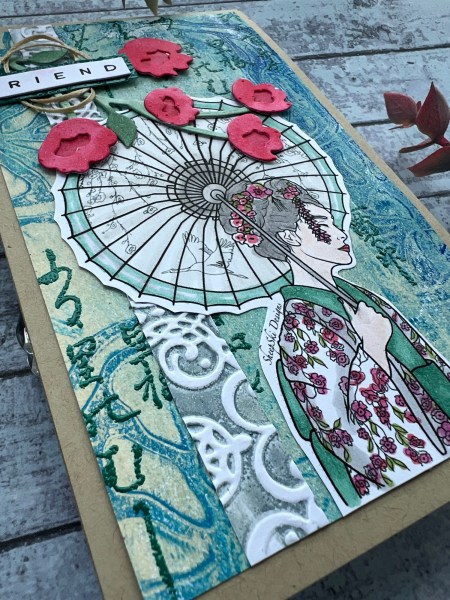
I die cut it from white but then used stampin blends to colour the pieces to create something that was the same colours as her outfit and parasol.

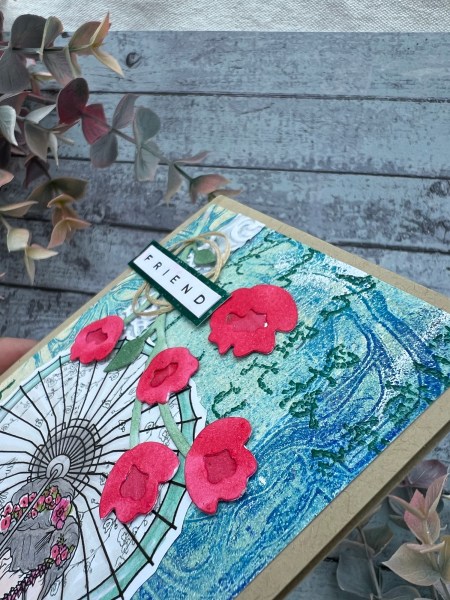
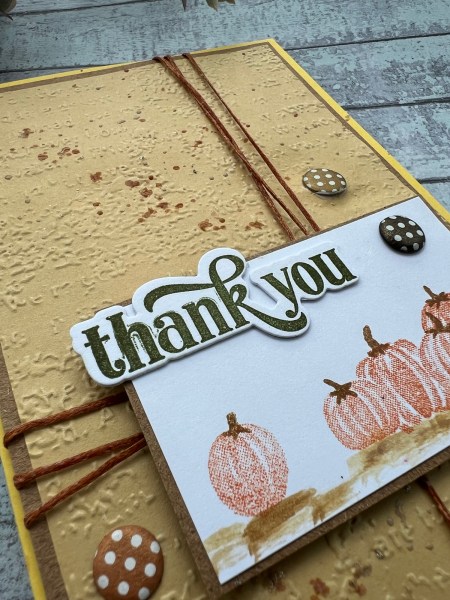
Next I stamped the friend from a cut mini Altenew set and decided it needed a border so I embossed a piece of scrap with the same green powder and used that as a mat for the sentiment.

I tucked some linen thread behind the sentiment just to add a different texture.

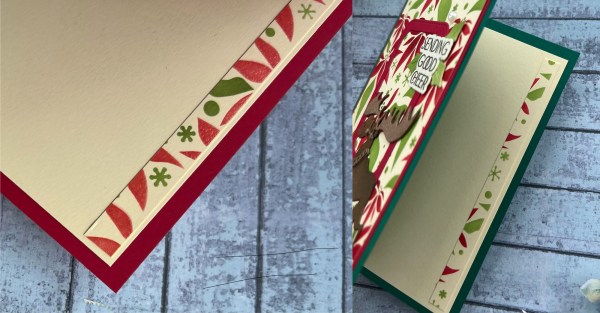
I added the panel to the crumb cake card blank I made which is a slimmer card than normal. This worked well with the feel of the card I thought.

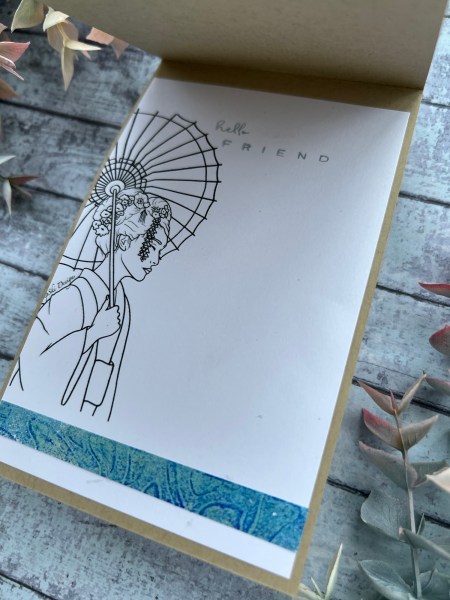
Inside I used another print out (this one has less detail on it than the one I used on the front) and cut the panel so the girl was to the side of the inside. I used a bit of the cut off gelli print at the bottom and stamped the sentiment at the top in distress oxide to finish off.

So three types of embossing – dry with a folder, heat embossing stamping and heat embossing for a background mat panel. Challenge completed!

Happy crafting!

Catherine

More Visible Image gelli print cards

Yes I did more cards like the one I shared yesterday but even more simple!

Gelli print, embossed stamping of the two cards, a mat and a card blank! Jobs a good’un!

Each of the gelli prints has its own thing going on so its own personality and with the bold black stamping and mat they each look fab!

Well I think so anyway!

This time I used the Biggest Wish for the sentiment and stamped and embossed directly onto the gelli print.

Some of the gelliprints have some gold paint in them too so that makes them shiny already – I love tilting them in the light to see the shine!

Just gorgeous!

Seriously why have I not been using this stamp set until now? It’s so simple and so pretty! And perfect for grungy funky backgrounds like these gelliprints!

Linking these cards up with the triple B challenge

Happy crafting !

Catherine

Visible Image hummingbird onto gelli print

This was a really simple card to put together and I can’t believe I have not used this stamp set before as it’s gorgeous!

I took one of the gelli prints in the stash and embossed the image using black versafine and clear embossing powder.

Then I added the little circles and line stamp to the edges and then trimmed the panel down. I added the sentiment onto white and hand cut to follow the wonky lines.

I mat the panel with white and then black to keep it classy and then added to a white card blank.

I used white card Candi to embellish and called it done!

Just love the pattern and texture of the background with the artsy image and how simple this was!

Hope you like it. I did video the process of putting this together for those who prefer a visual explanation!

And let this be a reminder to you to look through old stash to see if there is something in there you’ve not used yet or used in a while – it might spark your mojo!

Linking to the anything mixed media challenge at We love 2 create

Happy crafting!

Catherine

Scenic Pumpkin Patch

I decided to grab the pumpkin stamps again but also I had an idea for using up scraps and wanted to try it out … so I stuck the camera on and recorded the process of making these cards.

I started with strips of white cardstock from the scraps box and coloured them with different colours using my promarkers then adhered them to a piece of cardstock. I then die cut it to create the circle and cut down the remaining to create the frame for the second card.

I stamped the pumpkins using different colours of ink and then added the stem stamps with the green and fussy cut them out.

I decided to keep this one with the circle simple adding the circle to the crumb cake card blank and then adding some black die cut leaves to add contrast. I embellished with the thread bow and some black gems.

I used a Concord & 9th set for the sentiments on both cards matting them with a scrap of Calypso Coral cardstock.

This one was a bit more involved with the cut out from the soft sea foam card which is trimmed to be slightly smaller than the card base. I added some scrap cardstock underneath to raise it up slightly from the base panel.

I added inking and some splatters of the shimmer ink to the base too which added some fun contrast to the front. I also added the white and gold leaves for this one.

I added a nest of the thread behind the sentiment for this one and some glittery gems for embellishment.

Love how they both came out and loved playing with those cute pumpkin stamps. I also am pretty chuffed with how my idea translated for using scraps of cardstock – I think it worked pretty well!

Entering the first card for the autumn colours challenge at Allsorts challenge

Happy crafting!

Catherine

1 sketch 3 ways

My lovely friends Helen, Sarah and Jackie run a Facebook group where they give us a sketch to play with for the month with their three takes on the sketch. This morning I decided to join in for the September sketch!

This was the sketch that they used from Pagemaps.

I decided on these three photos and then picked out the single piece of patterned paper because it worked with the colour of my cap in the photos. I did have to immediately vary the sketch by having one pic slightly larger to keep us all in frame!

I turned the sketch to the right when I started with the sewing deciding on the vertical for the photos rather than the horizontal. Just felt more right with the pics that I had!

I then added the hand sewing based on the sketch (but also added a little more in a few other places too).

I chose a Bramble Fox acrylic for my title and some other Bramble Fox bits and pieces from the stash.

I decided to use one of the stencils in the background with some tattered rose distress ink – I thought it worked with the beach vibe!

I love those sparkly starfish elements and the cute shells.

My final embellishment was the sequins from the stash which just added some extra texture.

Love how this came out and it was good to get a scrapbook page done as the mojo has been missing for scrapping a little the past couple of weeks.

I did video the process so you can check this out on my YouTube channel.

Happy crafting!

Catherine

UK stampers forum ATC swaps

Hello! Had a moment where I decided to use some scraps up to create these cute little ATCs and joined in with the swap over at UK Stampers Forum!

Not often I go for cute stamps but these Alpaca Pals stamps make me smile and they are perfectly sized for the ATC.

I added some ink round the outside of the ATC and then added this slightly smaller panel for the topper using the scraps onto black cardstock. I stamped the stars using white craft ink and then added the little alien and the title on top.

I added the little sequin stars to finish off and add sparkle!

Fun! It was great to also make something totally different from normal and of course to use up scraps that were otherwise destined for the bin!

Happy crafting!

Catherine

Festive Friday

Hello! I actually made this card towards the beginning of August as I wanted to use the Waffle flower poinsettia background stencil that I had bought but not used during the Christmas in July series.

I decided to stencil onto the cream cardstock and for the first one I kept it simple with just the ink.

This creates such a beautiful panel of paper.

I decided for the second card panel that I would add in the versamark after the initial inking of the red and then clear embossing.

This gives the red petals some shine and texture.

I did add gold pen to the centre of the flowers of the first card but it doesn’t show so well on the finished card.

I decided to add the red frame that I die cut and then I used the leftover red to create the mat for the panel.

For each I added the Tim Holtz moose which were already die cut and inked up ready from when I used them a while ago for the Christmas in July- I die cut a few whilst I had the die out so there were some ready to go!

I also added the die cut sentiments that were made in a batch earlier that day.

I added some die cut holly leaves just behind the sentiment cut from inked cardstock so they match the inking on the background panel.

I chose to use green as a card blank for one and red for the other. The red one I added some foam behind the panel so it’s a raised dimensional card.

Inside both cards I added a cream panel and the scrap cut off the stencilled panel as a strip.

This helps link the inside with the outside.

Once again the process was captured on camera so please check out my YouTube channel.

Happy crafting!

Catherine

Concord & 9th mashup!

Took the Boho Butterfly set out of the stash to play with and then halfway through the project it went a little wrong and then I added the Garden Path stencil set into the mix and love the final mashup!

I kept the background stencil all soft and pastel with the bold sentiment which then allowed the butterflies to pop off the card front.

I didn’t do the best job of lining up the stencil for the background but it didn’t matter when I added the butterflies as they are the focal feature!

Inside the card looks just as pretty and would make a great CAS card front too …

All in all a lovely card.

I did video the playtime and so you can check that out on YouTube!

Happy crafting!

Catherine

More crafters companion paper

I did end up grabbing those final pieces of patterned paper that were already cut up to make two more cards – this time a different approach but again similar cards.

This time I went for the Sahara Sand as the base and this gorgeous butterfly themed paper and teamed it with lots of the Pierced bloom die cuts.

On both I stuck the paper down on the base of the cardstock and then ran it through the painted texture embossing folder. I love the look that this gives (and it reminds me of Artex walls from the 80’s!)

I chose the pierced bloom die cuts I thought worked well with the colours – pink, Kraft, blackberry bliss and white. I also added in those flower embellishments with the little wooden beads in the centre that I think work so well with these papers and the floral die cuts.

I added a nest of thread too to add in that softer texture.

On the first card I added a little banner behind the sentiment again from my stash of ready made die cuts.

This second card I added in the pink circle to ground the floral elements and the sentiment.

On this I also added that little touch of metallic with the rose gold leaf and flower centre.

So I’ve finally finished with the pouch that I put together of this paper and some die cut elements back in January but it’s been good to revisit all through the year and have a rethink on any plans I had for these papers. I must admit it also became a bit of a challenge to me as I kept veering away from getting this project done as it wasn’t always appealing to me. Funny how it sometimes works against you having a grab and go type project there!

Ah well! it is done now and really happy with how this pair of cards worked!

Happy crafting!

Catherine

DT: Addicted to stamps and more – Make your Mark #476

Made this card with the lovely Scenic Pumpkin Patch stamp set that I got as a birthday gift as my design team contribution for Addicted to stamps and more.

It’s a lovely little scene building stamp set but I just created the little panel for the front of this thank you card.

I added some panels and the texture in the background along with some lovely splatters. Then wrapped with the linen thread and some card Candi as final embellishments.

Sentiment is the lovely Altenew one die cut and stacked so it’s nice and sturdy.

Happy crafting!

Catherine