Another thank you card made this time using the fabulous stitching dies from Spellbinders – this one was the November 2023 kit.
First I die cut the pieces out and then got out the threads and needle to stitch up some pieces before I glued it together with the pinflair glue gel to keep the dimension.
I pulled a piece of inked cardstock which I thought worked with the colours I had used. I then added lots of mats and layers for the central piece.
I embossed the sentiment from Concord & 9th and fussy cut it out. then I had a hunt through the ribbon stash and selected this piece again because the colour looked right with the rest chosen.
I also grabbed some random turquoise gems to finish off.
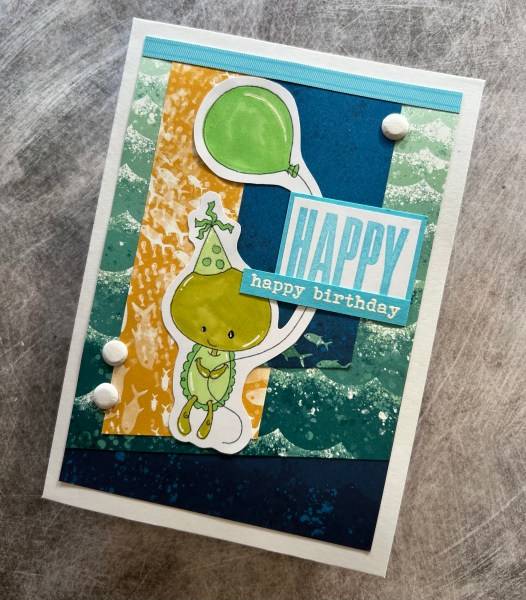
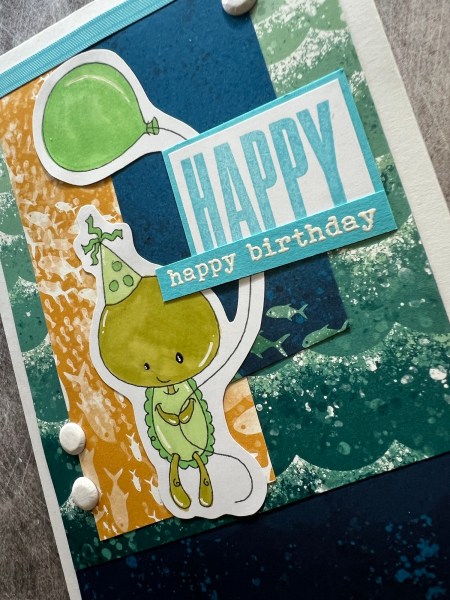
Hello! My first design team contribution of the year is this card I made for Creative Knockouts using the image Funny little turtle from Streamside studios.
I found the Whale of a Time papers in the stash to go with the theme and coloured the image using my promarkers.
As I will likely be using this for one of my great nephews birthdays in a few months time I kept the right hand side free for adding the number for his age nearer the time.
I also kept the embellishment simple with just some Card Candi and wink of Stella on the balloon and the hat for the little turtle ! 🐢
The sentiment I added the embossed strip as well as the larger happy from Biggest Wish.
Love how this came together and isn’t he just the cutest guy?
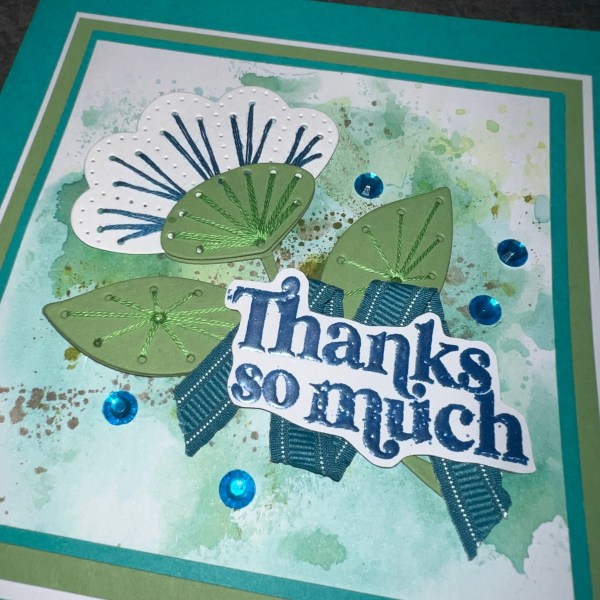
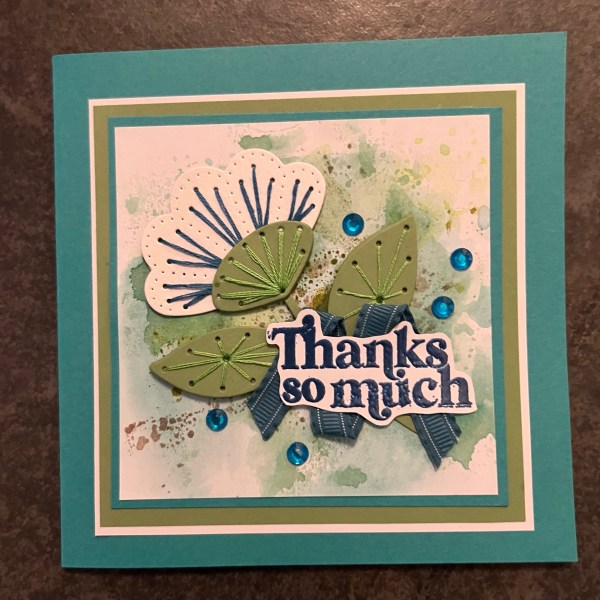
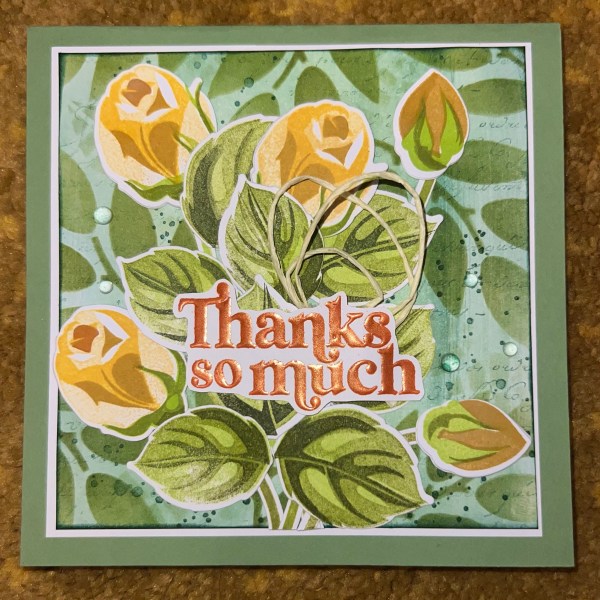
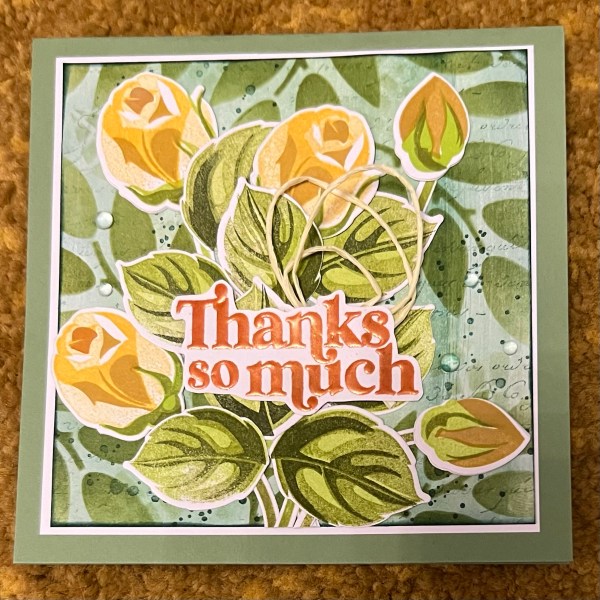
I put together this thank you card using some roses I had already stamped and die cut. I did stamp and die cut all the leaves out though as I hadn’t got any left ready done!
The background had some ink smeared on it when I started but I added stencilling of two different leaf designs. I also added some stamped text and the splattered ink spots.
Most of the background is clearly covered up but I really like the way this came together.
I added some paper string and an embossed sentiment to bring focus to the centre of the card. I also added some clear gems to finish off!
I used a green card blank which I think brought all the elements together.
I know I said not daily posting but I did get quite a few projects done during the Christmas break so I have a few posts coming up on the run!
I made this card for my parents stash as they often send anniversary cards to their friends (not something I ever think to do!). This was one of the things I was doing on Christmas Eve but saved to share with you until now!
I used two of the stitched flowers from the Spellbinders stitching dies I’ve been die cutting and sewing obsessively for the past few weeks … I have a pouch full of them now so expect a lot of stitched cards in the next few months.
I decided to make a card with some splatter and then the fabulous die cut anniversary sentiment.
For the flowers I only stitched the flower (two parts) and left the leaves plain as I was tucking them behind the sentiment die cut.
The background panel I inked first a little with the blackberry bliss ink so it gave some different shades and then when that was dry I embossed splatter using the gorgeous grunge stamp and gold embossing. Next I wanted a different colour splatter and took some shimmer watercolour paint to add some purple.
It doesn’t show so well on the photos but works well in real life and it breaks up the background.
I then added the gold gems too for finishing touches. I think this is an elegant card and quite chuffed with it! Also have to admit that die cut sentiment has been on my desk for months awaiting use so pleased to have found the perfect project to add it to!
Happy new year! I hope you have enjoyed the passing of another year and the start of a fresh new one. I’m planning a slight change of pace with less design teams this year and doing a little thinking about what crafting I want to concentrate on for 2024.
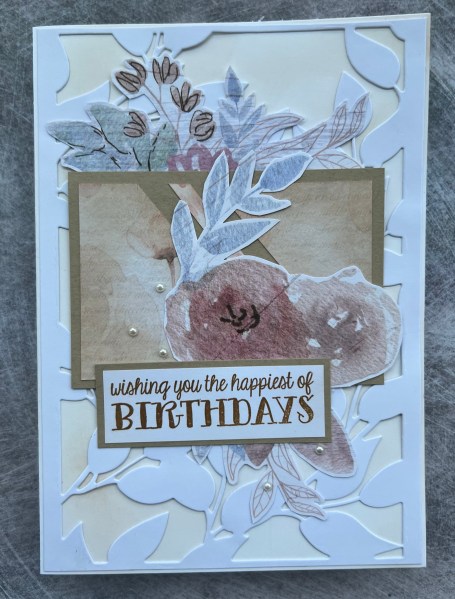
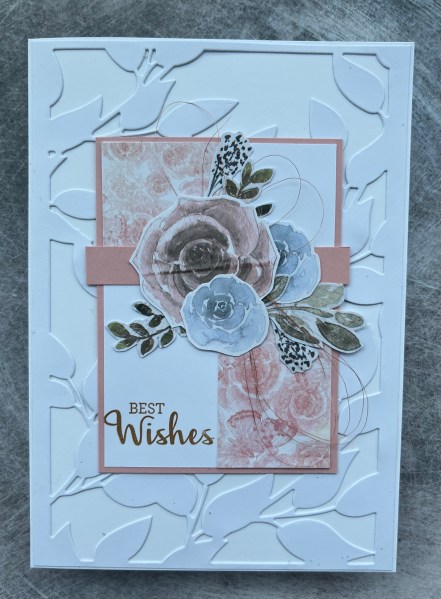
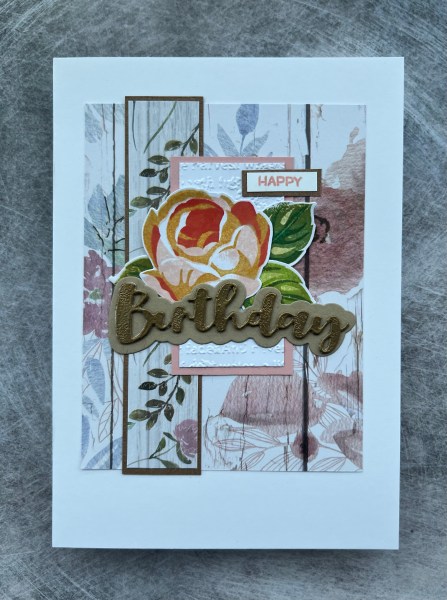
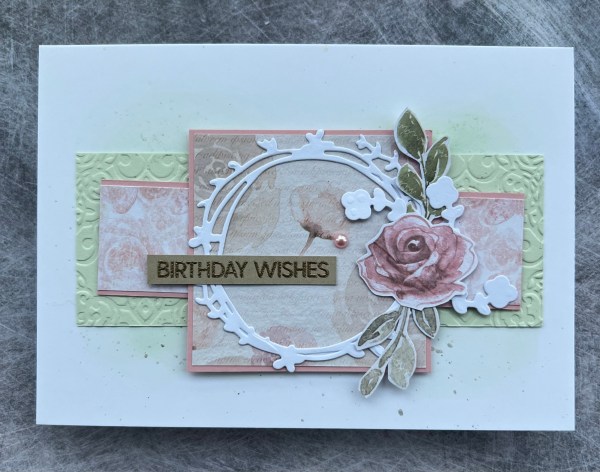
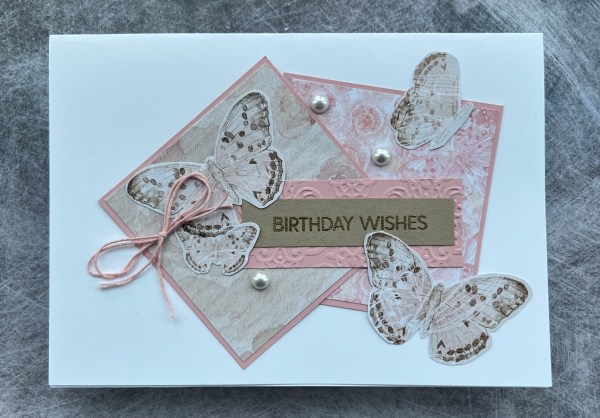
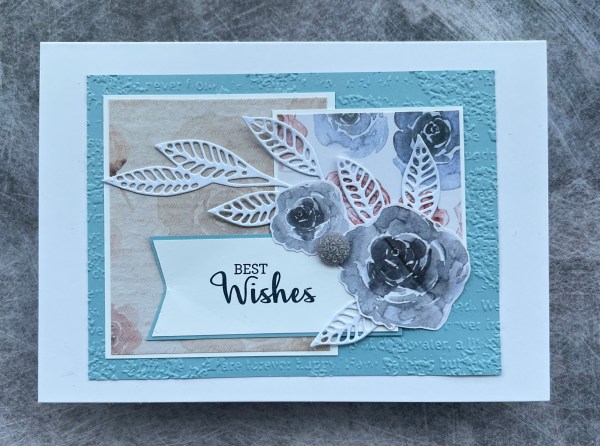
One thing I am still keen on doing is using up the patterned paper so I’ve decided I will keep to that as my first of the month challenge as that’s worked well for a few years. Not sure this year will have the same theme for this each month but I’ve started with this month by getting a Cards by Kendra challenge template and made some cards following that.
This post shares the first few cards I made using the template. I didn’t actually finish doing this one yet as I ended up tidying it into a folder as I needed to clear the desk so so far just got these few sorted.
I decided to add some different backgrounds to these cards so I added some die cut and inked backgrounds behind the main elements from the sketches.
I also chose other pieces of the patterned paper to cut apart for embellishment.
I also added in die cut elements and sentiments and bits of thread or ribbbon to embellish. I also thought pearls worked well for most of the cards as further embellishments.
I added in a bit of embossing to add texture on a few along with some simple white die cut elements.
All of these are birthday cards and I think they make a nice set all together. Still so grateful to my friend who gifted me the Crafters Companion dsp.
So not a bad start to the year.
One thing I have decided is that daily posting is exhausting (managed daily in December in the run up to Christmas and did a few longer stints last year but it is just so much pressure and I don’t need that) so not going to try and do that but will try and create regularly so there is something on the blog often … but daily is a tad more than I can cope with!
Now to make plans on what else I fancy doing this year craft wise! I definitely think I want to try and do a bit more mixed media as I’ve missed routinely doing that… and I am loving the stitching dies from spellbinders so suspect you will see a lot of things made with those … but other than that I am open to ideas. What are your plans?
So this past year has been busy busy busy both for work and also personally and I’ve also managed to fit a lot of crafting in that I’ve shared here on my blog. I did a few long stints of daily posting … think I even got to 100 days during the summer … and made so many projects! So strap in for a long post as I share some of my favourites from 2023!
I mainly stuck to card making this year and ended up with a very large amount of cards so ended up gifting some to charity and to my friend to sell for charity, as well as gifting some for Christmas to my aunties for their use or for them to gift to others.
As I put away the Christmas card basket a couple of days ago I actually took a pic and counted how many I had left (I know I took a few out after this as realised I needed to pop them in the neighbours letter boxes still!) and I was left with 27 … not bad as a starting place for next year!
My birthday card stash also reduced a lot but not quite to the same extent so perhaps have around 40 cards left in that box.
This year I started with the plan of not spending on new stash and completely went off that plan within a few months as I started seeing more and more card makers using stash I just wanted to play with. I had kind of fallen out of love with my existing stash and it meant the mojo went awol so spending money on new stash happened. I did sell a few bits of my old stash but nowhere near enough to compensate for what I ended up spending!
I fell in love with Altenew products in particular and made many cards using their fabulous stamps and dies. This is one of my favourite makes from this year which is actually quite a simple looking (but fiddly to make) card using the zero waste leaf die from altenew.
I also enjoyed using new stash from waffleflower and Avery Elle and Concord and 9th … basically all those American companies that Jennifer McGuire shows a lot of in her videos.
I think I would be understating it if I said I love Jennifer’s videos … they are the best. She explains what she is doing so well and is a very generous creative. Love them. I particularly enjoyed embossing the debossing technique and did quite a few cards with this technique … think this is one of the favourites I did with this technique.
I also have to thank Jennifer for the inspiration behind a series of shimmery master boards I made and then used in cards … these Christmas cards were so fun to make and made me fall back in love with mixed media and using it in a different way.
Thank you Jennifer! I could seriously spend a whole blog post on how this woman has inspired me but I need to cover more stuff in this post. I also want to pop a mention on here for Amy from Prarie Paper and Ink as I also love her videos. She comes across as totally my type of person. I love her different ideas for using products too and I can’t get enough splatter as a result of watching her create too.
This year has seen the start of the 18th birthdays with three of my daughter’s friends already reaching adulthood. In all three cases I ended up making two cards for the girls … one from my daughter and one from us (all our daughters friends are such special people and an asset to our lives as well as hers!) … I bought new stash for the purpose of these cards so have made some balloon and cake themed cards as well as flowery and butterfly themed ones …
I was particularly pleased with this green balloon one as I was chuffed to remember to layer stencils to create the patterns!
Watch this space however for more 18th cards as have quite a few more to make for those that have their birthdays in 2024!
This year I’ve invested more time on instagram in looking for ideas and having new to me creatives inspire me. I’ve had quite a few that have made me go wow … but the one that stands out in particular was Liane (@lilly7h) who inspired me to make this card …
And many other cards since… like these…
I am truly thankful that I found her on Instagram and for some of the other people I have also found and who have inspired me. It’s made me try new things, new techniques and occasionally made me also buy new stash! lol!
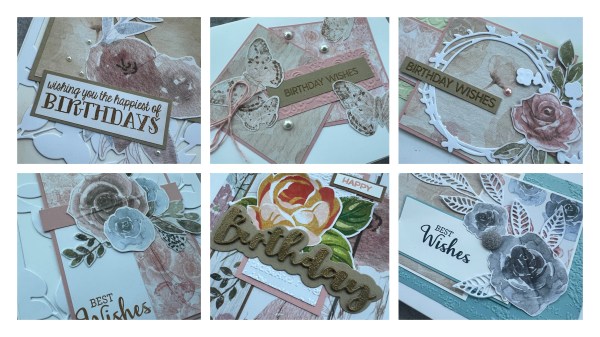
Going back to that new stash thing I have a current obsession (let’s blame Jennifer for this) … stitching on cards… specifically spellbinders stitching dies! I’ve signed up to the monthly kit for a few months now and been obsessed with sewing them in front of the tv over Christmas … so expect more cards to come … but for now let me reshare these four I made.
Also secondary note about these cards in particular … they have totally made me get back to a bit of mixed media and hope to do a few more collage and painty master boards like these in the new year. So much fun!
I’ve done a lot of design teams this year but already know I’m going to do a lot less this coming year. They can be quite a lot of pressure to do and keep to timescale, especially when the rest of my life gets busy, so although I am sad that Happy Little Stampers blog is taking a break, I am glad I’ve had the pressure taken off me. I am still keeping with Creative Knockouts and Addicted to Stamps and More might be coming back soon.
Creative Knockouts is my opportunity to do something completely different as it usually comes with a digital stamp which has forced me back into using digital stamps and thinking of ways to use them. I have particularly enjoyed some of the stamps I’ve been given this year … especially florals and often used them for other projects and not just the design team … I used one floral one for lots of cards in the summer
And then a Christmas one I used for a series of cards too …
Using a digital stamp makes me think about different mediums for colouring and pushes me to try different techniques.
I’ve also done a few one sheet wonder type things using the Cards by Kendra templates … I think my favourite of these was the cards I made using painted Christmas papers … there are too many pictures for posting so just got this one of the mountain of cards … but I did enjoy using those papers for this project.
I have managed to use up quite a few papers this year by cutting them all up at the beginning of the year and using the images on the paper as the focal elements or to create something new. That has been my monthly post at the beginning of the month. It has been good to get some papers used this way.
Think that was one of my favourite cards this year using up papers … the black and white with the pop of colour is so cute!
Well there is so much I can say about 2023 but I think I’ve gone on long enough now! I am still thinking about what my creative plans are for 2024 … but for now I want to thank you for visiting my blog posts … special mention to Deborah Wheeler who has left me so many lovely encouraging comments through the year … thank you so much, they are appreciated.
I have spent a few days of the last week crafting so I’m ahead on a few projects for 2024 … but will sign off now.
Wishing you all the best so a happy and healthy and of course creative 2024!
Merry Christmas! Wishing you and your family a fabulous festive season!
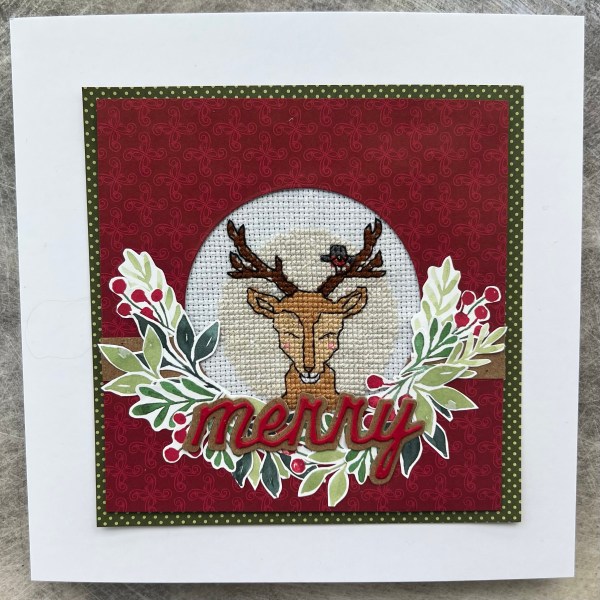
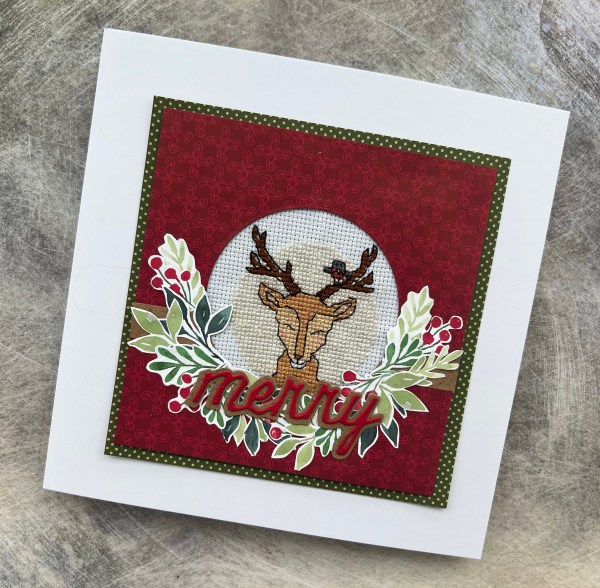
I know I said last Christmas card yesterday but I had saved this one I made for my daughter to share on Christmas Day. So here it is!
I used a little cross stitch I had done quite a while ago and never got round to using as the main element and then built up the spray of leaves and berries (pieces of the patterned paper I fussy cut out) around the bottom section. I did consider going the whole way round but in the end just went for the bottom section.
I then added the die cut word Merry using Tim Holtz dies to the bottom.
I used Tidings and Trimmings dsp both for the main piece and for the frame and used an 8×8 card blank so it really is quite a large special card.
So I have one more Christmas card to share before the big day tomorrow and it is this DL shaped card using the Christmas Season stamps. I made a similar card back in the summer and wanted to replicate it but this time with Cherry Cobbler as the accent!
I love these stamps and the way that you can quickly build up a background to make a unique but simple card. I also used the Colorado stamp company stamps and dies for that fabulous Joy sentiment.
I added the fab wide ribbon and then the very sparkly gems to finish off.
Love the Kraft accents too!
I am having fairly chilled day today crafting as we actually did Christmas Day yesterday as my daughter is working both today and tomorrow … only issue is I have is I am even more confused than normal as to what day it is than most Christmas periods! Ah well at least I’m having a lovely chilled out time and yesterday was fabulous for us to all celebrate together.
This year has been about trying to work through old stash and making use of it and trying my hardest not to buy new stash… let’s ignore the massive amount of stash I actually bought in the summer!
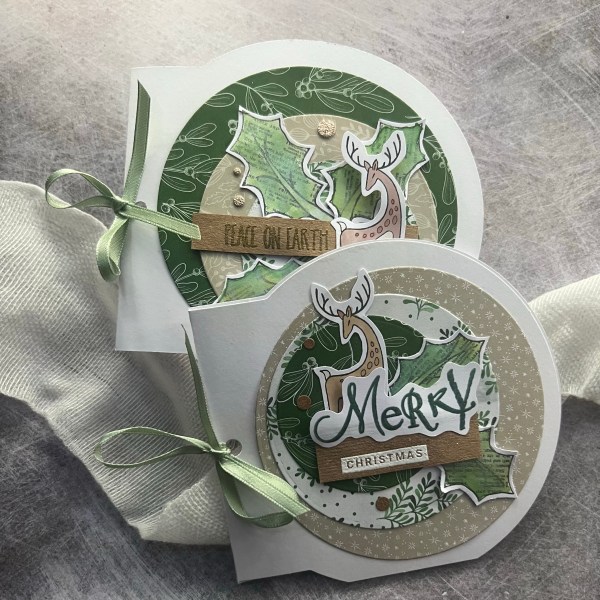
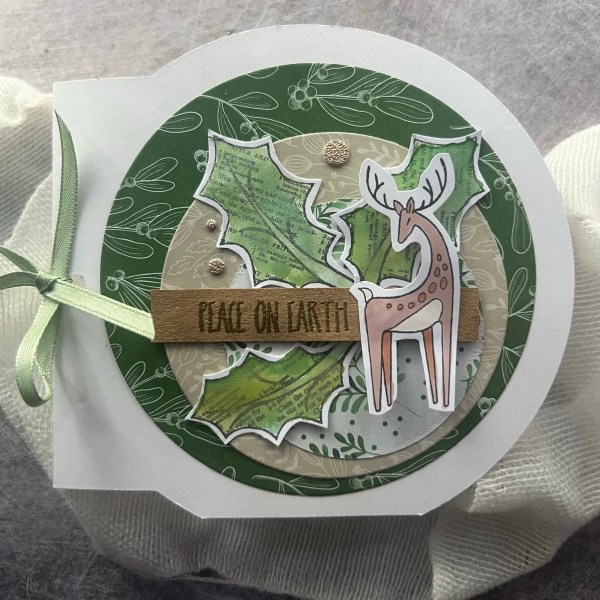
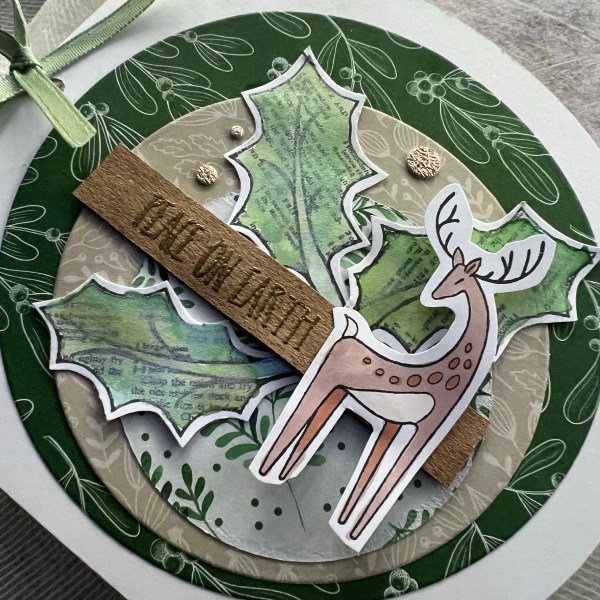
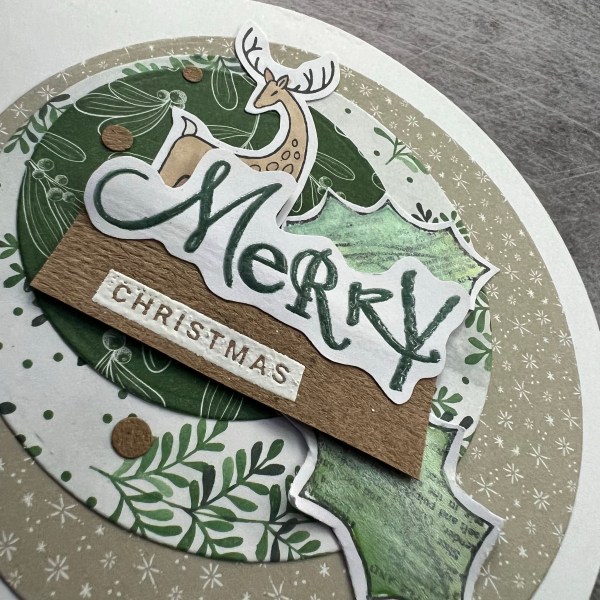
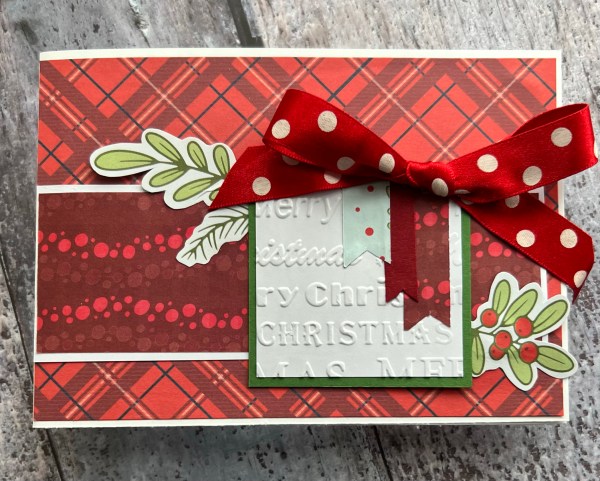
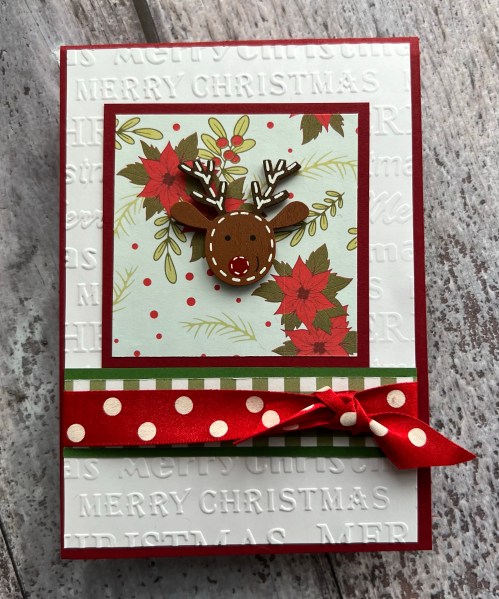
These two cards were half made about 12 months ago and have been on the pile of things I wanted to get used up so here you go … two festive cards!
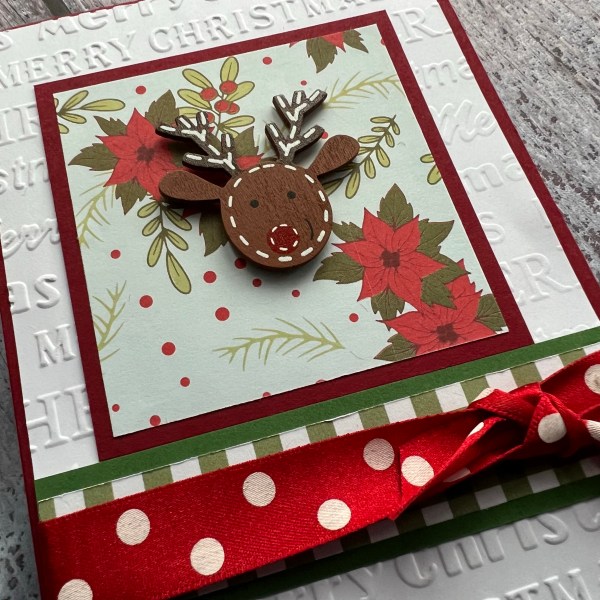
Both are made from magazine kit papers and then some ribbons scraps from the stash and the bottom one with an added little reindeer wooden embellishment.
I suppose the other element that makes them go well together is the embossed background. I love this embossing folder as it provides a great bit of texture for any type of card and also means I don’t even have to add a sentiment if I don’t want as it says the sentiment onto it!
The design of the cards were originally from a sheet load of cards template but goodness knows which one now as it is so long since I cut the paper up and started assembling them! but if you check out cards by Kendra I am sure you will find some great templates to use.