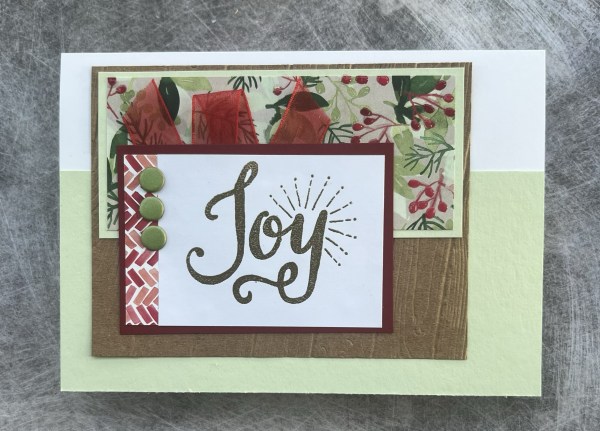
Hi and thanks for popping to my blog to see what I’ve been up to! Today I have a design team contribution for Creative Knockouts using an image gifted from LeAnn’s world 101 called Presents.
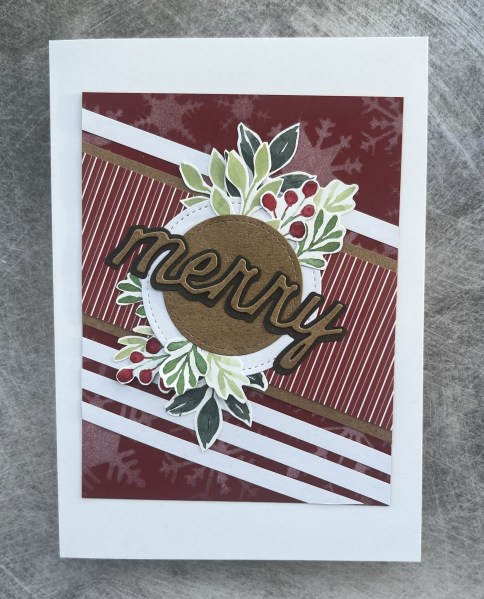
Our challenge for this week was Lots of Layers and so I started with the background and added lots of layers of inking, stamping and stencilling.
Then I added some bits of cardstock in red and Kraft to give something for the sentiment and the image to sit on.
I coloured the image using stampin blends markers and then cut round it with a nice white border.
I die cut the merry using a lawn Fawn die and then added the Christmas embossed with white to pick up on the white border to the image.
I chose a brighter green card base and then went a bit made with wink of Stella on the image to make all the baubles and presents sparkle (although as usual the photo doesn’t really show that).
I like this mix of grungy and cute and a fun layered card.
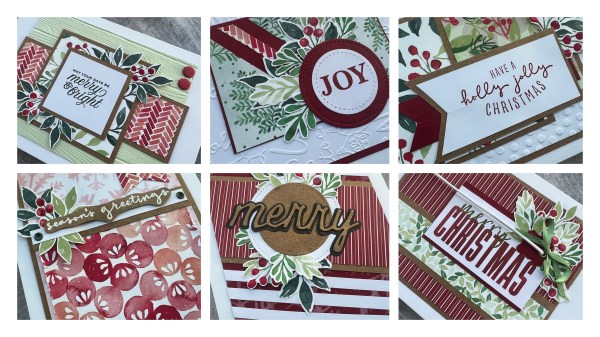
Hello! Thanks for popping over to my part of the internet. Today I have my design team contribution for Addicted to stamps and more and the challenge this fortnight is Christmas. I shared this incorrectly a few weeks ago so some of you may have had a peek at this already!
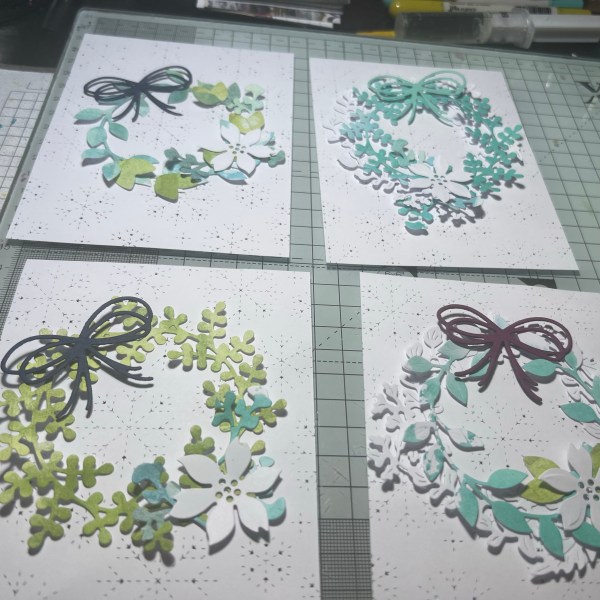
I actually went a little overboard and ended up making four cards but you can never have too many Christmas cards, right?
I started as I often start challenge cards by delving into the pouch of ready made backgrounds and grabbed a teal one and a green one. These were originally gelli prints made with ink and water and are great for die cutting… so I went to town with white cardstock and these and my wreath dies and some leaves and flowers…
I then die cut four backgrounds with the snowflake impression die and started clustering together the different elements. I also grabbed some die cut bows from the pouch of pre- die cuts.
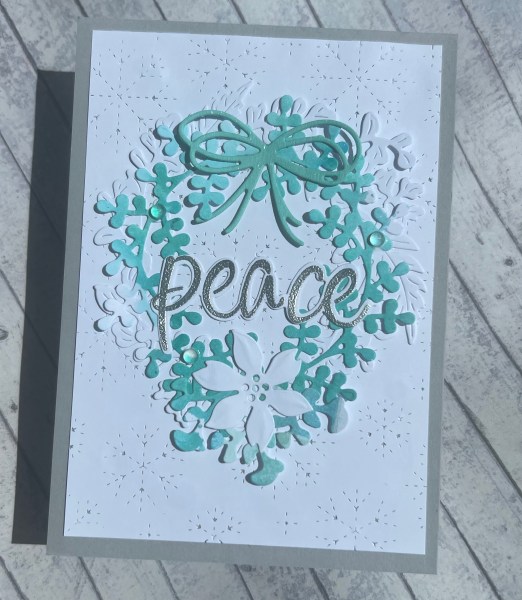
Next I had to decide on how to add a sentiment and I wanted to use the fabulous Colorado Craft company stamp and die so I embossed them in silver and then die cut them out.
This one I layered the Natures print wreath with the simple one in teal and then added the green leaves to surround the flower, the BlackBerry bliss bow and some teal sequins to finish. All of the cards I used Smoky Slate as the base.
This one I also used the Natures Print but this time the bobbly looking wreath and kept all the colours similar with the teal and the turquoise. I added clear gems for the embellishment which reflect the colours surrounding them.
This time I cut down the panel into a square and added some embossed vellum behind. The wreath is the bobbly one from green and added some of the teal separate leaves around the flower. Added the clear gems again for finishing off and love the navy bow too!
This time I did something a little different. First I added navy foam behind the panel so the dots in the background show up more and it gives dimension … I also added a vellum strip on to which I added the sentiment to give it more dimension and interest. I added green gems this time and think that the colours in the wreath are more mixed so it worked well with the additional leaves.
Love how they all came together … a really pretty set of cards.
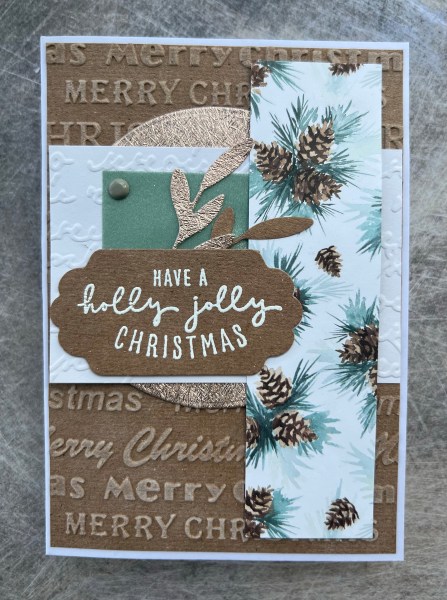
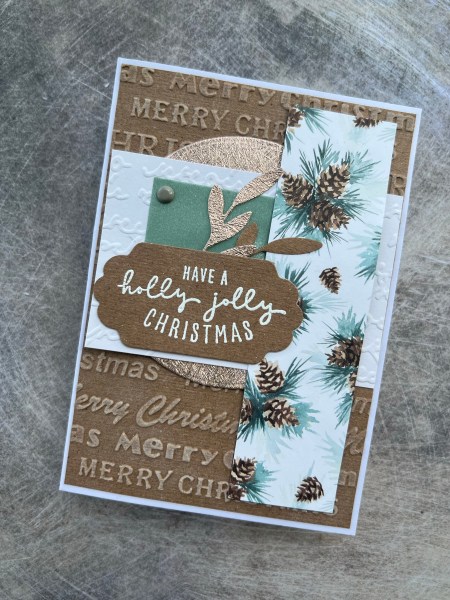
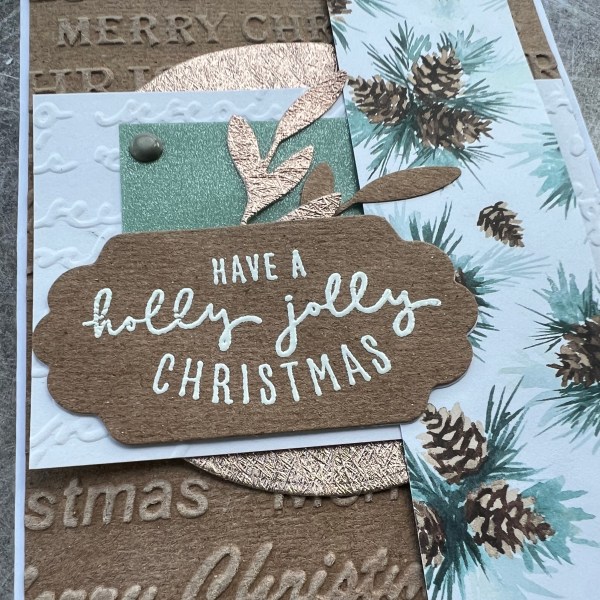
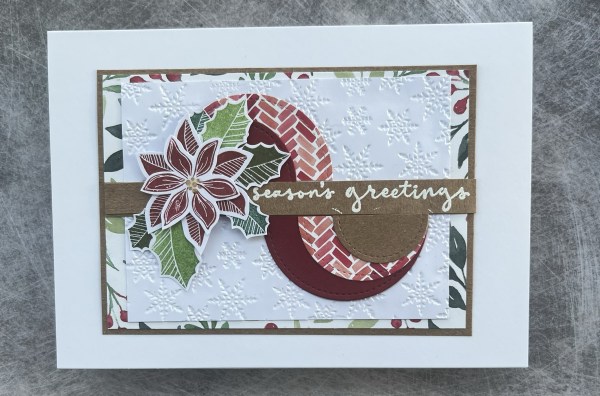
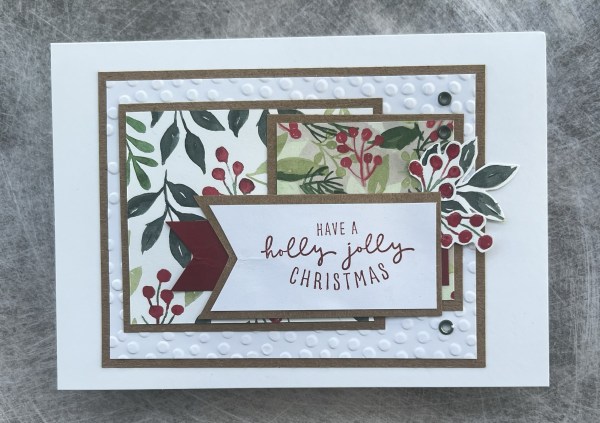
Now regular readers of my blog will know I don’t tidy my desk after every play and so I often end up making cards from scraps leftover from other projects … and here is one such card!
The patterned paper is a bit leftover from a project in August, the rose gold circle is similarly leftover from something I made in the summer.
The two die cut leaves are leftovers from using the zero waste leaf die and have been in the bits and bobs plate for a while.
The white embossed cardstock came in a parcel with a swap. Then the background Kraft cardstock was just sat on the desk… so I embossed it with the Christmas greeting folder and then went over it with my white Kraft ink dauber … it gives a little highlight to the embossing when you do this… although it is quite subtle and the key is to only add it lightly.
The green pearlescent vellum has also been on the desk for a while and it finally got its use here today with a brad to adhere it in one corner and the rest of the glue hidden behind the sentiment label which I embossed with the sentiment once I had die cut it out… it was cut from scrap but was intentionally made for this project at least!
So a fun and I think interesting card mainly made from scraps!
And now I come to a little break on my blog as straight after my holiday we got an inspection at work so I’ve not been able to craft and have not many premade things left to share … it’s been a good run I think I’ve managed to post daily for at least 3 months but sometimes life gets in the way! So give me a couple of weeks to get things sorted and then I will be back!
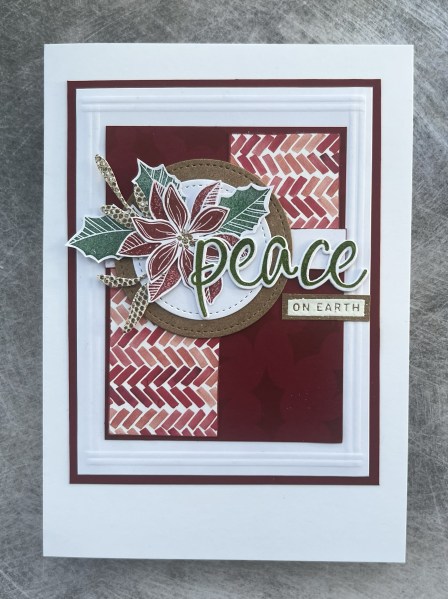
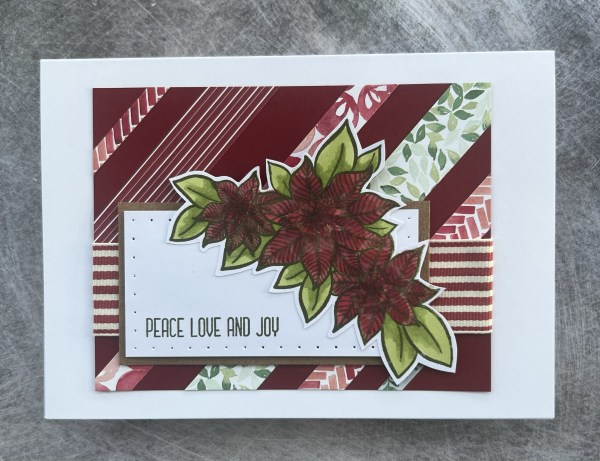
When I use distress oxides I often use a piece of glossy photo paper to mop up any excess ink and this background started like that and has been in my stash of pre-made backgrounds for quite a few months. I decided to grab this and make something from it.
I decided to emboss it with a snowflake folder and then sand off the raised areas to remove the colour and shine.
As the background was quite bold it needed a bold image to go with it so I chose this Altenew Christmas flower image. I stamped it first onto a piece of scrap that had leftover ink brayered on it. Then I also stamped it onto white with Memento so I could colour the flowers with SU Blend markers.
Once coloured I then fussy cut the flowers so that I could paper piece them onto the other piece.
Next I stamped and embossed the sentiment layering it up to add some dimension.
I then coloured some gems with the same stampin Blends pens so they would match with the image.
I mounted the panel onto black so the line art and the sentiment strip all pulled in together.
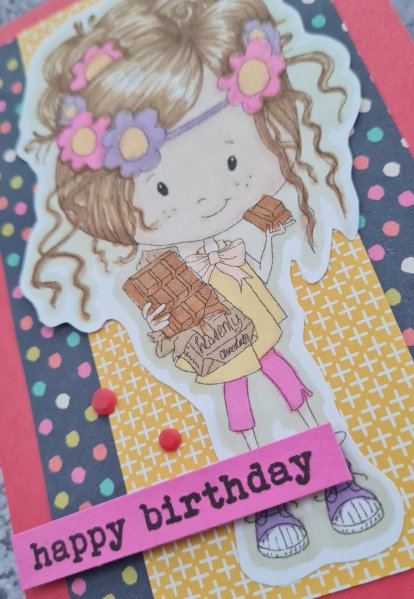
I had printed this onto quite a thin paper and coloured it with promarkers including a nice shadow outline.
I decided to cut round the image to give it a white halo and then stick directly onto a mix of patterned papers. I particularly love the dotty one with all those cool colours. So as I had coloured the girl in a mix of bright colours this worked fab. I grabbed some Sweet Sorbet cardstock and made my cardblank and then thought it would be good to do the peep of the paper at the edges by curling it back and this created both some dimension and interest.
I added a sentiment in bright pink and then some enamel dots to add to the “dottyness”.
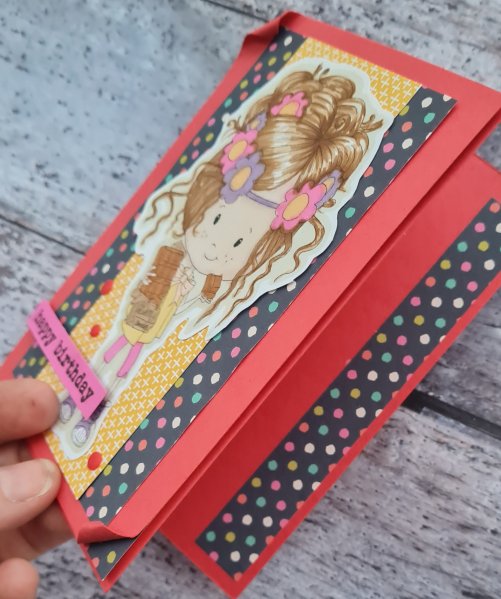
Inside I just added a strip of the paper… but look at the dimension to the front of the card … you can really see it on this photo.
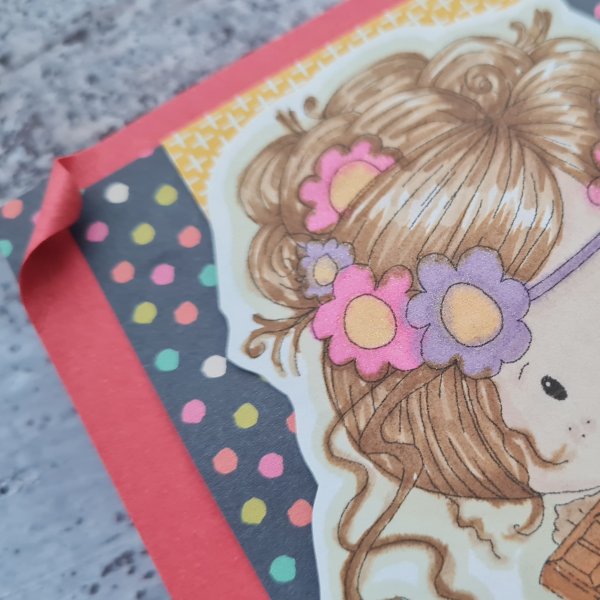
What doesn’t quite show on the photo is that I added wink of Stella to the flowers in her hair and the bow on her top… so in real life they are quite shimmery.
Super cute image and pleased that even though it took up most of the card front I was able to make a card this size using the image.
I am doing well in my using up stash I’ve got challenge I set myself for 2023 … and really enjoying playing with stash I had forgotten about and lay around unused for years.
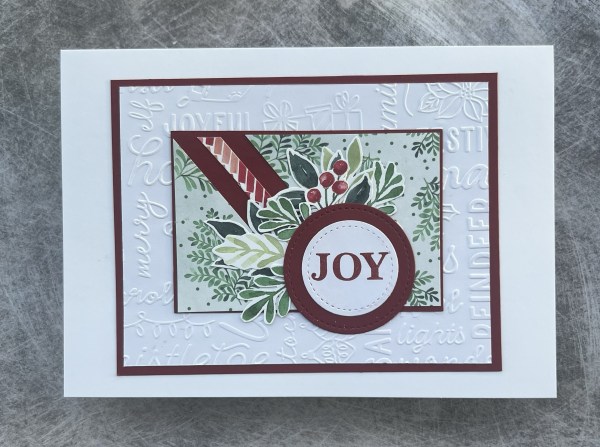
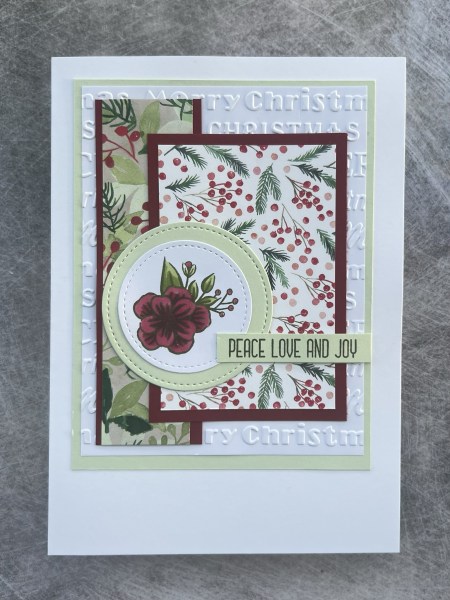
I grabbed the pouch with the patterned paper fussy cut bits and had another play. This time I integrated some die cut inlay with the sentiment die and also a real blast from the past for the embellishment … peels offs!
I added another piece of dsp from this pack and used that for the main background on a black card then I added the panel I had used for the die cut inlay.
I used the Tim Holtz die to cut the hole, then used it again on the white cardstock and then added a cherry cobbler die cut for the smaller cut.
I used the word stamp from Peace and Joy to finish off the sentiment.
I added the panel at an angle and cut off the excess and then added the deer and the black peel off stickers.
Inside the card I added the bit of paper I had cut off for the excess with another deer but forgot to take a picture of that! Ooops!
I still have a few of those peel offs but not likely to use them so think they may end up in the bin … for now I will keep them on the desk and if they get used in the next few weeks great… otherwise they are going!
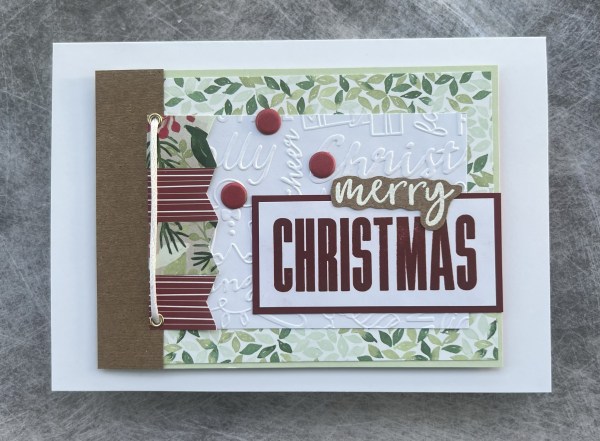
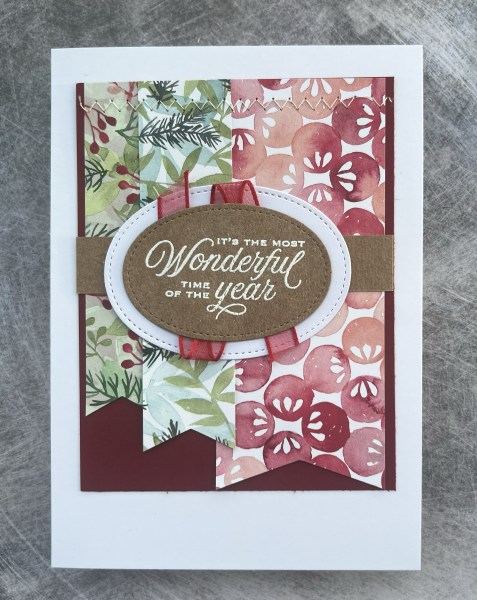
This month for the patterned paper playtime I decided to keep the patterned paper to a minimum! Which seems a little like I forgot the brief … but really as long as I’m using it I think it works.
So each month I’ve been cutting apart a piece of dsp (which I did way back in 2022!) And then using the cut apart elements mixed with any solid panels of patterned paper to make my card. This fabulous reindeer themed paper had both the snowflakes and the fabulous reindeer on one side and the Plaid on the other.
So whilst I did use a full piece of the plaid I then covered most of it with the white embossed panel. I then added a strip of the patterned with some snowflake elements (in honesty I preferred it without them but had nearly finished the card when I added them and didn’t want to waste it so decided to live with them!). Then a die cut oval which is stacked on black ones for dimension and the cut out reindeer.
With all the sentiments on the embossing I decided not to add another one and just finished with the gems for some sparkle and added wink of Stella to the reindeer to give it a touch of shimmer!
Inside I added another strip of patterned paper and another reindeer.
Love the clean look of this card with the beautiful prancing reindeer!
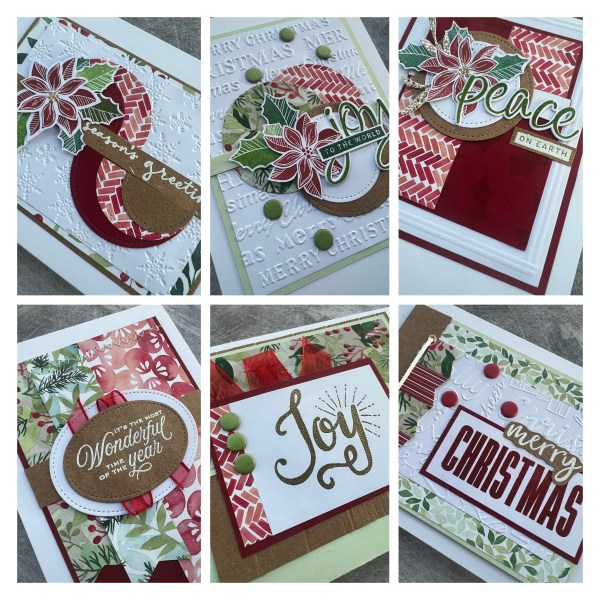
I decided to join in with Kendra’s card challenge again. It’s been a while since I did this but I loved doing this again.
The challenge #12 gave me a quite a few cards all of which will be gifted to the auntie for her to use.
I used Painted Christmas papers along with one other from Tidings and Trimmings. I then had lots of fun with embossing folders and stamps and cut apart bits of dsp.
So here are the first batch of cards and tomorrow will share the rest.
These ones all used the cut apart parts of another piece of dsp to embellish the cards.
The next few were one offs … each chosen differently.
This one using a stamp from an old kit from Stampin Up.