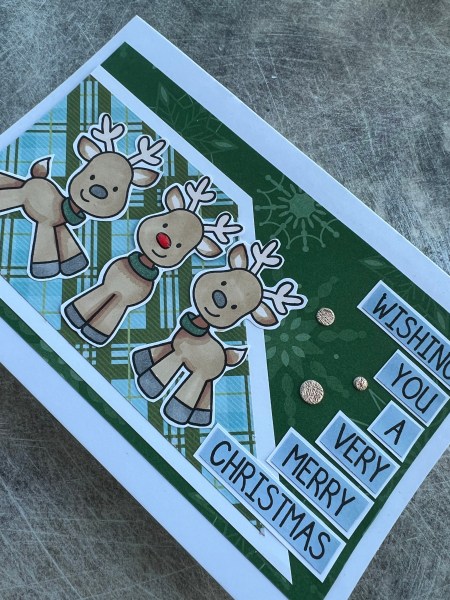
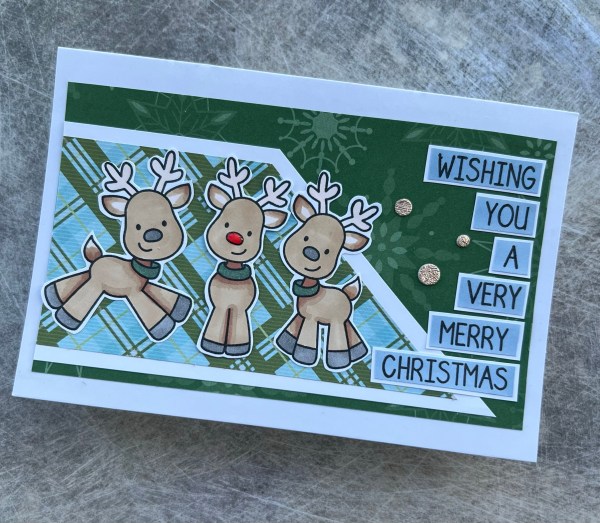
I made another card from scraps and the lovely Avery Elle stamps I had already stamped and coloured and then set aside.
I love these little reindeer … they are so cute!
I had the panels of dsp left over from last month plus the cute little circles leftover from the speciality gold paper I die cut from the zero waste leaf die.
I stamped the sentiment onto white cardstock I had coloured with promarkers and then added the glossy accents to the nose of Rudolph.
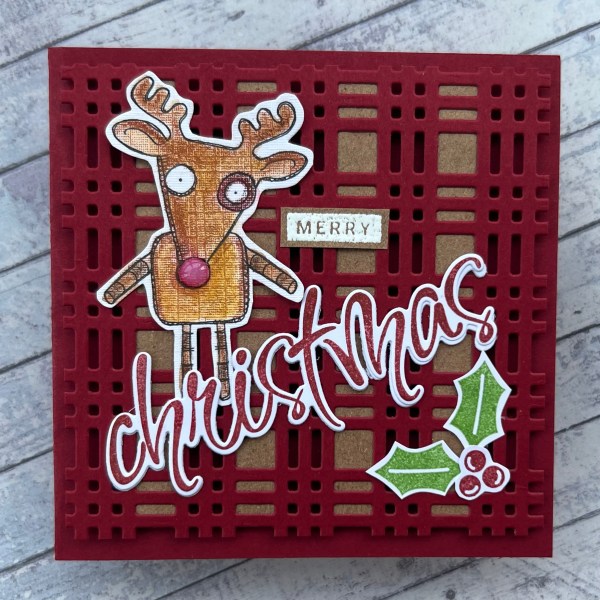
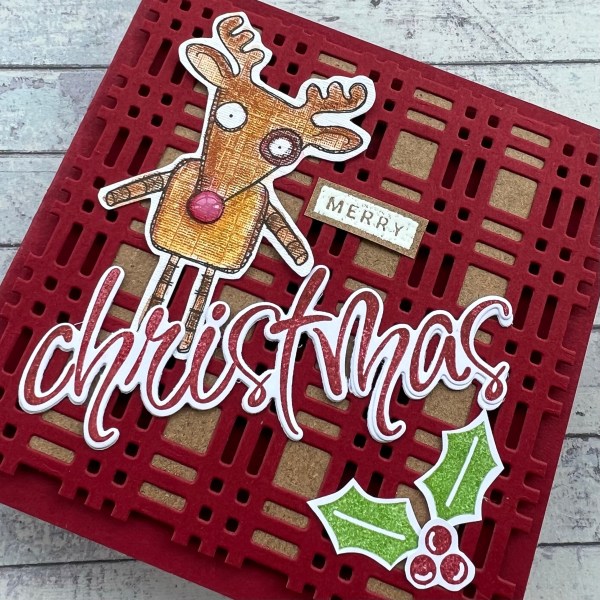
The challenge for this next two weeks at Addicted to stamps and more is to use die cuts and stencils… well I didn’t quite manage a stencil for this but plenty of die cutting!
This started with the gorgeous little reindeer and then the Colorado Craft company die cut stamped Christmas. But then I decided to go with a die cut and layered background using the fab plaid die.
Once I had die cut it out and cut it to size for the small square card I decided to add in the Kraft strips to sit behind part of the pattern. I could then add foam behind those parts to help the card layer up.
I coloured the image with a mix of prisms colour pencils and inktense pencils that I activated with water. I did a simple stamp and cut out for the holly and berries. I embossed the little Merry sentiment and then added glossy accents to Rudolph’s nose!
Cute and simple but messy getting all the bits out of the background die cut!
I stamped onto a piece of scrap that I had wiped off a brayer on and it had some lovely textured colour on it so I didn’t want it to go to waste.
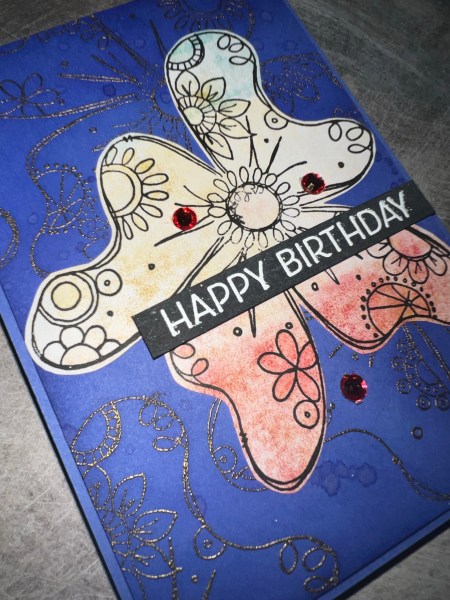
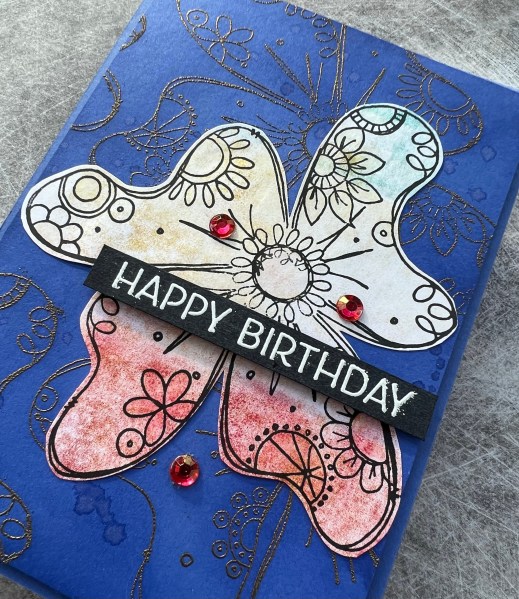
I decided to use the embossing the background technique and have another play … I used the same stamp set to add gold embossing to the background. I decided to add some ink also to the background to distinguish it from the base card blank. I also splattered some ink although it also added some sparkle as the brush had some shimmer ink still in it!
I decided to keep the focal flower flat and so adhered it straight to the background panel. I instead added dimension by mounting the background onto foam and the same for the sentiment panel.
I added some additional shine by adding wink of Stella to the focal element.
The sentiment I grabbed from Artistically Inked and embossed on blank with white to give contrast.
Today I have another of those Crafters Companion dsp cards I’ve been making but this time I added some die cuts that I haven’t used in years.
Those Kraft coloured bird on wire dies and the Just for you sentiment die I have had in my stash for a long long time but barely used.
I created this by stamping the card blank in the background before creating the panel of the dsp on the Kraft background. I embossed this using the Pinewood Planks folder.
Then I added a cluster of the vintage ephemera bits and pieces before die cutting the birds three times each and stacking them up.
Then I die cut the sentiment twice, stacked it and added ink and versamark so I could then emboss it with the pearl embossing powder.
This created a lovely element to finish off the card that had dimension and shine.
Todays card is another using the Crafters Companion dsp and this time I used some more of the shimmery watercolour to stamp the flower on to.
The panel behind the flower is two strips of cardstock run through an embossing folder which I had added ink to. I then added a scrap of ribbon and then stamped the sentiment onto the leftover watercolour card and sandwiched the ribbon behind the sentiment.
So when I am inspired and enjoy a particular result or technique I like to repeat it in a different way to either perfect it or make it my own. Todays card is moving on from the cards I shared yesterday with were inspired by Liane’s tree card.
At the same time as die cutting the trees for the cards yesterday I also die cut these dragonflies from the same inked paper I had created.
So clearly the inspiration of the original card is still evident but the orientation had changed, the dragonflies are also more haphazard in the way I have added them to the card and also I added lots of inky splatters in the background using the same inks as I used to create the blended paper.
I still added the clear gems and the sentiment using black cardstock with white embossing.
Whilst I loved the tree cards I really loved this dragonfly card more … think I just loved the whimsy and the shine.
I will say I was glad to pack the glimmer paper away though … I really don’t enjoy working with glitter like this … even though it’s reasonable quality it still sheds loads so I ended up both covered with tiny pieces that came out of the die cuts and the glitter! The cards all looked super sparkly though so maybe worth putting up with the mess!
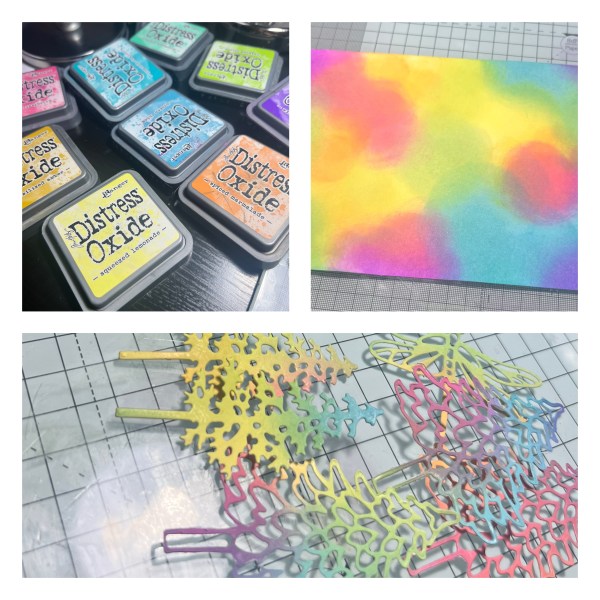
I spotted another card by Liane over on instagram and it made me immediately hunt through my dies to see what I could use to CASE the card and within about 30 mins had inked cardstock and die cut some trees and some dragonflies.
But then I didn’t do anything for a few days as I had a very busy time and not enough time to get to the craft desk and make these into something!
When I did I had to then do lots more diecutting from white and the glimmer paper to make sure I had enough to stack die cuts and also to have some sparkly ones in there too.
I ended up though after a few hours play with three different cards inspired by the one Liane had shared.
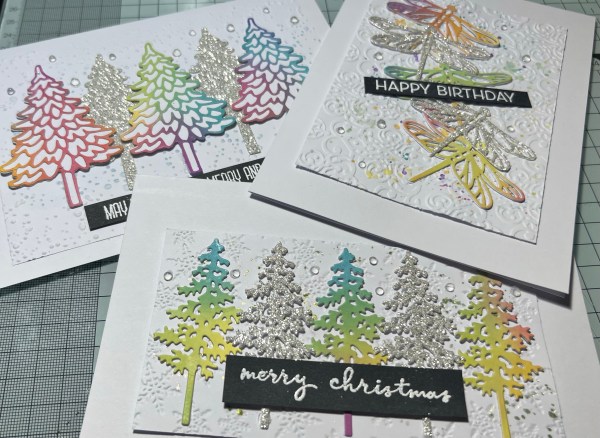
I’ll share the dragonfly one on another post but will pop the two trees ones onto this post as these were closest to the original inspiration.
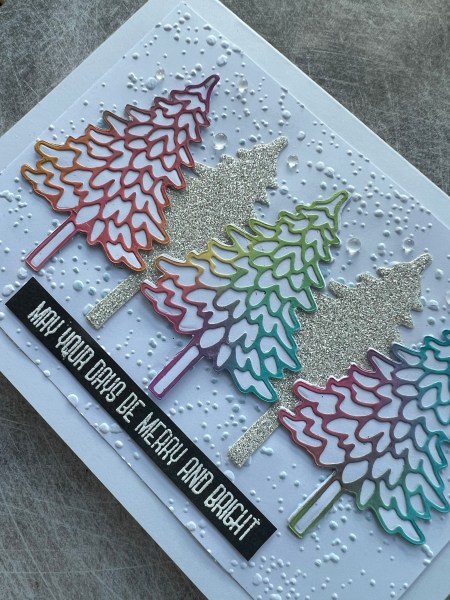
I started with this one … these more graphic die cut trees I love although I must admit I find them tricky to cut with my rather worn Big Shot machine now and goodness me there are a lot of bits at the end to clutter the desk and floor!
I die cut the tree three times from the inked cardstock I had created and then again enough times to stack each tree a couple of times with the fancy top layered as the final one.
I did try and cut the fancy layer from the glimmer but didn’t like the look plus the die was so fiddly it was tearing a little with the glimmer paper so decided the solid shape would work better. Again I added a couple of layers underneath to give them some dimension.
I embossed the panel I had adhered the trees to using a snowfall pattern. I had lightly brushed the centre with a light blue just to give it some interest. Not sure any of the pics pick this up though.
The sentiment I stamped and embossed from a set from Altenew. I like the font on this set.
I added it to a 5×7 inch card blank.
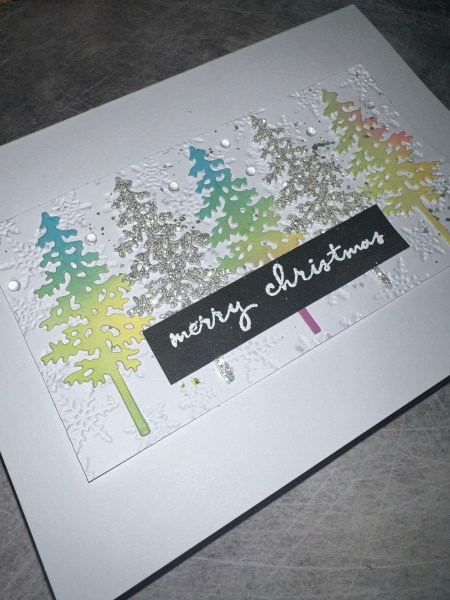
I then made this card using the more solid but slimmer trees.
These are less fiddly to die cut but still lots of bits when all those holes have come out!
Again stacked the images at least twice. I then chose to emboss a slimmer panel and then added some shimmer paint splatters to the background.
This time the sentiment was from Christmas to Remember and again embossed onto black with white powder.
Both cards had dimension from both the die cuts and also raised the panels a little off the card blanks.
Both were finished with some clear gems.
Love how these came out … but must admit I think my favourite is the dragon fly one … so check back to see better pics of that one tomorrow.
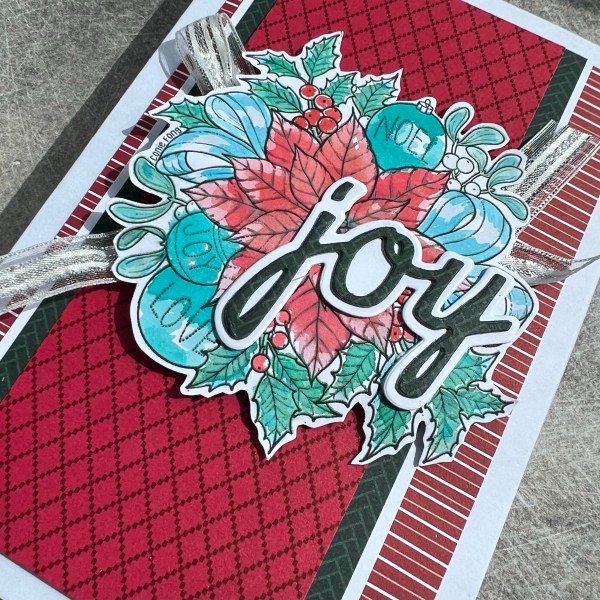
I have a design team contribution for you today for the Creative Knockouts blog. Our challenge is to use two or more patterned papers and the blog is sponsored by Conie Fong who gave me this lovely image to work with.
The pointsettia and the holly and the baubles are so beautiful and I decided first off to watercolour them using distress inks.
Then I chose patterned paper from the stash to sit behind the image once I had fussy cut it.
I layered up the patterns and added in a strip of white on either side of the green to break it up.
Then I added ribbon behind the goal image and added foam to give dimension.
Next I took the same green paper and die cut it with the word Joy and layered that up a few times including the shadow die so even more dimension. I probably should have kept this flatter because it’s now quite a bulky card but hey ho … I think it is still cute!
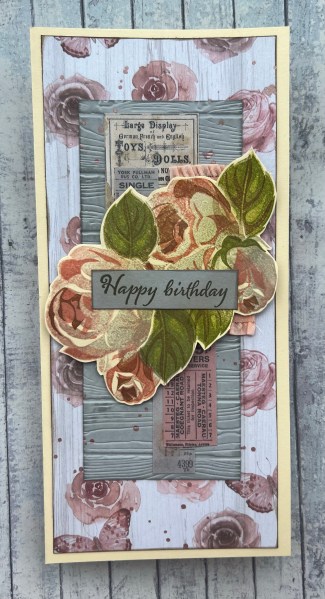
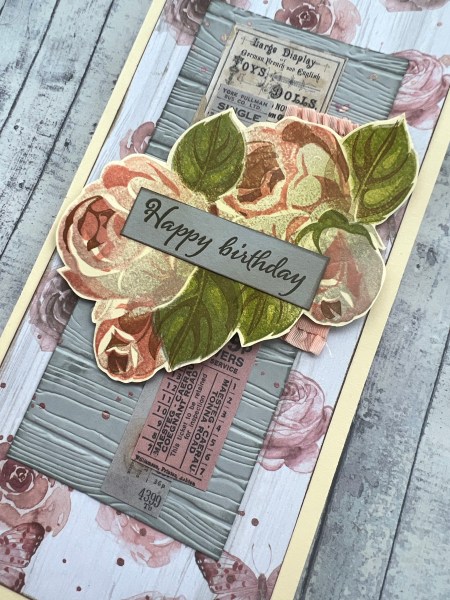
Another long talk DL card using the gifted dsp from Crafters Companion.
This time I added an inked panel of the paper to the card blank and then added a panel of embossed Smoky Slate cardstock I had also inked to this and added lots of splatters of pearlescent ink in rose gold.
I then took some elements of vintage ephemera from a kit and added those before starting work on the main floral image.
I decided to have a go with stamping and using the coordinating masks for the Altenew Rosy Outlook set. Well it worked ok but it was very messy with the masks sticking to stamps and having to be continually realigned … next time will just stamp and cut out of a post it note like normal!
But the stamped images work really well to create a cluster of flowers and I’m pleased with it!
I fussy cut it out and then added on foam to give some dimension before I then added the sentiment… I used a magazine stamp for this.
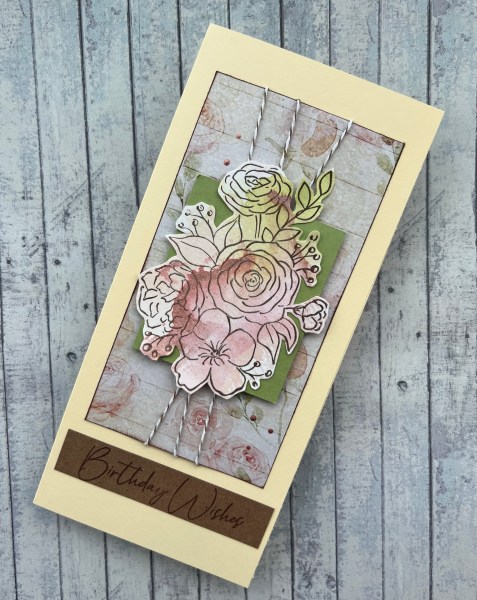
I played with some more of the crafters companion dsp but the focal image I stamped onto shimmery watercolour background I had created from mop up of another projects.
I teamed it with a small panel of green and then some twine. I then stamped the sentiment onto some Kraft cardstock for underneath.
It is difficult to see the shimmer in the pictures but hopefully you can see that there is a variation to the pigment in the following picture with the flash on…
I also added some dot of the mica onto the background.