I am an on-the-side and increasingly up front papercrafter who loves nothing more than getting inky and creating pretty things with paper and stamps!
I am also a wife to lovely hubby and mummy to a wonderful 14yr old princess.
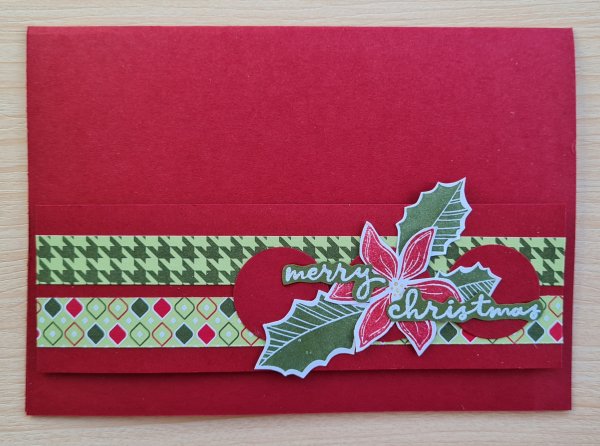
I had some scraps of the Heartwarming Hugs dsp on my table and this made me create a festive card… so the strips of dsp became a border on a Real Red card. I added some circles and then stamped and fussy cut the Holly leaves and the flower from Merriest Moments stamp set.
Next I added the embossed sentiment from Christmas to Remember which I again fussy cut out.
And that was that… another Christmas card for the stash.
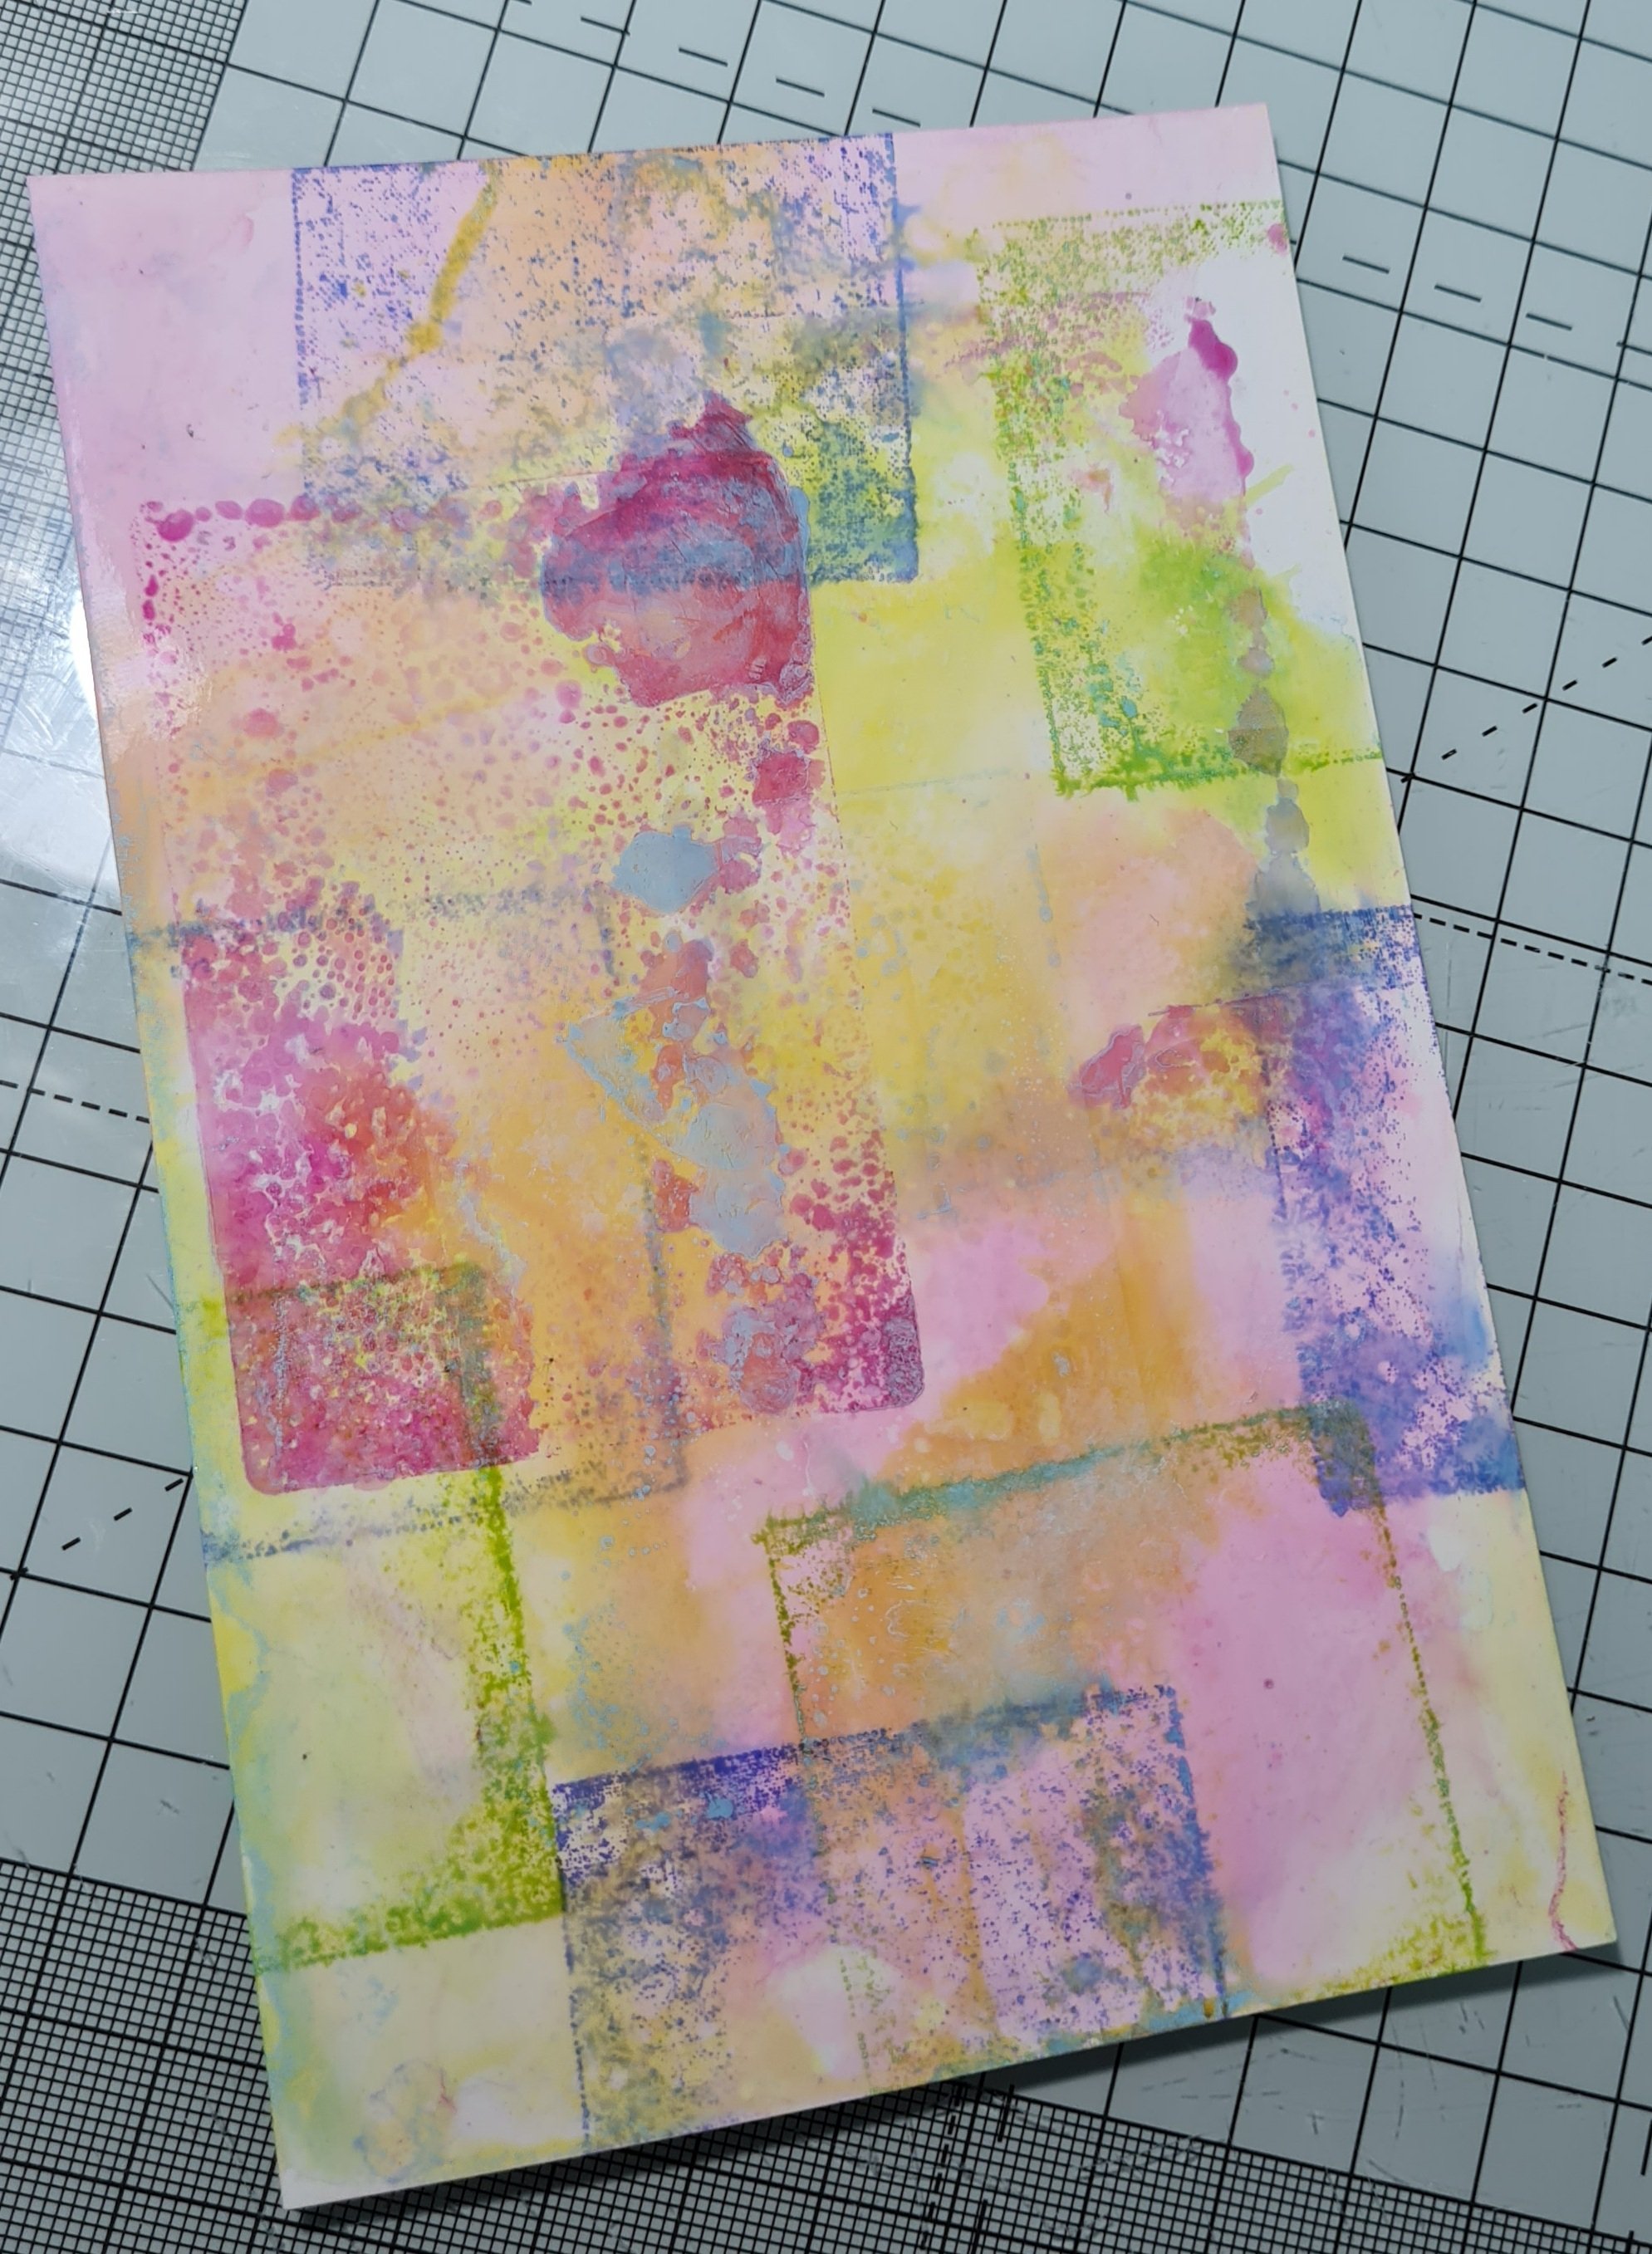
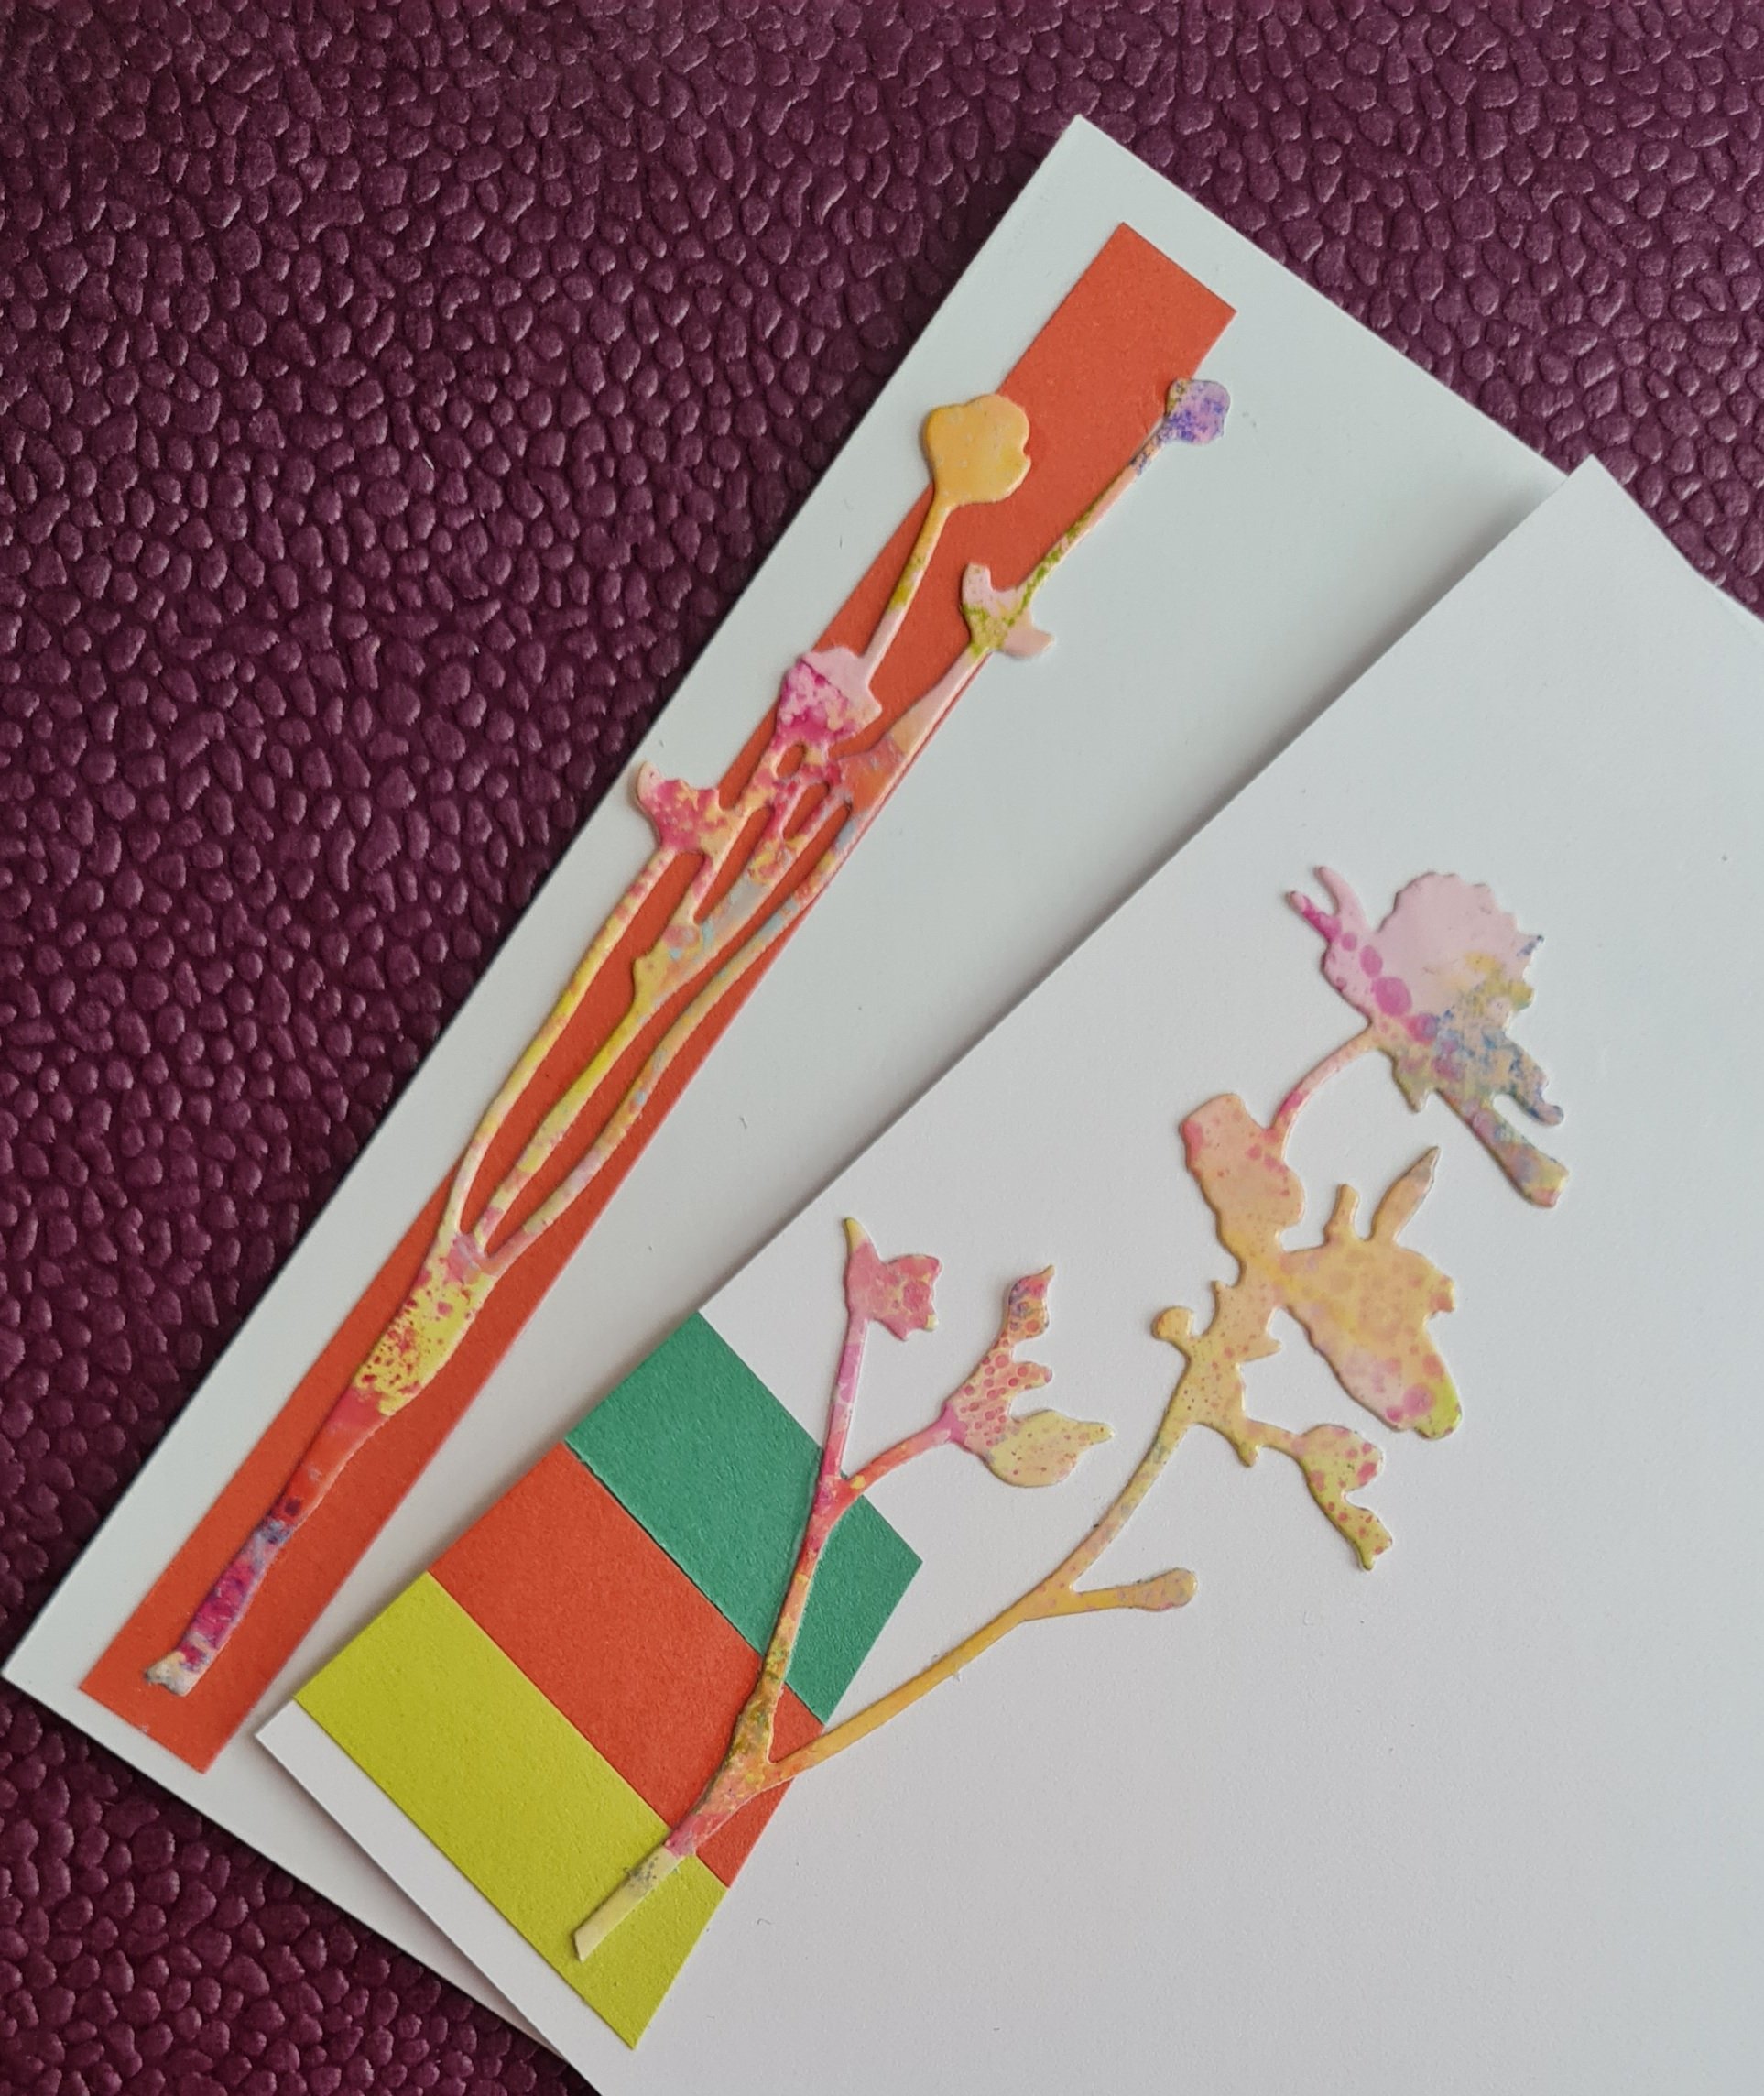
I started with a piece of mop up glossy paper. I always do this when I do ink smooshing… I use photo paper to mop up the ink off the glass mat.
From this I die cut three flowers from the Tim Holtz dies.
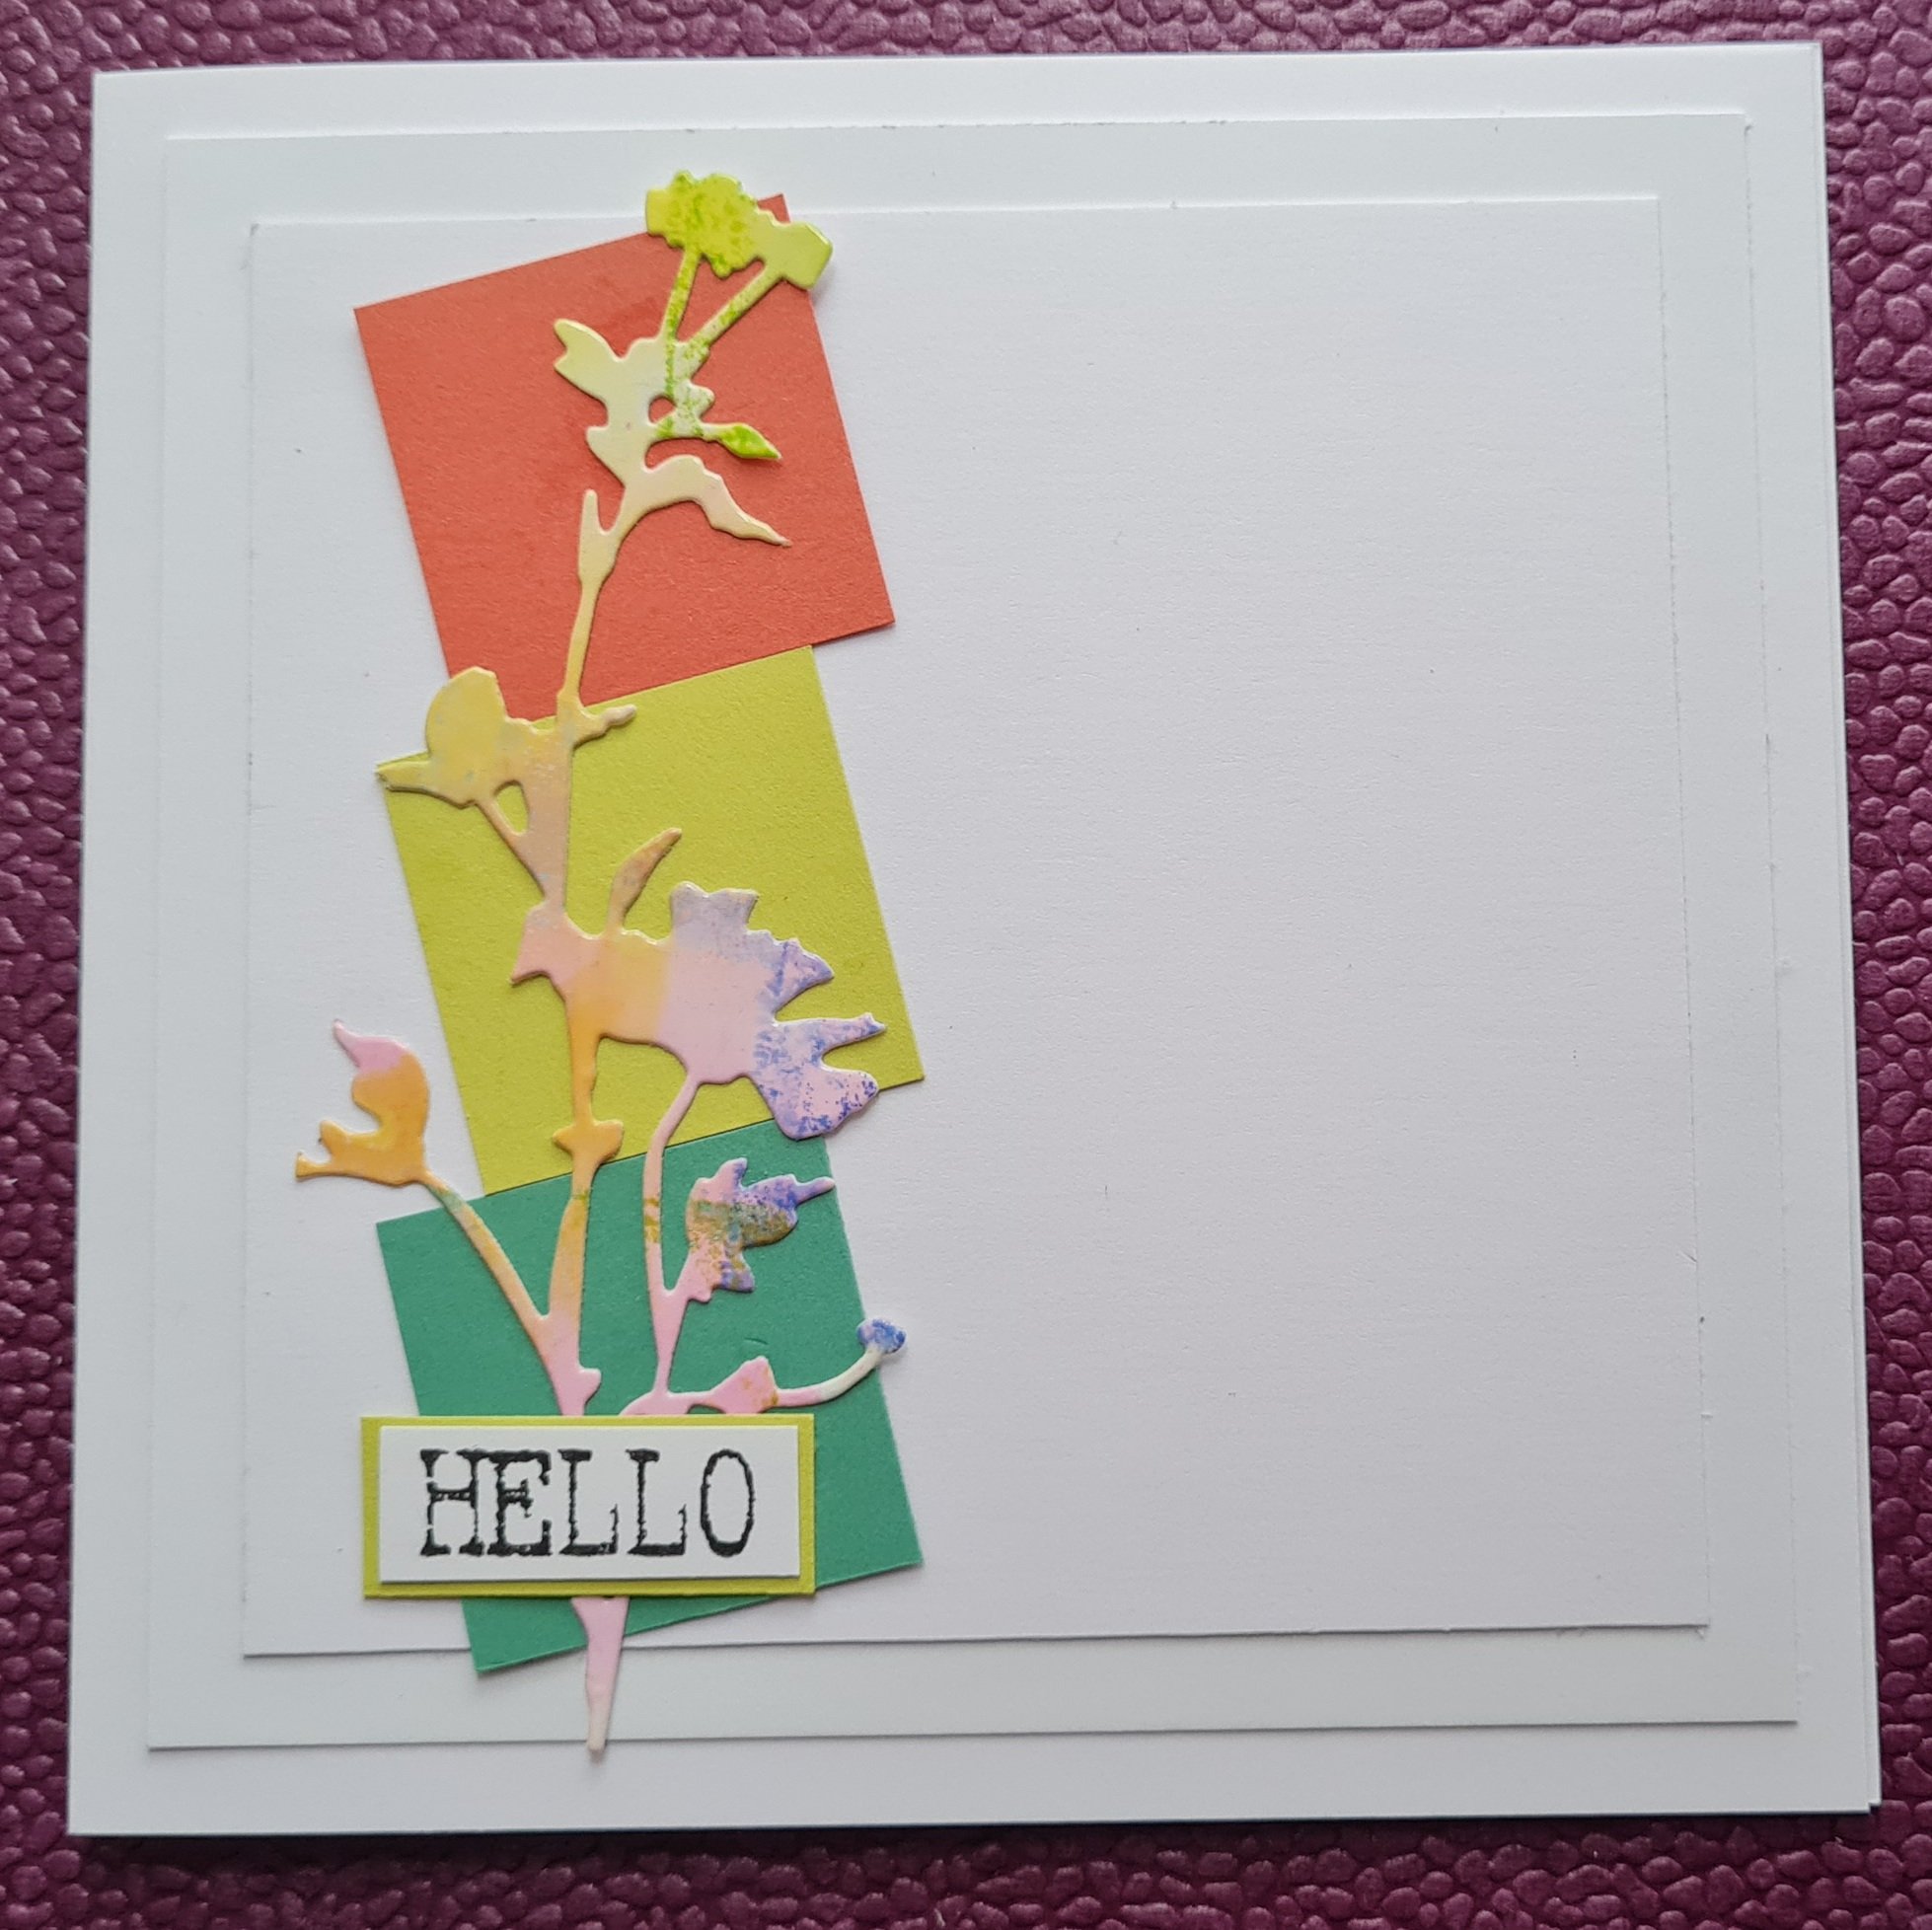
Then I cut some squares of scrap cardstock and added one of the flowers to this.
I then double mounted on scrap white cardstock so it gave the card some simple definition. I also added a simple sentiment mounted on the coordinating cardstock.
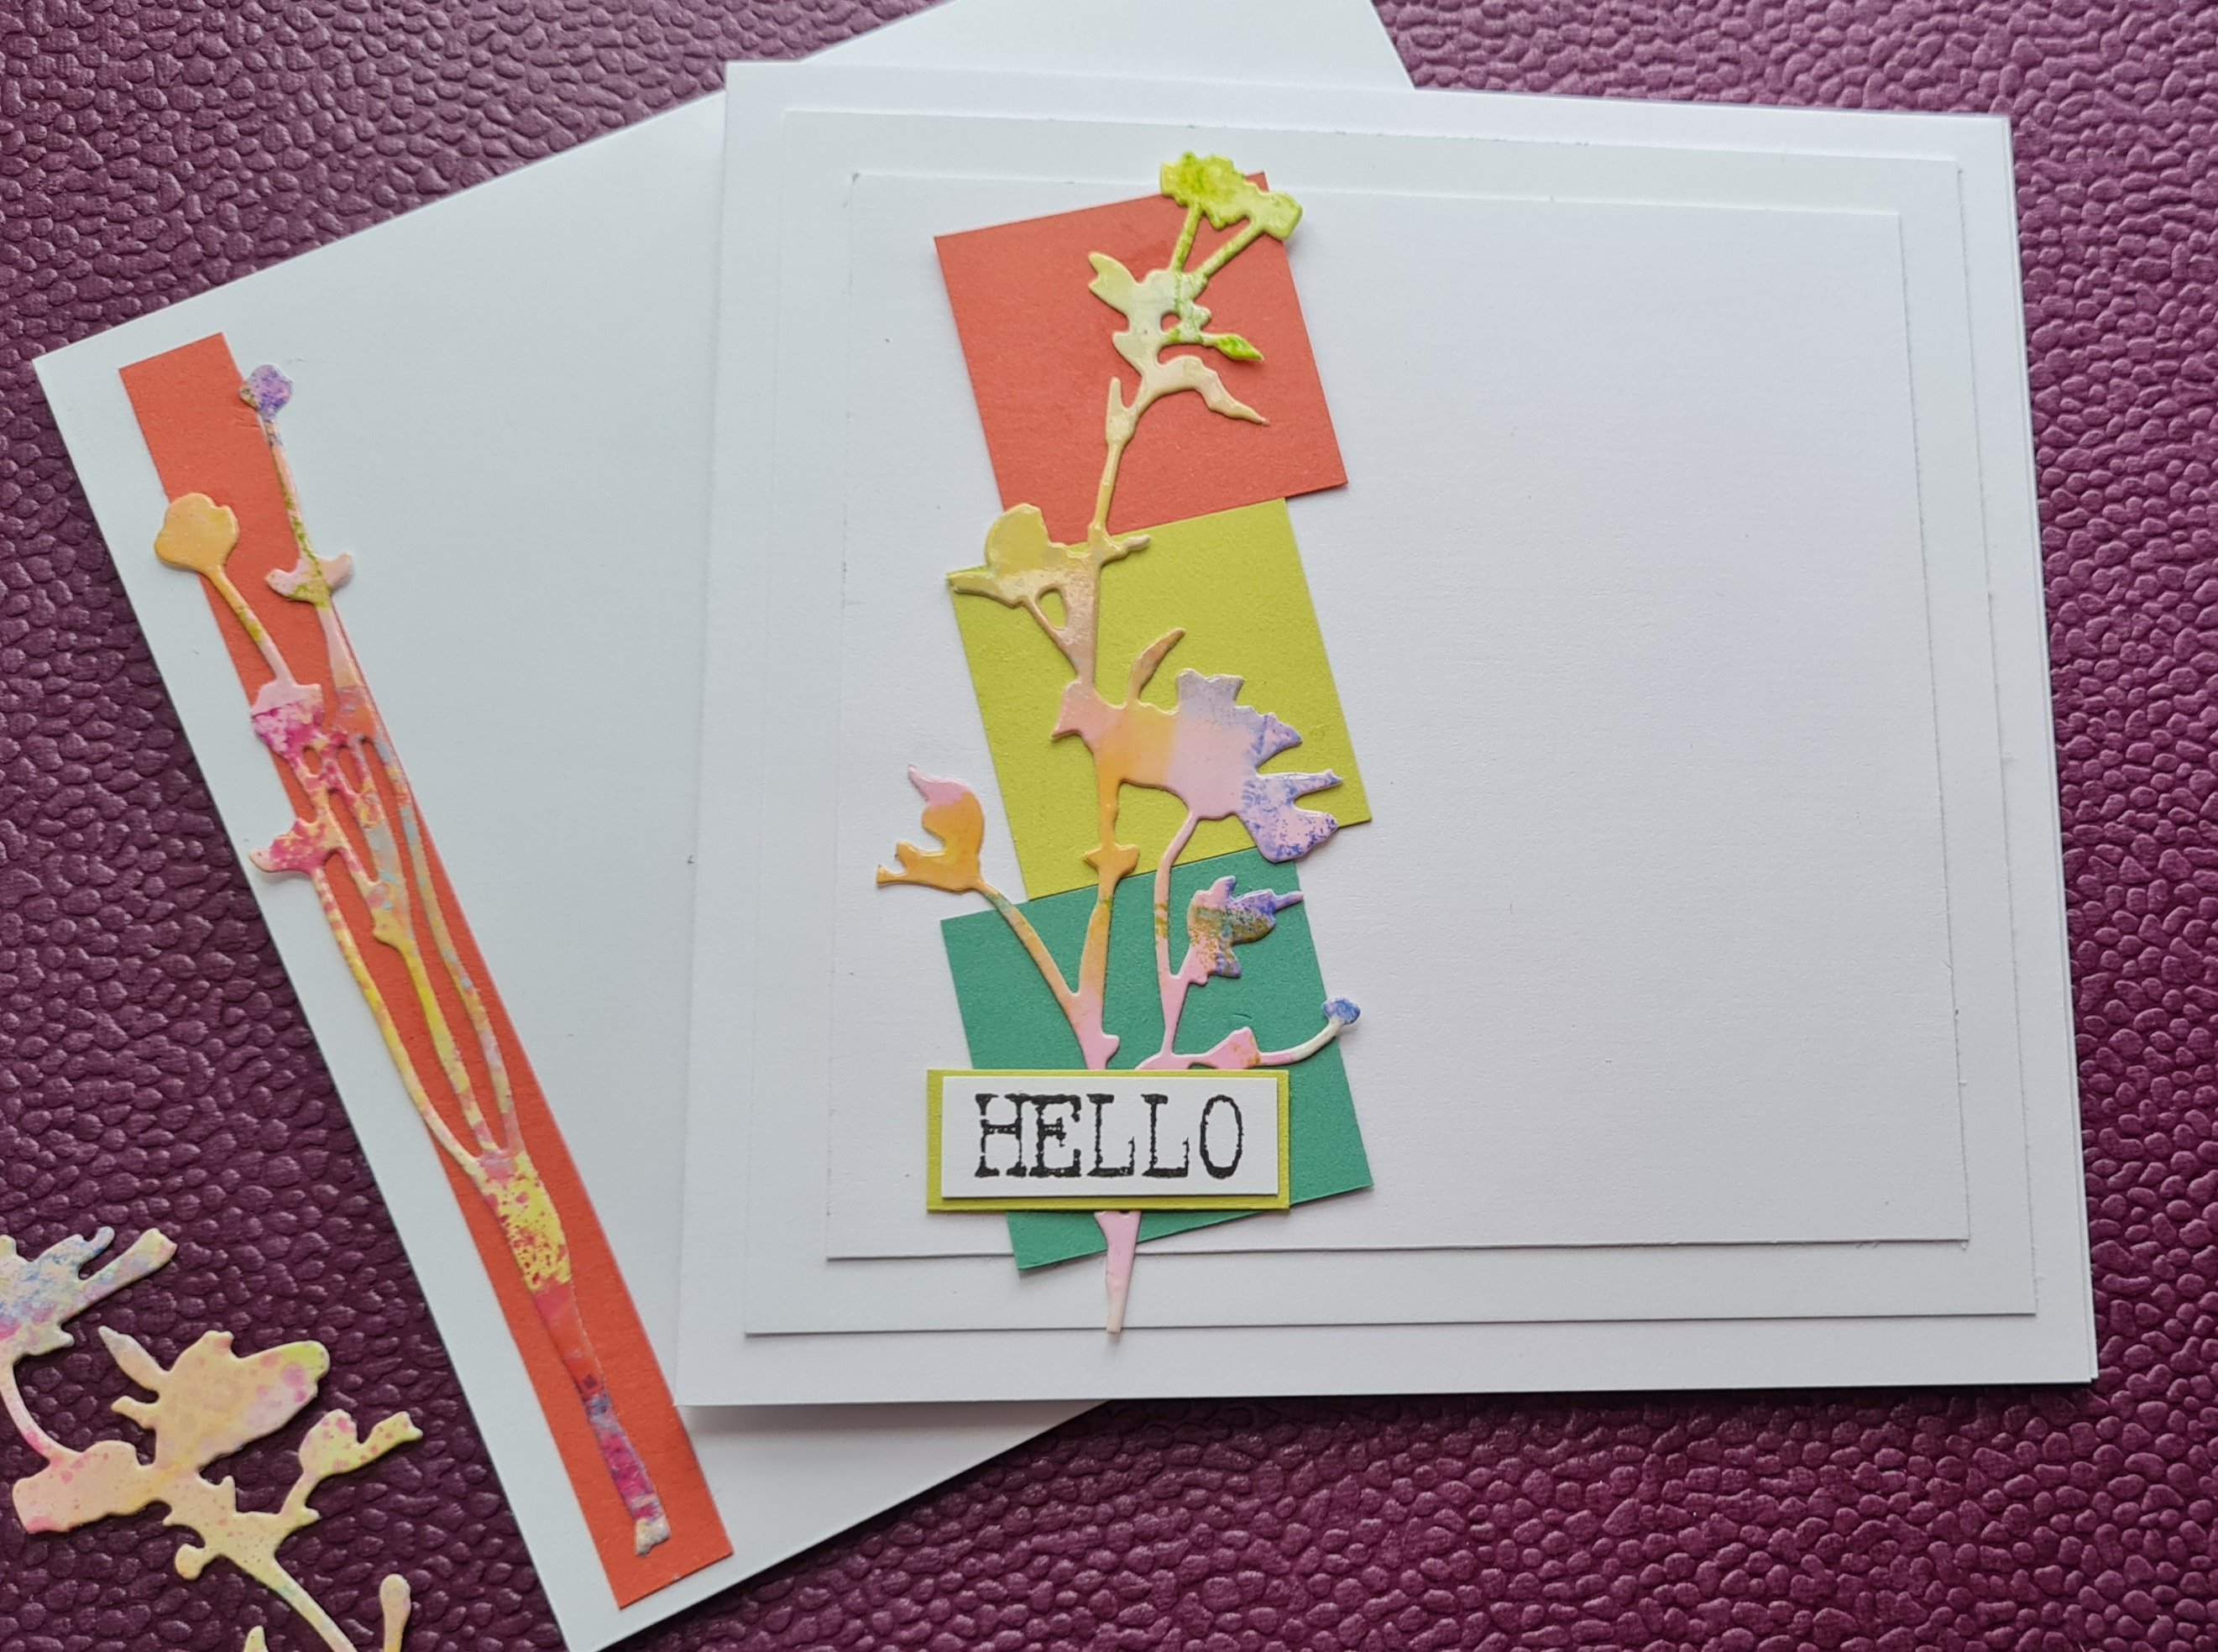
I used the slimmest of the diecuts for adding to a strip of cardstock for decorating the envelope.
Then inside I added three tiny banners and the larger die cut.
Love how this card turned out… and pretty much all from scraps and in a change from my usual style … pretty CAS!
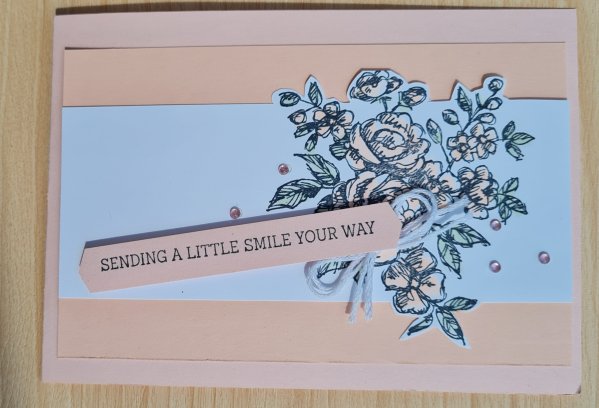
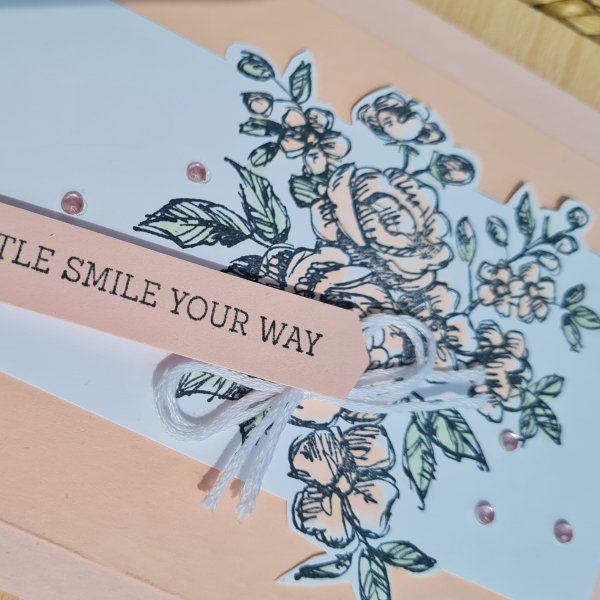
So for this card I went for 2 different kinds of pink … warm and cool pinks … aka Petal Pink and blushing bride… mainly because I had them in my stash of scraps.
I decided to use the beautiful Fancy Phrases stamp set as its so easy to do quick colouring on this as it lends itself to a messier style.
I fussy cut some of the image and then created a panel by straight cutting the rest. It’s a bit fiddly but worth the effort I think.
Then I mounted it on one colour pink cardstock and made the card blank out of the other. This gave it two tones but I think they work well together. I added the sentiment strip which I punched using my Pick a Banner punch. I added some little pink gems and a twine bow to finish.
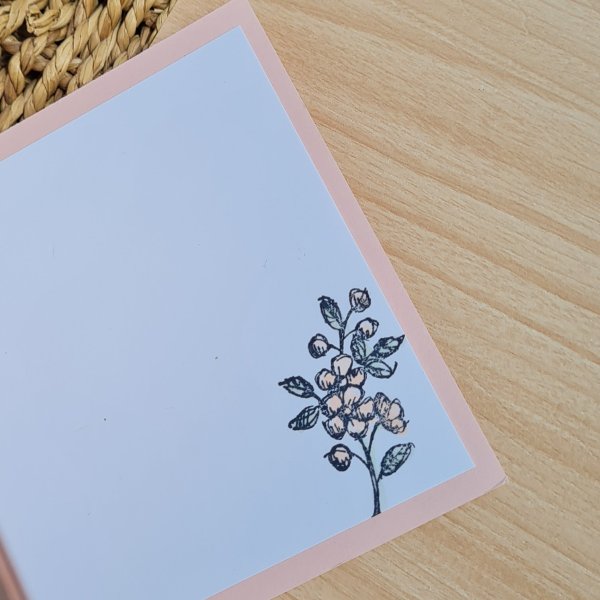
Inside I added the panel of white with the small branch stamped and coloured.
Happy with how this turned out. Pretty and most importantly Pink!
Hi there! Another design team contribution to share with you today. Once again I’m joining the Happy Little Stampers CAS challenge and this month the theme is Christmas!
Now as regular visitors to my blog will know I often make Christmas cards all year round so this one was not exactly a challenge as a theme… but the CAS element still challenges me … especially as of late my cards have been all about excess not clean or simple. So a quick reminder of the rules…
Clean and Simple design with one focal point, lots of white (or open) space and minimal layers and embellishments
OK with these rules in mind… this is what I made…
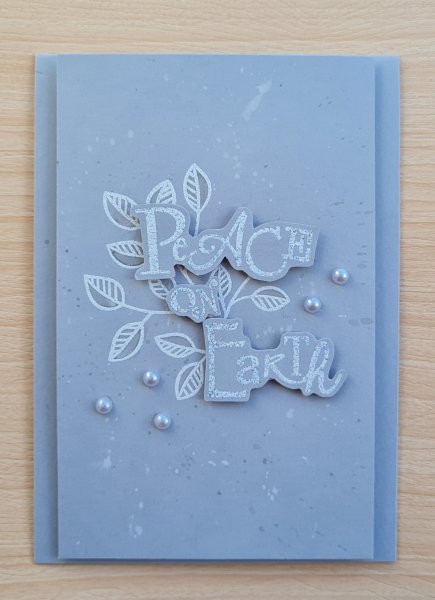
I went for a smoky slate cardstock and a modern feel. I embossed a foliage stamp in white (stamp from Creative Stamping magazine stamp set) and added some depth of colour with grey watercolour to the leaves then added splatters of both grey and white.
Next I embossed the sentiment using a holographic embossing powder. The sentiment is a Claritystamps one. I then fussy cut that out, added foam behind it and then adhered it to the panel.
I finished with some pearls.
Love the simplicity of this and how pretty and modern it is.
One of my crafting raggy doll sisters has recently moved home so I made this card for her. I was inspired by another Jennifer McGuire YouTube video technique using distress oxides.
I must admit for a while I’ve mainly been using my Stampin Up inks and so neglected my Oxides and distress inks … this might well have got me to fall in love with them again… they do have some fabulous properties that make them fun to play with!
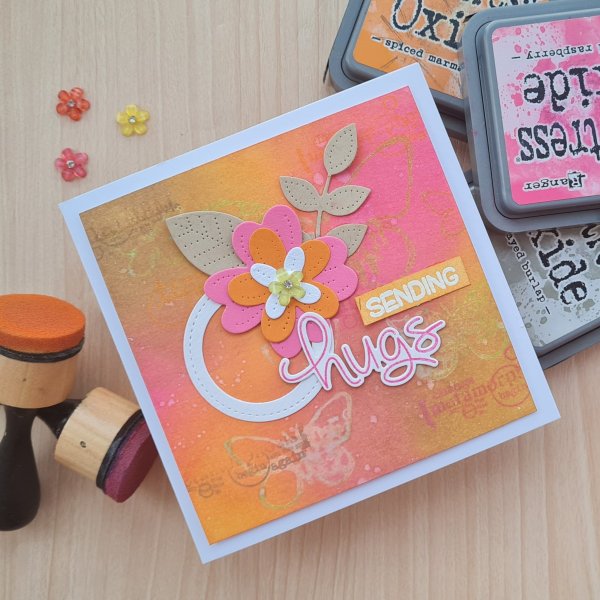
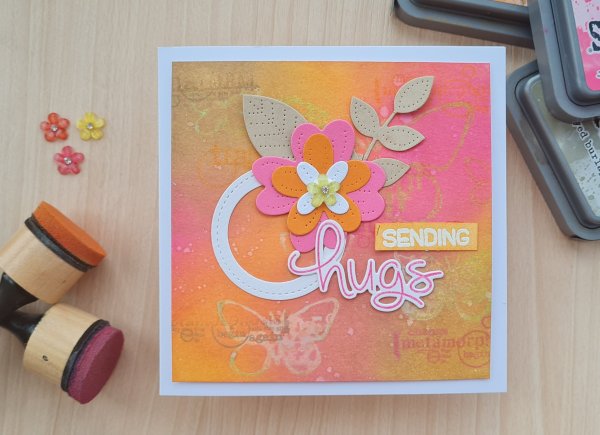
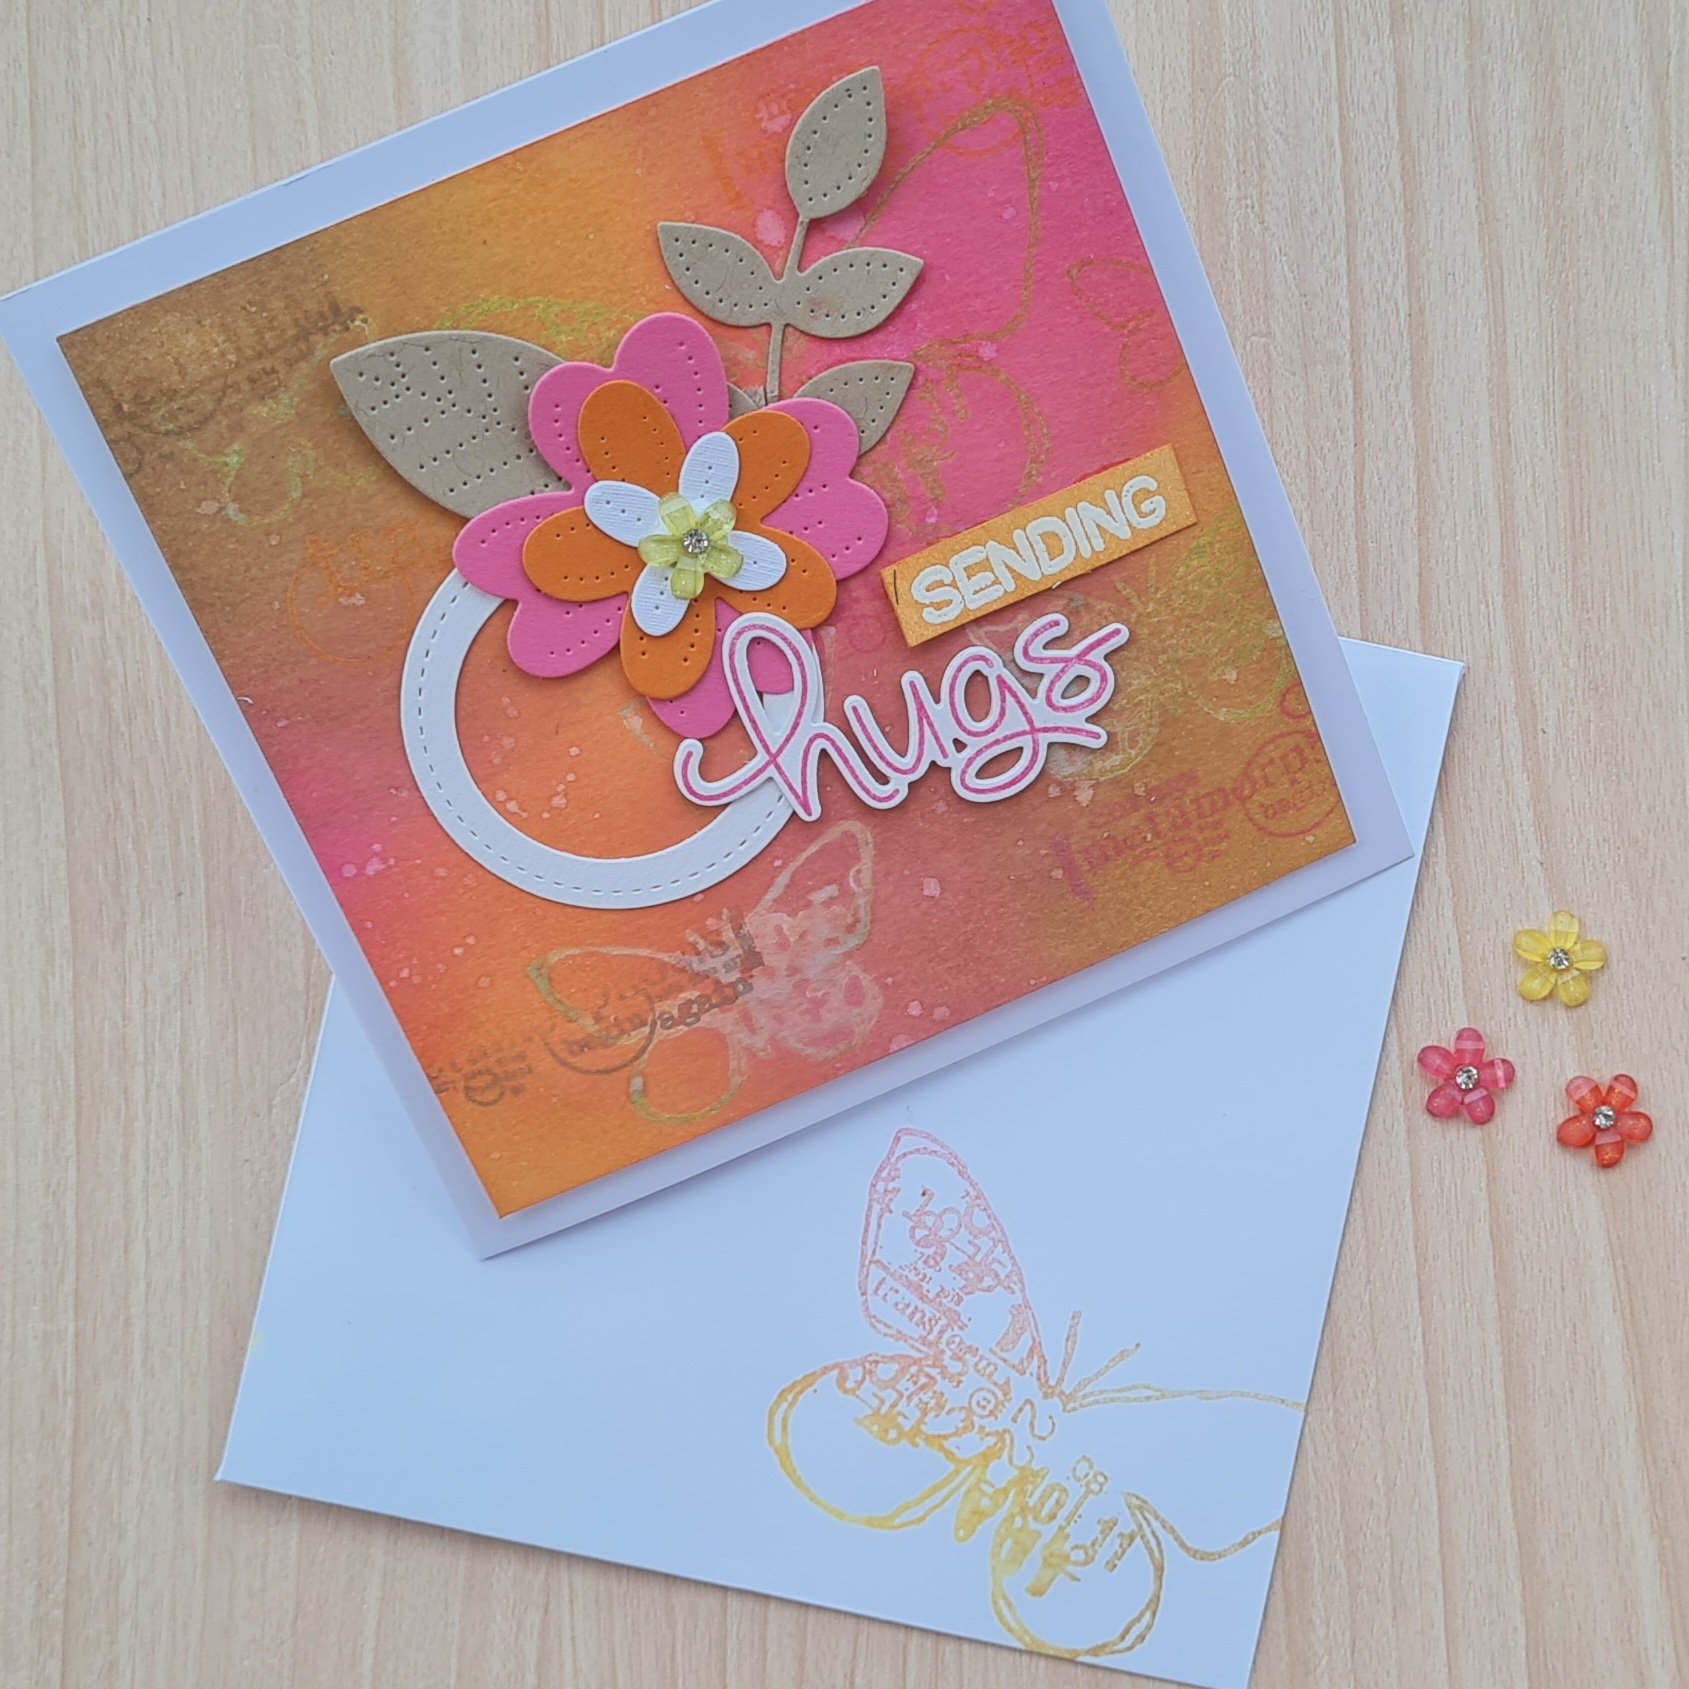
So I started with some mixed media cardstock and blended a heavy amount of the oxides on in the Picked Raspberry and Frayed Burlap. Then I chose my stamps (Visible Image) and inked them in Twisyed Citron and gave a spritz of water before then stamping them. This creates a kind of bloom to the image but still sits some of the pigment on the top.
I then did more stamping with the word stamps and added some drops and splatters of water to give the nice finish to the oxides.
Then I decided on the focal image. I wanted to use the Lawn Fawn sending hugs sentiment but wanted a nice bold flower … but needed something to give it contrast. So I chose to die cut a ring using the stitched framelits out of white. Then used my Pierced Blooms flowers and leaves (I have a big pile of these I die cut from scraps ages ago) and created my flower focal image.
In the centre of the flower I added this little resin flower with a gem (I’ve recently rediscovered a lot of old stash like these flowers and am trying to remember to use them!).
I then raised the panel on foam to give it some dimension.
The envelope I added and image where i added the ink using blending tool so it is multi coloured.
So happy with this cute card. Happy New home Jackie.
Hello… and here starts the 2nd half of the year… can you believe it? I can’t quite get my head around it!
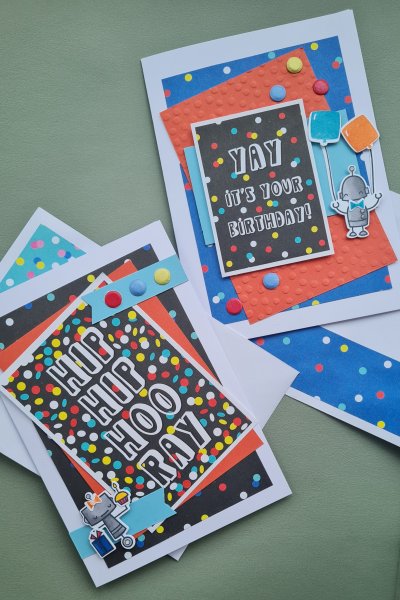
So as it is the 1st of the month it is time for another Craftyhazelnuts patterned paper challenge blog design team contribution and once again I am working with old Making Cards magazine stash and these fun confetti themed papers and sentiment panels.
Aren’t they fun papers?
Because the sentiment panels do most of the work and the large one covers most of the front of a 5×7 I had some trouble working out how to decorate them so they were a bit special and not just paper layers.
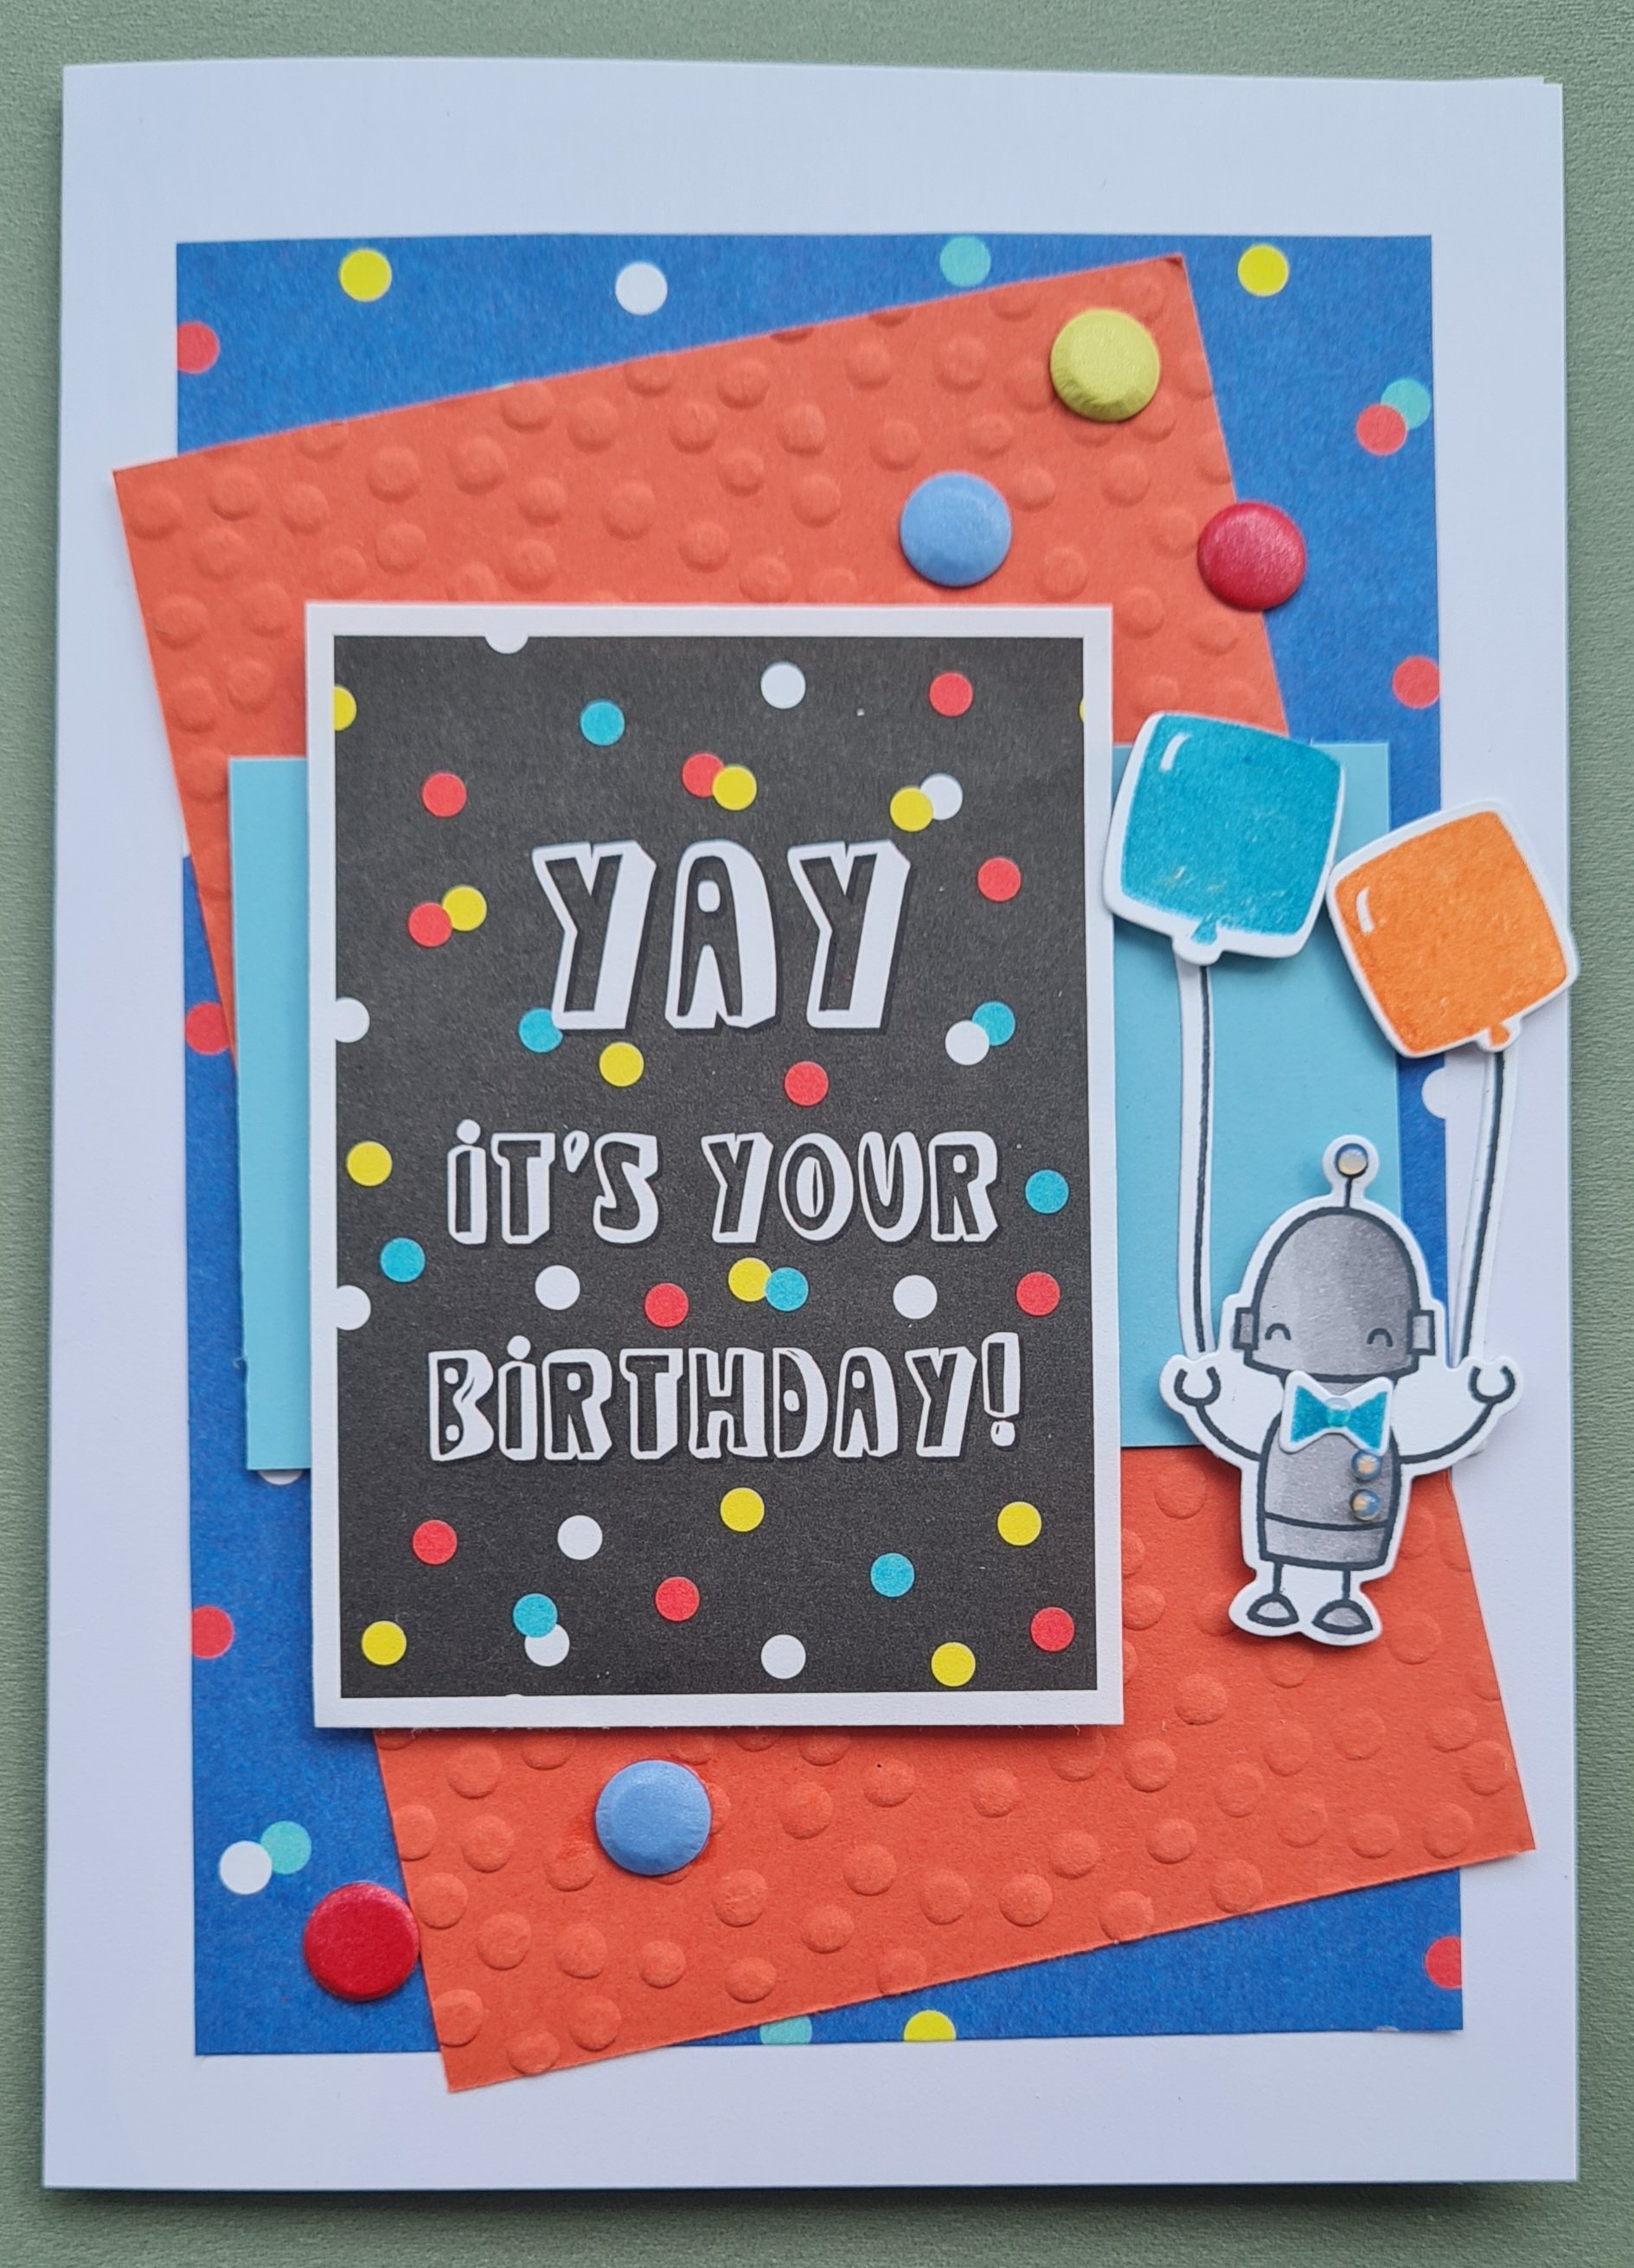
I ended up using the cute Lawn Fawn robots to add embellishment … after all I haven’t played with these in a long time!
This one I added the bow tie to the head so maybe a more feminine robot … and the cute present and cupcake.
The second one more of a masculine robot with the balloons!
On the second one I also added embossing to the red panel and thought this pattern worked well with the confetti feel.
I embellished both with card candi from the stash which I thought complimented the colours!
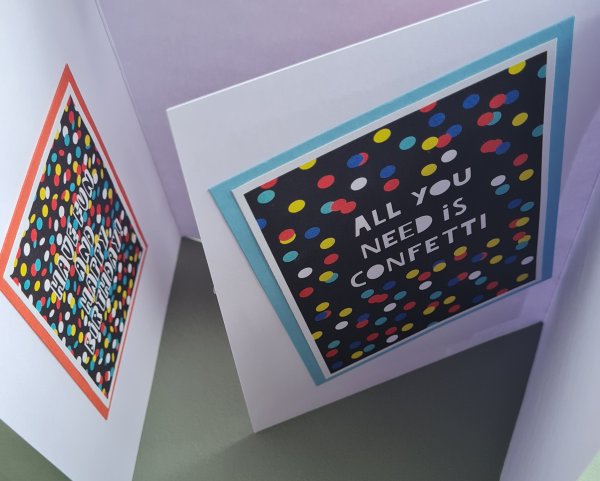
Inside the cards I added coordinating panels…
And the envelopes I added strips of the paper.
All done and I must admit I am happy with how these came out… cheery and fun!
A few days ago I shared some cards I made using the Jennifer Maguire ink lift technique I had seen on her YouTube video. Well I had a little panel leftover that was a second pull of ink.
This one was far paler and I wasn’t sure if I would use it but it was pretty so didn’t want to throw it away … so here it is in use and I wanted to play and just grabbed bits and pieces that were on my desk.
I mounted the panel onto Polished Pink and then decided to grab a Memories and More card that was pink based to use as a background. I didn’t want the focal image to show … but fortunately the mounted strip covered it up but I decided I wanted it to look less clean… so I added some blending and some ink splatters … I also added some splattered gesso for the white.
Next to choose a focal point. Well I decided to die cut a leaf shape from the Splendid Stems set and then stamp in Night of Navy and die cut the larger leaf image too from the coordinating Splendid Thoughts stamps. I also added some So Saffron colour by using the background leaf stamp over lapping a couple of times…. this creates an interesting texture to the added colour.
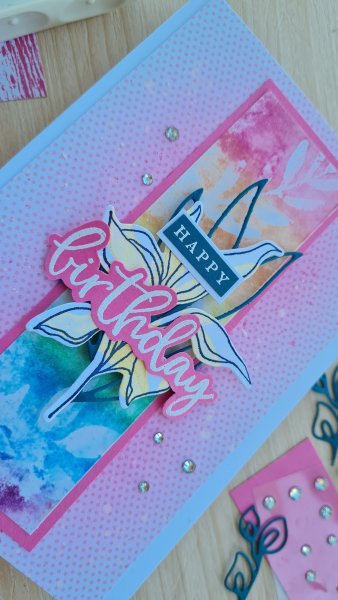
I decided to turn this into a birthday card (I’m starting to build up a stash for the next year of 17th birthdays for the princess’ friends) and so heat embossed the birthday from Biggest Wish and Happy from Cottage Rose onto the polished pink and Pretty Peacock scraps I had on the desk.
After fussy cutting the birthday and then matting and layering the Happy it was time to assemble… with dimension and foam in-between the layers!
I ended up curving the birthday sentiment a little as the middle dimension is bigger than the sides … but I think it looks cute.
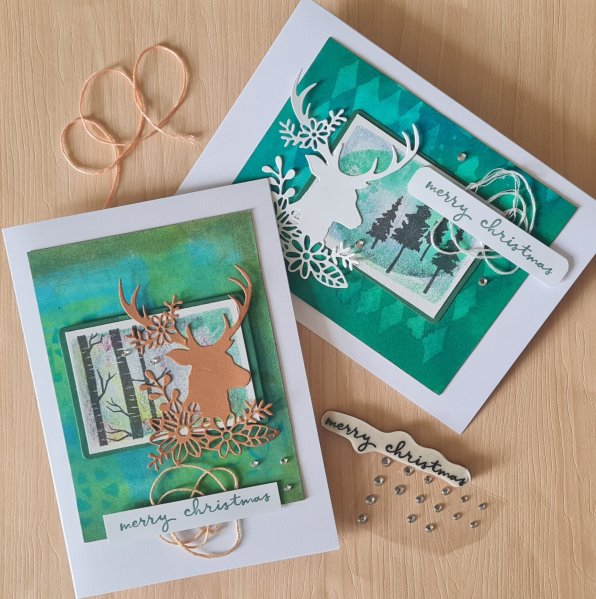
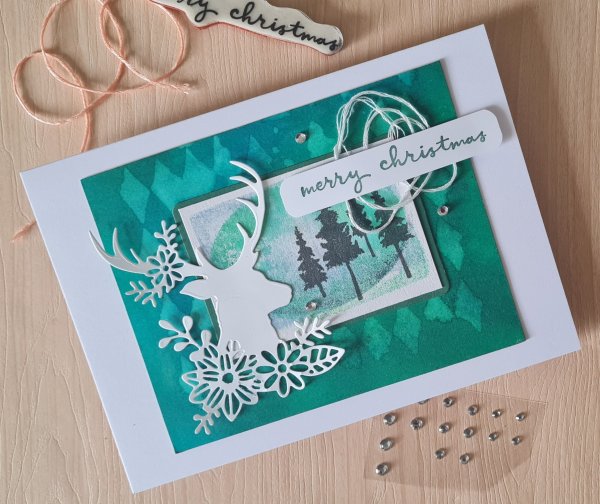
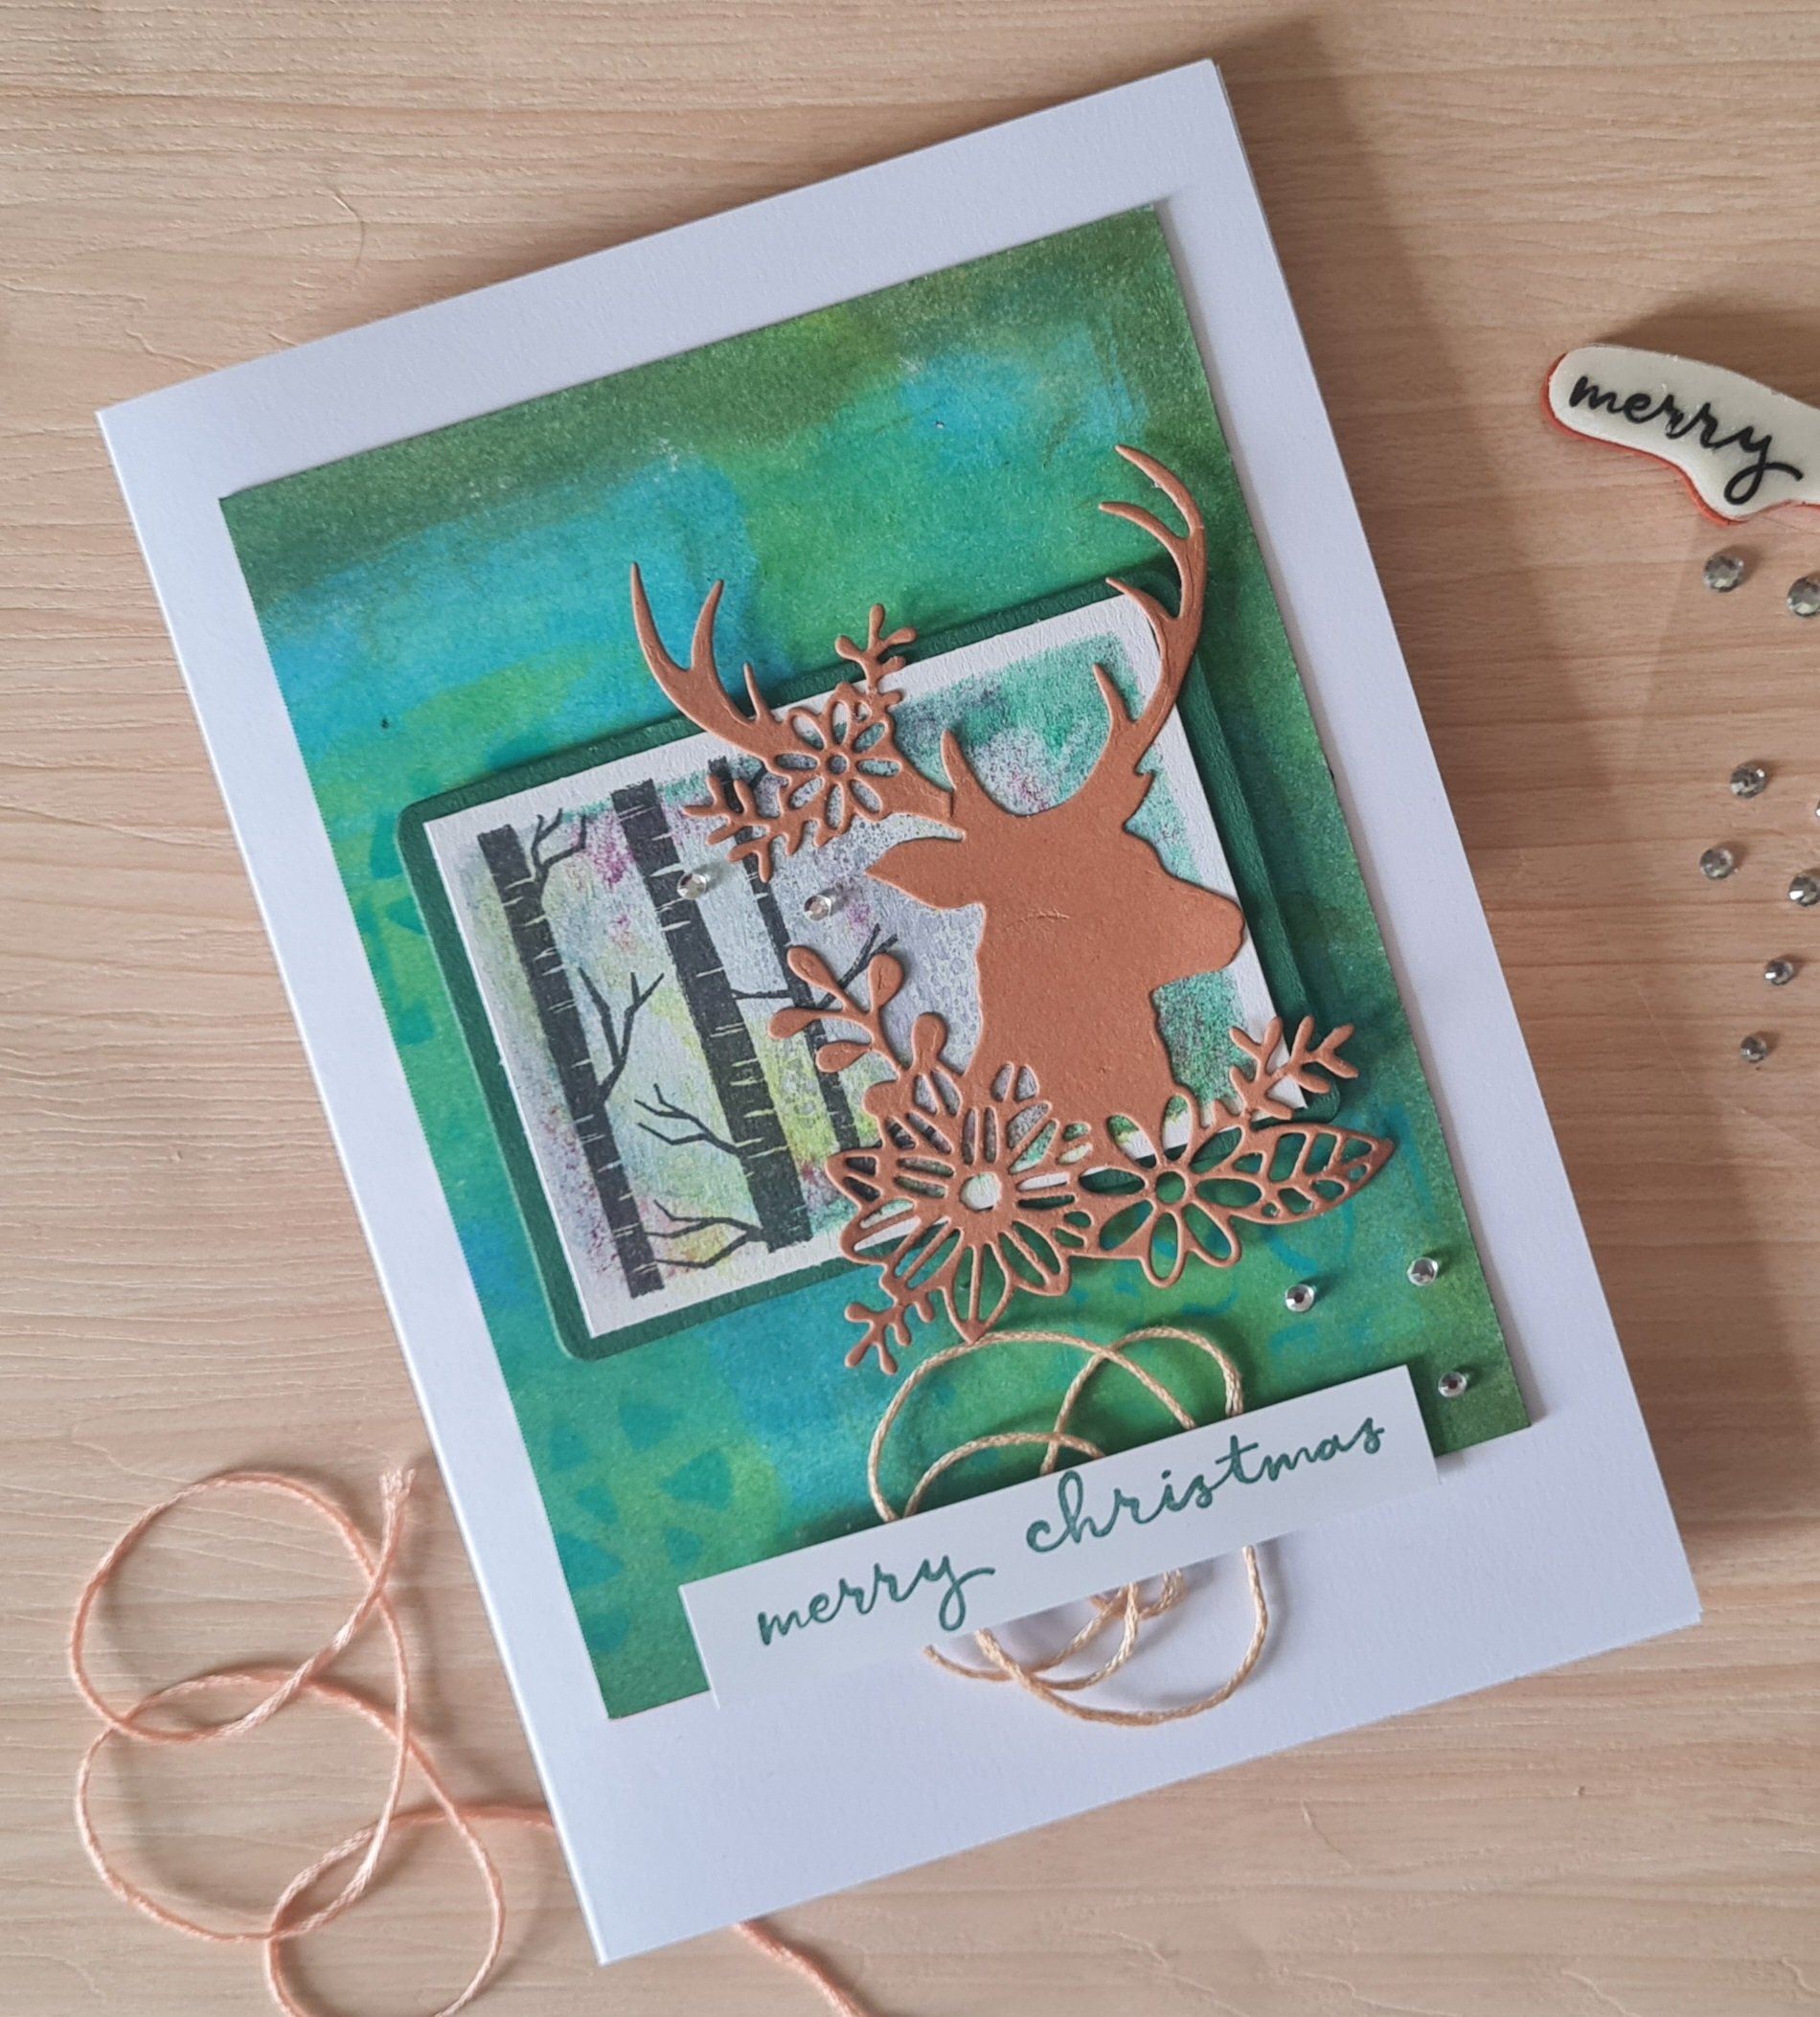
Another of my ‘found treasures’ posts… this time two more of the Dylusions backgrounds made many years ago on a class with Dyan at Art from the Heart. I teamed this with some gelliprint watercolour ink background ATCs I then made, again several years ago, but never finished. I decided these two would work OK as Christmas cards and added a new to me die cut of a deer onto them along with a sentiment.
It took very little work at this point but because the background is so rich and then the gelliprint also has plenty of interest and then the die cut has texture and intricacy it all works well together.
I must admit the Dylusions backgrounds were so lovely to make but I have no time to do anything so messy these days. But it is tempting me to have a play again sometime soon.
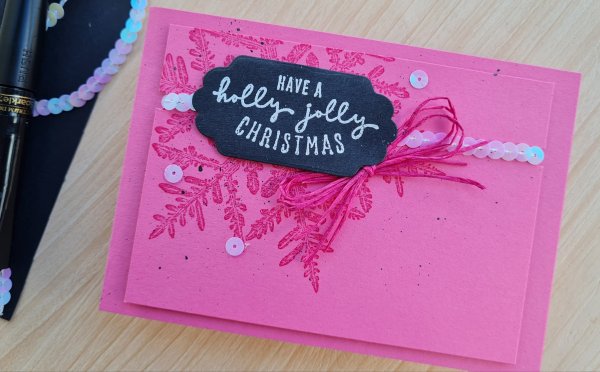
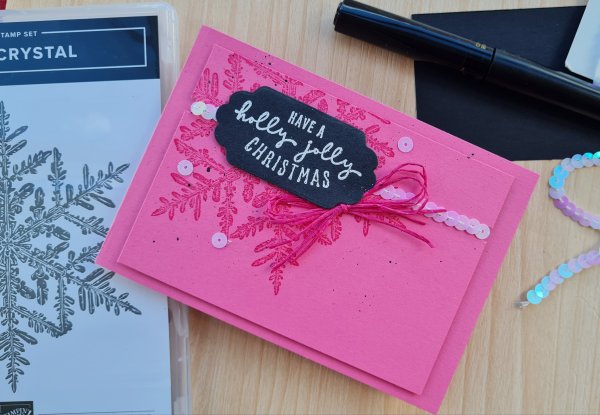
Another new stamp… a large (approx 4″) snowflake background type stamp from Stampin Up … bizarrely chose to have its first inking in pink!
I stamped it off the edge of the panel of Polished Pink cardstock in Melon Mambo … and it really is so pretty and detailed. I then decided to add the sequin trim, a paper twine bow and the black sentiment label which almost covered it up … but you can still see some of it!
I also added some splatters of the black wink of Stella for this modern and fun Christmas card.
Really like how this looks and might make a few more like this but in different colours… although the snowflake is so pretty I want to also see more of it so may switch up the sentiment to be smaller.
Loved finding a use for the sequin trim that I’ve had for years and rarely can I think of a good way of using it … I also used a few of the sequins that came off the end as little embellishments.
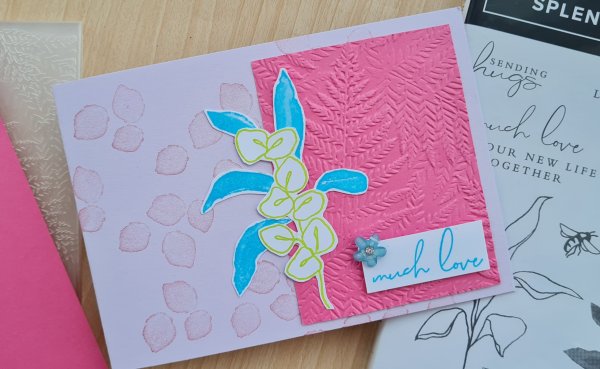
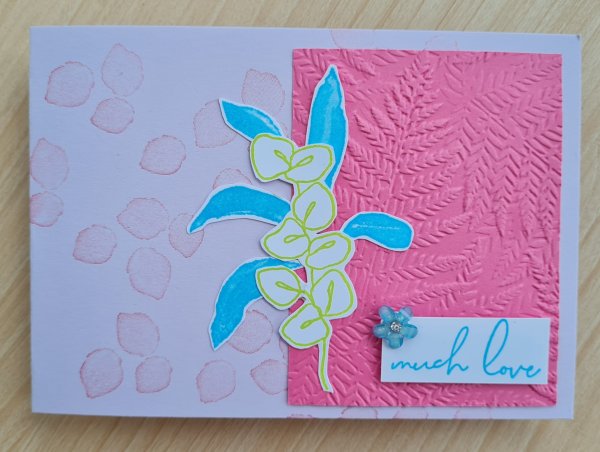
Yesterday I decided to make a card with just some bit’s left on my desk … so some stamped elements from Splendid Thoughts, some leftover cardstock in Polished Pink and Fresh Freesia and the Fern embossing folder … and this is what I came up with …
Really simple and the only thing I had to get out of the stash as extra was the little flower gem that I must have had for many years in the stash and it seemed like the perfect moment to add it to my project!
I did stamp the background of the card blank with the little Petal type stamp to give it some interest. With hindsight I wish that I had also added some ink blending to give it more depth… but hey, hindsight is a wonderful thing!
I am really liking the Fern embossing… such a lovely new addition to my craft stash, and those Splendid Thoughts stamps are great. Love how you can use just parts of the sentiments too as they aren’t too closely set to mean you can’t fussy cut them , or snip them apart!