Festive Friday

I had a few days off blogging. Think the fact the princess is leaving for uni soon is hitting at the moment and so I’ve had zero energy for being creative. At least I was a little ahead on my Festive Friday projects so this one was preprepared! I’m sure the mojo will come back – just needed a few days of rest!

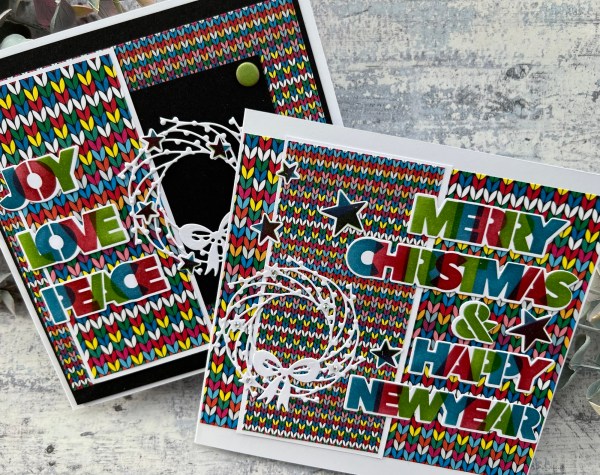
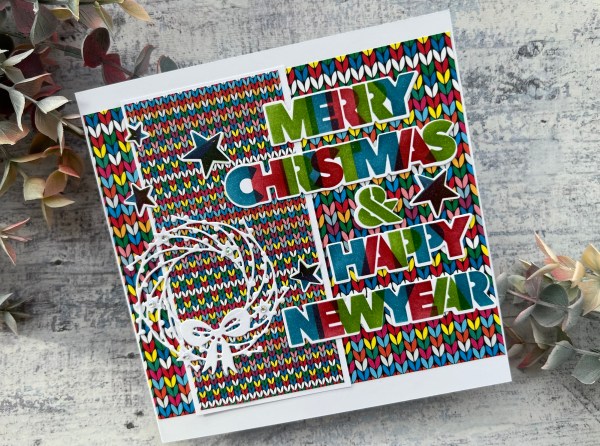
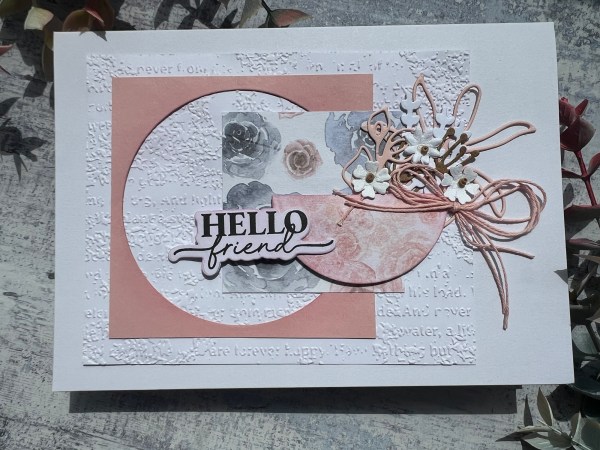
Went back to the stack of painty backgrounds for this weeks Festive Friday.

I had a big test of my mojo in making these particular papers work but I knew from the beginning that I was going to use the Spellbinders stitching die as the topper!

I did stick the camera on to capture my process … so please checkout the video.

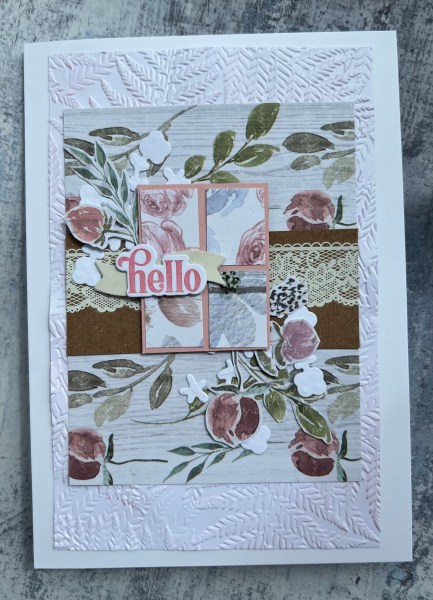
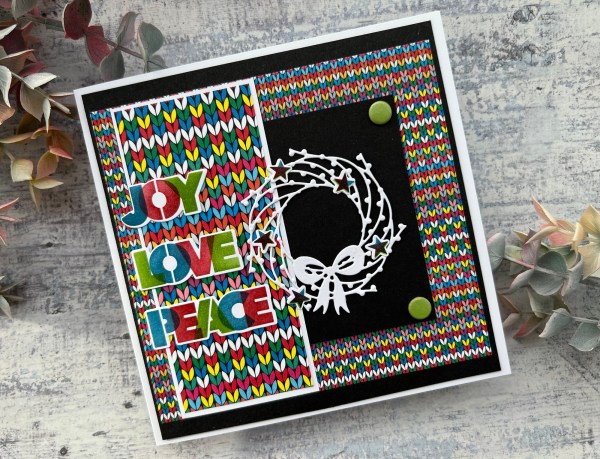
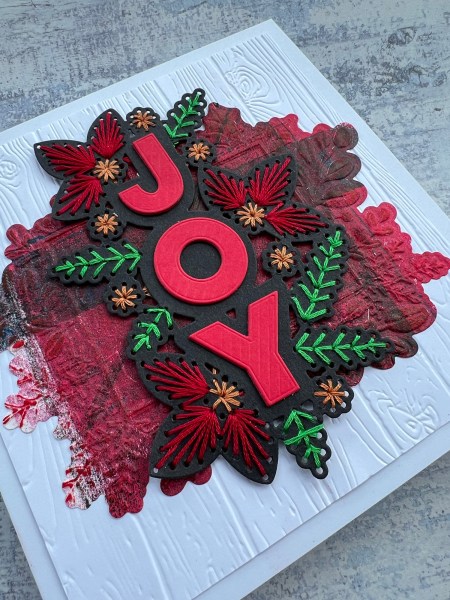
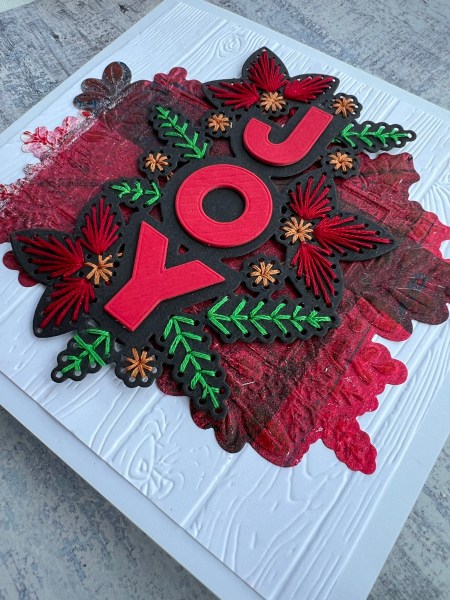
This one I embossed and die cut with the Merriest Moments die and folder. Then layered onto a panel I’d embossed with the Hardwood folder.

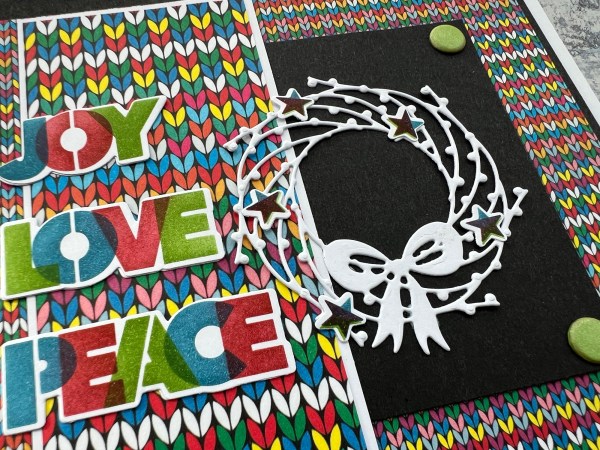
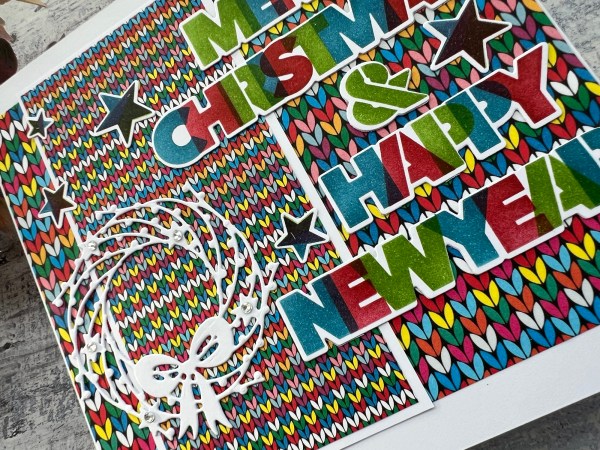
Love the texture and the way the other die cut frames the stitched die cut.

Obviously the scene stealer is definitely the stitched die and love this traditional colour scheme I chose for both the pieces.

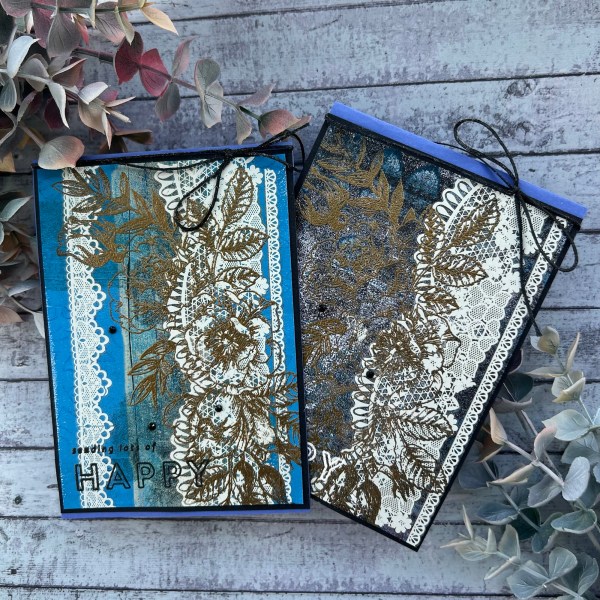
Nice to have the variations between them but both kept quite traditional.

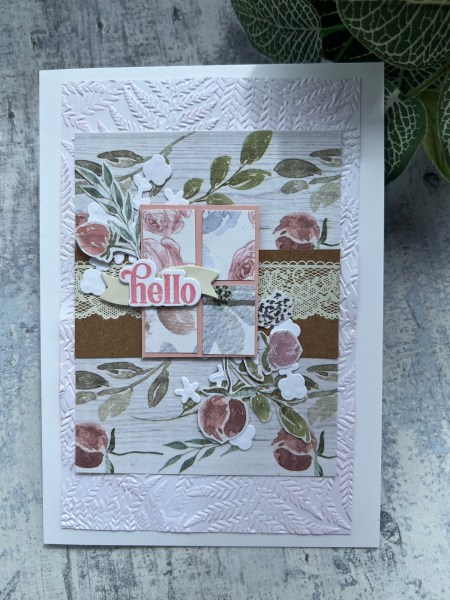
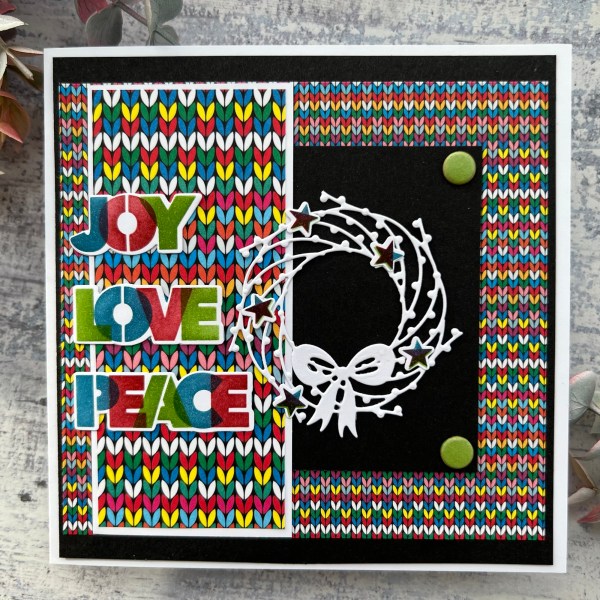
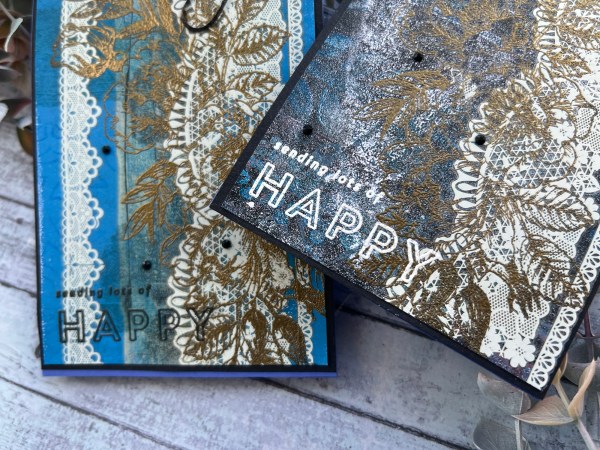
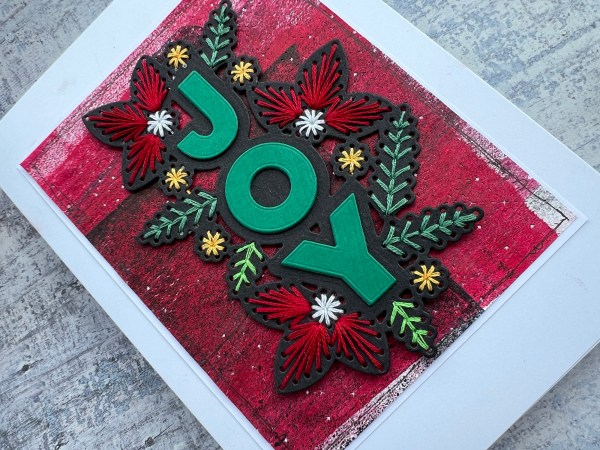
This one I die cut the background using the pierced snowflake Waffleflower cover die but it’s not so obvious with the painty background.

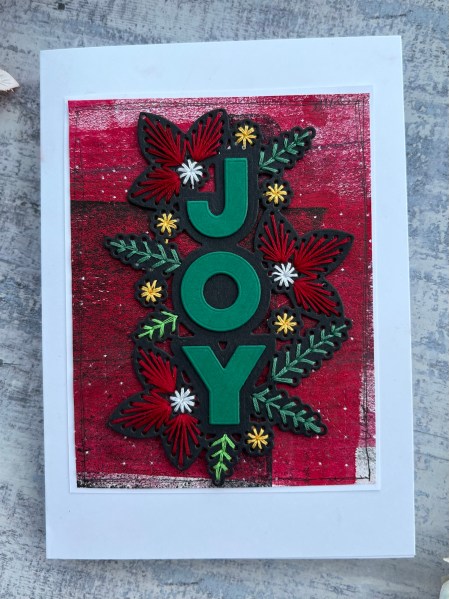
I like the little pops of white in the sewing for this one plus the different greens I used on the leaves.

I did add a little doodled border on the red piece but not sure it’s very visible in the end … but sometimes it’s fun to play!

Happy crafting!

Catherine

You mean the world card

Today I have a card I made just because I wanted to make something using the Altenew Big World stamp and die set I bought in the sale. For once I also kept this clean and simple! Weird! But the stamped image itself is just gorgeous!

Three layers of stamping creates the world … and there is a second set of the three images for a different view (the Americas) and then added the stamped sentiment and the die cut word!

Added two layers of cardstock to frame and that was it! No embellishments or anything!

I just felt the image was all that was needed!

I did do some stamping on the inside of the card too using the mini atlas stamp.

This kept it tied in with the front but obviously not the same.

Just love how this turned out, and was really impressed with how easy it was to line up the stamps.

Now even though this is an easy card I did video it for my YouTube channel so please do pop along there to watch how easy it was!

Happy crafting!

Catherine

More patterned paper play

On days like today I am glad I prep ahead for my blog and had this ready to post as I’m weary after a fun night out and have my parents popping round to have lunch in a bit so definitely no time or energy for crafting! So here is a prepped ahead blog post for you!

For this card I grabbed that pouch of Crafters Companion paper that was already cut up and made another card.

I decided to start with the base of the embossing using the fern folder and lightly inked with pink then the topper of the patterned paper. There were also the four tiny pieces of the paper so I backed them with the pink cardstock to create a window type shape.

I then added in the white die cuts and the fussy cut stems…. But decided it needed something to separate it out a little so went for a strip of Kraft but pulled in an ancient rub on to add to that.

I added foam behind the window shape to lift it above and thought it looked pretty.

I grabbed a ready stamped sentiment that was die cut and some banner die cuts. I coloured the banner with the promarker in a pale green colour I thought went with the paper colours to go underneath.

Love how this came together easily with those die cuts and the lacy rub on adding some different elements.

Happy crafting!

Catherine

The Flash scrapbook page – 1sketch : 3ways

I played along with the 1 sketch 3 ways challenge which my friends Helen, Sarah and Jackie organise over on Facebook. I also videoed the process for this which you can find on YouTube.

My page definitely doesn’t look the same as the sketch but was inspired by it and the same building blocks are there for the page.

I chose to only use the part on the left hand side and had far fewer photos to use but I think it still works!

I added lots of machine sewing and of course some distress inks using the packaging technique.

I also added some bits from the Bramble Fox Club kit and the Lollipop Box Club kit.

Happy crafting!

Catherine

Experimenting with stamping on gelli prints

I decided to experiment with stamping and embossing onto a gelli print quite a detailed stamp – Fanciful Flowers background from My Favourite Things – to mixed results.

You’ll have to see the video I made to see the hot mess that ended up in the bin – but this turned out nice at the end!

This one was a striped gelli print panel with different blue colours. I embossed the image with blue powder and then used Inktense to colour the flowers very loosely! I then added some splatter including the shimmer ink.

I then trimmed it down to around 4×4 and mounted it on white and then on a purple card base that is 5×5.

I added the glitter die cut leaf sprig and then the sentiment with a nest of thread for texture underneath.

I kept the inside simple with a panel of the white with one of the off cuts of the gelli print stamping to finish off.

Sometimes you have to admit defeat when something doesn’t work out well so I am glad I actually tried it with two panels and so could at least use this one! And at the end of the day the other one was only paper so no big loss to throw it away as an experiment failed!

Happy crafting!

Catherine

Festive Friday

Today my festive Friday project was one I filmed and have uploaded on YouTube for a change. Think I’ve got myself more in the habit of putting the camera on when I create now after the mammoth filming project that was Christmas in July.

These cards were made when I decided to grab the papers I have leftover from old Making Cards magazine kits and the knit design papers just jumped out at me to use!

Decided to then go multi coloured with the sentiment and use the fabulous stencil and die set from Waffle flower: overlapping Christmas

This one I went with black for the frame and for the centre to help show off the detail of that gorgeous wreath.

During the Christmas in July series I used this die and loved it so much I die cut a few from scraps and stacked them and popped them into a pouch so they are ready to grab.

I added the stars that I had stencilled and die cut to the wreath which look black here but are actually the three colours I used for the words overlapping!

I added card Candi to finish this one off.

This one is very busy with all that print and the words dominating the card!

I added gems on the wreath although probably would have been better with coloured ones to show up more!

I also used the larger stars from the stencil and die set for scattering around the card front.

Inside the card I just added the remaining strips of papers to finish off!

Happy crafting!

Catherine

Rub ons and embossing on gelliprints

Today I took a little time off work as I had a few meetings cancelled and decided to make the most of an emptier calendar than normal! So the good news is that I could then get my blog updated for the next week or so with all the projects I’ve been making … so lots of blogs/projects to share.

On this blog I am sharing the cards I made when I decided to use two of the darker and less patterned gelliprints to make a set of little cards, grabbing some rub ons I’ve had for years!

I added the cream lacy rub ons directly onto the gelli print and then decided to heat emboss in gold the Beautiful Flowers stamp over the top.

This created a very interesting effect with the pattern of the rub ons coming through the image of the flowers and leaves.

I added the sentiment in embossing on both – the black for one and the white for the other.

I then added a black mat for each panel and stuck it onto the orchid oasis cardblank. I wrapped some waxed thread around the top with a bow and glued it in place.

Then I added the black gems to finish off.

So much detail going on in these cards but really they are quite simple because the rub ons and the large stamped image do most of the work!

Happy crafting!

Catherine

DT: Addicted to stamps and more – die cuts and stencils #475

I kept this simple as I hadn’t realised how quickly I had got to this design team project for Addicted to stamps and more and ran out of time … so I grabbed a ready sewn Spellbinders panel and flower and assembled them onto a square card blank.

I then went hunting through the pouches of die cuts I do when I purge my scraps and have a session die cutting and found three sprig dies and two labels – and the waffle flower sentiment too!

I added green ink to one of the labels to give some contrast for the sentiment to sit on and then clustered them to the right of the centre.

Love this bright and cheery card and know that although this took no time at all to put together for the challenge it was all because I had done the sewing on another occasion and got this all ready for when I needed something quick but impressive to put together!

Happy crafting!

Catherine

More patterned paper play

Hi

At the beginning of the month I always play with patterned paper and this month I didn’t get around to tidying away the pouch I had pulled out so I made another card. I actually used a scrap of cardstock I had die cut from last time too!

So the two pieces of patterned paper were cut for the sheet load of cards challenge months ago but I never got around to doing the full batch and I couldn’t actually work out which sketch this one was for so didn’t end up doing that … instead I added the die cut panel and an embossed panel background and made a vase out of the half circle with sone random die cuts and the little flower embellishments and a thread bow.

I also added the sentiment from Waffleflower.

I lightly inked the background, the sentiment and the edge of the vase – I had previously inked through the die cut circle so that’s a bit inky too!

Really pretty papers and I think a cute used of the shapes and that panel.

Happy crafting!

Catherine

Congratulations to my princess

Last Thursday it was confirmed that the hard work had paid off and that with some very good A Level results our daughter will be going to Manchester Met University. Of course I made a card!

I chose to use the Altenew background stencil and stamp set I bought last year and then lots and lots of the pierced blooms flowers, leaves and some splendid thoughts dies too!

I went with a peach and pink theme but also brought in the dark purple and red – basically all the warm tones!

Whilst I used a sentiment from Altenew I also printed a sentiment to go underneath as it couldn’t find the right one in my stash!

So we are now on count down to her moving out to her new adventure – exciting times (obviously also highly emotional for me who will miss her so much – whilst being happy for her!) !

Happy crafting!

Catherine