Christmas in July – 23

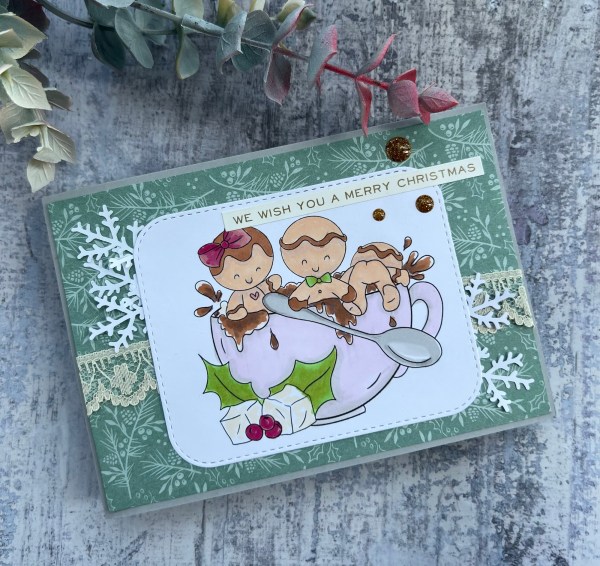
Second project of the day because I had to make a non Christmas themed card for the design team – so back with another post so I don’t miss a day on my Christmas in July challenge.

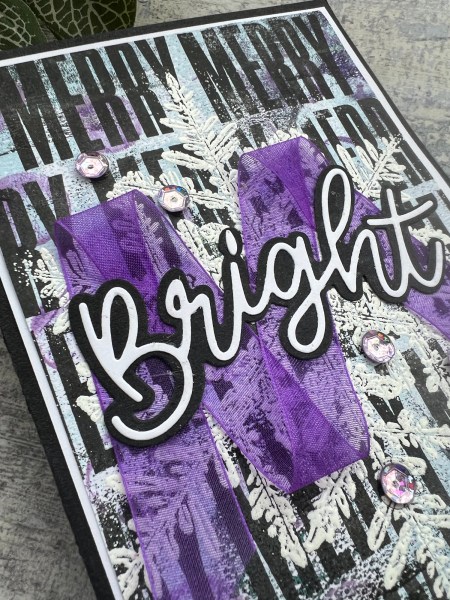
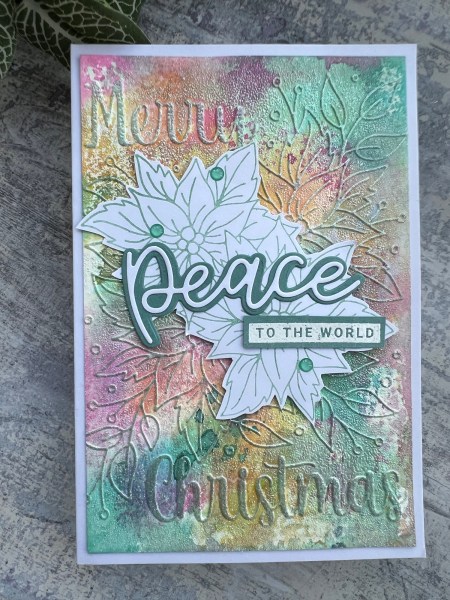
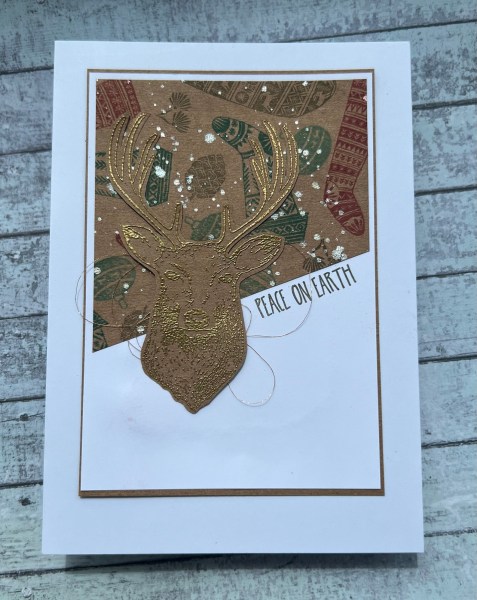
This card was made in three stages … firstly the iridescent paste through the stencil – which I then let dry (for a few weeks because I got poorly and then went away for a few days! Thankful I got ahead on my projects!). Secondly the sewing done in a different session on the sofa not as part of the video! Thirdly assembly!

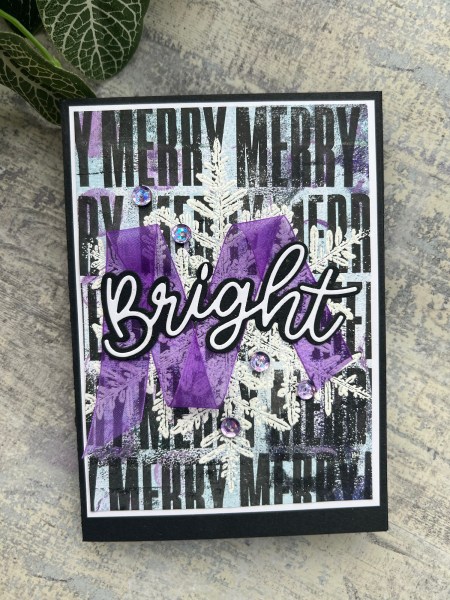
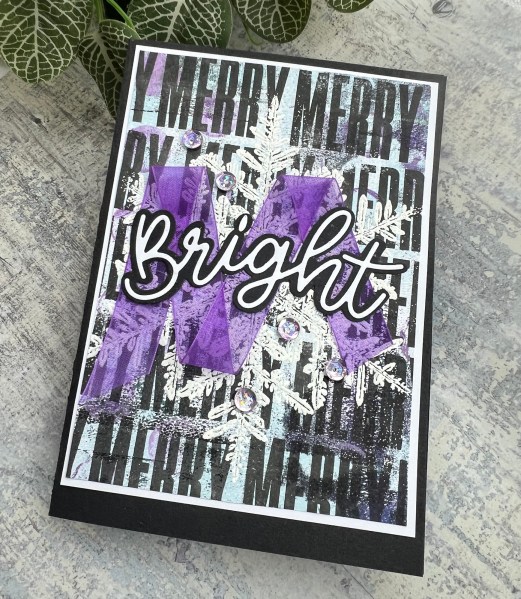
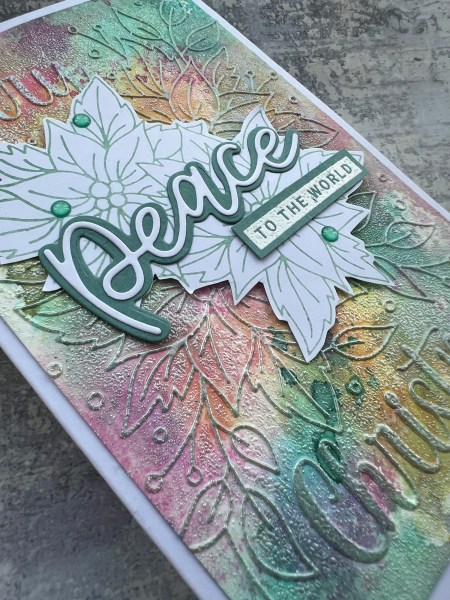
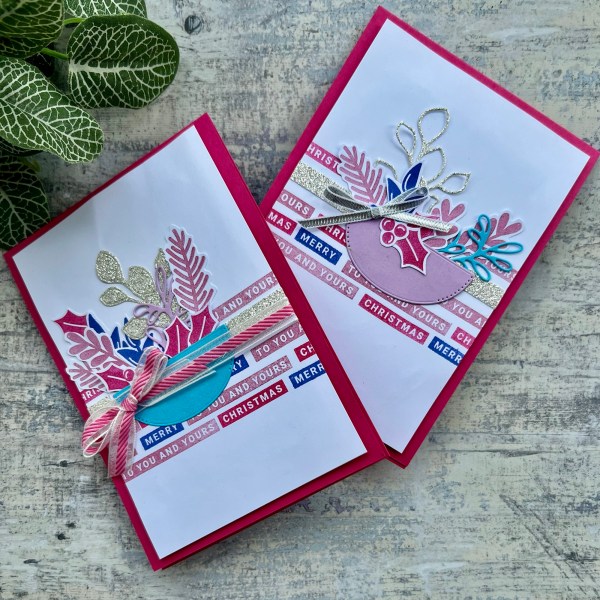
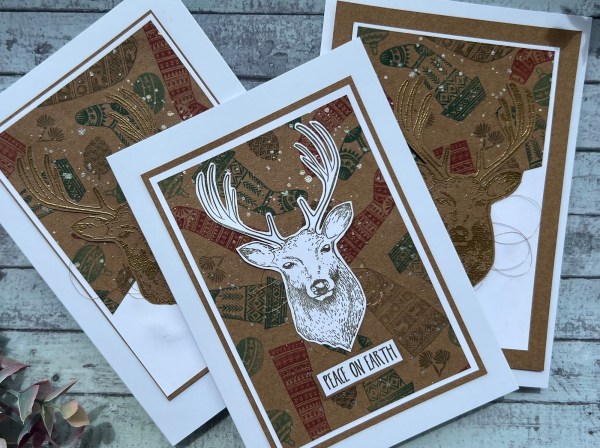
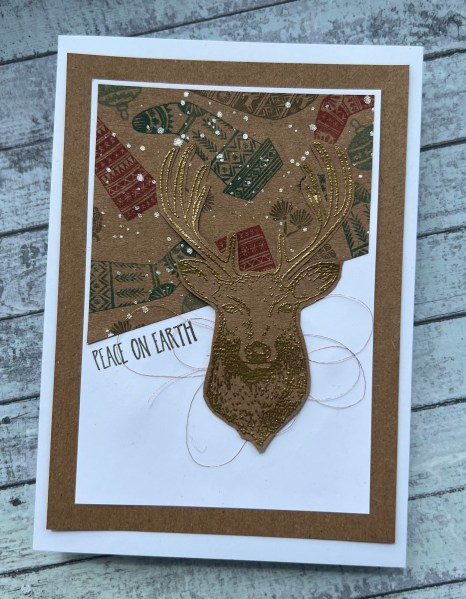
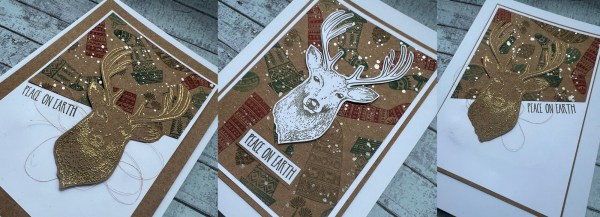
The card itself is quite simple … the paste creates a fun background with dimension and shimmer. Then a topper of a die cut with additional die cuts on top!

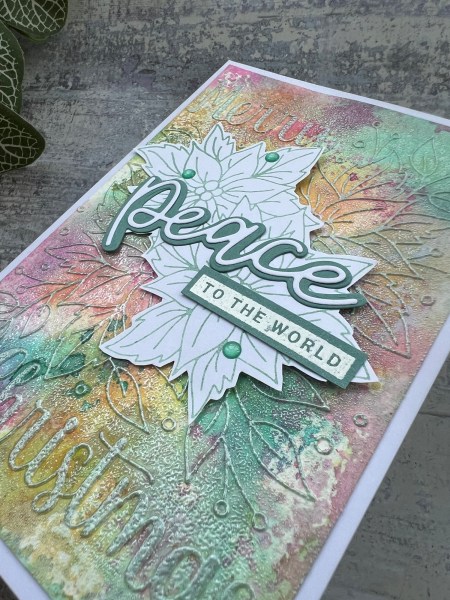
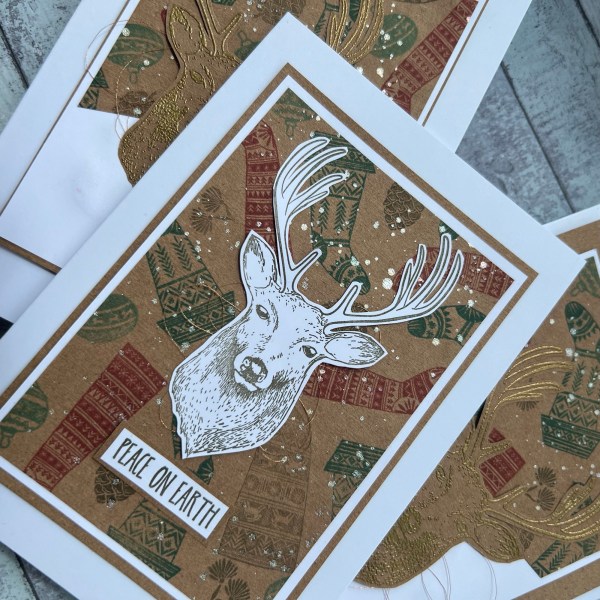
Obviously the sewing is what makes it special.

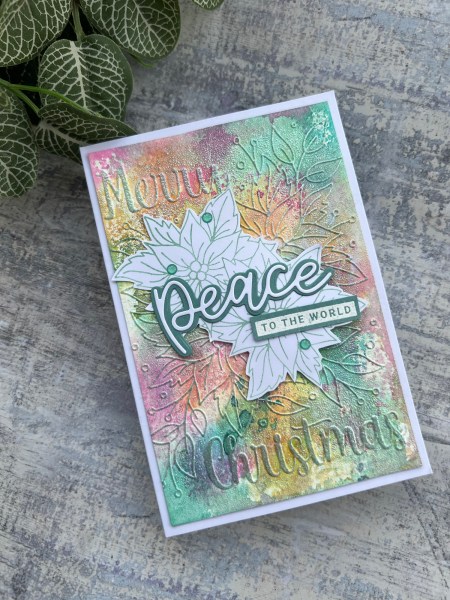
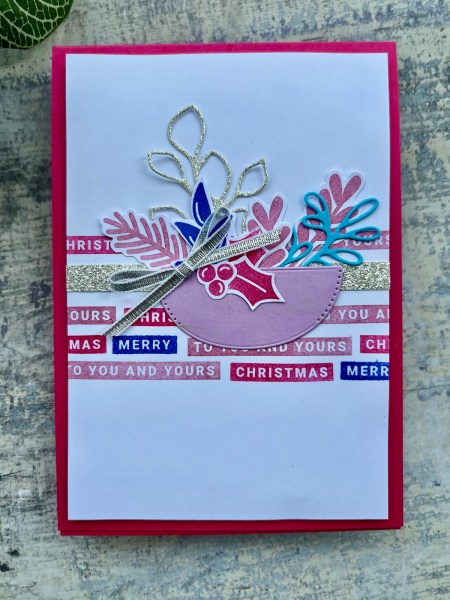
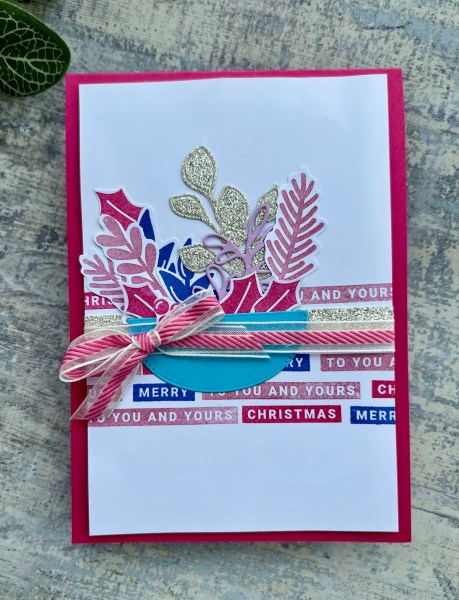
I chose the Merry Merlot cardstock base for this, then some darker thread for the leaves, some tone on tone for the smaller flowers and then light grey for the flowers with the gold centre.

I then chose the smoky slate for the letters and added some wink of Stella to add some more shine. The letters are also stacked three times for dimension.

Now I have a few of these die cuts already sewn ready to make into cards so expect some more at some point as part of my regular Festive Friday – probably won’t get a chance to use them again before the end of the month … although you never know!

Happy crafting!

Catherine

PS don’t forget to check out my YouTube for a quick process video!

Christmas in July – 22

Used my favourite ever Stampin Up stamp … Dasher… and whilst I did a lot of deer themed cards on the run earlier in the month it’s been a little while now so feel safe to pick up a deer stamp again!

He is just soooooooo gorgeous!

I started though by inking through the stencil to give the die cut a frame of white. Don’t know why I don’t think to do this more often! It’s a great technique!

Then I embossed dasher in silver.

I inked up the leftover card after die cutting and then die cut the leaves from frosted frames to sit behind the oval.

I decided to add a panel of embossing behind the oval too rather than a plain grey. Then added the white gesso splatters.

For the sentiment I used the waffleflower die and backed it with the inky cardstock too.

Love how this came out – and again if you want to see the process check out my video.

Happy crafting!

Catherine

Christmas in July – 21

So this was a quick card and definitely very funky in style!

I had a very grungy piece of gelli print and decided what I wanted to do was stamp the Merry word all over it in black.

Then I heat embossed with opaque white the fabulous Snow Crystal stamp (I love this stamp so much!).

Next some purple ribbon and the die cut word and some sequins to finish!

I mat the background panel with the white to give a frame before adding to the black card blank.

Very modern and funky Christmas card!

And that is project number 18 – watch the process video on YouTube 💜

Happy crafting!

Catherine

#dyicad 37 – 48

Been a while since I shared my #indexcardaday challenge progress. I did have to get a little ahead in prep for going away and then got poorly before that so it ate into my pre-prepared cards and made me have to do another little bulk make to cover the days away! Back up to date again now we are back from our little break in Somerset.

Each time I have managed to use at least one old postage stamp and raffle tickets and kept up with the addition of circles.

I then mainly used up scraps of stash off the desk and from the bits and bobs box!

Particularly liked using scraps of packaging and die cut waste.

I also started doing more doodles and mark making to add some pattern and definition.

It was good to get so many of the stickers used from the Art by Marlene sets that I’ve had for years.

Onto the final couple of weeks now so I am confident that as long there is no more sickness I should get there. I am then looking forward to having a clear out of the bits and bobs box as I think there will be some stuff I can actually get rid of rather than hoarding for no reason!

Finally thought I would share a pic of me and the hubby on our little break. We had a few days staying in this little lodge near Cheddar (whilst the daughter was with her friends in Majorca!) and had a great time. Unfortunately he developed Shingles whilst we were away so didn’t end up doing much exploring but did manage to relax and chill out for the few days!

Happy crafting!

Catherine

Christmas in July – 20

I am back to playing with the wreath builder again for today’s Christmas in July project. This time the Darcy paperartsy holly leaves and some masking and stamping to make it a little different!

I also experimented with the smaller size template with a 4×4 panel.

I used my Concord & 9th inks to stamp and on the larger card masked off the darker leaves once I had finished the circuit and then added the lighter leaves for behind.

I then watercoloured them to move the ink about and created coloured in leaves!

On the smaller one I kept to the same ink colour and went for a pastel theme.

On both I added the die cut words from the Joy set and added the coordinating stamped elements to finish the sentiment.

I edged the panels with the ink and kept them simple and flat.

I did add in the pop of the pink with berries from the Peace & Joy on this one which I mounted on the Coastal Cabana cardstock which I made into a small card.

Really been loving the cards I’ve made with the wreath builder and it might well have to stay on the desk as a tool to grab more often!

As usual video over on YouTube showing the process.

Happy crafting!

Catherine

Christmas in July – 19

Hello! Another festive project and once again using those inky backgrounds I made months ago and the die cuts I cut from scraps to get me past the mojo fail a few days ago.

This time I embossed the panel using a folder I got from a magazine and then added some embossing on the embossing!

This gave the background a lovely pearly finish. Then I stamped and fussy cut the pointsettia image. This gave a nice coordinating image to sit behind the die cut.

I added the rest of the sentiment from the Peace & Joy set. I also added some gems.

I keep it simple then just on the card blank with a small frame around the background panel.

Please check out the process of this coming together over on my YouTube channel.

Happy crafting!

Catherine

DT: Creative Knockouts – Christmas in July (18)

Hi

Perfect theme for this design team challenge for Creative Knockouts – Christmas in July – so it works perfectly for my full month of festive projects! So this is also day 18 of my Christmas in July !

I used the Hot Chocolate image from Polkadoodles for this as they are sponsoring the challenge at Creative Knockouts!

I used promarkers to colour the image and then chose patterned paper I thought worked with the soft colours I used.

I added the lace and the die cuts behind the image which again made the card look quite soft.

I also used a smoky slate card stock for the base again this makes it less stark than using white would have done!

Enjoyed making this cute card. As with my other Christmas in July projects there is a process video for you to enjoy!

Happy crafting!

Catherine

Christmas in July – 17

When I have a crafting mojo fail I often start die cutting scraps to at least get something done even if it doesn’t lead to me creating it helps me feel productive … and more often than not I do end up creating something as a result! So in my stash I have lots of pre die cut bits and bobs ready to create with. Well this card started very much as one of those mojo fail – just die cut sessions.

I die cut loads of the Joy dies (smallest and middle layers) in colours I thought might come in useful for Christmas cards. I chose these because I had not managed to use them on the previous card and had come up with a block.

My other way of clearing my crafty block is to make backgrounds and not worry about what they get used for. So I sorted through the stash of ready made backgrounds I had and found an inky piece I thought would work and grabbed that to play with.

I added gesso through a snowflake stencil to the background which changed the panel into a Christmas themed one. Then I grabbed some coral cardstock and adding red ink to an embossing folder I added the texture and colour.

This then sat behind the three Joy die cuts and gave them some variation from the background.

I added a second sentiment from Altenew and some gems and then mounted onto white and a white 5×7 cardblank.

I did video the whole process and as I say in the video I am not 100% in love with the card but I don’t dislike it – and so that’s ok. At least it got me creating and using those die cuts and another one of the ready made backgrounds!

Happy crafting!

Catherine

Christmas in July – 16

Well these turned into a challenge of a project I can tell you … totally lost my way half way through and couldn’t decide what on earth to do with them – but rescued them and love the final product!

I started with the stamping of the words on a panel of A5 and chose pinks and purples because I thought I would use the lilac word background dies I had already stamped but then changed my mind completely. So for at least half an hour I pulled out lots of different things to try and then ended up creating a floral cluster in a vase and loving the very non traditional cards I made!

The word stripe was inspired by a card I remembered Deborah Wheeler doing that I liked but never got around to trying out.

I used all the lovely foliage stamps in the Peace & Joy stamp set and then fussy cut them (hate that they don’t have dies for these too) and then from Splendid Stems I pulled in a few of the dies including the vase/bowl and created my floral display.

It was good to use some glimmer paper too – I’m not a fan of glitter stuff normally but in small quantities like this I can cope!

Inside the cards I did some stamping in the corner of the white panel to keep it tied in with the outside of the card too.

I do love how these cards finished up but goodness me it was a trial in the middle till I ended up with my floral focal point! Check out the video of the heavily edited process! 😂

Happy crafting!

Catherine

Christmas in July – 15

Decided to grab an old magazine stamp set to make a background onto Kraft.

From this I made three cards.

After all the stamping in the background I added some shimmer splatter. I cut the piece into three panels and each one got added to a panel of white cardstock.

I stamped the deer head twice with versamark and then gold embossed, then a third time with the brown ink onto white. I fussy cut each of them.

I mounted each of them onto a further panel of Kraft and between the stag head and the background I added a panel of the copper twine.

I added the same sentiment to all three to keep it simple.

Just love the shimmer and the way it changes as the light hits it.

Also just realised I’ve done three different deer projects on the run so will try and grab something different for tomorrows!

And for those that fancy watching the process – here is the video!

Happy crafting!

Catherine