I am an on-the-side and increasingly up front papercrafter who loves nothing more than getting inky and creating pretty things with paper and stamps!
I am also a wife to lovely hubby and mummy to a wonderful 14yr old princess.
I decided to join in with Kendra’s card challenge again. It’s been a while since I did this but I loved doing this again.
The challenge #12 gave me a quite a few cards all of which will be gifted to the auntie for her to use.
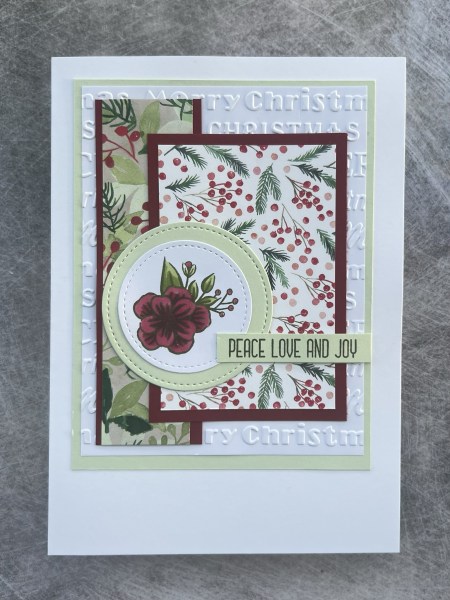
I used Painted Christmas papers along with one other from Tidings and Trimmings. I then had lots of fun with embossing folders and stamps and cut apart bits of dsp.
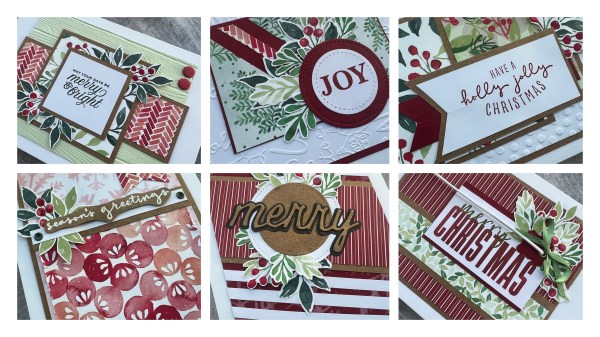
So here are the first batch of cards and tomorrow will share the rest.
These ones all used the cut apart parts of another piece of dsp to embellish the cards.
The next few were one offs … each chosen differently.
This one using a stamp from an old kit from Stampin Up.
Well we are home from our holidays but sooooo much laundry to do so no time for crafting …. So this is from a few weeks ago!
So I have had an idea in my head for a while inspired by a few other crafters of having bright florals against a black or very dark background but struggling to work out which way to do it … this card came from one of the attempts and although I love the final card it isn’t quite what I had in mind originally so will keep trying to achieve that.
I started with the background and stamped the flowers on either side of the panel and then coloured them with promarkers. Next I coloured in the background with a warm grey and then as that didn’t look dark enough I went over it with black soot distress ink. This got me closer to the final effect I wanted. I then embossed the images again over the top of the colouring to make the line art stand out but chose gold instead of the black.
This reminded me of the cards I made using the one Liane had shared as inspiration so then I grabbed a text stamp and added that with embossing to the other spaces on background and I was happier with the background.
I then stamped, coloured and coloured the background to the floral stamp again before embossing and fussy cutting it to sit on top of the background. I then splattered everything with white gesso.
The background on the cut apart piece I kept with the warm grey to add contrasts with the background.
I stamped and embossed the sentiment and then coloured the cardstock with daffodil delight ink and the mat layer with black soot. I then sandwiched the bakers twine between the sentiment and the images to create a cluster of twine.
I added the black gems as final embellishment and then added it to the 5×7 card blank.
So I do love this but it isn’t quite what I had had planned so back to the drawing board on getting the effect I was really after!
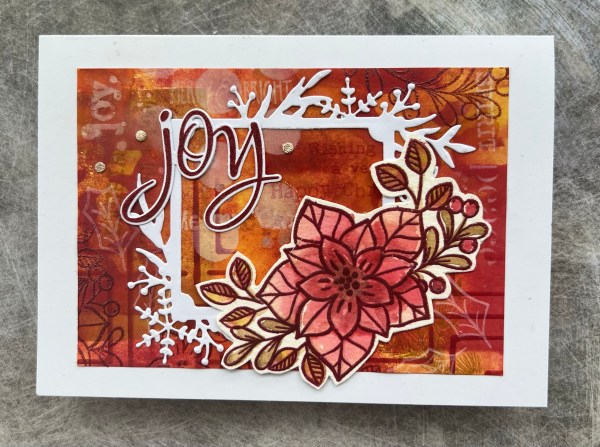
Hello all! Thanks for popping by my blog. I have a large card I made which has lots of bright cheeriness along with the beautiful Artistic floral cluster die.
Now there is quite a lot going on with this card. Firstly a pre-made gelli plate background for the patterned paper on the left and then a sprayed piece of cardstock I embossed in the debossing on the right.
There is a lot of Kraft cardstock layers and then the lovely Artistic die cut flower section that I stacked up a couple of times to give strength and then cut round to give it a white frame (this is my main grumble for this diecut – it didn’t come with a frame die cut!)
I added some pierced holes as a border on the Kraft middle panel and then that gorgeous yellow ribbon and the sequins to add more texture.
The sentiment is a mix of die cut letters (again stacked for dimension) and the Paperartsy sentiment which I embossed to pick up the gold from the embossed debossing panel.
All in all, lots going on and I really like the final card.
One final card (the remaining panels of the masterboard are still sat in the to be used folder!) … and like the last couple I used the background die to create this.
I die cut the panel then die cut the frame a few times from white so it stands thicker then slotted in the middle sections again.
I then stamped and die cut the sentiment using the Colorado crafts stamps and dies.
Then I added the Darcy holly leaves which I had created using scrap cardstock I had inked and then embossed the holly leaves in silver.
I then added some gems to finish off.
Really love this … it is quite a chunky card with the raised frame but I love it… also love the monochrome scheme.
I have another Paper Blooms card I’ve made using up those fussy cut bits of dsp from one the patterned paper playtime pouches.
I went a little overboard with the foam and created a dimensional background.
Not sure how evident it is but I had also stamped in the background using tone on tone a starburst type background using a turnabout stamp but I pretty much covered it with the flowers so you can barely see it!
What you can probably see is the dimension this card has with all those raised blooms—- I love it!
I decided to die cut the sentiment using white card stock and stacking up both the shadow and the actual sentiment. I did colour the sentiment though using stampin blends so it would work with the colours on the card.
I used the small happy from the Peace and Joy set for the rest of the sentiment, white heat embossed onto some of the coloured in cardstock again to match.
I then added lots of gems into the spaces between the blooms to finish off.
This is the last of this pouch of bits too as I added some to the inside of the card onto the white insert just to finish off!
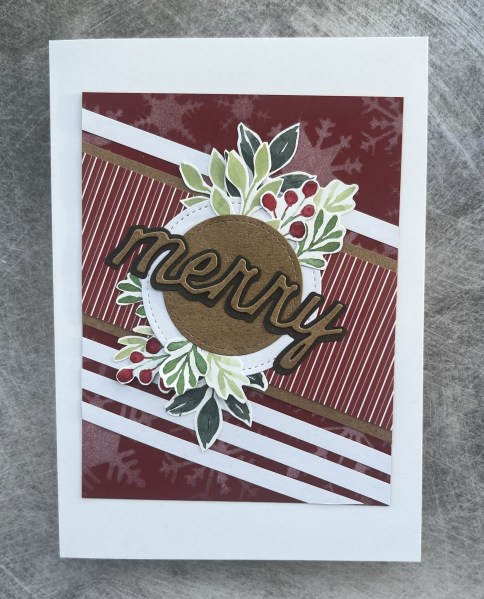
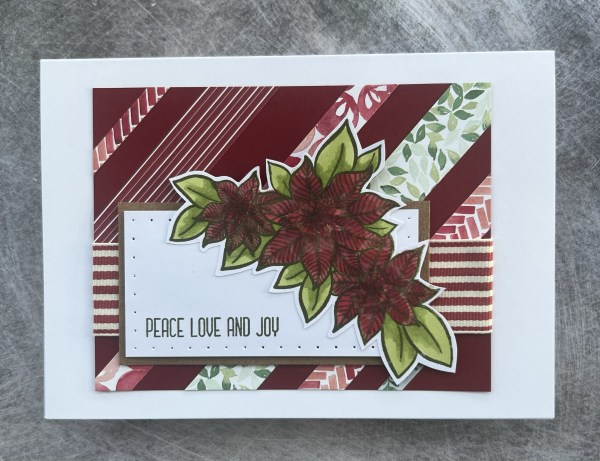
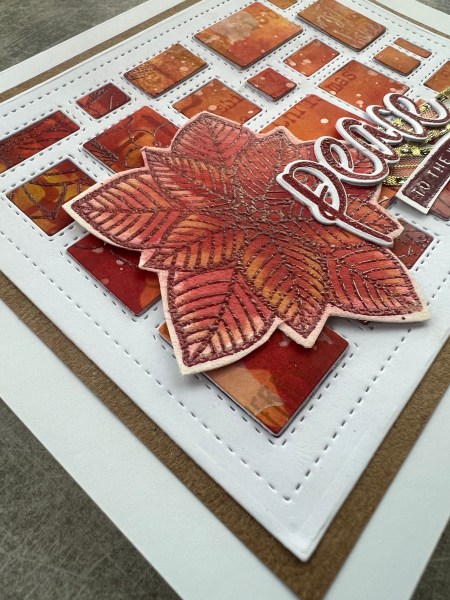
I used the fabulous background die to cut the red panel and created two cards from it … one using a white frame to house the pieces and the other straight onto the card blank.
There is so much texture on this one because once I had added the frame I then used leftover pieces of the white frame to add back into the frame, sometimes three or four deep and sometimes leaving without a white piece which means when I then added the pieces of the inky background in it has different dimensions for each piece.
Next I created the flowers for both cards … I used the watercolour with embossing on the top …
… this really transforms the embossing and I love this technique.
I added the flower on this one with a piece of gold ribbon and a Colorado Craft company stamped and die cut sentiment with the Peace & Joy stamped sentiment to finish off.
I love the Kraft mat layer too to finish it off.
This one I added some die cut leaves … lots of them!
I then added an embossed sentiment which was on coral cardstock.
I really love these cards… admittedly the stacked one was a little fiddly but I enjoyed the puzzle of putting it back together again.
I have one more card to share with you … and two background panels left … but they are safely tucked away for another day and the final card I will share in a few days.
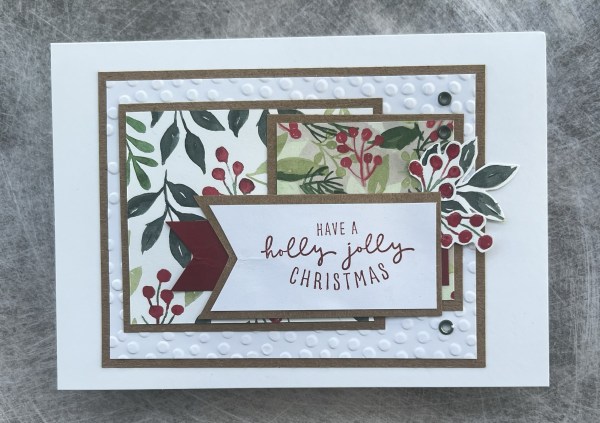
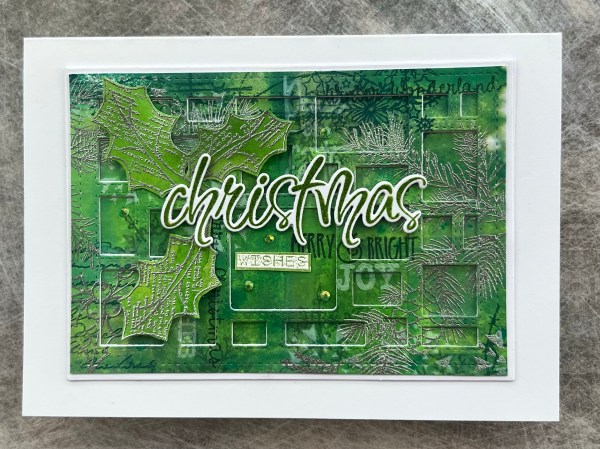
This time I added die cuts from the Frosted frames to break up the background.
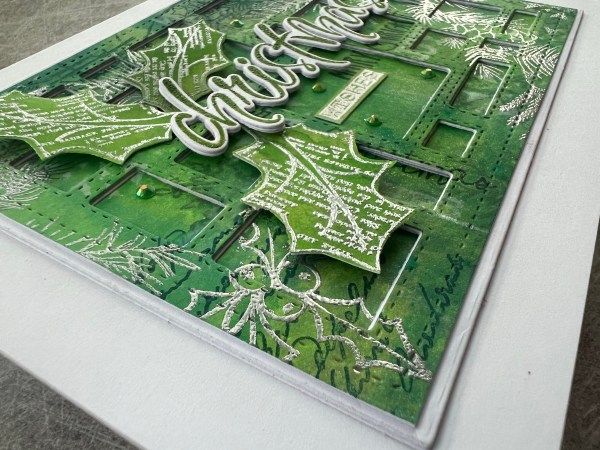
On the green one I cut down the background a little and then stacked up the inside panel a lot with both Kraft and white cardstock so it sits proud of the rest of the frame.
I then stamped the sentiment with green ink and added clear embossing to the top to make it shiny and slightly raised.
The red one I went back to the stamp set I had used in the background and created a watercolour floral element and did the watercolour with the same colour inks and then emboss the line art over the top again.
I then used the Colorado Craft company to stamp and die cut the sentiment.
Doing this one did make me inspired for the next two cards I will share on a different blog post… but before I get to those … I added the little die cut rose gold die cut circles.
Love how these turned out… but wait till you see the next ones!
A few months ago I made two masterboard backgrounds as I was inspired by a Jennifer McGuire video to just play with the stash I have got and I then made some cards … a total of six so far but will share them over a few blogs to spread them out.
Let’s start with the how… I tried to remember to take in progress pictures.
I started by creating the first inky layer with the brayer just like Jennifer. She then did a spray of the distress mica sprays but I don’t have any so I made my own using Dylusions and some perfect pearls. I used yellow for the red coloured one and then added some blue to turn it green for the blue one.
You wouldn’t believe how sparkly this makes them … they look gorgeous but it never comes out in photographs so you will have to take my word for it … super ✨ soarkly!
I did the same as Jennifer did and cut the panels up first and then taped them together. Next I added stamping, stencilling and had lots and lots of fun!
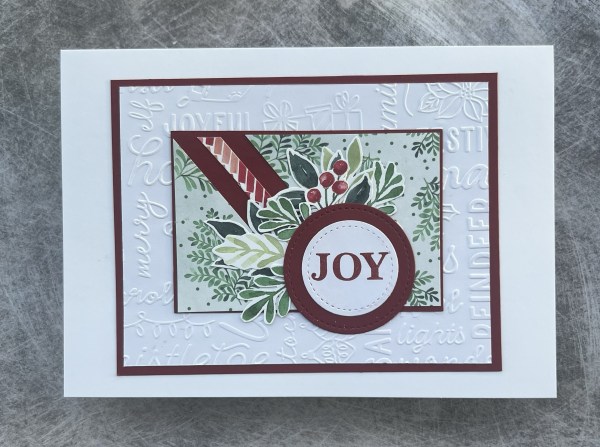
I started by die cutting the panels with the pierced background die from waffle flower and then cut them into angled panels.
I decided to keep it simple for the first two…
I stamped and embossed the deer image and stacked up the cardstock so it was nice and thick and fussy cut it out.
I stamped and embossed the sentiment and then added some gems.
The pierced die cut adds some extra subtle elements.
For this one I blended ink onto some scrap and then embossed the Darcy holly leaves in silver to coordinate with the embossing in the background.
I then added sequins to embellish and the embossed sentiment layered up on the green leftover panel.
I’ve shown this many times on the blog … using up bits off the desk to make a card. Todays is another one of those.
The background uses a piece that had a few mop up splatters … so I embossed it, lightly ran over with an ink blending tool and added lots of splatters to it in the colours I thought would work with the seagull image.
The seagull digital stamp was already printed off and still on the desk having used it a week or so ago for another card. Perfect for cutting out and loosely colouring with ink and water brush.
The Kraft card I embossed with some ink on the embossing folder to give depth to the embossing colour. This was just a scrap sitting on the desk that was the perfect size for this layer.
The ribbon I did hunt through the stash for so that and the paper clip I added rather than just grabbing from the desk.
The teal card was some scrap where I had wiped off the brayer … there was only a small piece left but I loved the texture on this so glad to have found a use for it.
Finally the sentiment … I often stamp multiple sentiments in one go just in case the first doesn’t work out and this was one left over from another project … just needed cutting to the right size and adding onto the card.
I chose a watery teal colour cardstock for the blank and then added the card front panel to it and an insert inside to finish off!
Oh those Kraft circles are leftover bits from the zero waste leaf die I had cut (I’ve kept leftover circles in a little pot for using as flat embellishment!)
I have had this Mama Elephant stamp (plus the cat version and the snowman version) for a long time. I love them, but rarely use them and I just had a desire to use it. So I stamped it, masked it and then stamped it again to create a taller grouping of the pups!
I then used all my neutral promarkers to colour in the individual dogs. They are so so cute and I just love colouring them in.
Once coloured (including the pops of colour from either their accessories or the envelopes) I masked them again to blend the sky area with a mix of different bright blues.
Then I stamped the sentiment on the top and decided to leave it at that.
I did add a little gelly roll glitter pen to the bow ties and the hearts and the top party hat, but none of my usual over the top shimmer, shine or gems!
I mounted it onto a black card blank and added a white insert inside to make it easy to write to the recipient.
Love this image and how easy it is to transform into a portrait image even though it is normally a landscape one!
Watch this space the cat one may have to make an appearance too soon! (And maybe the snowmen one too!)