I am an on-the-side and increasingly up front papercrafter who loves nothing more than getting inky and creating pretty things with paper and stamps!
I am also a wife to lovely hubby and mummy to a wonderful 14yr old princess.
I delved into the box of stuff that was half made and just needed putting together or finishing off and came up with this card.
The background I had already put together probably around 12 months ago so I just needed to add that to a card blank with the ribbon, the cute bear and the sentiment strip.
It was good to get this card made from all bits and pieces in the stash.
So after I finished the card I shared a few days ago I decided to have another go at embossing with the Merriest Moments set and getting the debossing embossed! And got it the right way round! To give credit where it is very much due this is inspired by a Jennifer McGuire video.
I used the white sparkly embossing powder and this time on Kraft cardstock … and then went to town with stamping and embossing to keep the card to the white and Kraft feel.
I know on the main pics of the card the embossing looks cream but really it is white … not sure what happened with the pictures as it was natural light I took the pics in! Ah well you win some you lose some as they say!
I love how this card came out … the little flowers I just die cut from the Kraft to add contrast and the rest is all embossed.
Finished off the flower centres with the iridescent snowflake embellishments which change colour as they catch the light.
The background piece I decided to use the scoreboard (an oft neglected piece of equipment) to create the debossed stitch line… it just broke up the background and gave a subtle finish.
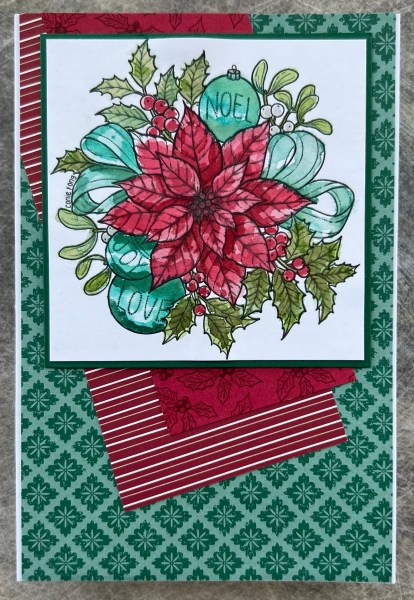
Today I’ve got three cards all using the same image and all kept pretty flat for a change!
I used a Connie Fong digital stamp that I had been given for a Design Team a few months ago and had printed a few times so thought why not use that and colour it three different ways to make up some cards that were similar but different!
I used patterned paper from the stash and this time kept the sentiment off the front and instead stamped the inside of the card instead.
The first one I coloured using stampin up inks and water with a brush.
The colours are really vibrant and as I had used teal type colours I went for the blue toned greens for the background paper.
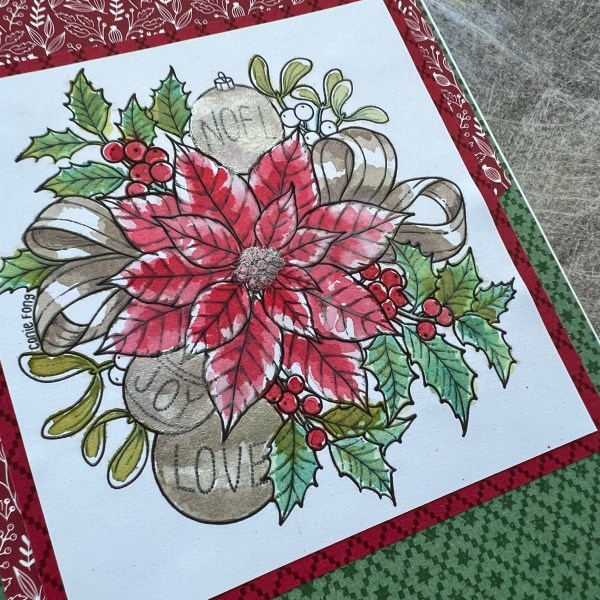
For the second card I used distress inks and more water so it is a little bit lighter. I also added some shimmer ink for the baubles and the centre for the flower.
This time I chose browns for the ribbon rather than blues. So the green background is garden green which matches with the leaves I think. I really like the pop of the shimmer and the brown ribbon.
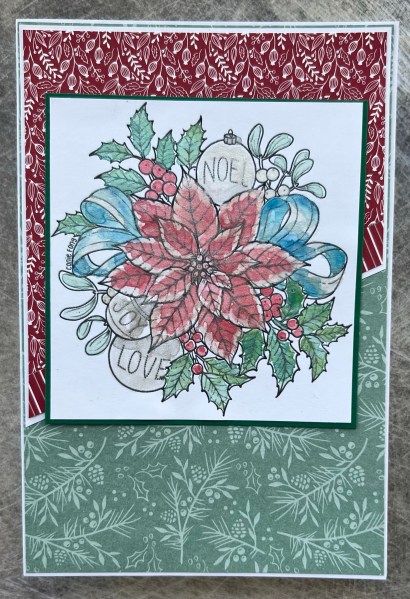
The final one I went all in with the shimmer watercolour and did the whole thing with them. This gives it a much softer look and clearly everything shimmers!
I went back to the blue for the ribbon though as I wanted a bit of contrast. But this time I went with the soft green of soft succulent in keeping with the softer look of the painting.
So that’s three cards using the same image but each coloured differently for three slightly different looks!
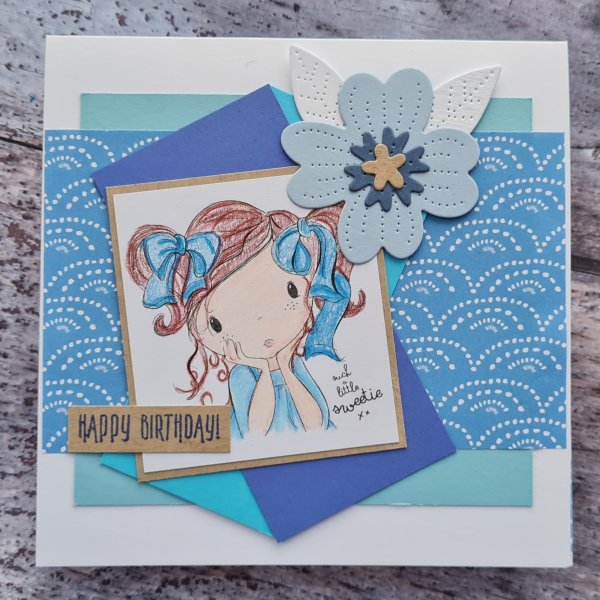
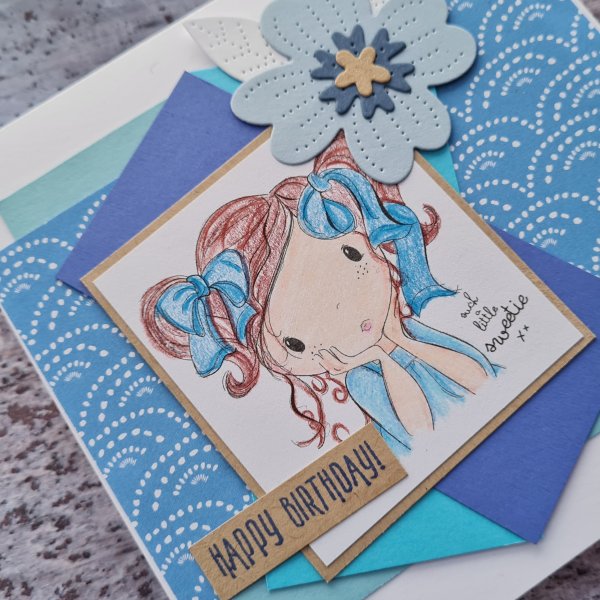
I decided to go all Blue with this card, using an image I coloured ages ago (one of the digital stamps I had printed out and stored in a pouch!)
Then I chose some Blue patterned paper from the stash and scraps of different blues I had lying around.
I added in a bit of Crumb Cake too for contrast.
I decided to embellish it with pierced blooms die cuts and made a layered flower.
Of course inside I had to add some more paper just to add a little something.
And so just like that another year if contributing to the HLS design team for the Anything Goes Birthday challenge. Loved this challenge as any style goes and can just play and make the always useful Birthday cards!
Unfortunately though this is the last month of HLS as Kylie who has steered this ship for so long is having to rest the challenge blogs at the moment. I really hope that she only rests them but totally understand her need to do so. Hope you’ve enjoyed my contributions as much as I’ve enjoyed making them.
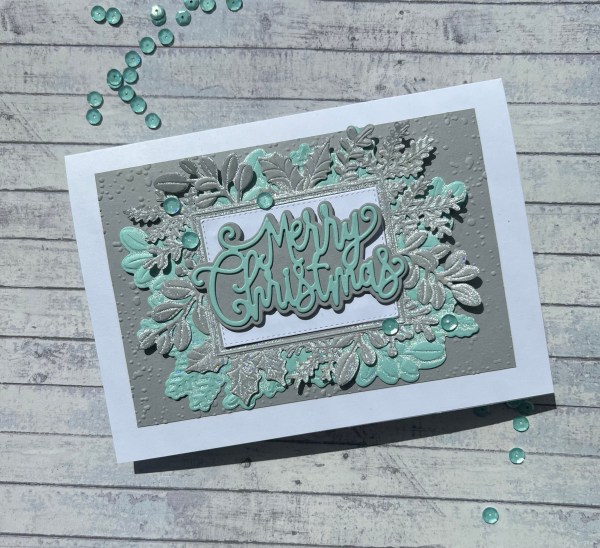
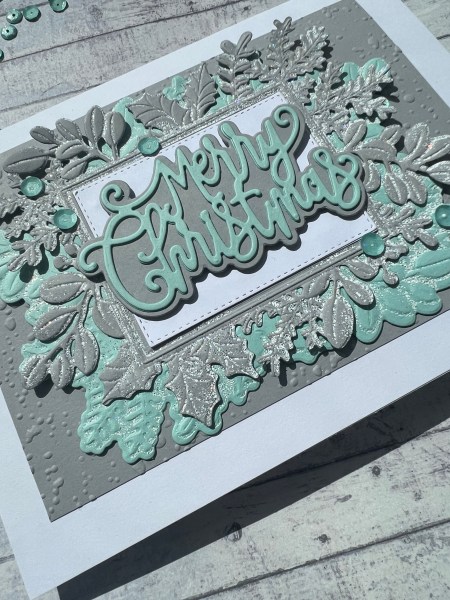
Todays card I actually started back in July but never got round to finishing until very recently … inspired by Jennifer McGuire.
I watched her video where she did embossing using versamark on the embossing folder and the powder sticks into the crevices and decided to try it on this Merriest moments folder … but couldn’t work out which side would emboss and which debossed! So got it wrong … so stuck the attempts to one side figuring I would get round to using eventually!
So what had happened is that the powder stuck in the crevices but around the embossed images and to be honest it still looks pretty! Especially when the image is die cut out which this set does brilliantly with two sizes of die cut!
Both the grey and the pool party I had embossed with a glittery white powder so this makes it extra shiny and sparkly … a bit like snow in sunlight!
I then embossed a simple sheet of the grey for the background with snowfall and then added the Tonic sentiment (again I created this at the same time back in July and just set it aside!). Finished off with sequins.
So not exactly what was intended but a pretty effect especially when layered up… to be honest I don’t think you can go wrong with this embossing and die set … they always make pretty cards but love the embossing to make it extra sparkly!
Thanks Jennifer for the inspiration… will have to try the technique again and get the embossing folder the right way round!
Also if you didn’t see it here is the original card I made back in July with my first embossing on embossing play from that session inspired by Jennifer.
Happy 1st day of advent … and here is my final patterned paper playtime session of the year.
As with all the other months this year I used a sheet of dsp I cut apart and then put all the elements I had cut apart plus some more solid panels into a pouch ready to use when I was ready to play. It has certainly made it a lot easier to get the project done as the decision making was done already on what to use and the basic theme of the card.
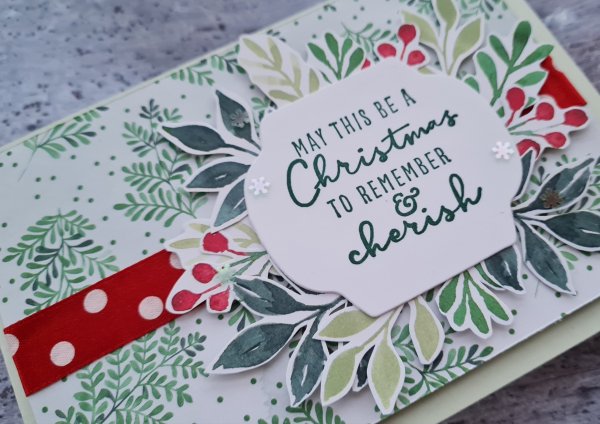
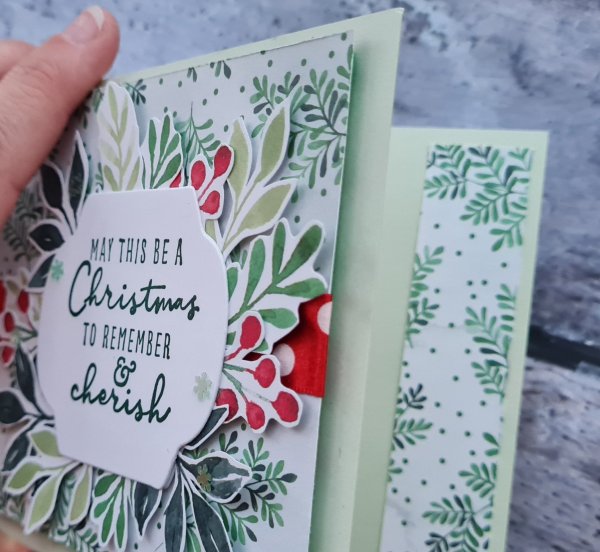
Of course as it is December I have gone with a Christmas themed paper… Painted Christmas.
This paper gave me a mountain of little leaf images… perfect for surrounding a sentiment panel or making wreaths. I went for the former design choice.
I also had some panels I left uncut so I could use the gorgeous reverse of the paper too.
So this is actually a simple card using the paper, a ribbon, a diecut label with stamped sentiment, some gems and of course those fussy cut leaves and berries.
Of course it was simple mainly because all the work of fussy cutting was done in advance and so I only had to do a little bit like stamping and die cutting the sentiment and then it was just assembly time!
Inside a strip of leftover dsp …. all in all a sweet card! And I have lots of leaves and a few panels left for more cards if I want to… and the sheet of dsp …. this is the remains!
I have loved this patterned paper playtime I’ve been doing each month and the way it worked. I think planning ahead is a great way of then just sitting and having fun as almost all the elements are ready to play with. Not entirely sure what to do for next year’s challenge as I’ve kind of run out of the dsp that works well as a cut apart so may need to have a different think for next year… of course I have plenty of dsp left but it needs tackling differently I think.
Ah well will need to get the brain in gear to have a think.
My intention is to post everyday up to Christmas as I had a fair amount of November off due to lack of crafting time … so let’s see how I get on and how many times I go back to this stash of patterned papers.
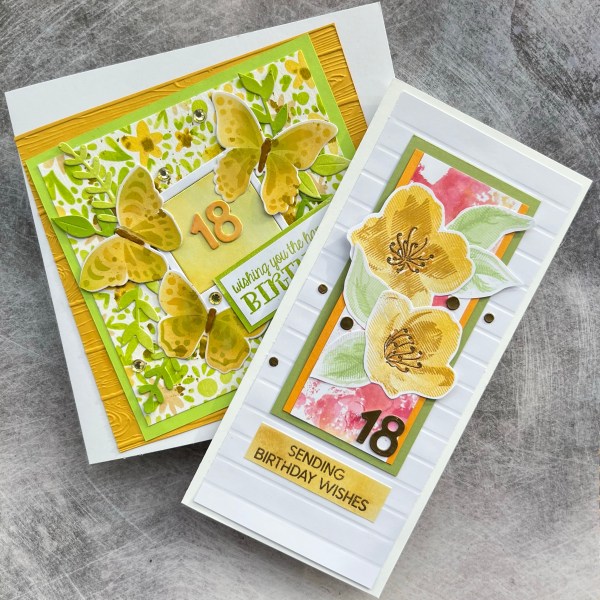
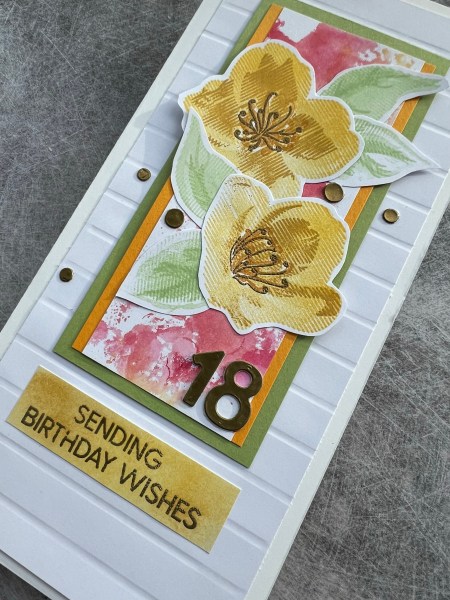
Hello! Another birthday card made for the lovely Niamh … this time the one from me and the hubby!
Kept it coordinated with the other in terms of colours …
… but added in the pink watercoloured background!
Used some of the zig zag flowers and leaves as the focal points then some gold embossed cardstock for the 18 and used the centre of the 8 for the gold circle elements as embellishments.
I also heat embossed the sentiment in gold with added ink behind to blend in with the yellows.
The background sheet was a piece of white cardstock and I dry embossed the lines to break it up and add some interest.
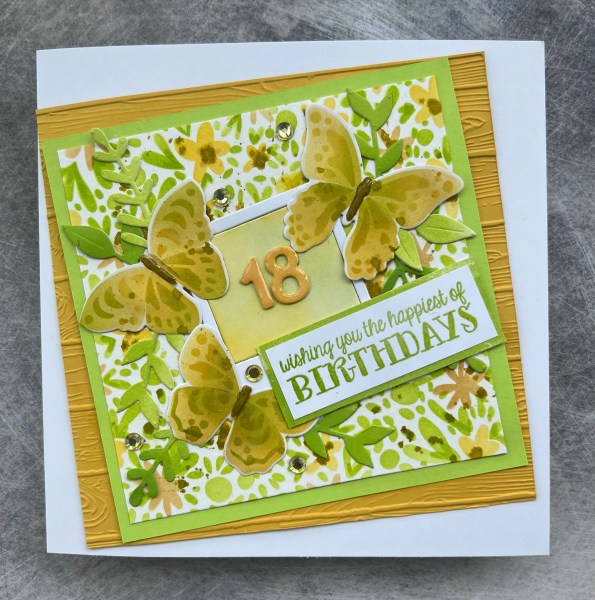
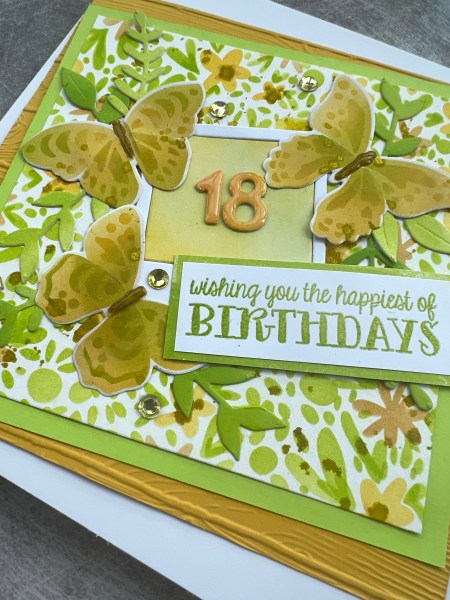
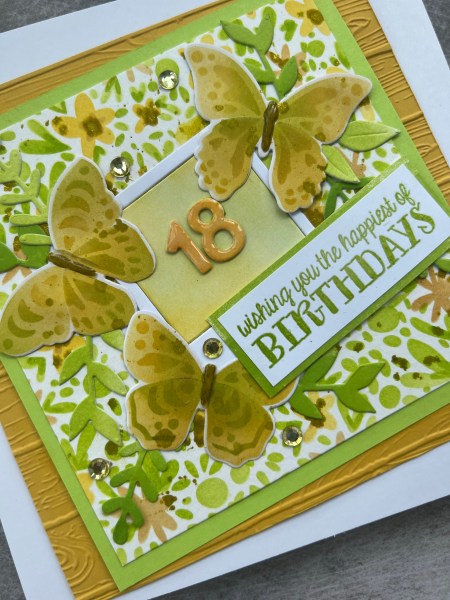
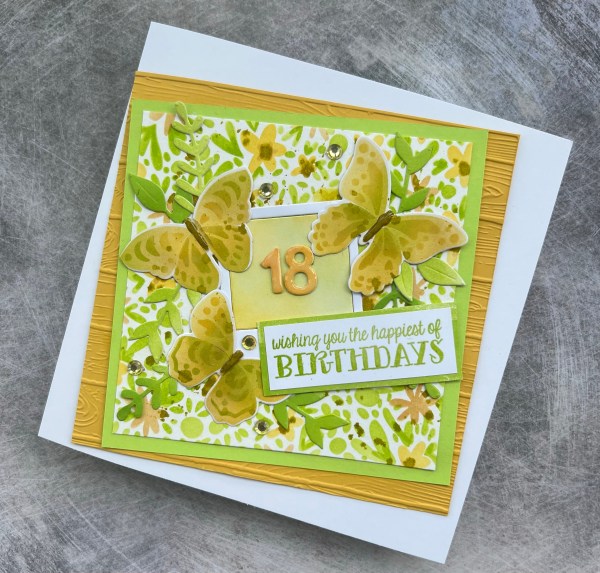
Time to share another 18th birthday card… this time for the lovely Niamh. The brief was yellow and I wanted to play with the Concord and 9th butterflies again so they became the focal images for this card.
I decided yellow and green would be the colour scheme so inked the butterflies using daffodil delight, hello honey and parakeet party.
I then did the same colours for the Altenew layered stencil. I also added some splatters of gold wink of Stella over both the background and the butterflies. I find the gold wink of Stella has a green hue to it so it worked well with the colour scheme.
Next I inked up more cardstock with the parakeet party and die cut some leaf shapes using the Sizzix dies I used these to ground the butterflies and also to add more texture and interest.
I decided to cut a Polaroid frame from the same set and inked the central portion and then added die cut numbers which I inked, added clear wink of Stella and then added glossy accents to so they are super shiny and stacked three times so very dimensional.
I then stamped the sentiment in the same ink and clear embossed to give it some shine and darkened the colour a little. I cut a mat layer from the same inked panel as I had die cut the leaves.
I then mounted the panel onto the parakeet party cardstock and then a panel of Hello Honey cardstock I had embossed with the Pinewood planks to give it texture.
I love offsetting the layers so that it is purposefully wonky and also it helps then if a layer isn’t quite adhered straight … far more forgiving!
I added some glossy accents to the bodies of the butterflies and then coloured some clear gems with alcohol inks to give them a coordinated look for the project and added them as embellishments.
Hope you like this card … I love making it and of course Happy Birthday to the fabulous Niamh whom it is a pleasure to know.
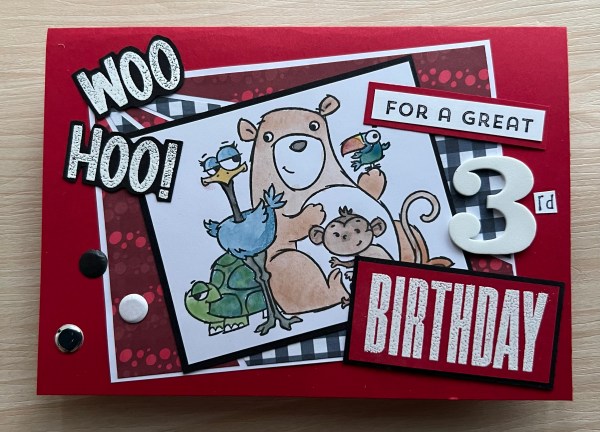
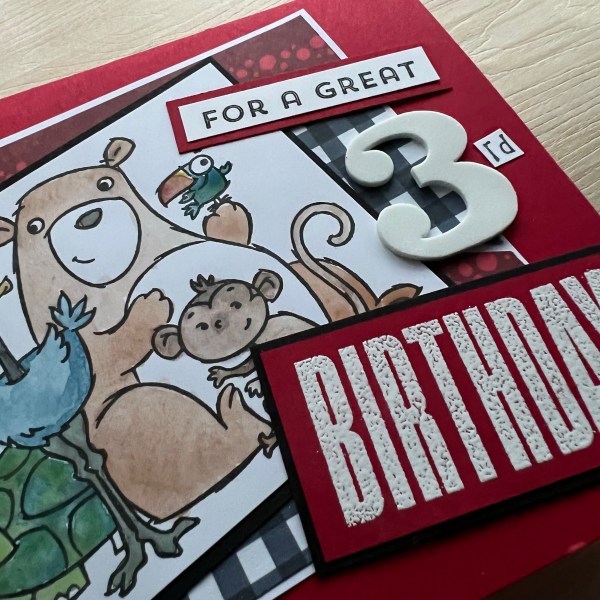
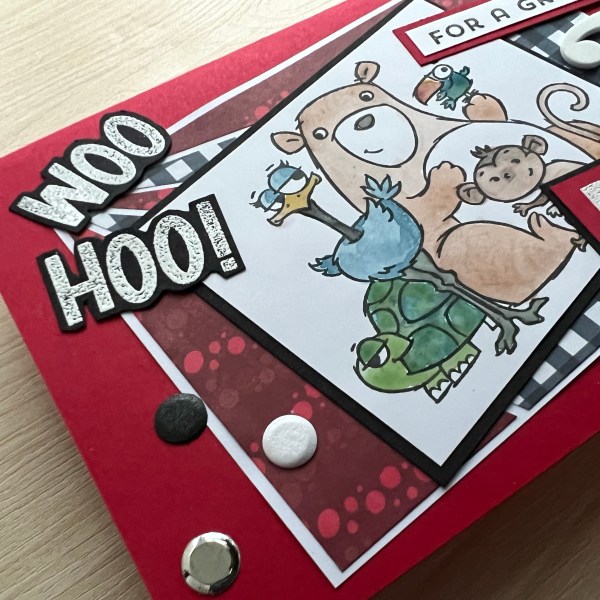
Todays birthday card I am sharing was made using up some leftover Christmas paper from a load I cut up and never got around to finishing for a sheet load of card template but I saw it and thought this would work with the fun From All of Us image for a card for my great nephew whose birthday was earlier this week.
So once again showing that Christmas themed paper isn’t just for Christmas !
I decided to add a few sentiments together … amazing phrasing, biggest wish and Lovely inside and out and embossing and layers and some fussy cutting which made a fun sentiment along with the foam sticker for the number!
All the layers and the patterned paper work well with the fun image which I had coloured using watercoloured inks.
I then added three card Candi for embellishment… plus because he turned three! And here is a pic of the birthday boy at his party last weekend stolen from his mums Facebook. Isn’t he adorable?
I took two more of the stitched die cuts and created a couple of cards using bits and pieces off the desk.
This one I had a piece I had been stamping to practice using a wreath template thing I had bought … not got another example of using this yet but this was my tested using some Tidings and Trimmings stamps. I made a couple of errors but it was fine once the centre was covered so it had been sat there waiting for me to finish.
I added the tree over the top and then the die cut Merry. To tie the elements together onto the 5×7 cardblank I added a strip of the cherry cobbler cardstock which I embossed with the fern folder.
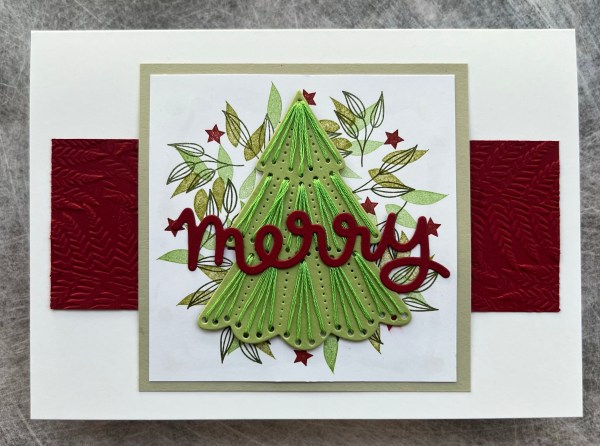
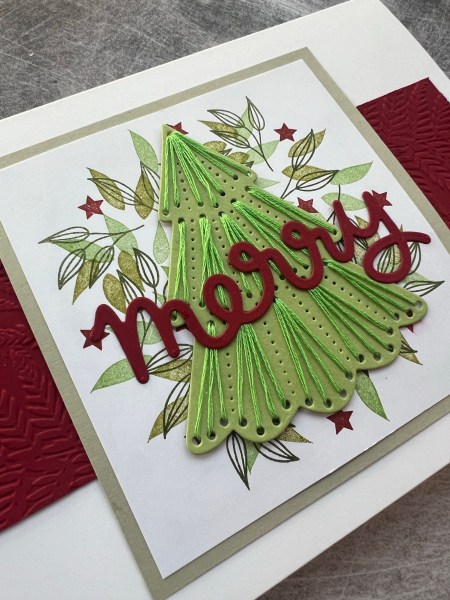
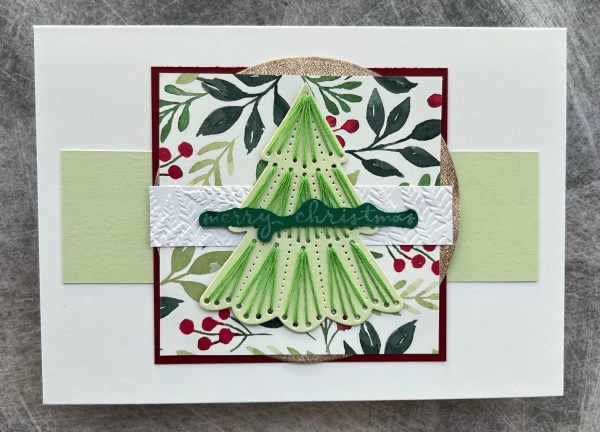
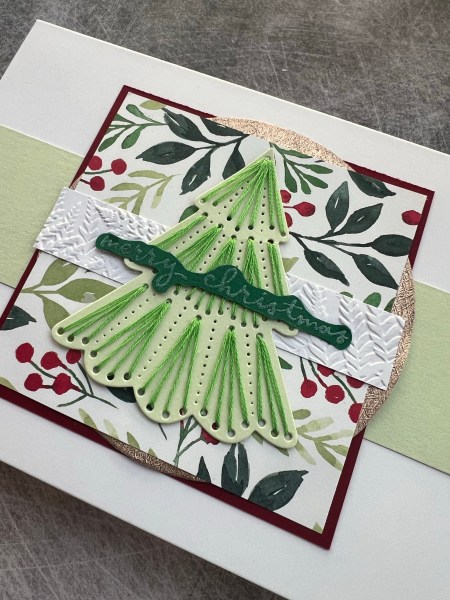
The next one I kept to the same layout but this time patterned paper behind the tree.
I also added a strip of the white I had embossed and the sentiment is from Christmas to remember set embossed on dark green. I also tucked a rose gold circle beneath the square but it barely shows so kind of wish I hadn’t bothered.
I do love these stitched trees and will definitely be using this multiple times in future for Christmas cards … also have an idea of using it and adapting it into a flower … need more time to get the ideas all turned into something!