I am an on-the-side and increasingly up front papercrafter who loves nothing more than getting inky and creating pretty things with paper and stamps!
I am also a wife to lovely hubby and mummy to a wonderful 14yr old princess.
I have another stitched flower card using the blooms I stitched a while ago … this time I used three in total. I made up the card just over a week ago but only just got around to blogging it because of the virus. Good news is I am feeling better. Although I type this in bed at just gone 1pm I have managed to be up and be productive most of the morning and been for a short walk outside so much improved on the previous days even if now I am back to being tired and in bed again! Fingers crossed I’m almost back to being healthy again.
On these I had kept to the same peach coloured thread so I added some rose gold splatter to the background I had inked and stencilled lightly. I also stamped the sentiment in peach and added the peach sequins too.
I raised the background panel up on some foam to give the card dimension too.
Still got lots of ready stitched blooms to play with next time I decide to make some flowery stitched cards.
Happy crafting!
Catherine
PS found that ribbon after I had finished the card and wish I had found it earlier and added some under the sentiment … ah well … it made it into the picture even if not onto the card!
Weeks like this I am so glad I craft a little ahead of time and get lots of projects done over a couple of days because this week I’ve barely left my bed thanks to a horrible virus. So the cards I’ve got to share were actually made a week ago when I panicked because I hadn’t got anything made for Festive Friday! Thankful to have been ahead for this week as otherwise it would have been a week off the challenge. Fingers crossed I am over the worst of this virus and should be back to being vertical next week!
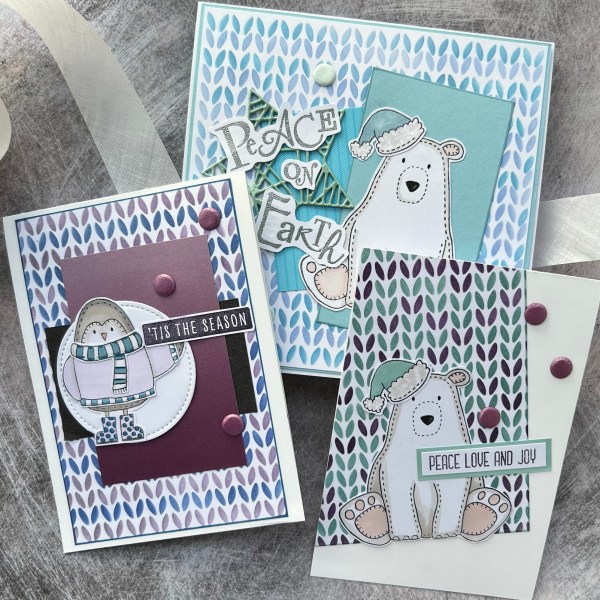
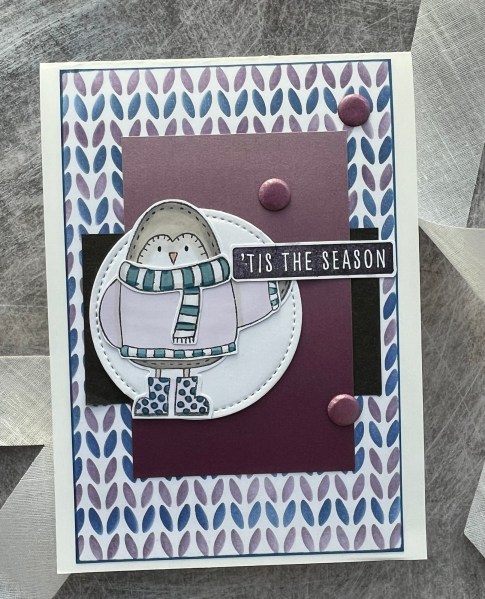
Today I have three cards for my stash of Christmas cards. I had so much fun playing with a new layered stencil and so ended up making three cards. I also used the same set of stamps from an old Creative Stamping magazine set for the focal images because I thought they worked perfectly with the knitwear themed backgrounds.
I spotted the cosy knit layered stencils from Altenew and thought they were so cute so decided to treat myself to a little crafty splurge. There are two layers in the set and they create a lovely pattern with the different colours. You can of course add more colours with masking but for now I stuck to two colours for my panels.
I did one 6×6 and then the other two were more suitable for standard 6×4 cards.
I grabbed a mixture of blue, purple and green coloured inks and very quickly created the three backgrounds … I think I would have kept going if I had had more time as it was so cute revealing the different ones!
I then stamped out the two penguins and two bears with their winter clothing/accessories. The bear also had a couple of jumper options but I didn’t end up stamping those and instead stuck to the hat!
I coloured them all with my promarkers and then fussy cut them out and added their clothes etc too.
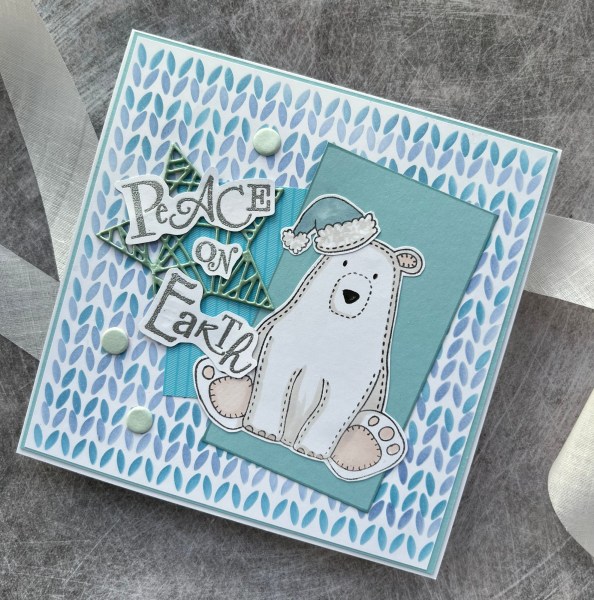
Then I made up the three cards. First the larger one.
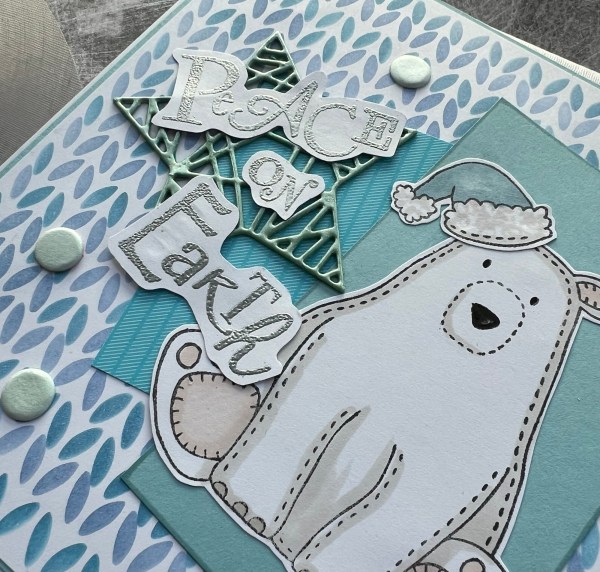
I created a cluster in the middle of the card of blue cardstock and some blue paper scrap that was on my desk. I had also reclaimed the star embellishment off the card I made for my hubby (we don’t keep them after Christmas as so I always recycle or reclaim elements I think I can use again) and I thought it would work well on the card.
The sentiment is a Claritystamps one which I heat embossed in silver and fussy cut.
I finished off by embellishing with some blue card Candi.
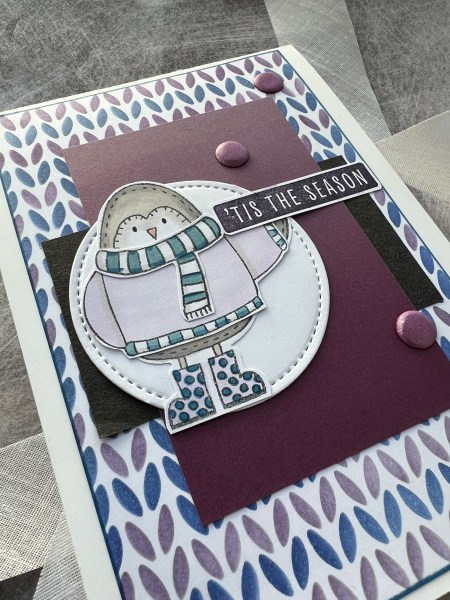
The purple themed card I used the penguin on and I decided to make it quite bold with the black panel and a panel of ombré purple (again a scrap off the desk). I then added the white stitched circle die cut under the penguin and added purple card Candi to embellish.
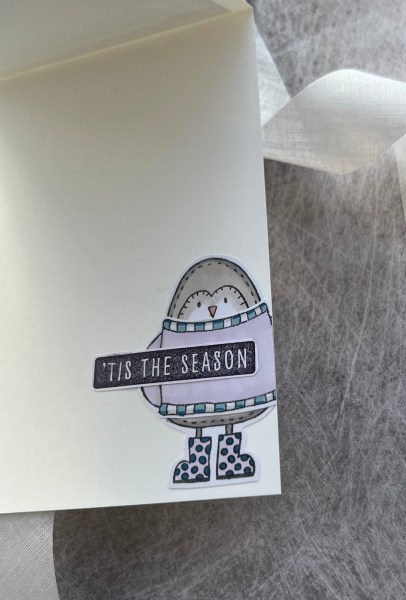
The sentiment I stamped twice and added it on the front and then inside the card I added the second penguin and the second sentiment.
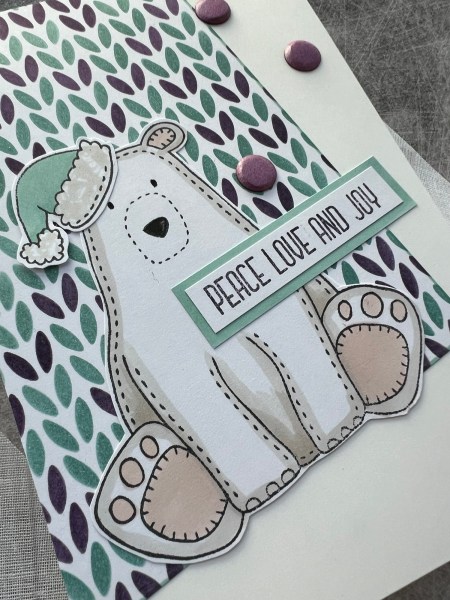
The last card I changed it up and added the panel on the edge of the card at an angle and then just added the bear on the top. I added the sentiment onto a mat so it had a frame and again card Candi to finish off.
Inside this one I just added another piece at an angle to tie in with the front.
Love how these three cards came together and in love with that layering stencil. So much fun to use!
I came back to the patterned paper that I started with at the beginning of the month and decided to make two more cards … but completely changed up the feel by inking up the cardstock.
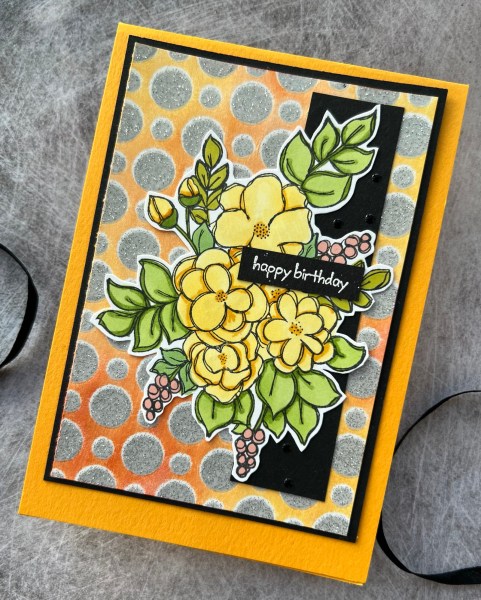
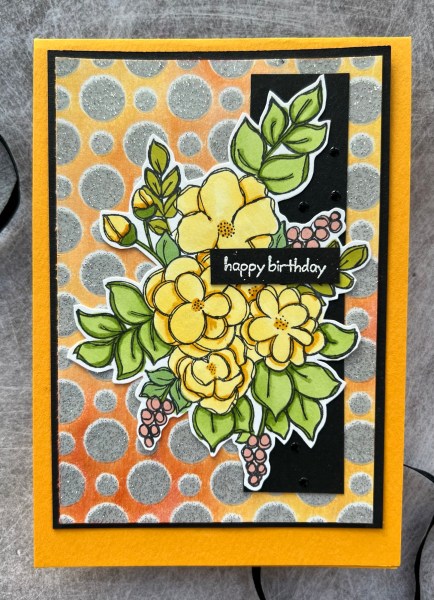
I started with this bright and cheery yellow and orange one.
Once I had added the ink I then wiped off so that the parts of the card that had the encapsulated glitter resisted the ink.
I then decided to use the Alpaca Pals gorgeous floral image as the main element. I coloured it with promarkers and then fussy cut it out.
I trimmed the inked panel down and mat it on the black cardstock. I also added a panel of the black beneath the floral element to ground it. Then used Mango Melody card stock to create the card blank.
I added a little white embossed sentiment and then some enamel accents as embellishment.
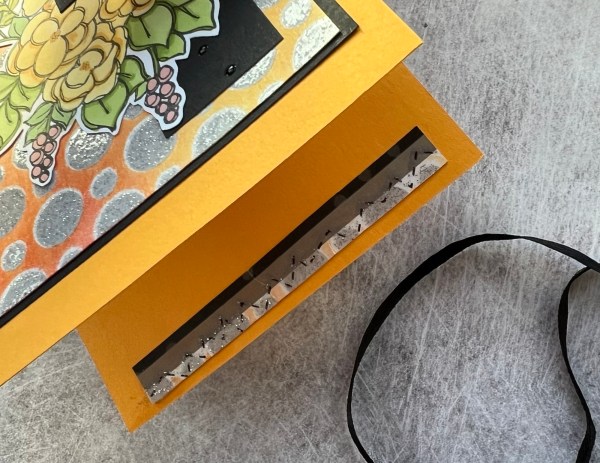
Inside the card I just added a little strip of the inked patterned paper to finish.
The second card I used my distress inks to ink up the panel and then I used the same inks to watercolour the same alpaca pals image (plus some green too of course!).
This time the panel was small square and I added it to a black panel perfect for a card front. I added the floral image at the side of it.
I then added some ribbon and the stamped sentiment. I remembered that I had some purple/black sequins too that would work well with the colour scheme so added them to embellish.
I used some purple card stock to make the card blank and on the inside some more inked paper and a mat of the black.
Love how different these are from the original because of the added colour.
I still have one larger piece of the glittery circle paper left but not sure yet what to do with it … so watch this space as I’m sure I will come up with something!
I took a very old digital stamp I had in the stash and coloured in with promarkers for that part of the challenge and then went mad with diecuts!
The background to the image was actually using the leftovers from another project I haven’t yet blogged about but using the Creative Expressions panel that has lots of rectangles in. I had cut it from two pieces of dsp and then used the leftovers from the previous project to put together this cute background. Admittedly most of it is covered on this card with the main image and the flower and leaf die cuts but you can still see some of the variations in the back.
I then went through the pile of die cuts I have from when I’ve die cut scraps using the pierced blooms and added ones in colours that went with the image and background.
I also added some strips of fabric to the back too to add in a different texture.
I added a layer of peachy pink cardstock to the image and raised it on another layer of card and then stamped and layered the sentiment too.
Finally I added the gold gems to the centre of the four biggest flowers to embellish.
Love this cute image. Nice to revisit old things like this and get them used.
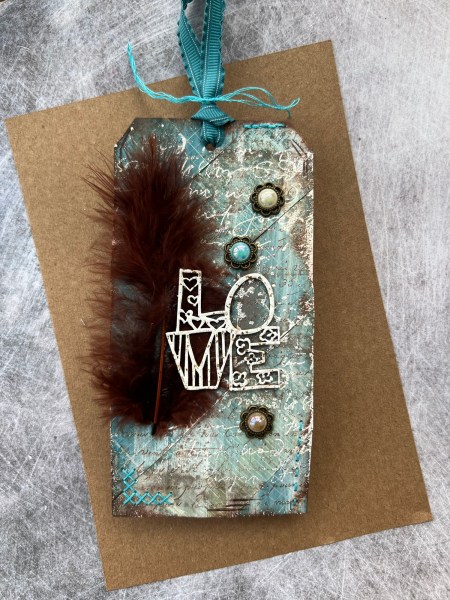
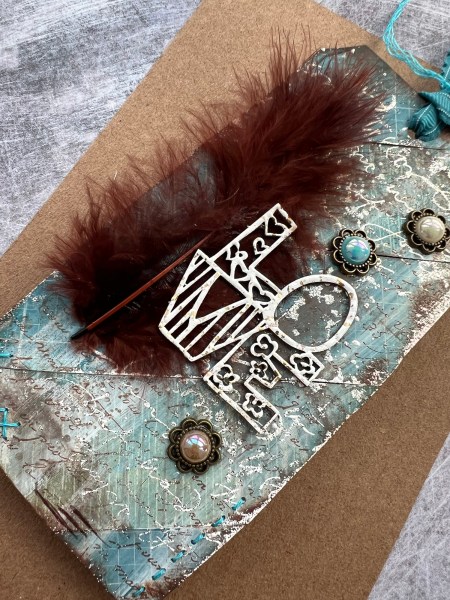
It’s been a few months since I joined in the Uk stampers forum tag swap but decided to have some fun with bits and pieces from the Artful Days goodie box stash that I hadn’t touched in an age and making a tag seemed like the best way to do that!
I started with strips of the patterned paper that were left on the desk from other projects and added them to a piece of cardstock cut to the right size for the tag.
I then used gesso to blend them together. Once that was dry I then used some distress inks to add brown.
Next I stamped a script stamp all over the background. Then I took a different script stamp and stamped in some places and embossed with my white and gold frantage powder.
I then started playing with the wood laser cut LOVE adding a couple of coats of the same embossing powder to that too.
I chose a feather and glued it down and then added the wood piece too. I then chose three coordinating gems and added those too.
Next I added some doodles in brown ink and took out my piercing tool and added some holes for sewing.
I then added the Island Indigo ribbon and some thread to the top of the tag.
I shared on Thursday the first card I made with my old patterned paper and now it’s time to share the second card I made that you saw a sneak peek of on that blog…
This time I used a larger panel of the DCWV paper where I had die cut out the circle that had a D in it.
I kept to the same colour scheme as last time but this time used a bigger digital stamp image from the stash as the focal point.
I added some embossing to the circle die cut to keep in theme with the circles.
I added a ribbon to embellish and then did lots of die cut letters for stacking them up for dimension for the sentiment!
I love the encapsulated glitter elements and the pop of peach and green against the black and white.
Inside I added a panel of the dsp layered on the peach.
Thinking that this card will be for my auntie whose birthday is next month so keep it quiet about this!
Still got a few panels left which have yet to be used so expect to see some more soon.
I know I’ve already done one post today but I didn’t want to miss out on doing Festive Friday and I also spent the time making the card last night having not realised I already had a blog post! So today you get two blog posts!
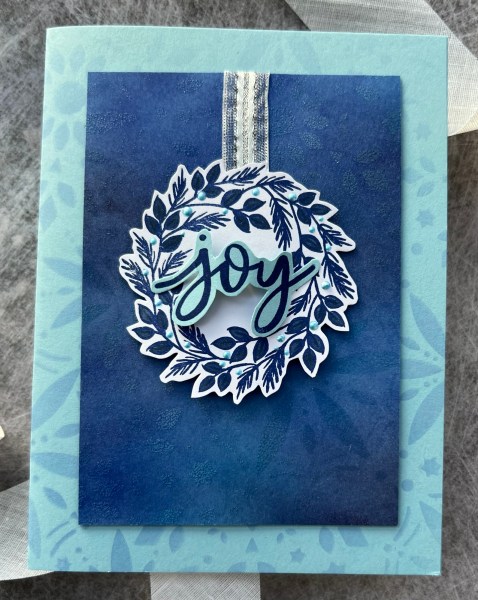
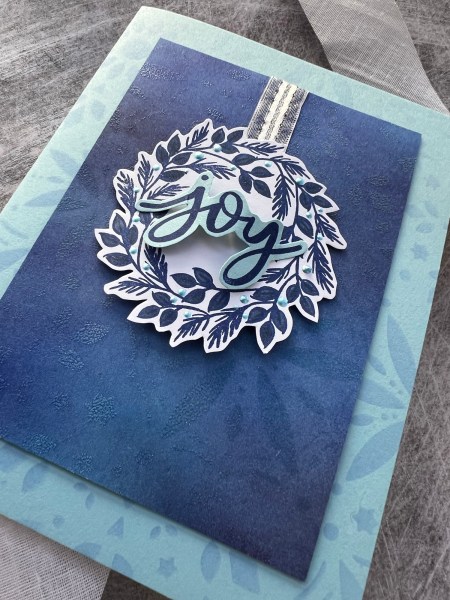
This weeks card was inspired by the video Jennifer McGuire and Gina K did showing stencil techniques but to be honest my attempt didn’t work well!
Jennifer showed trapping colour beneath the embossing and then using darker ink over the top to make the pattern pop … but my inking was too similar to the final colour so instead it became a nice inky panel for the centre of the card!
I used a new to me stencil from the Greetery which has some fun snowflake type patterns. I first just added a light stencilling onto the blue cardstock for the base and then inked up another piece of the blue with other blue inks.
Then I did the stencil with versamark and clear embossing powder. Next used the starry sky to do another layer of inking.
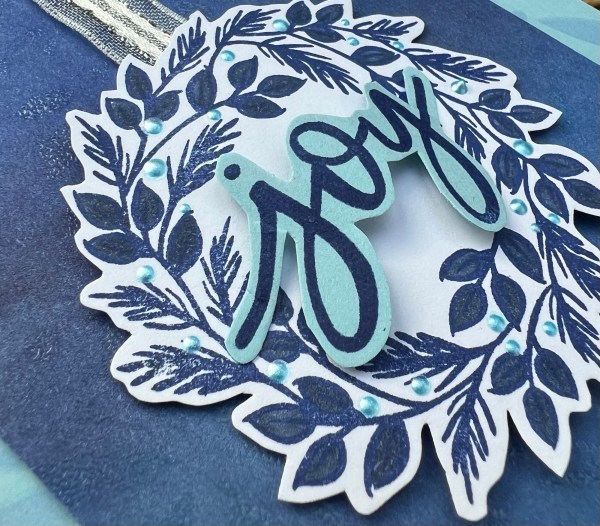
I think if I had gone for much lighter inks originally this would have worked well. I also think my versafine is less juicy now so probably didn’t put enough down to make the image more clear. Ah well will try again another time. Decided instead to make this into a definite background instead and stamped the wreath and fussy cut it. I added some additional colour into the leaves using my stampin blends but kept it monochrome with the starry sky.
I then fussy cut the wreath and added some foam behind it so it is raised. I added a scrap of the silver ribbon behind too. I also added some little dots of blue enamel accents as berries.
Then I stamped onto the blue the sentiment and fussy cut that. I curved it and added slim strip of foam behind the middle and stuck it down. Inside the card I just added the off cut of the inky panel to keep in theme … should have thought to lightly stencil the inside but just didn’t think of it at the time of making!
Really like this cute inky card even if it didn’t quite go according to plan!
Entering this into the A is for anything Christmas and B is for Berries challenge at ABC Christmas
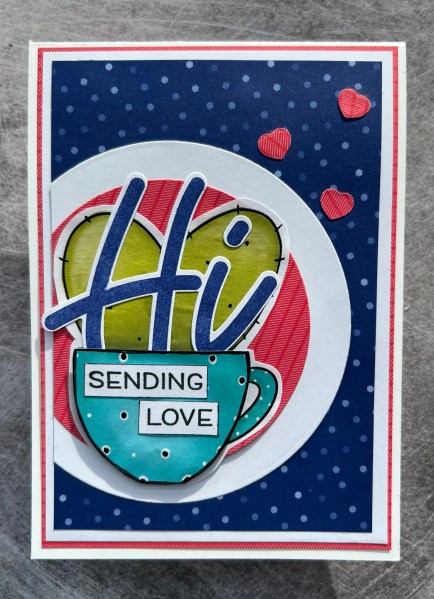
Hello! Thanks for popping over to my bit of the internet. Today’s blog is a design team contribution for Creative Knockouts. The challenge is to make a ‘love’ card and I chose the Polkadoodles image for my card. Polkadoodles are sponsoring the challenge this fortnight.
I chose this because I thought the image as was cute and perfect for a love themed card.
The image is ready coloured so that meant choosing the colour scheme was easy!
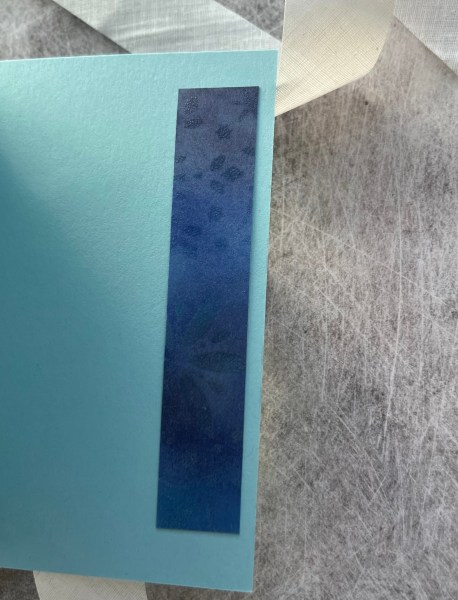
I wanted bright colours and so went with the Sweet Sorbet and Starry Sky patterned papers in the background and the starry sky ink for the large ‘hi’ sentiment.
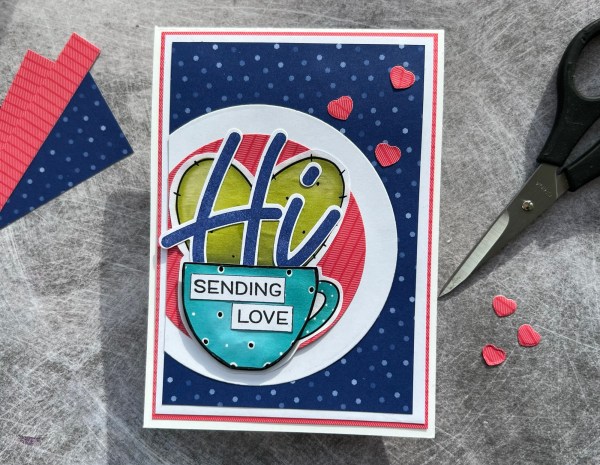
As I had printed the image a couple of times I cut the cup out on a second image and used foam tabs to decoupage it up for dimension.
I die cut circles of the red and the white for behind the image, and then die cut some red hearts out of the same patterned paper.
I added a panel of white and another panel of the sweet sorbet behind so it’s got a lot of layers on the card.
The theme for the challenge was love/anniversary/valentines but the image made me think of a friend so I decided to add the sending love and the hi … after all I love my friends too!
Inside the card I added some of the leftover paper and another of the images I’d printed in a smaller size… this is the joy of digital images … you can resize them for your projects! I also added more die cut hearts.
The idea of having a regular feature on the blog is that I can get ahead a little and maybe make it at least a few days ahead … sounds like a great idea… but I find myself on the 1st of the month but no patterned paper projects made!
Fortunately today I had a day off work and had no plans so could give myself a good few hours in the craft room… and taking one piece of very special patterned paper I made two cards.
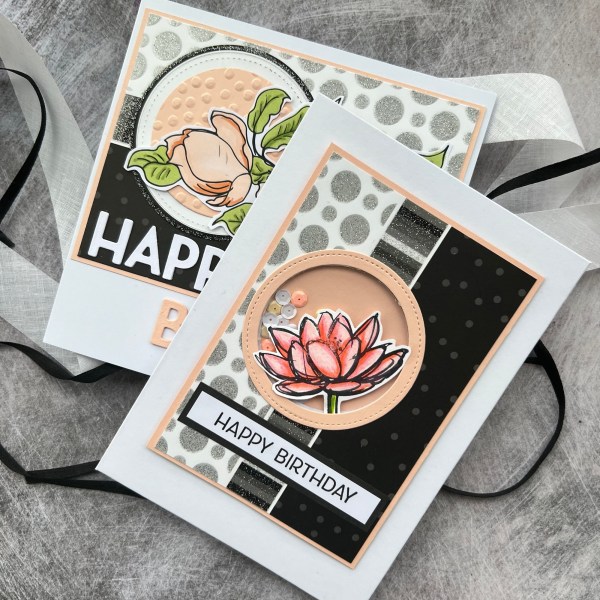
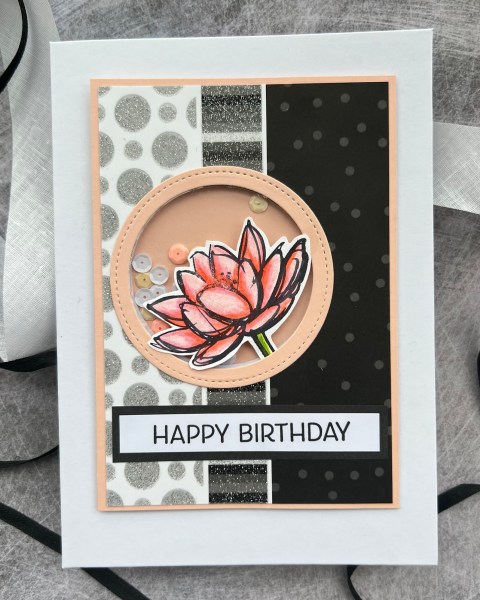
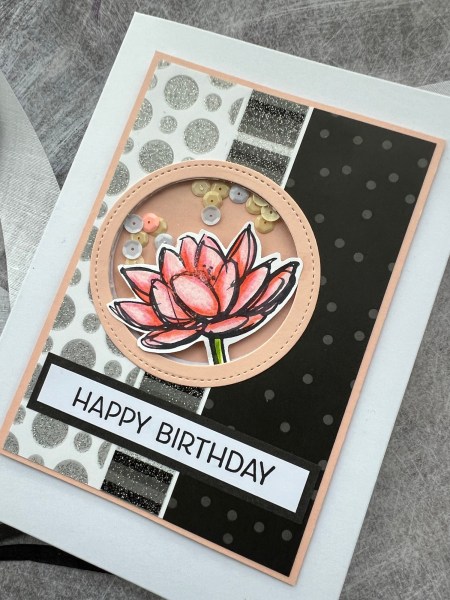
First up is this shaker card with the gorgeous large flower stamped image.
I started by die cutting lots of layers of scrap cardstock with the circle to create the backing and backed it with the Petal Pink and then did the same to the top layer of patterned paper. This paper is from a DCWV pack I have had for years and years. Each sheet has encapsulated glitter and a different letter – ideal for scrapbooking – but as I rarely do this now it’s just sat there waiting for use.
This piece had a circle with the letter D in it otherwise was dots and circles with a few striped bits.
I cut it into two panels (one for this card and one for the second) and on the front I die cut the circle in the same place as the backing bits.
Next I added the die cut circle frame for the edge and added the flower poking out before adding the acetate layer.
I added sequins to the background and then sandwiched them together. It is quite a shallow shaker but it’s enough for the sequins to move around a little and the whole panel is sturdy as it’s made of layers of card rather than foam tape bits.
I kept the rest simple with a stamped sentiment and a little strip of cardstock inside to finish off.
And that flower on the front I actually stamped and coloured and have had waiting to use for a number of years … perfect for the front of this black white and silver card with the pops of the peachy pink!
The second card I will blog in a few days time so you only get the sneak peek now… and the rest of the piece of patterned paper is still sitting on the desk awaiting use so will no doubt get used soon as I like to try and use what is on the desk rather than grab new products!
Entering this in the sparkle and shine challenge at Dara and Diane and the patterned paper challenge at Make my Monday
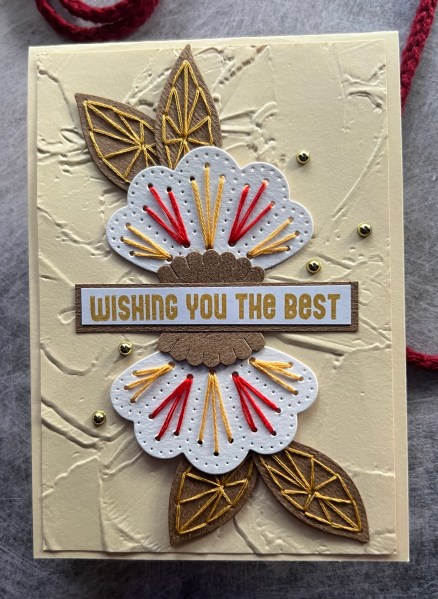
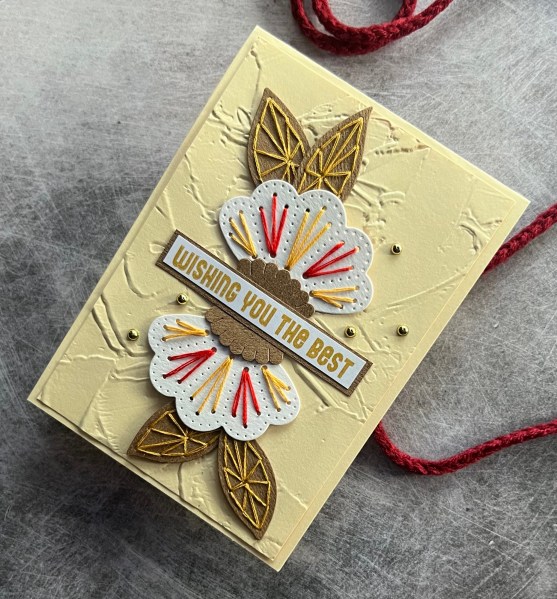
In December I had a whole session of die cutting scraps and then sewing and popped some flowers into a pouch waiting to make stuff! Well I grabbed a few pieces of the flowers to make this card.
I decided to use two of the mid flower size to frame the sentiment and added two leaves to each of them… I love that I kept the colours simple with the mix of the Kraft, white and cream and then the bright stitching!
I decided to add a textured background and then the gold gems for the embellishment!
I love how special the sewing makes the flowers and how you can use just parts of the die set and create different looks. Really am in love with the spellbinders stitching die kits!