Cutting up an old canvas

Many years ago I made a few ‘she art’ girls based on Christy Tomlinson classes and I had them hung up around the room. Well gradually they’ve been taken down and replaced for various reasons … mainly because they had faded but also I sort of fell out of love with some I made and this was one of the ones I fell out of love with. I’ve had it stored under my desk with the intention of painting over and doing something else with it … but then I have stopped doing that kind of art and I have lots of canvas under the desk so decided to do something radical…

… I cut it up!

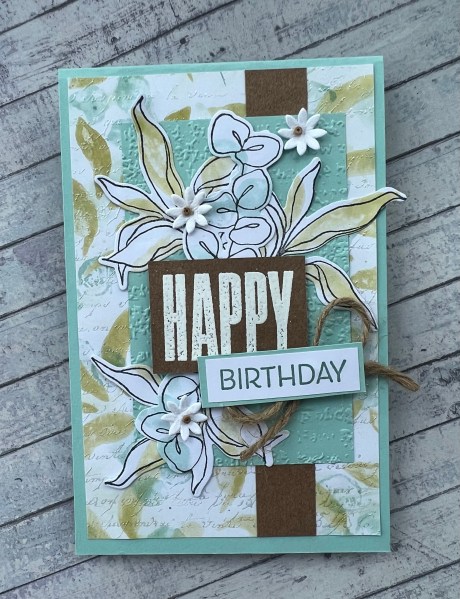
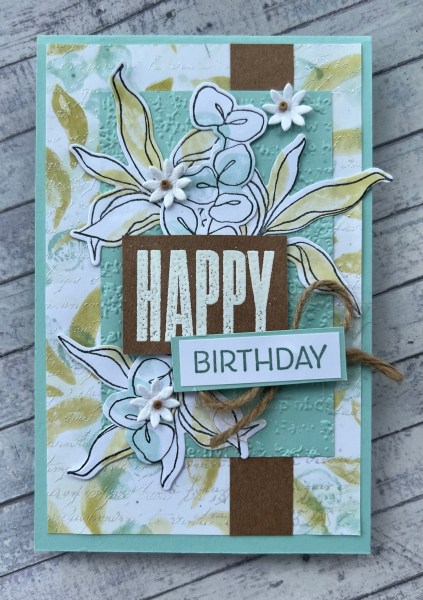
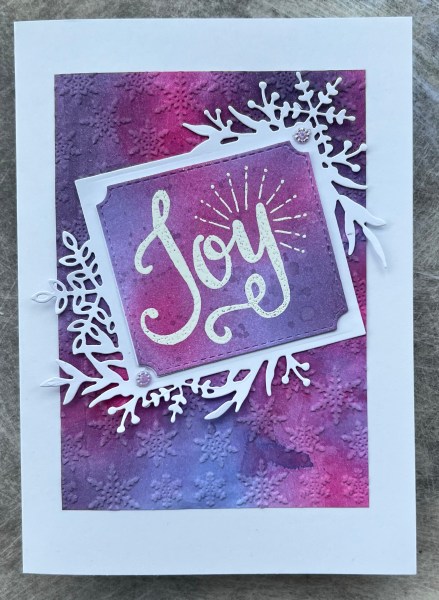
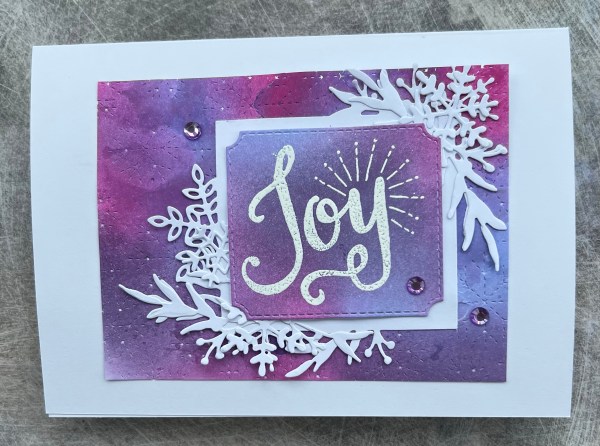
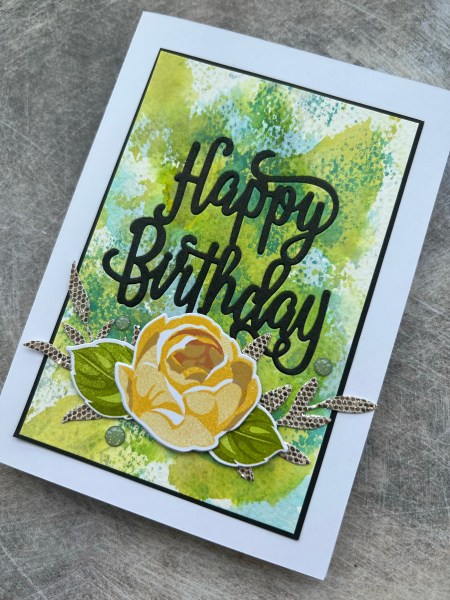
I took my scalpel and cut out the central part of the canvas and threw away the frame. I then chose this section (ignoring the girl I didn’t like anymore) and made it into a card for a friend!

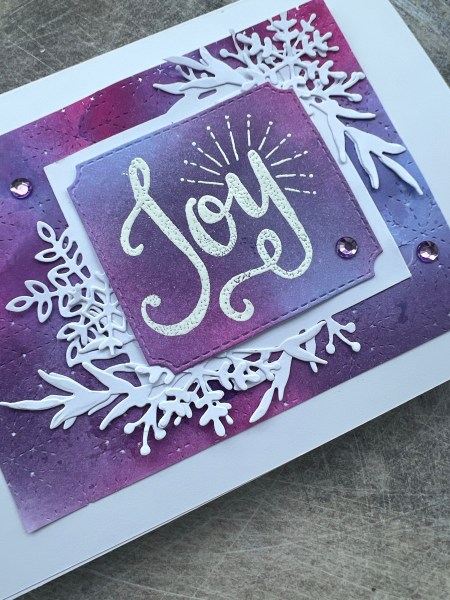
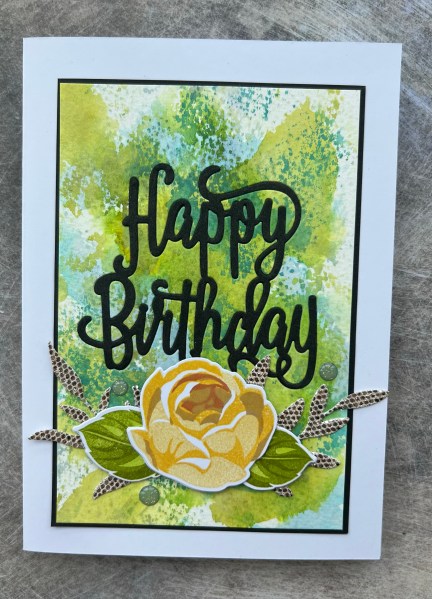
I love all the texture and pattern and the details within this and the wording is perfect for the friend I am giving this to. I added ink around the edge to frame it and then the flowers were added to finish off the card.

So lesson to me and anyone else who needs to hear it … just cut it up when you no longer love it … then you can turn it into something you do love!

Also stop hoarding and have a clear out occasionally … you never know what you will find!

Happy crafting!

Catherine

DT: Happy Little Stampers anything goes Birthday challenge

Hi there … my design team contribution for Happy Little Stampers to share with you today … for the anything goes birthday challenge.

I made this card using distress crayons and the Splendid stems stamps and dies.

I teamed the stamped background with Kraft and the Pool Party cardstock.

The background after I stamped the more solid images with the distress crayons I then embossed using a pearlescent powder a script stamp from the stash. I also splattered with some of the crayon I had left on the glass mat.

I then took some plain white and added some more of the solid stamping and then overlapped with the outline stamps before diecutting them.

I used a panel of the pool party cardstock and the old paper embossing folder and then on top of that I created a cluster of the die cut images.

I embossed the happy into craft and cut it out then took a different stamp set for the birthday and stamped that too. I added a twine bow and the strip of the Kraft beneath the cluster and the embossed panel to break it up a little.

Inside the card I took a strip of the paper I had stamped and embossed to edge and finish the inside.

The front I finished with the little flower and bead embellishments.

Delighted with how this ended up. A really pretty card.

Dimension is slightly narrower than a standard card to make the panel sit centrally but have the card still fit in a standard envelope as there is a bit overhanging the right hand side.

Happy crafting!

Catherine

Playing with purples

I grabbed the lovely Altenew stencil to create a background … I used pinks and purples for the flowers and then navy and teal for the leaves. I decided to keep the over stamping light with a light grey.

I also decided to overstamp the full panel with a script stamp. I then cut the panel into two pieces and put one to one side. This one I had dropped a little water onto and so decided to cut a section out.

I kept the distance between the two panels the same as if the other section was still there so that the pattern was continuous. It was layered onto the darker purple cardstock.

I added some ribbon and then added a separate floral sprig which I fussy cut onto this.

I added a few layers of coordinated colour cardstock and then stamped and embossed the sentiment before fussy cutting it out and adding it on top.

I added pearls that were lilac and purple and that made it feel finished.

Happy crafting!

Catherine

Patterned paper playtime

Hello! Every month this year I’ve been cutting apart a piece of dsp and then using the elements from that dsp to make a card.

This time it was a very old piece of pretty desp with gorgeous trailing flowers. I took one cut apart floral element and the reverse of the paper as a panel and also added in the bookprint dsp I had left over from another project. I added some lace trim by sewing it long the top of the panel with the floral trailing underneath.

I decided to make a slimline card rather than the usual size of 6×4 so this is 6×3 instead. I made this using the Crumb Cake cardstock.

I heat embossed the sentiment and then added a mat of the Petal Pink which I think works with the pink of the flowers.

Inside the card a strip of the dsp and another floral element … and decided jobs a good’un.

Really happy with this cute little card.

Happy crafting!

Catherine

DT: Creative Knockouts – Use embossing

Todays blog is my design team contribution for Creative Knockouts and we are sponsored by Beccys Place who kindly gifted me the Gull on Post image for use on this card.

I printed the image and then coloured with promarkers and fussy cut with a very slim white outline. Then I took some mixed media scraps and stickers and bits and pieces to collage behind the image that I thought worked well with the beach /travel theme.

Next I took a piece of background that had spray ink on it and embossed with the Old Paper 3D embossing folder and brushed over it with an ink blending brush. I didn’t load the brush with ink, just used what was there to slightly colour the raised embossing to make it more visible.

I added a piece of sand themed patterned paper behind the image and then stamped the sentiment on a strip to finish off the front. I also added some brads as wanted to keep it from being shiny and sparkly so it can be used for a man or a woman recipient. You know it is so difficult for me to not add gems … Matt brads are a good alternative!

Really happy with this textural and grungy card and that image is lovely… can see me grabbing that again! (I printed six images at once so I have a few more to play with again!)

Happy crafting!

Catherine

More Avery Elle North Pole friends

I carried on playing with the Avery Elle North Pole friends stamps and the same dsp as I used yesterday and made these three ultra cute reindeer cards.

I kept each of the cards very similar in style with diagonal cuts and the white mat layers to keep them clean and modern. I love that plaid with the darker green paper.

This one I decided to colour the sentiment strips with the Stampin Blend colour I had used for Rudolph’s collar. Then I added them to slightly wider strips of white as a mat.

I added some circles die cut and leftover from the zero waste leaf die and added wink of Stella to them to make them sparkly.

This is the smallest of the images so it needed an extra panel and the dsp is double sided so this worked fine. This time I coloured the sentiment mat layer rather than the sentiment so it had a green layer.

I again added die cut circles as embellishments but these are from gold speciality paper so already shiny!

This one has the two plaid panels sitting on the dark green snowflake paper. Originally it was designed that the plaid panels would be within the layer of the green so it had a border but I realised I got my measurement wrong for the card blank so had to trim down … but I still think it looks good.

Again I coloured the mat layer for the sentiment and added those gold speciality paper circles to finish off.

These are all very flat cards for me although clearly still lots of layers and things going on… but I hope I still allowed those gorgeous cute reindeers to have all the focus!

Happy crafting!

Catherine

Avery Elle North Pole friends

I slipped up and bought some more stamps but this time from Vinted because they were a bargain and clearly brand new for just £6 including the postage.

I’ve been looking for a cute Santa stamp as I’ve got rid of all the ones I had and spotted this set of stamps from Avery Elle and knew they were perfect for making some cute Christmas cards. This was my first play.

I grabbed some dsp from the stash (think one is magazine paper and the other is SU) and made a few layers onto the card and a piece of white which I had put through the Waffleflower piercing die. Then stamped Santa onto the white and coloured him with promarkers and stampin blends.

The sentiment is from the set too and I coloured some scrap white with the grey promarkers to give a border mat for the words.

I then used some circles I had saved from another project using the zero waste leaf die and added them as embellishments and added some wink of Stella to make them sparkle!

Love the cute Santa and also love this relatively flat and simple card. Think I can see me using him plenty of times for when I want to do cute. I don’t have the coordinating dies but the images are easy to cut out and the colouring is also simple to do with only a few colours needed.

Happy crafting!

Catherine

Two inky Christmas cards

Today I decided to get a bit inky with distress ink and made two similar but slightly different cards.

Both had the same starting point of a piece of mop up paper that I then added a heavy amount of distress ink to with the blending sponge.

I cut the piece into two and for one I ran it through the embossing folder and then ran a little white Kraft ink over the top of the embossing to make it stand out a little.

I took another piece of white and added the distress inks again to be able to die cut the centre element for the stamping.

I had to make sure it was very dry before I then embossed the Joy sentiment.

I had die cut a couple of the Frosted frames from white so used one on each and to one I added some additional sprigs and snowflakes.

This frame I added to the other panel which I had run through the Waffleflower snowflake cover plate die.

This is more subtle than an embossed panel as it just adds pierced details in the background.

Both cards I finished with gems from the stash.

Lovely to have a little inky play!

Happy crafting!

Catherine

Die cut inlay

Todays blog is the card I made from the panel I die cut the sentiment from for Fridays card

The panel was watercolour card I had used to mop up distress oxide off the desk with using greens and blues.

I mounted the panel onto black cardstock, popped a sentiment into place that I die cut from black and then added all the middle elements back in too.

As the black card was only thin I die cut it another couple of times to stack them up until it was the same level as the thick water colour cardstock.

Next I took some leaves I had die cut from the glitter cardstock scraps using the Zero Waste leaf die and added those to the space underneath the sentiment. I wasn’t sure what central element to add but then remembered all the yellow roses I had already stamped and die cut so used one with two leaves to finish off. I did have to add some foam under the centre of the rose as the leaves are also stacked die cuts and it was wobbly otherwise.

Then I found these sparkly green gems in the stash and added them.

Love how this was made from leftover ink and the remainder of other projects and makes a dramatic but beautiful card with the artsy background!

Happy crafting!

Catherine

New stencil and stamp duo

Played with one of the other sets of stamps and stencils I bought … this gorgeous floral one.

It’s a really simple two layer stencil and then a single stamp for each of the floral sprigs.

I used a mixture of yellow and orange and red inks for the flowers and then used a dark blue green for the leaves.

I stamped the line art in black and then mat the full piece onto black and then the pearlescent vellum.

I added a strip of black across and white embossed the sentiment.

I then stencilled and stamped a single floral sprig and then cut that out and then added that with some die cut leaves from the Splendid thoughts dies.

Love how this looks… admittedly it’s a very big card for a thank you card but still I enjoyed making it and I am sure I will find a use for it at some point!

Happy crafting!

Catherine