Playing with purple distress inks

Last weekend I grabbed a stack of distress inks to make a background inspired by Jennifer McGuire but ended up not using the two that I made originally but instead the ‘fail’ background and made that into a card. If you fancy watching it come together I did video the whole thing.

If not … read on!

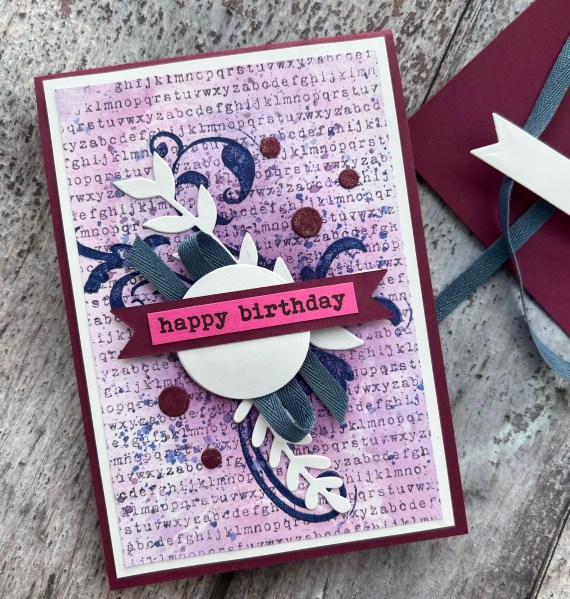
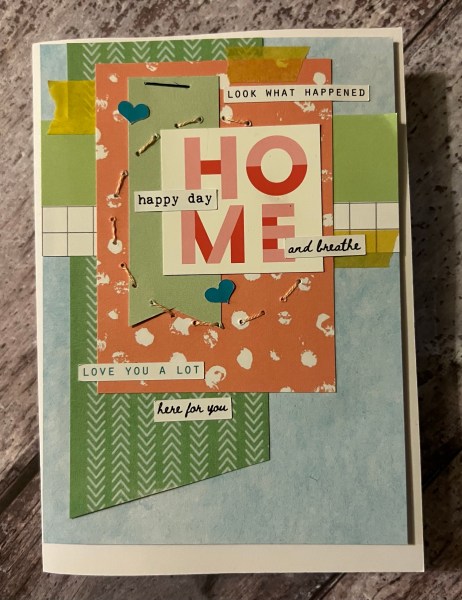
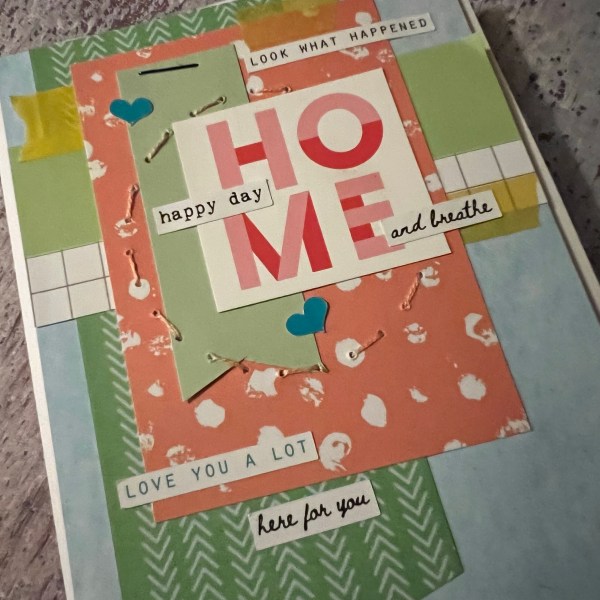
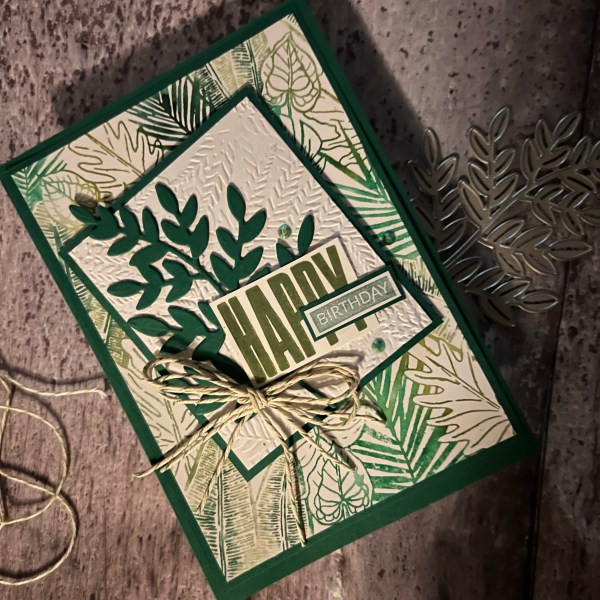
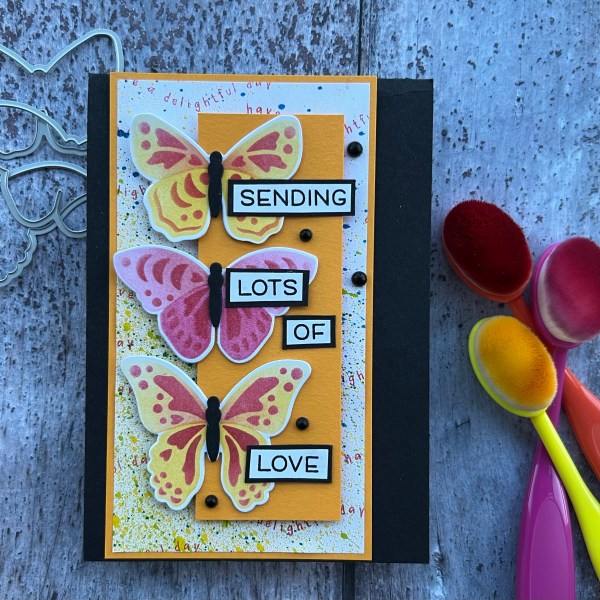
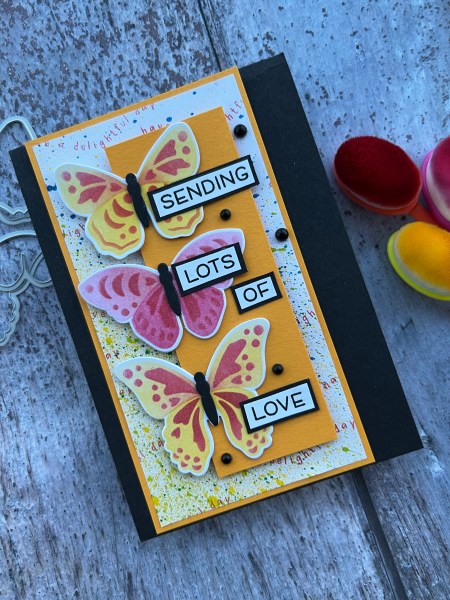
So the background was made by using distress ink resist mono print type technique. But this one didn’t come out very clearly so I decided as it was pretty to carry on playing with it regardless and come up with something. It ended up quite grungy and I love it!

I used the Gummiapan alphabet stamp and then lots of splatters. Then the Stampendous stamp that had been used as the resist pattern originally.

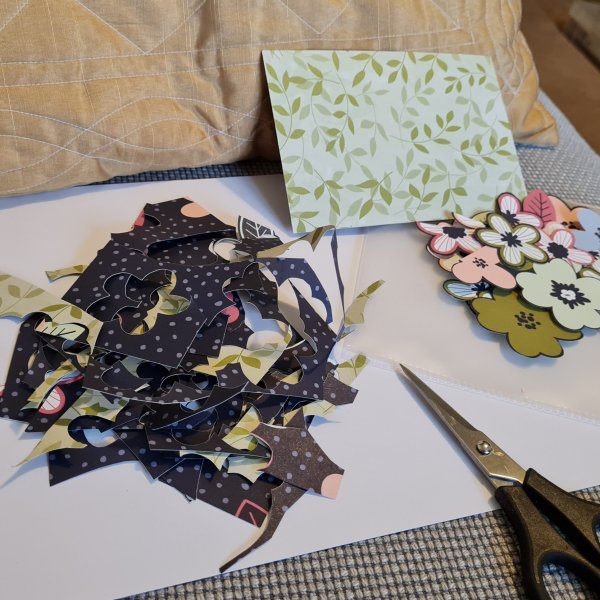
Then I picked out some new to me dies (I know no spend but I bought these with the money I had used selling stash so I’m not counting it as spends! – yes I’ve found a loophole in my no spend resolution I’m willing to work with!)

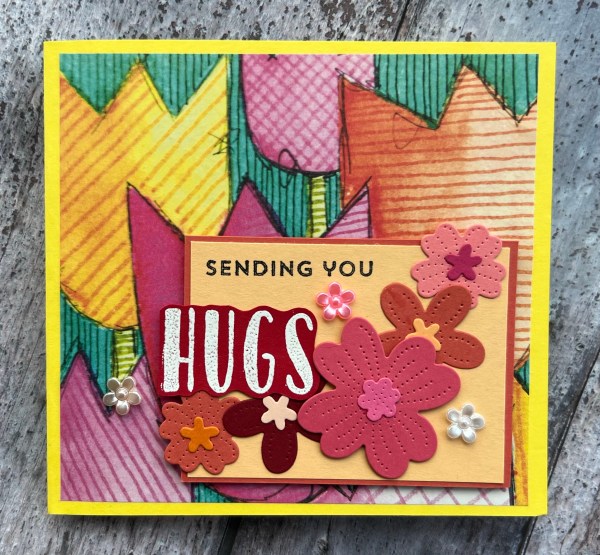
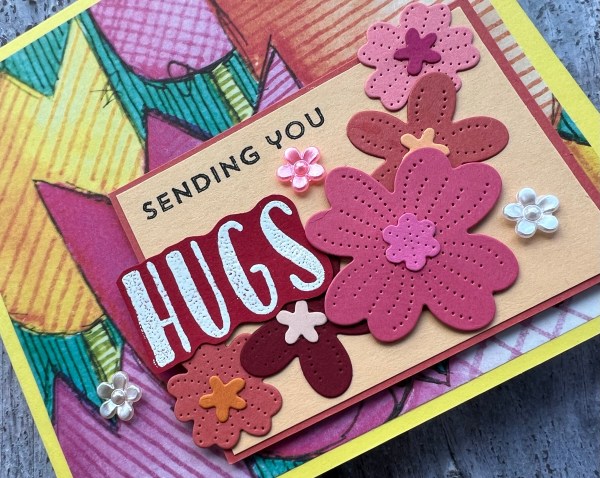
Anyways I die cut some leaves and the circle in white and stacked them up.

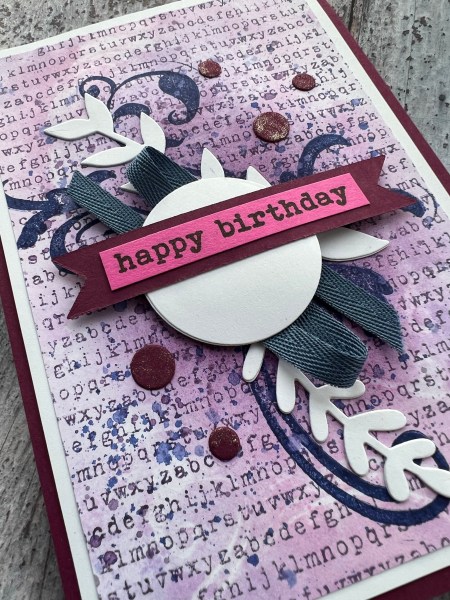
I grabbed the denim blue ribbon and added that before adding the banner and sentiment. I also die cut the little circles from the same cardstock and die set and added wink of Stella and used them as gem type embellishments.

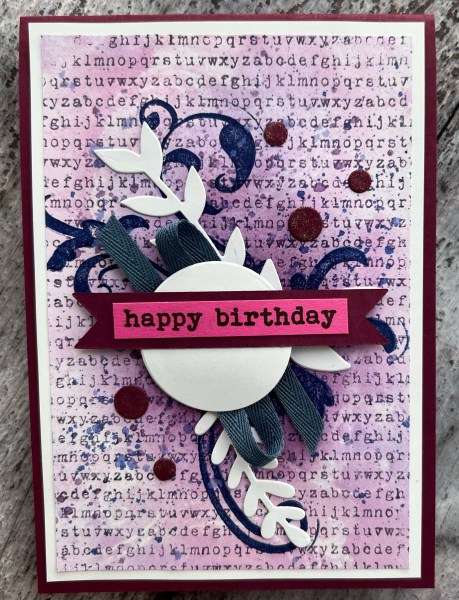
I used Rich Razzleberry as the base and added a layer of white to frame the background panel and added white inside to make sure it was good for writing on (but didn’t decorate the inside).

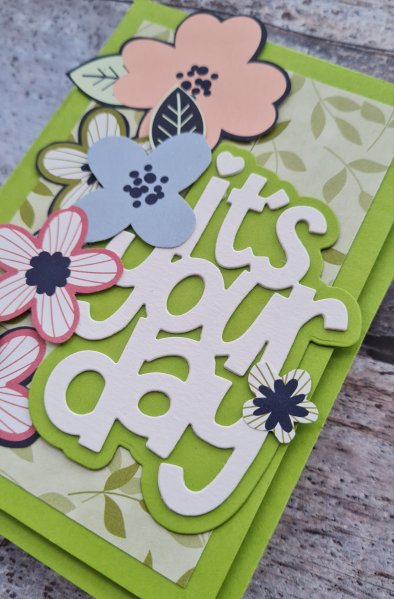
Really pleased with this inky card and what’s more from the play I ended up with another three backgrounds to play with.

I did end up using one of them straightaway and filmed another video but I’ll blog about that once I’ve got round to editing and uploading it!

Happy crafting!

Catherine

Happy new home Mum and Dad

This past weekend we’ve been supporting my parents to move home … to somewhere nearer to ours and hopefully a little more future proof for their ages and increasing frailties.

Here is the card I made for them using old Lollipop Box Club Kits.

Just like last time I played with a little hand sewing too!

Love how cute the colours are in Lollipop box club kits … Lisa chooses it all so well!

Just don’t really do the journaling anymore so need to find new uses for the stash!

Happy crafting!

Catherine

Patterned paper play

Hello February! And as its the first day of the month it is time to play with patterned paper. Like last month I actually prepped for this card quite a while ago by choosing a piece of dsp and going to town with fussy cutting!

This one ended up with a panel of the green and a pile of flowers (and of course a pile of rubbish.

So what to do with this… well I went for a funky green base and the fun Heffy Doodle sentiment die.

I decided to use a couple of strips of the flowers, one of which I raised up a little to give it some dimension.

I did stack the sentiment a little with 2 layers, and then added another flower onto the top!

I also added foam between the card base and the topper which gives a lovely finish.

Still got some flowers left in the pouch for another project or two. Really like this paper so good to get some use out of it!

Looking forward to seeing what everyone else makes with their patterned paper stash.

Happy crafting!

Catherine

Art by Marlene and bright die cuts

Todays card is one of those where I wanted to try and use a product up … admittedly one panel isn’t going to do it but it’s a start!

I no longer feel the urge to do art journaling so I am looking at some of my supplies and trying to find ways of using them … for example these Art by Marlene collage papers. Not all of them work on cards as the designs are quite large but I thought this one worked as a background to a larger size card blank like this one.

But then it needed something quite bold to work with it as the paper is so bright and so busy. So I cut some panels of cardstock and then used die cuts to tray and create a focal point above the busy background. I think this along with the stamped and embossed and fussy cut sentiment worked quite well.

I added in the little pearlescent flowers too to add a different texture.

So I’ve not exactly used up my collage paper stash .. I’ve still got a fair few pieces left but at least I found a use for one panel and quite like the card I created using it! Now what to do with the rest?

Happy crafting!

Catherine

Tropical hideaway play

This card was sort of inspired by both Jennifer Maguire (her video made me grab the stamp) and instagram YVON0202 who I had seen using this stamp with a few colours … but I did go for a different style in the end so inspired by but far from copied!

I used stampin write markers to colour the image in using lots of different greens and some water spray which helped to blend them. If you want to see how I made it I did video it!

I decided to then use the Forever Flourishing dies and Biggest wish stamp set for the main elements with an embossed white panel behind the focal image. The twine and the sparkly gems finished it off.

I took some pics the night I made the card but this next one shows the colours better in the daylight.

Love that twine bow and the colour mix in the background and love even more that I have a second background yet to be used.

Once again I also videoed the process which you can watch if you fancy it!

Happy crafting!

Catherine

Scraps and random dsp bits and bobs

A really quick card that I put together using scraps off the desk once again.

I made this card so quickly because I had already fussy cut the dsp flowers and the Art by Marlene collage paper was sitting on the desk ready for using!

These first few photos are taken in the evening when lighting is not great … skip to the bottom to see it in the light!

I used card Candi to embellish and those True Love dsp flowers are fab against that bright background!

Love this bright card with the black and white elements. Sentiment is in white embossing on the black with a tiny pop of the Parakeet Part my as a mount to the sentiment!

Happy crafting!

Catherine

New Concord & 9th goodies

Yes I know that 2023 is no spend on new craft stash but I bought these between Xmas and New year so they don’t really count as spends! Anyway … I bought the Boho Butterfly layered stencils, dies and stamp set and this was my first play with the stencils and the dies (I used a few of the stamps the other day).

Do I love those layered stencils? Yes, yes I absolutely do! They are amazingly easy to use and the results are gorgeous!

I teamed these three with one of those spray backgrounds and some scrap orange cardstock and a Lawn Fawn sentiment I cut apart and mounted onto black to go with the black card base.

Each of the butterflies is stacked a few times and I used one of the sentiments from the stamp set to add to the background to also add in the pink colour.

Love how it turned out… and if you fancy watching the process there is a long craft with me video which shows me making it, along with my usual rambling and also a little tidy up section and haul section!

Happy crafting!

Catherine

Craft stamper magazine sort out

I’m back delving into the box of Craft Stamper magazine stamps and sorting out which are for keeping and which are for leaving my stash… today it was this one with a collage type feel to it that I decided to play rainbows 🌈 with.

I stamped it in a row along a longer piece of cardstock so I could make a DL card from. I then stamped it again in black on a separate piece so I could colour in the creature (I think it’s a moth but I went colourful as though it was a butterfly!)

I then cut that out and mounted it onto black. I used black to also mount the background panel but I also used my scoreboard to edge it a little … it’s subtle but it’s there I promise!

I then decided to go a bit rainbow mad with the die cut letters and used a rainbow washi I’ve got to cover some card then die cut the letters on different parts and at different angles. I stacked them on other die cut letters to give them the dinension too.

Next I took some of the stamp from a happy celebrations for the other part of the sentiment and mounted that onto black.

I also added some shiny black stars as embellishments.

As much as I love this card I think it is unlikely I would use it again and have plenty of collage type stamps I could use instead, so it’s going into the get rid pile rather than the keep pile.

Happy crafting!

Catherine

DT: Creative Knockouts – Celebrations

First design team contribution for Creative Knockouts of 2023 to share with you today. The theme is Celebrations and we are sponsored by Alex Sybera designs.

I chose this Lovely Bouquet image which was kindly gifted for using for the challenge.

Our challenge was celebrations so I went with happy birthday as that is the thing we celebrate most in our house.

I printed the image onto cream cardstock and coloured in using my Stampin Blends. Admittedly I should have paused between the printing and colouring as it did move the line art ink a little but not enough for me to consider it ruined.

I then fussy cut the whole image out.

I created a base panel and used my scoreboard to create some border lines … this was because I was also entering this card into a challenge over at UK stampers forum to include dry embossing.

I adhered this panel to the base card, which is slightly larger with foam behind the middle section so it is slightly raised.

I then stuck the flower image in place.

I decided on some ombre letters for the sentiment so I coloured the scrap cardstock with my stampin blends before die cutting the letters using Playful Alphabet dies. I then cut more out of the scrap cardstock so I could stack them for dimension.

Next I used a stamp from the Artistically inked set for the birthday, cut it out, stacked it once and then edged it with the yellow ink to give it a little dimension.

Finally I added the little flowers as embellishments.

Really pleased how it came out and how cute this card is. I must also remember to use the scoreboard more for the creating of borders like this as it is so elegant.

Happy crafting!

Catherine