Arrange a Wreath, Beautiful Brocade, Biggest Wish, DCWV, Spellbinders, Splendid Stems, Splendid Thoughts

Patterned paper play

It’s the start of the month so it’s a patterned paper focus and this time I used two pieces of patterned paper from the stash (again both DCWV old papers) and made a few cards by layering them up together. I’ve got a couple to share today that were the first two I finished off. The others are to follow in other blogs as haven’t actually finished them completely as I write up this blog post!

So the patterned paper is the pink one and then the dark grey crisscross type pattern.

I treated both of these in very different ways … first up is this embossed one.

I embossed the large piece of the pink with my intricate design folder and then wiped over with my Kraft white ink before adding clear embossing. The clear embossing actually stuck to the whole panel so it turned it into a shiny panel with some white highlights on the raised elements.

I added a mat of the dark grey paper and then a square of it for the middle.

I then used some purple cardstock to white heat emboss the wreath from Arrange a Wreath, which I fussy cut.

I used the same purple for the flower elements on the Spellbinders dies and cut the leaves and stems from black.

I added the three sprigs coming out from the sentiment as contrast to the wreath.

The sentiment I chose for both cards is from the Biggest Wish sentiment set… still one of my favourites.

The second card I changed up the colour of the paper a little by adding some purple ink to the pink and the dark purple to the dark grey.

This gave it an even more weathered look and also darkened the grey panels to be more in keeping with the grunge look.

I decided to contrast this with the lovely Splendid Thoughts leaves which I embossed and watercoloured before I die cut them. I was reminded of the way Martin used these in a card a month or so ago and so laid them in a diagonal across the card panels.

I raised the sentiment up a little on some scrap cardstock and then added the purple pearls for embellishment.

Love how adding the ink and the embossing changes up the paper and makes it something a little different from the original.

The other cards I have done less with the papers at this point … but who knows how I will end up finishing them!

Happy crafting!

Catherine

Altenew, Designer Series Paper, Indigo Blu, Spellbinders, Waffle flower, Waffleflower

More little thank you notes

Following on from yesterdays I got in the zone and made more little notecards from old dsp …

Some I added die cut flowers which I cut from scraps of cardstock and then added the sentiment…

Others I added the little stamped image I coloured with ink and water…

I also added a little stamping to the panel of grid dsp on these.

I kept going just using up the dsp I couldn’t bear to throw out but knew I needed to not hoard any longer!

This final one for today was simple.

Throughout these projects I’ve been refusing to use anything but scraps and managed to almost clear out the little pouch of small scraps to make them. impressed with myself!

Happy crafting!

Catherine

Spellbinders, Waffleflower

Stitching and patterned papers

This card I made ages ago but never got round to sharing … better now than never!

It’s one of those stitched flowers I have had in the pouch of ready stitched elements and on the day I put this together I was in a use patterned paper kind of moods! So I grabbed papers I thought worked ok together and worked with the colours in the flower I had stitched. I actually trimmed this flower as didn’t want the stem to be as long.

I added ink to the edges of each of the panels of paper to give them a frame and stuck them down. No dimension just flat with the inked edge worked fine.

I added the Kraft back panel to tie in the colour of the flower and the stem.

I added the sentiment which I stamped in the Hello Honey colour as I thought that worked well with all the elements in the card.

I trimmed down the card blank so it’s about 6×5 rather than the usual size of 7×5 as that worked better with how the layers looked.

Finishing touch was to add those three card candi on the edge of the middle panel of patterned paper … this pulled out the green of the leaves and from the patterned paper.

Cute card and quite different from the other cards I have made with these stitched flower dies.

Happy crafting!

Catherine

Crafters Companion, Masks/Stencils, Natural Prints, Nature's Prints, Spellbinders, Stitched framelits

Masterboard part two

Today I have the second of the cards I made from the masterboard piece I shared on the first of April.

Again I die cut a panel using the scalloped die from the December spellbinders die set. This time I teamed it with the wreath from the Natures Prints set and the sentiment stamp and label from the same set. I also added the die cut dragonfly to the centre of the circle.

I again added pearls as final embellishments.

Love this shabby chic background and the pretty way this came together.

I did stack up a couple of extra panels of the scalloped panel so that there is quite a lot of dimension on the card but otherwise kept the card blank clean so that the texture and fun on the main element took centre stage!

Entering this into the Use Dies challenge at Unicorn challenge

Happy crafting!

Catherine

Claritystamps, Crafters Companion, Masks/Stencils, Spellbinders

Patterned paper … masterboard time

Today I have my usual use up the patterned paper challenge and this time I went for a masterboard using the Crafters Companion papers that a friend gifted me last year.

Lots of pieces of the papers on to some white cardstock and then some Kraft pieces mixed in. Added some stamping with Gorgeous Grunge and then added inks using my distress inks. Next up I added the iridescent texture paste through a stencil. I also splattered the shimmer ink too.

From this I made two cards … firstly the Mother’s Day card I made for my Mum and then a second card as a best wishes card.

I decided to create cards using the Stitching dies from the December kit from Spellbinders so once it was dry I die cut the two big scalloped panels from the masterboard.

I started with the Mother’s Day card first. I decided to add extra ink to the background to darken it up a little. Then I set it aside and worked on the embellishments for both cards … the stitched flowers. After die cutting them from Kraft for the leaves and petal pink for the flowers I grabbed my peach thread and started sewing.

Then I die cut the Love letters from the kit and stitched them too.

I then die cut some circles and the scalloped circle for the two larger flowers to sit on and then started adding elements to the card topper starting with the 6×6 Kraft base to go onto the 7×7 card blank.

I added a few layers of cardstock and the main scalloped element and then decided to use the Claritystamps letter stamps to create the rest of the sentiment (the ON is from a different claritystamps set) which after stamping I embossed to make it shiny and then fussy cut.

I added some pearls then around the card and called the front done!

The inside I added another panel which I had just cut and inked in a similar way, plus a piece of Kraft and one more flower image.

Given this is quite a long post already I will share the other card I made in a separate post. Please pop back to see that in a couple of days (DT post coming tomorrow).

Joining the challenge of add flowers at Here is a place to start

Happy crafting!

Catherine

Alpaca Pals, Masks/Stencils, Spellbinders

Another sympathy card

I needed another sympathy card. So sad to have my friends going through these difficult times.

This friend is a big fan of bees and had admired my recent stitched bee card so I knew it would be the perfect type of card to make for her.

I made the bee in a similar way to last time, inking the pale yellow card to give it some depth of colour and this time a dark grey thread for the stitching on the bees body and then silver for the wings.

I took a stencil and inked through it the honeycomb in the background and splattered very lightly some black ink too before adding both the sentiment and the little cross stamps.

I didn’t add anything to the inside of the card but instead concentrated on my message to my friend.

I did add an extra little envelope with the card containing all the pieces of the die cut bee so she could stitch her own if she fancied it. And also sent a little ceramic heart ornament too as a reminder of my love.

Hate that I had to make a sympathy card but was pleased with how I made this one special for my friend.

Happy crafting!

Catherine

Distress oxide ink, Heffy Doodle, Spellbinders

Cute stitched card with ink blending

I had some fun ink blending with the distress oxides and created the background panel with zero plan of what I was going to do with it… just wanted to play.

I then remembered all the purple flowers I had die cut and sewn at Christmas time … perfect for embellishing the card.

I decided to add some white and then the purple card blank.

I chose the sentiment from the die cuts I had already made and die cut many many months ago from scraps. I ended up with just the three die cut flowers but think they are cute and perfect for the card!

Really do love the finished effect of these stitched dies. They make the cards feel really special.

Happy crafting!

Catherine

Decorative Dots, For My Family, Spellbinders, Washi tape

Simple card with a stitched flower

Because the stitched die cuts are quite special I decided to try and keep the card quite simple this time … just the one flower and a simple background…

But of course it wasn’t actually that simple a flower because I went a little crazy and did multicoloured stitching to create a rainbow flower!

Background : I used an iridescent shimmer paper and embossed with the dots. Then a simple rectangle of cardstock for behind the flower.

The sentiment is a piece of rainbow washi on black with a black strip with the sentiment embossed with white. Simple and cute!

Silver gems finish off the card … but in comparison to most cards I made this was super easy!

Happy crafting!

Catherine

Crafters Companion, Design Team, Digital stamps, Sizzix, Spellbinders

DT: Creative knockouts- anything goes

Hello! Welcome to my blog!

Todays post is my design team contribution for Creative Knockouts where the theme this fortnight is Anything Goes!

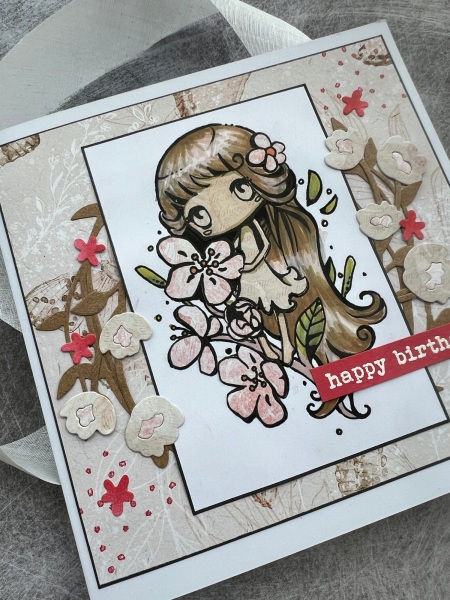
I used this cute digital image called Spring flower from Star Stampz

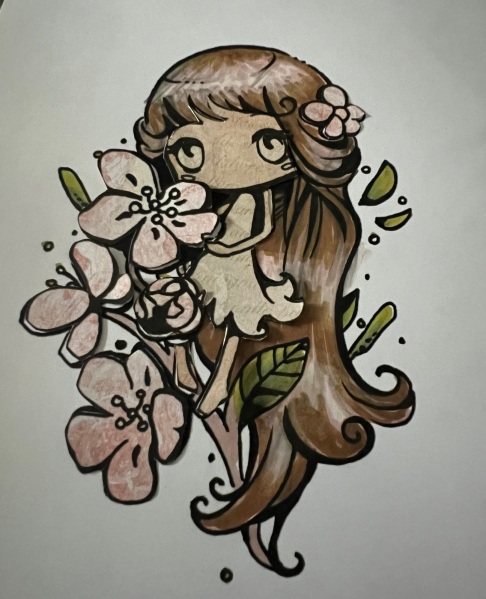
I decided to do some paper piecing along with using my promarkers to create the girl .. I printed the same image several times on both the white cardstock and the patterned paper.

Then I fussy cut out the pieces I wanted to layer and coloured the rest with my promarkers. I also added promarkers to the skin elements of the image.

This is how I had got it before I actually glued it together.

After glueing together I added some shading to the image and some dots of brighter colour to the flower stamen. Then started thinking about putting the card together. At this point the in progress photos disappear as I get busy creating!

I chose another piece of the crafters companion paper from the stash and had that as the base layer. I edged it with black pen though as I thought the line art on the image was so thick it needed the black line of the frame in contrast to the soft papers.

I did the same black pen for the edge of the image panel.

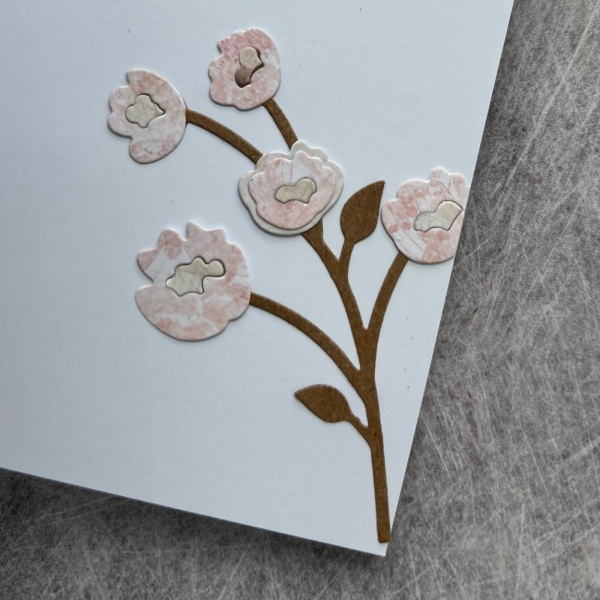
I added the spellbinders wreath from an old spellbinders set in the Kraft and then used a Sizzix die set to create the flowers.

Again I used the paper scraps from the paper piecing to create the flowers so they coordinated.

I popped this all together with the flowers coming from behind the panel but also overlapping the edge.

Then I decided to go bold and added the sentiment heat embossed on the sweet sorbet card and then needed to add a pop of the red on other parts of the card … so I inked up some white cardstock with the sweet sorbet ink and die cut the tiny flowers and also added the dots using a dot from Artistically inked stamp set to the background.

I think this added enough to tie it all in together.

Inside the card (it’s a 6×6 card blank) I added one more of the flower die cuts that I made, this time in full.

Love this cute card and saving it until September for my cousin’s daughter as I think it is perfect for her (so shhhhh keep it 🤫 secret!).

Happy crafting!

Catherine

Lawn Fawn stamps, Spellbinders

Another stitching die set from spellbinders
Yes even though I only just shared the bee from January I am already onto playing with the new kit from February.

This is a fabulous set of dies to create a full card panel. But actually there are a few dies in the set so you can keep the panel totally flat or can cut out the individual flower. I went for maximum die usage on this first try!

I decided to keep to a soft coral and ochre colour scheme and then added an embossed sentiment at the bottom so you get the full impact of the die cuts and stitching.

Love love love!

I did add some ink to the flower die cut pre sewing so you can see some gradient in the colour on the petals.

Genuinely can’t get enough of these stitching die kits.

Happy crafting!

Catherine